

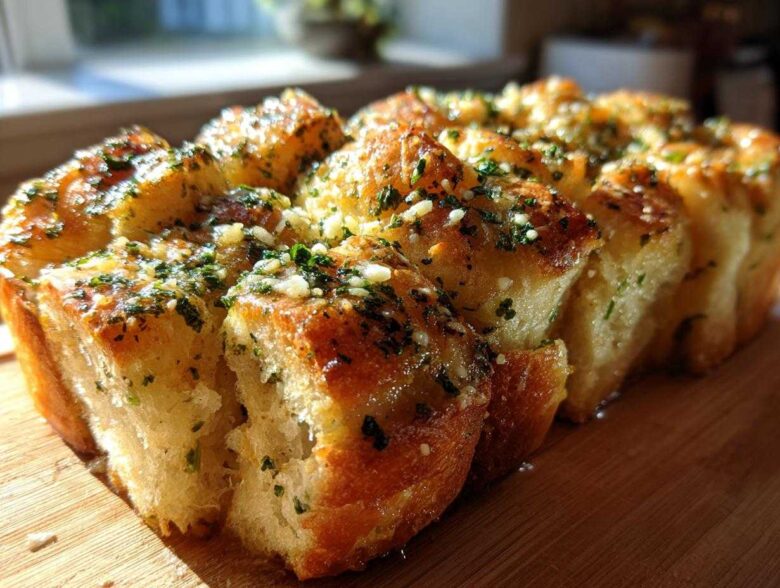
There is nothing quite like walking into a room and smelling warm, yeasty bread, especially when you know it’s going to be drenched in garlic and cheese. Forget fussy baking projects when company is coming over! I whipped up a batch of this Garlic Parmesan Pull-Apart Bread last month for a neighborhood potluck, and honestly, they vanished before the main course even hit the table. People kept asking, bewildered, if I’d spent all day slaving over yeast and kneading—not a chance!
My secret weapon, and the absolute key to making this the best, quickest party appetizer you’ll ever assemble, is using store-bought biscuit dough. Trust me, we’re coaxing maximum fluffiness out of those cans. We are aiming for soft, decadent bites loaded with pungent fresh garlic and salty Parmesan. If you want the absolute easiest way to amaze your guests, pull up a chair because this recipe is about to make you look like a baking genius in under 35 minutes!
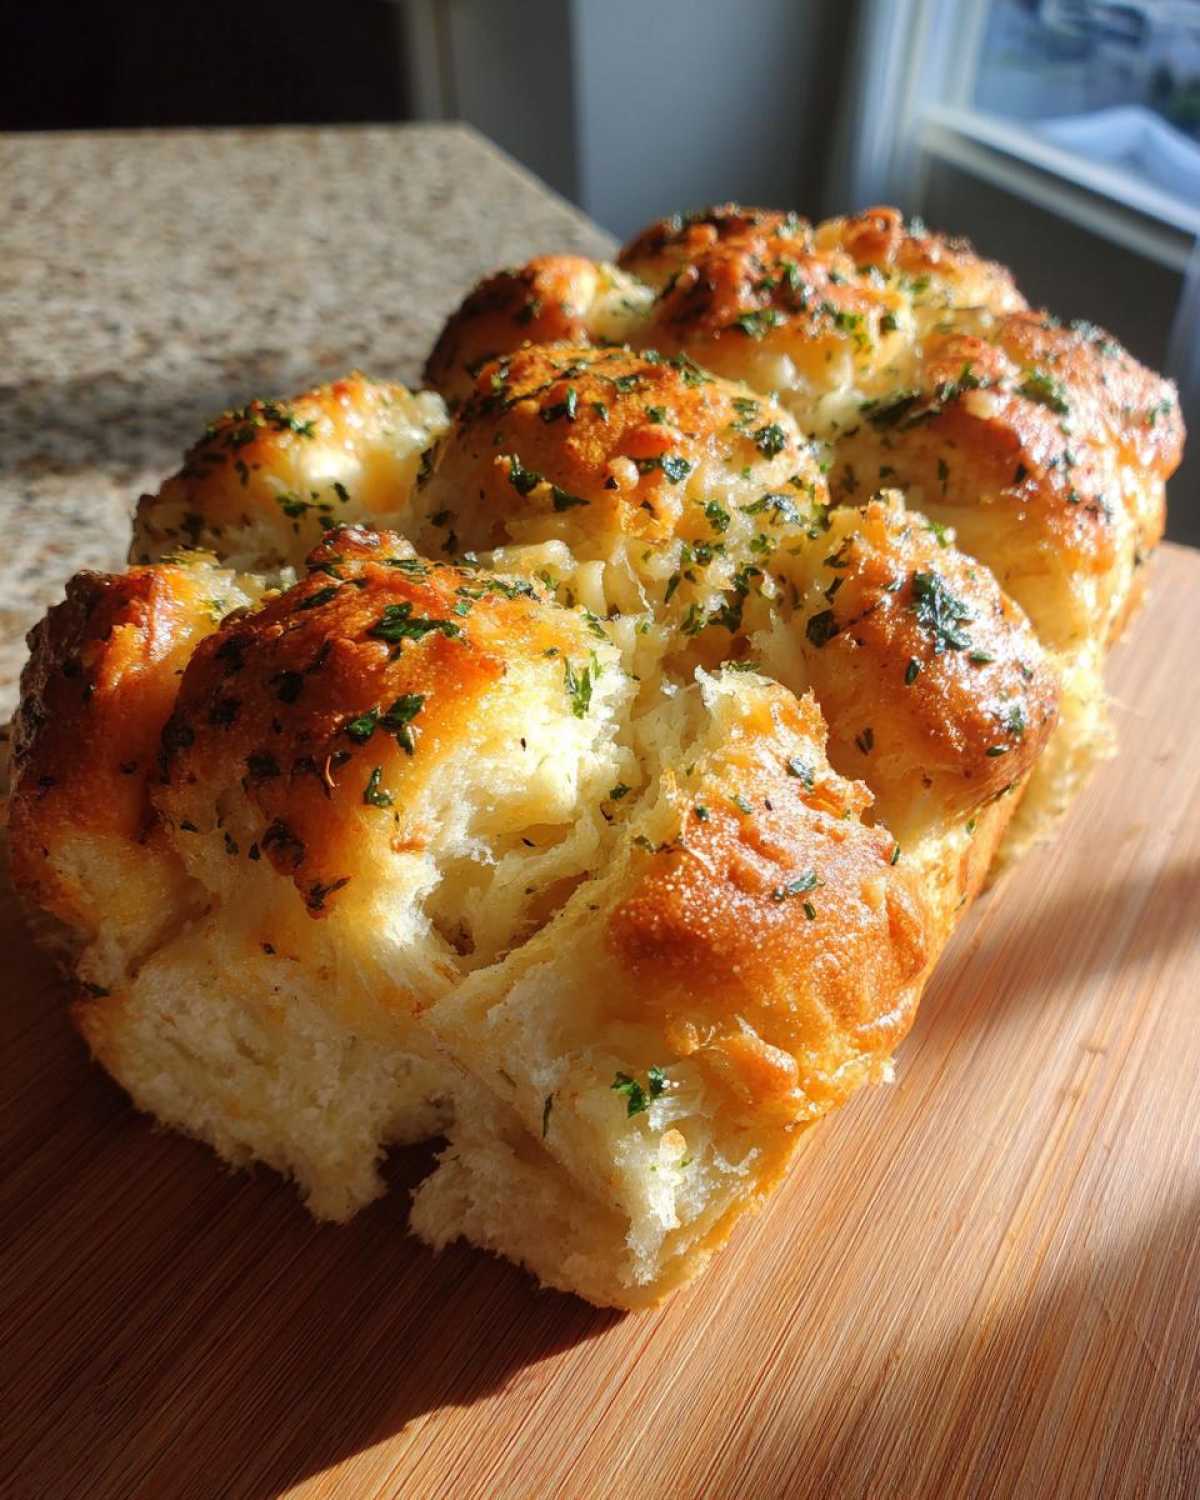
Why This Garlic Parmesan Pull-Apart Bread Recipe Works (Easy Pull Apart Bread Recipe)
If you need incredible flavor without the multi-hour commitment of baking from scratch, this is your go-to. I’ve tried a few methods for savory baked bread snacks, but this one always wins because it delivers on speed, texture, and flavor intensity.
- Speed is King: We’re talking less than 15 minutes of prep before it slips into the oven. It’s perfect for weeknight dinners or last-minute party panic!
- The Ultimate Fluff Factor: The secret to achieving that amazing, fluffy texture is how we handle the dough, making sure every bite is soft, not dense.
- Intense Flavor Bomb: Fresh garlic, real Parmesan—we aren’t skimping here. It’s savory, cheesy perfection.
If you enjoyed this quick approach, you *have* to check out my Hawaiian Roll Garlic Bread Recipe next time you need an appetizer!
Quick Biscuit Dough Appetizer Convenience
Listen, I love homemade yeast bread, I really do, but sometimes you need a “wow” factor 30 minutes ago. That’s where refrigerated biscuit dough saves the day. It guarantees consistency, it’s already proofed, and it bakes up incredibly soft because it already contains the perfect ratios of fat and leavening for this style of pull-apart bread. It takes all the guesswork out of making a truly fluffy garlic bread.
Gathering Ingredients for Your Garlic Parmesan Pull-Apart Bread
Okay, get your mise en place ready because this is the shortest ingredient list you’ll ever see for an appetizer that tastes this good! Because we’re relying on packaged dough, most of the work is already done. We need quality simple stuff for that killer garlic cheese bread flavor. Don’t substitute the fresh garlic—it makes a huge difference!
Here is exactly what you need to grab before you start mixing:
- One big can of refrigerated biscuit dough—that’s usually 16.3 ounces. This is the secret to making it a Quick Biscuit Dough Appetizer!
- One full stick (that’s half a cup!) of unsalted butter, melted down until it’s happy and liquid.
- Four whole cloves of garlic, minced by hand. I mean it, minced finely!
- Half a cup of grated Parmesan cheese. Make sure it’s the finely grated stuff for maximum coating power, plus extra for sprinkling later.
- Two tablespoons of fresh parsley, chopped up. You want that bright green color on top for presentation!
That’s it! Seriously, this list is foolproof. Having those four cloves of garlic ready to go is what elevates this from just ‘cheesy bread’ to Best Garlic Parmesan Bread territory. It builds trust when you see those precise measurements, right? You know you’re getting the right blend for the perfect texture.
Step-by-Step Guide: How to Make Pull Apart Bread
This process moves so fast, but you have to be strategic! First things first: get that oven warming up to 350°F (175°C). I always lightly grease my 9-inch cake pan now—I use the leftover butter from the measuring cup—because dealing with sticky, cheesy bread trying to cling to the metal in the pan is just not worth the struggle later. Trust me on the cake pan; it helps trap the steam and keeps the inside wonderfully soft.
Preparing the Dough and Butter Mixture
Time to deal with the biscuits. Pop open that can and separate every single piece. Now, grab a cutting board and snip each biscuit into quarters—they need to be nice little bite-sized chunks ready to soak up all that flavor. Toss those pieces into a big bowl. In a separate, smaller bowl, whisk together your melted butter, all that amazing minced garlic, and the half cup of Parmesan cheese. You want that sauce looking golden and speckled! You can check out my Easy Garlic Butter Recipe guide if you want to boost this baseline flavor profile!
Pour that glorious garlic butter right over the dough quarters. Now, this is important: use a rubber spatula and gently toss everything. We aren’t beating a cake batter here! We just want every single piece lightly coated in the butter mixture without tearing or smashing the puffy dough.
Assembling and Baking the Best Garlic Parmesan Bread
Take those coated biscuit pieces and dump them into your prepared cake pan. Don’t try to arrange them neatly! The whole point of this Garlic Parmesan Pull-Apart Bread is that they settle together randomly, leaving gaps for the butter to seep down and create those crispy, cheesy crusts on the edges while the centers stay fluffy. Once they are nestled in there, sprinkle the remaining Parmesan and all that fresh parsley right over the top.
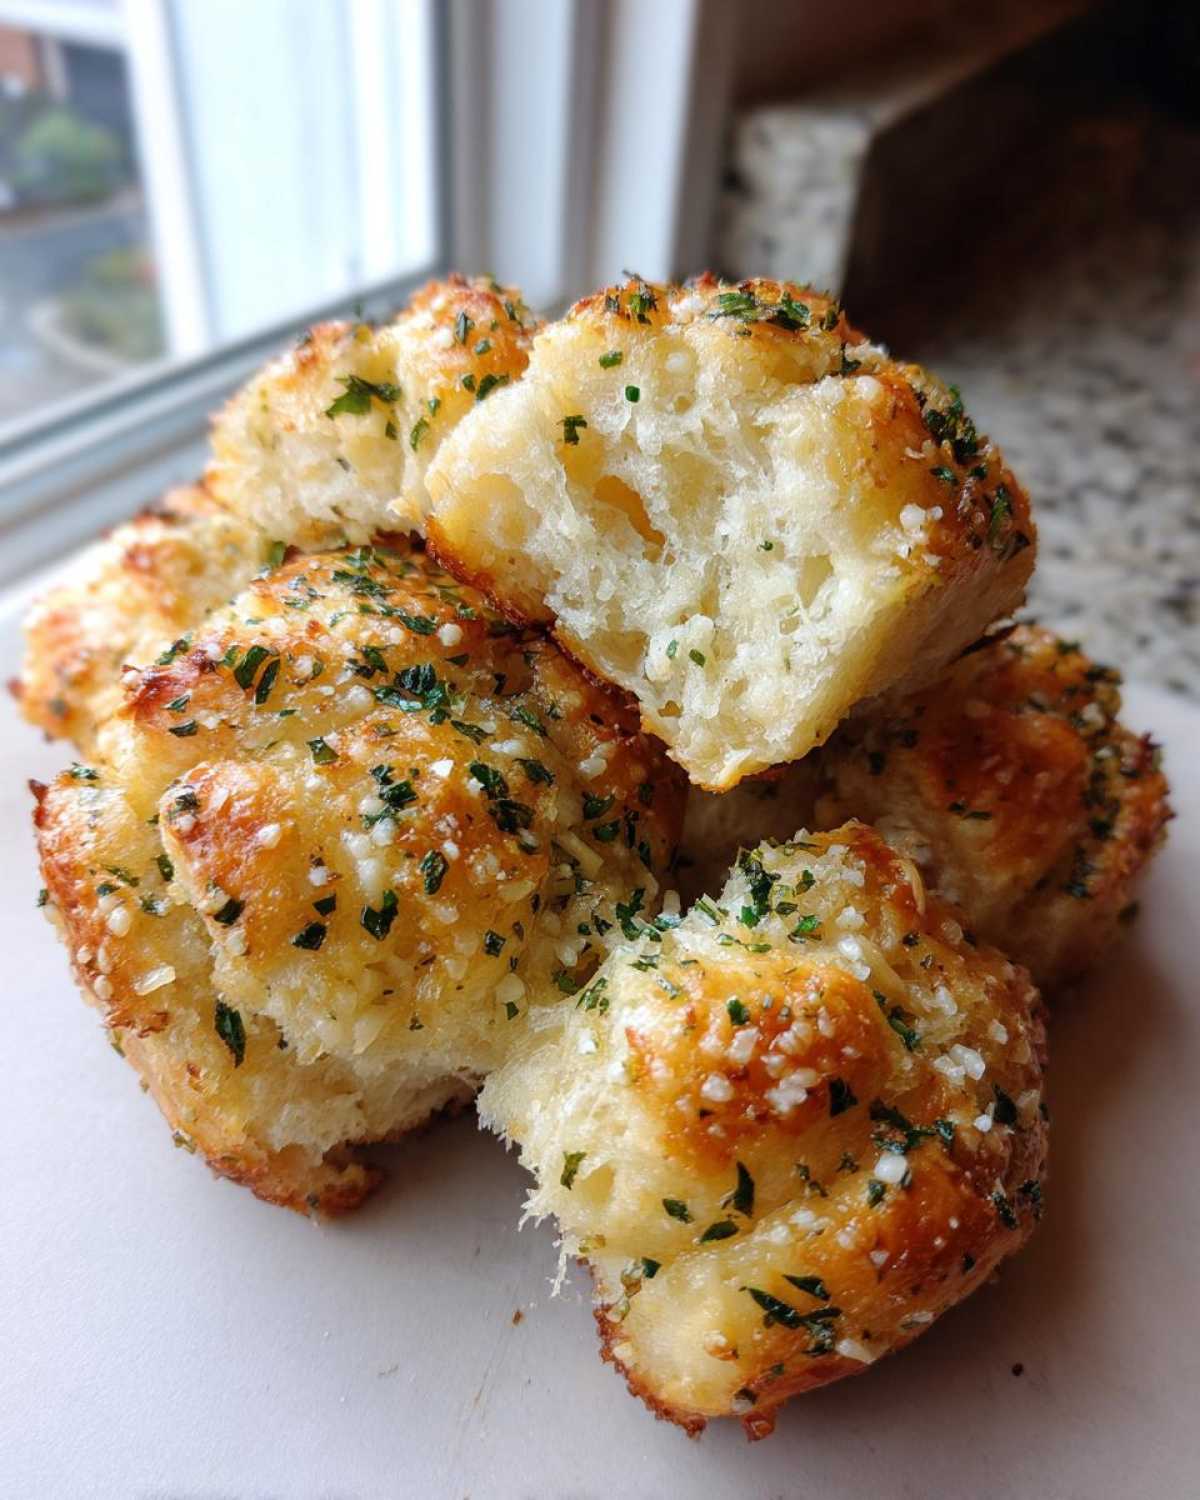
They need about 20 to 25 minutes in that 350-degree oven until they look deeply golden brown and smell unbelievably good. When they come out, don’t dig in immediately! Let them hang out in the pan for about five minutes. This short rest lets them firm up just enough so that when you pull that first hot, cheesy piece off, the rest of the bread stays right where it belongs.
Tips for Perfect Fluffy Garlic Bread Success
Achieving that cloud-like interior while keeping the edges salty and crisp is what separates a good Garlic Cheese Bread Appetizer from a great one. My biggest early mistake was trying to bake this when the biscuits were ice-cold straight from the fridge. When that happened, the centers stayed dense and gummy, no matter how long I left them in the heat!
Now, I always let the can of biscuits sit on the counter for about 10 minutes while I chop my parsley and mince the garlic. They don’t need to warm much, honestly, just take the chill off. This little bit of temperature equalization ensures they puff up evenly when they hit the heat. If you don’t treat your dough right, it won’t treat you right on the plate!
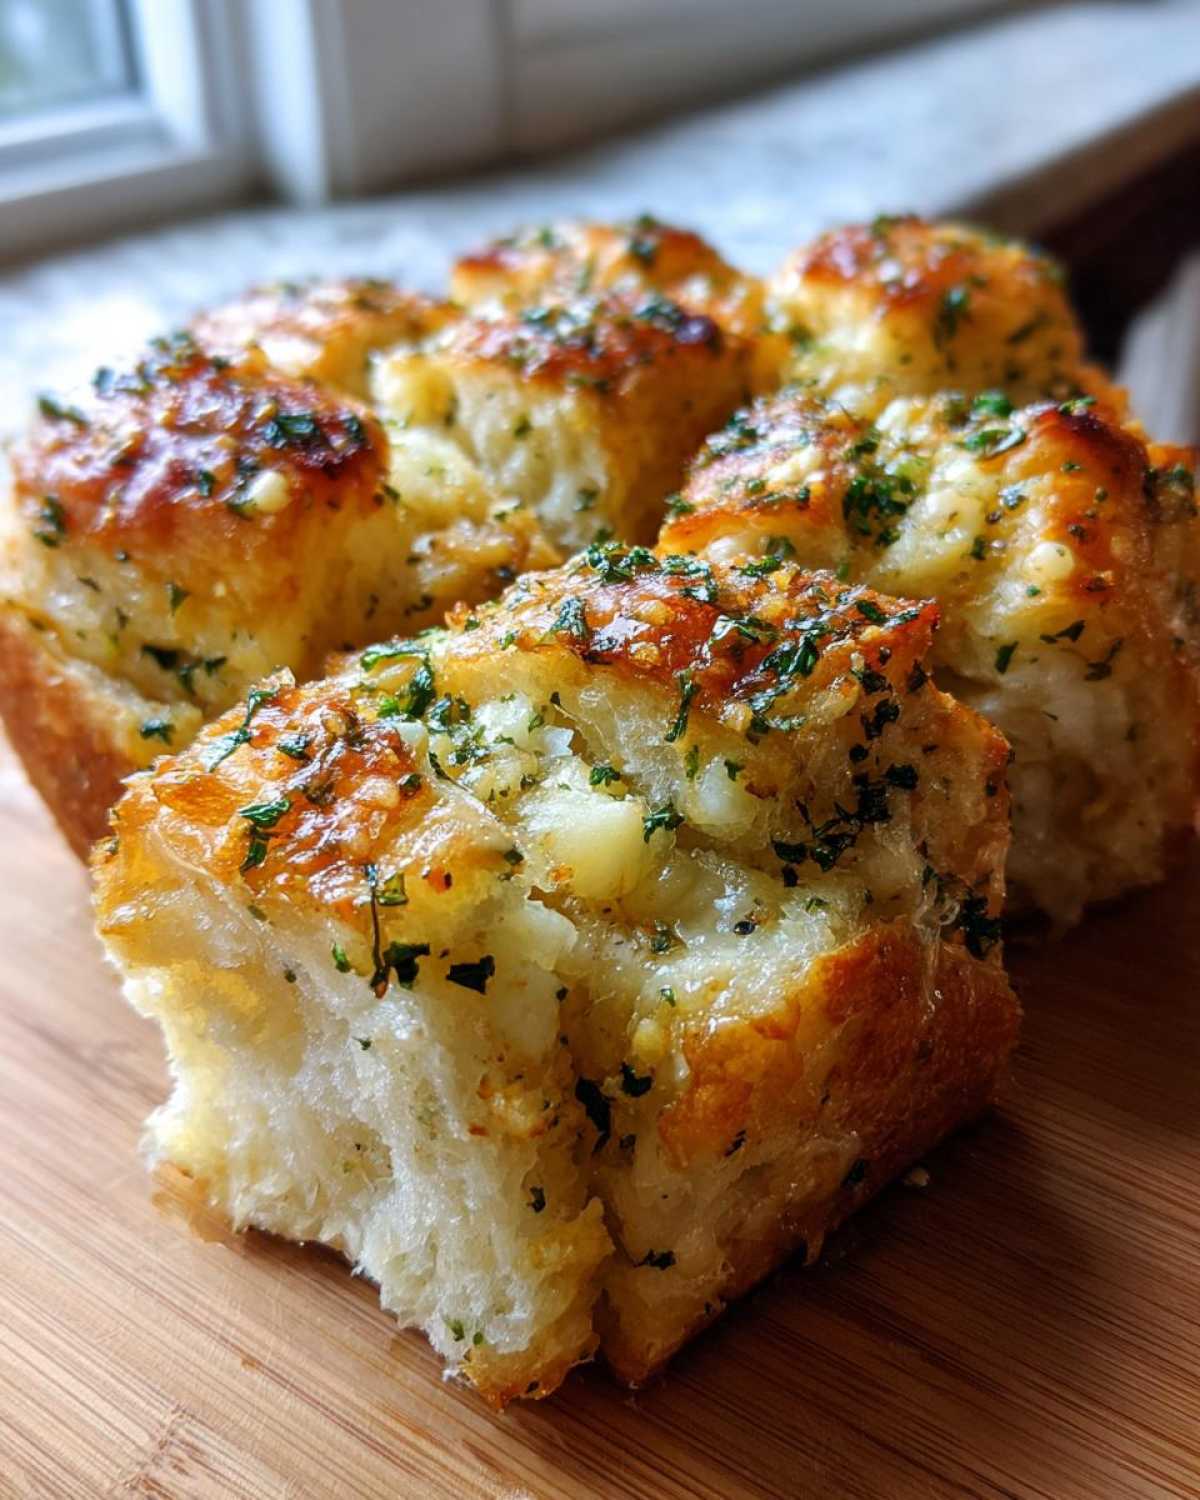
For super savory baked bread snacks, I also learned to save a tiny bit of that melted garlic butter in the bottom of the mixing bowl. When you spread the dough pieces around, you can drizzle that potent, reserved butter right into the gaps between the dough quarters *before* you sprinkle on the final cheese topping. That guarantees a boost of flavor right where you pull it apart later. For even more inspiration on soft, tender bakes, you should really look at how I treat rolls in my Soft Buttery Garlic Dinner Rolls guide.
Ingredient Notes and Substitutions for Garlic Cheese Bread Appetizer
The recipe calls for refrigerated biscuit dough, and that’s the fastest route to success, but hey, we all have different things in the fridge sometimes! If you want a slightly chewier, more bread-like result for your Cheesy Bread Bites, don’t hesitate to swap in store-bought pizza dough instead. Just coat the dough balls the same way.
The garlic butter mixture is super flexible, too. If you’re making this for a bigger crowd or just really love that Italian flavor, feel free to stir in about a half teaspoon of dried Italian seasoning along with the Parmesan cheese when you are tossing the dough. It really amps up the herbaceous notes!
And remember that fresh parsley? If you don’t have any on hand when you’re ready to bake this Party Bread Recipe, dried flakes work fine, but you’ll need less—maybe a teaspoon instead of two tablespoons. The fresh stuff just gives you that necessary pop of color, though, once it’s fresh out of the oven and sizzling!
Variations for Your Savory Baked Bread Snack
Part of the fun of making something this simple is getting to dress it up! This recipe is so robust, you can really play around with it without worrying about messing up the core texture. It already delivers that perfect soft, fluffy texture, so adding extra little flavor surprises just makes it even better.
When I’m feeling extra ambitious (or when I simply need to empty out the spice drawer), I love trying out these little twists. They elevate it from a basic appetizer to something you simply can’t stop eating!
- A Little Spice Kick: If you like a bit of heat, add 1/4 teaspoon of crushed red pepper flakes along with the minced garlic in your butter mixture. It warms everything up nicely without making it truly spicy. It’s perfect for people who love that hint of fire in their food.
- Herbal Swap: Beyond the parsley, try finely chopped chives or perhaps a teaspoon of dried oregano mixed into the flour and cheese layer before sprinkling it on top. A blend of dried rosemary and thyme works wonders too, particularly if you serve this alongside a roast dinner. Speaking of savory depth, if you’re interested in taking your umami game up a notch in general, you should definitely read my guide on Caramelized Onions!
- Cheese Upgrade: While Parmesan brings that salty bite, try mixing in half of the Parmesan with some sharp white cheddar or Monterey Jack. The melting power of the cheddar makes the center sections even gooier. You’ll get incredible cheesy stretch when you pull the pieces apart!
- A Hint of Sweetness: This is weird, but stick with me! If you add about 1 teaspoon of finely chopped sun-dried tomatoes (drained well!) to the butter mixture, it gives this Garlic Parmesan Pull-Apart Bread a surprisingly complex, almost sweet/tangy note alongside the garlic. It’s really addictive, I promise!
No matter which route you take, the key is to make sure whatever you add to the interior coating (the butter sauce) adheres well to the dough pieces before they go into the pan. A good, thorough toss ensures those little flavor bits bake right into every bite!
Serving Suggestions for This Party Bread Recipe
This Garlic Parmesan Pull-Apart Bread is so rich and satisfying; it honestly demands a role in the meal! While it’s the absolute star as a standalone appetizer, especially when you get that first stringy pull of cheese, it pairs beautifully with heartier fare too. Think about it—what’s better than tearing off a cheesy, fluffy chunk of bread to scoop up sauce?
For maximum fun, definitely serve it with a dipping element. Remember those extra notes I included? You can whip up that super simple dipping sauce in about two minutes flat: just mix 1/2 cup of sour cream with 2 tablespoons of melted butter and a teaspoon of garlic powder. It’s cool, creamy, and the perfect counterpoint to the hot, garlicky bread. It’s way better than just plain marinara, in my opinion!
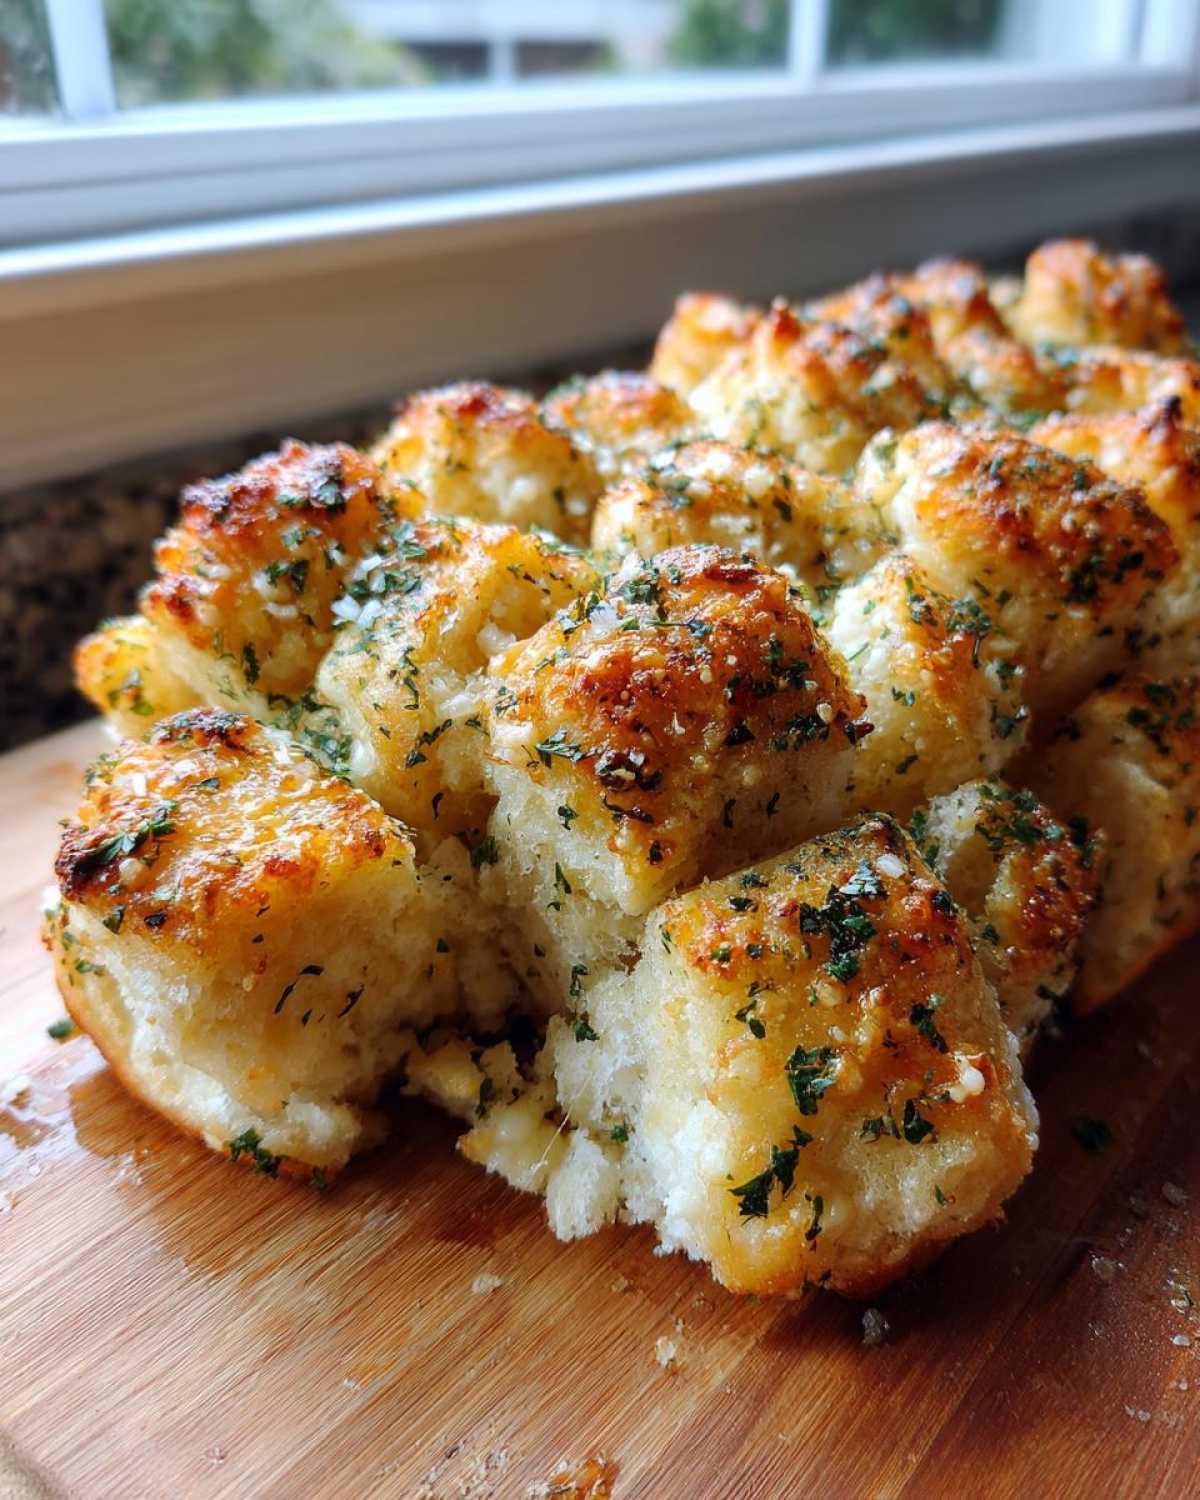
If you’re looking to turn these Cheesy Bread Bites into more of a complete meal situation, they are magnificent alongside soups or pasta dishes. They cut through rich, creamy sauces perfectly. They were phenomenal the last time I made this Cheesy Chicken Pasta—we basically just traded forks for bread pieces! Even a big bowl of chili benefits from having this warm, savory bread ready to sop up every last drop.
Honestly, because this bread has so much butter and cheese baked into every fold, you don’t need much else on the plate beside it. Keep the sides simple, let this Fluffy Garlic Bread shine, and watch everyone fight over the center pieces!
Storing and Reheating Your Cheesy Bread Bites
The real sign of a truly successful appetizer is when you have leftovers, right? (Though honestly, with how fast this Garlic Parmesan Pull-Apart Bread disappears, I rarely do!) But when you are lucky enough to have some of these Cheesy Bread Bites left over, you want to make sure they taste just as wonderful the next day when you reheat them.
First things first on storage: You need to protect that fluffy interior from the air! Once the bread is completely cool—and I mean fully cooled down, not even slightly warm—transfer the pieces to an airtight container. A sturdy zipper-top bag works in a pinch, but a rigid container prevents the tops from getting squashed. Keep it on the counter for an absolute maximum of one day if it was baked fresh, but if you plan on keeping it longer than that, stick it in the fridge. It stays great for about three or four days this way.
Reheating is where we have to be smart. The microwave is fast, yes, but it’s a total texture killer for bread. If you use the microwave for even 30 seconds, you’ll end up with chewy, almost rubbery bread because it quickly dries out the starches. Steer clear!
The oven is always the champion for reviving baked goods. Set your oven to a nice, gentle 300°F (about 150°C). Place the leftover bread pieces directly on an oven-safe baking sheet. Warm them through for about 7 to 10 minutes. This gentle heat warms the butter back up, softens the dough again, and brings back that fresh-baked aroma without drying out the crust. They will come out fluffy and soft, like they were fresh from the oven the first time around!
If you absolutely *must* use the microwave in an emergency, I suggest placing a paper towel under the bread and perhaps even wrapping a slightly damp paper towel around the portion you are heating. Microwave in 10-second bursts only. But seriously, the oven method is the way to go for keeping this bread tasting superb.
Frequently Asked Questions About Garlic Parmesan Pull-Apart Bread
I always get so many great questions once people start trying this recipe out, which is fantastic! It means you all are getting into the kitchen! Here are some of the things I hear most often about ensuring this Garlic Parmesan Pull-Apart Bread turns out exactly right for you.
Can I use homemade dough instead of the refrigerated biscuits?
Yes, absolutely! While the canned biscuits are my shortcut for a truly fast appetizer, you can certainly use your own dough. If you are using a homemade yeast dough, make sure it’s a softer dough, kind of like a dinner roll dough, not a crusty artisan loaf. You’ll need about two pounds of bread dough total. The main adjustment is resting time: let the cut dough pieces sit in the butter mixture for about 15 minutes before baking so they warm up slightly. This will help you achieve that wonderfully Fluffy Garlic Bread texture that store-bought dough gives you automatically.
What’s the best pan to use for this Easy Pull Apart Bread Recipe?
I highly recommend a standard 9-inch round cake pan, like I mentioned in the instructions. Using a cake pan really helps the edges get those perfect caramelized, cheesy bits while the center stays soft and moist because the pieces are packed in tightly. If you use a standard loaf pan, remember they are deeper, so you must add about 5 to 8 minutes to the baking time to ensure the center cooks through properly. If you’re interested in making the dough from scratch one day, check out my Easy No-Knead Artisan Bread Recipe to learn the basics!
How long does this Garlic Cheese Bread Appetizer stay fresh?
If you manage to have any leftovers, honestly, they are best eaten the same day! But what I told you about reheating works wonders. If stored properly in that airtight container at room temperature, they are still pretty decent the next morning for breakfast (don’t judge!). If you put them in the fridge, they’ll last about four days, but you *must* reheat them low and slow in the oven to bring back that lovely softness. Never eat them cold!
Can I make this ahead of time for a party?
You can assemble this ahead of time, which is a lifesaver when you are hosting! Coat all your biscuit quarters in the garlic butter mixture, toss them in the pan, and cover the whole thing tightly with plastic wrap. Keep it refrigerated for up to 12 hours. When you’re ready to bake, let it sit on the counter for 20 minutes while the oven preheats, and then bake as directed. Don’t forget to sprinkle that extra Parmesan on top right before it goes in!
Estimated Nutrition for This Garlic Parmesan Pull-Apart Bread
Now, I know what you’re thinking. We’re slathering butter and cheese all over these fluffy bites, so it’s probably heavy, right? While this is definitely an indulgence—and shouldn’t be eaten every day if you’re counting calories—I like to keep an eye on what we’re putting into our bodies, even with comfort food like this Garlic Parmesan Pull-Apart Bread.
Here are the rough numbers for one serving, based on the recipe breakdown. Remember that since we use refrigerated dough and our choice of butter brand can vary, these are just guidelines to help you plan. Think of this as informational; you can check out the full details on my official disclaimer page if you need super specific counts for dietary tracking.
Based on 6 generous servings, here’s the estimate:
- Serving Size: 1 serving
- Calories: 310
- Fat: 18g (including about 10g of that saturated goodness)
- Carbohydrates: 28g
- Protein: 8g
- Sugar: 3g
- Sodium: 650mg (A bit high, because, well, Parmesan and dough!)
I always remind people that this is a Party Bread Recipe, not a health food, but those 310 calories get you a huge amount of carb satisfaction and cheesy flavor! The lower sugar content compared to sweet breads is a definite win, though. It’s all about balance when enjoying these amazing Cheesy Bread Bites!
Share Your Experience Making This Recipe
Now that you know all my secrets for transforming a simple can of biscuits into incredible, flavor-packed Garlic Parmesan Pull-Apart Bread, I’m dying to hear how it went in *your* kitchen! Seriously, this is one of those recipes that just begs for a rave review.
Did you make any fun swaps? Maybe you added some caramelized onions or tried that sour cream dipping sauce I mentioned? Did the kids devour it before you could even get a decent picture?
Please, please, please leave a rating for this Easy Pull Apart Bread Recipe down below! I thrive on knowing that my tips helped you serve up an amazing appetizer. Five stars for fluffy bread, right? If you have any questions at all about technique or storage, feel free to drop those in the comments too—you can always reach me directly through my contact page if you prefer.
And if you snapped a gorgeous photo of your bubbling, cheesy loaf, tag me on social media! Seeing my readers enjoy these simple, savory bakes makes all the recipe testing worth it. Happy baking, and enjoy sharing those cheesy, garlicky pulls!
PrintGarlic Parmesan Pull-Apart Bread
Make soft, fluffy pull-apart bread loaded with fresh garlic and Parmesan cheese using convenient pre-made dough.
- Prep Time: 10 min
- Cook Time: 25 min
- Total Time: 35 min
- Yield: 6 servings
- Category: Appetizer
- Method: Baking
- Cuisine: American
- Diet: Vegetarian
Ingredients
- 1 (16.3 ounce) package refrigerated biscuit dough
- 1/2 cup (1 stick) unsalted butter, melted
- 4 cloves garlic, minced
- 1/2 cup grated Parmesan cheese, plus extra for topping
- 2 tablespoons fresh parsley, chopped
Instructions
- Preheat your oven to 350 degrees Fahrenheit (175 degrees Celsius). Lightly grease a 9-inch round cake pan or a loaf pan.
- Open the biscuit dough package and separate the biscuits. Cut each biscuit into quarters. Place the cut pieces into a large bowl.
- In a small bowl, combine the melted butter, minced garlic, and 1/2 cup of Parmesan cheese. Mix well.
- Pour the butter mixture over the biscuit pieces in the large bowl. Toss gently until all pieces are evenly coated.
- Transfer the coated biscuit pieces into the prepared baking pan, arranging them randomly to create the pull-apart effect.
- Sprinkle the remaining Parmesan cheese and the chopped parsley over the top of the bread pieces.
- Bake for 20 to 25 minutes, or until the bread is golden brown and cooked through.
- Let the bread cool in the pan for 5 minutes before serving warm.
Notes
- For extra flavor, add 1/2 teaspoon of dried Italian seasoning to the butter mixture.
- If you prefer a dipping sauce, mix 1/2 cup sour cream, 2 tablespoons melted butter, and 1 teaspoon garlic powder.
- Use store-bought pizza dough instead of biscuits for a slightly chewier texture.
Nutrition
- Serving Size: 1 serving
- Calories: 310
- Sugar: 3
- Sodium: 650
- Fat: 18
- Saturated Fat: 10
- Unsaturated Fat: 8
- Trans Fat: 0
- Carbohydrates: 28
- Fiber: 1
- Protein: 8
- Cholesterol: 45