

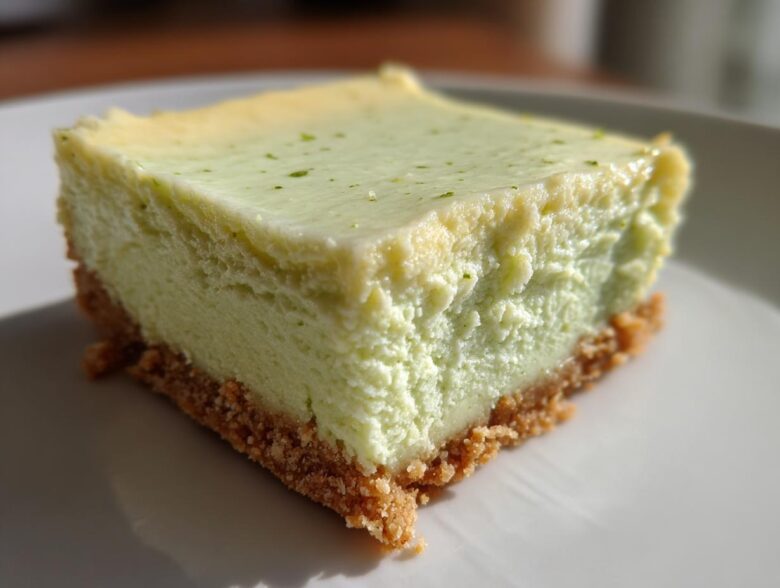
Oh my goodness, are you ready for sunshine in bar form? Seriously, when that heat hits, nothing beats something cold, tart, and totally decadent. I spent years trying to nail that perfect middle ground—you know, where the graham cracker crust is buttery and firm, but the filling is pure, creamy luxury. I struggled forever with cracks until I figured out the cooling trick! But trust me on this, these Key Lime Cheesecake Bars are worth every single test batch. They nail that vibrant, zesty punch combined with that rich, cool cheesecake texture. If you see a better summer dessert out there, you let me know!
Why You Will Make These Key Lime Cheesecake Bars Often
I’ve got a whole list of reasons why this recipe has become my go-to for everything from potlucks to just a Tuesday afternoon craving. Once you try them, you’ll see why I’m obsessed!
- They hit that flavor sweet spot! I’m talking genuinely tart, bright lime flavor cutting perfectly through the super creamy cheesecake. It’s the definition of tart and sweet lime dessert magic.
- The texture is unbelievable. Because we bake them slowly and cool them right in the oven, they set up so dense and smooth. No airy mousse here—just pure, satisfying richness!
- They are party perfection. Since they are bars, they travel beautifully and slice into neat squares, which means they are amazing dessert bars for parties. No fussy cake knife needed!
- They get better as they sit! Seriously, the chilling process is crucial, and chilling them overnight marries all those lime and cream cheese flavors together beautifully.
- The crust is just right. That buttery, slightly crisp graham cracker crust gives you the perfect crunch contrast to the smooth top layer. It’s my favorite part, honestly.
Essential Equipment for Perfect Key Lime Cheesecake Bars
Baking is always easier when you have the right tools ready to go, right? I’ve learned the hard way that trying to fake it rarely works when dealing with something as temperamental as cheesecake filling. Don’t worry, you don’t need a million fancy gadgets, but a few key things make sure your Homemade Key Lime Cheesecake Squares come out looking professional.
You’ll want to pull these out before you even start your ingredients:
- An 8×8 inch baking pan. This size is crucial for getting that good depth in your bars.
- Parchment paper! This is non-negotiable for me. I always cut a piece long enough to hang over two opposing sides so I can essentially lift the entire cooled block right out of the pan later.
- A good quality electric mixer, either a stand mixer or a handheld one. You really need to beat that cream cheese until it’s totally lump-free.
- A sturdy silicone spatula. It’s the best for scraping down the sides of the bowl when you’re mixing the filling. Trust me, you don’t want any unmixed cream cheese hiding in there!
- A fine-mesh sieve if you decide to use fresh lime juice—it keeps those tiny seeds out of the mix.
Gathering Ingredients for Your Key Lime Cheesecake Bars recipe
Okay, friend, let’s talk about what makes these bars sing! The secret to getting that beautiful, smooth texture, which is key for any Key Lime Cheesecake Bars recipe, is making sure your dairy items aren’t cold. I mean it—your cream cheese and sour cream need to be totally, completely softened on the counter for at least an hour. If they are cold, you end up with lumps, and nobody wants chunky cheesecake bars, right?
We’re using a classic graham cracker base, but the filling is where that bright, tart flavor comes from. I’ve included a link below if you want to check out my tips for zesty lemon cookies, because the handling of citrus zest is similar!
For the Graham Cracker Crust
This part comes together in two seconds, but it holds everything up, so press it in there firmly!
- 1 1/2 cups graham cracker crumbs
- 1/4 cup granulated sugar (for crust)
- 6 tablespoons unsalted butter, melted
For the Creamy Lime Cheesecake Filling
Make sure you buy those wonderful Key limes if you can find them, but if not, the bottled stuff is totally fine in a pinch for these Summer Key Lime treats. Just make sure everything is room temperature!
- 16 ounces cream cheese, softened
- 1 cup granulated sugar (for filling)
- 3 large eggs
- 1/2 cup Key lime juice, fresh or bottled
- 1 teaspoon lime zest
- 1/4 cup sour cream
Step-by-Step Instructions for Baked Key Lime Cheesecake Bars
This is the roadmap to pure citrus bliss! While these are baked, don’t panic about the oven. We’re using a slow and gentle approach, which is the secret weapon in preventing those awful cracks you see in bad cheesecake recipes. I’ve got a great guide linked below if you want to dive deep into my full no-crack philosophy, but honestly, just following these cooling steps below will give you gorgeous results for your Key Lime Cheesecake Bars.
My no-crack cheesecake secrets
Preparing and Pre-Baking the Crust
First things first, you need a warm oven. Preheat it up to 325 degrees Fahrenheit. While that’s happening, line your 8×8 inch pan with parchment paper, making sure those edges hang way over the sides—that’s our lifting mechanism later!
Now, mix those graham cracker crumbs, the crust sugar, and the melted butter together until it looks like wet sand. Press that mixture down *really* firmly into the bottom of your pan. I use the bottom of a measuring cup to really compact it down. Pop that crust into the oven for a quick 10 minutes just to set it. Then you pull it out and let it cool off a little bit while you work on the filling!
Mixing the Tart and Sweet Lime Filling
This is where patience matters, and we do NOT want to overmix! Grab your softened cream cheese and the filling sugar. Beat those two until they are totally silky smooth—no grit allowed! This takes a minute or two, and you need to scrape down the sides constantly.
Next, add your three large eggs, but here is the trick: add them ONE at a time. Beat just until the yellow yolk disappears before adding the next one. If you dump them all in at once, you’ll whip too much air in, and that causes problems later. Finally, gently stir in the Key lime juice, the zest, and that little bit of sour cream. You should only mix until you see everything just come together. Stop mixing the second it looks uniform!
Baking and Cooling for Perfect Key Lime Cheesecake Bars
Pour that beautiful, slightly thick filling right over your slightly cooled graham cracker crust. Smooth out the top carefully.
Bake this for about 30 to 35 minutes. Here’s my crucial expert tip: you are looking for the edges to look totally set, but when you gently jiggle the pan, the very center should have a tiny, slight wobble. That little jiggle means it’s perfect—it will firm up while cooling, but if you wait until the center is rock-solid, you’ll end up with dry edges.
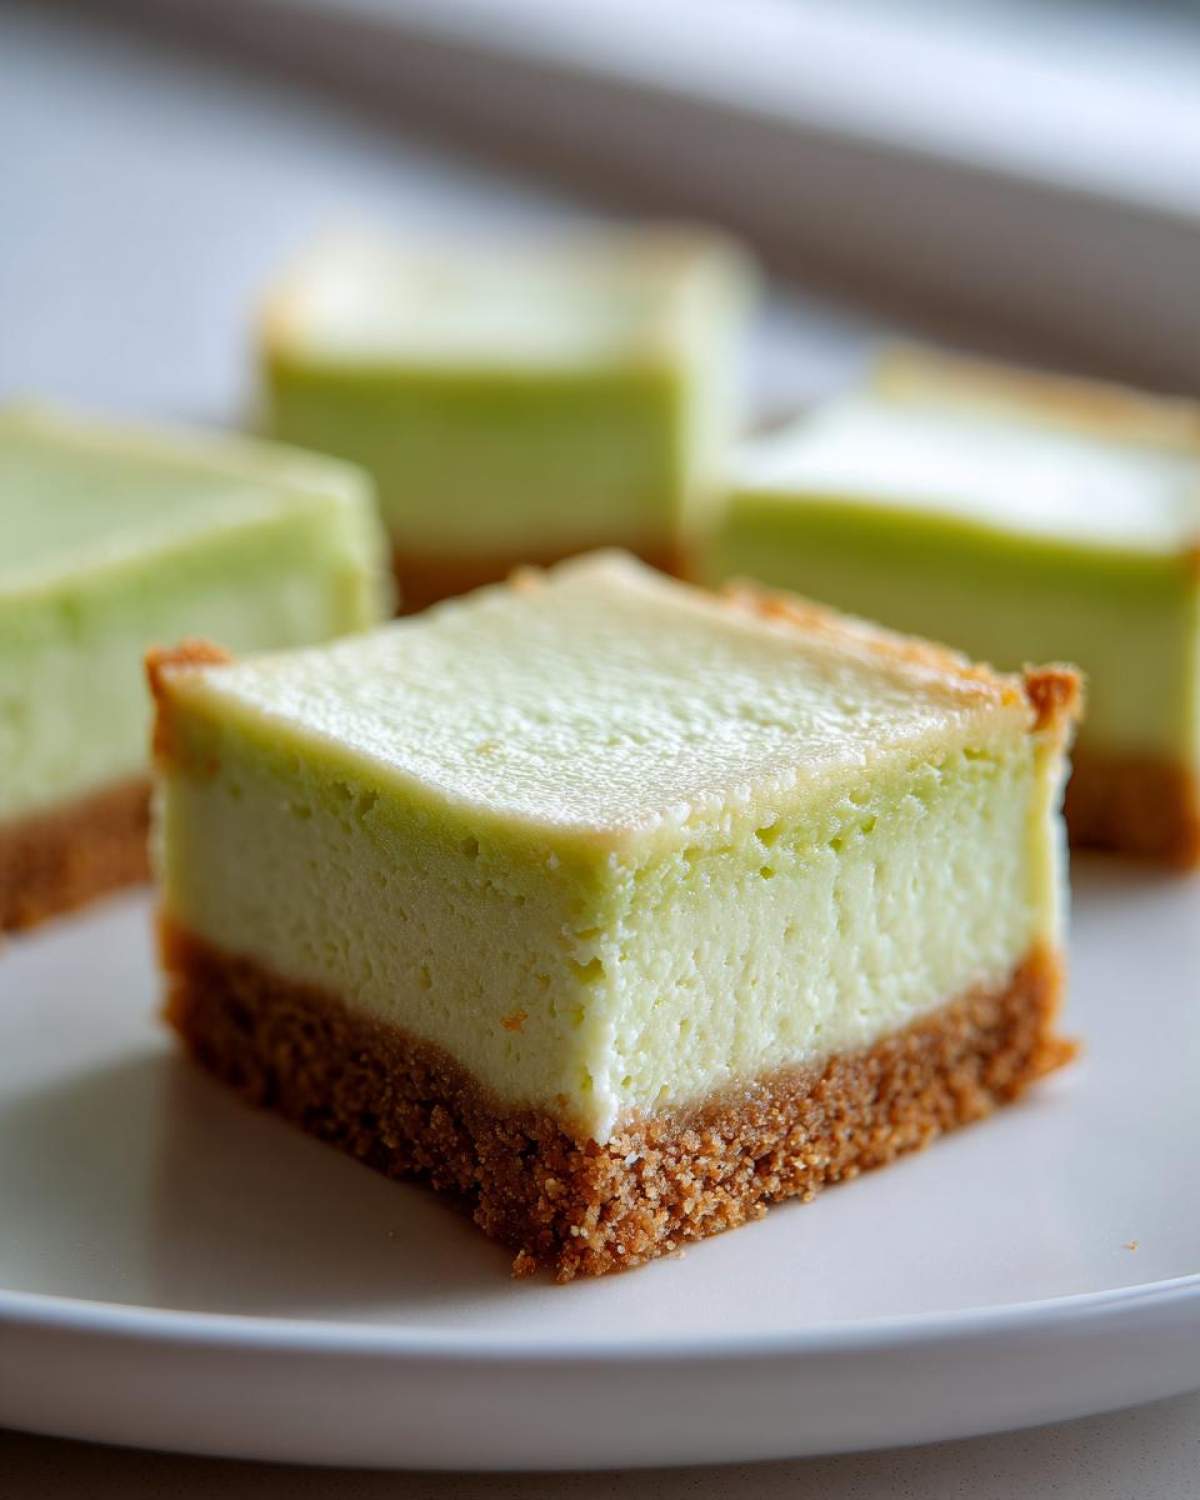
Once that slight jiggle appears, shut the oven off immediately! Do not pull them out yet! Prop the oven door open just a tiny crack—even sticking a wooden spoon in the door works—and let those bars sit in that residual heat for a full 30 minutes. This slow transition prevents the temperature shock that causes cracking. After 30 minutes, take them out, let them cool on the counter until completely room temperature, and then, and only then, get them into the fridge for at least four hours, or better yet, overnight. That chilling time is mandatory for those super clean cuts!
Tips for Slicing Homemade Key Lime Cheesecake Squares
This is honestly the most frustrating part, isn’t it? You spend hours making these gorgeous, creamy bars, and then you try to cut them, and everything smears and smears. We want perfect, sharp squares, especially if we are serving these beauties at a party!
The key to getting those professional-looking Homemade Key Lime Cheesecake Squares is all about the knife—and making sure it’s hot!
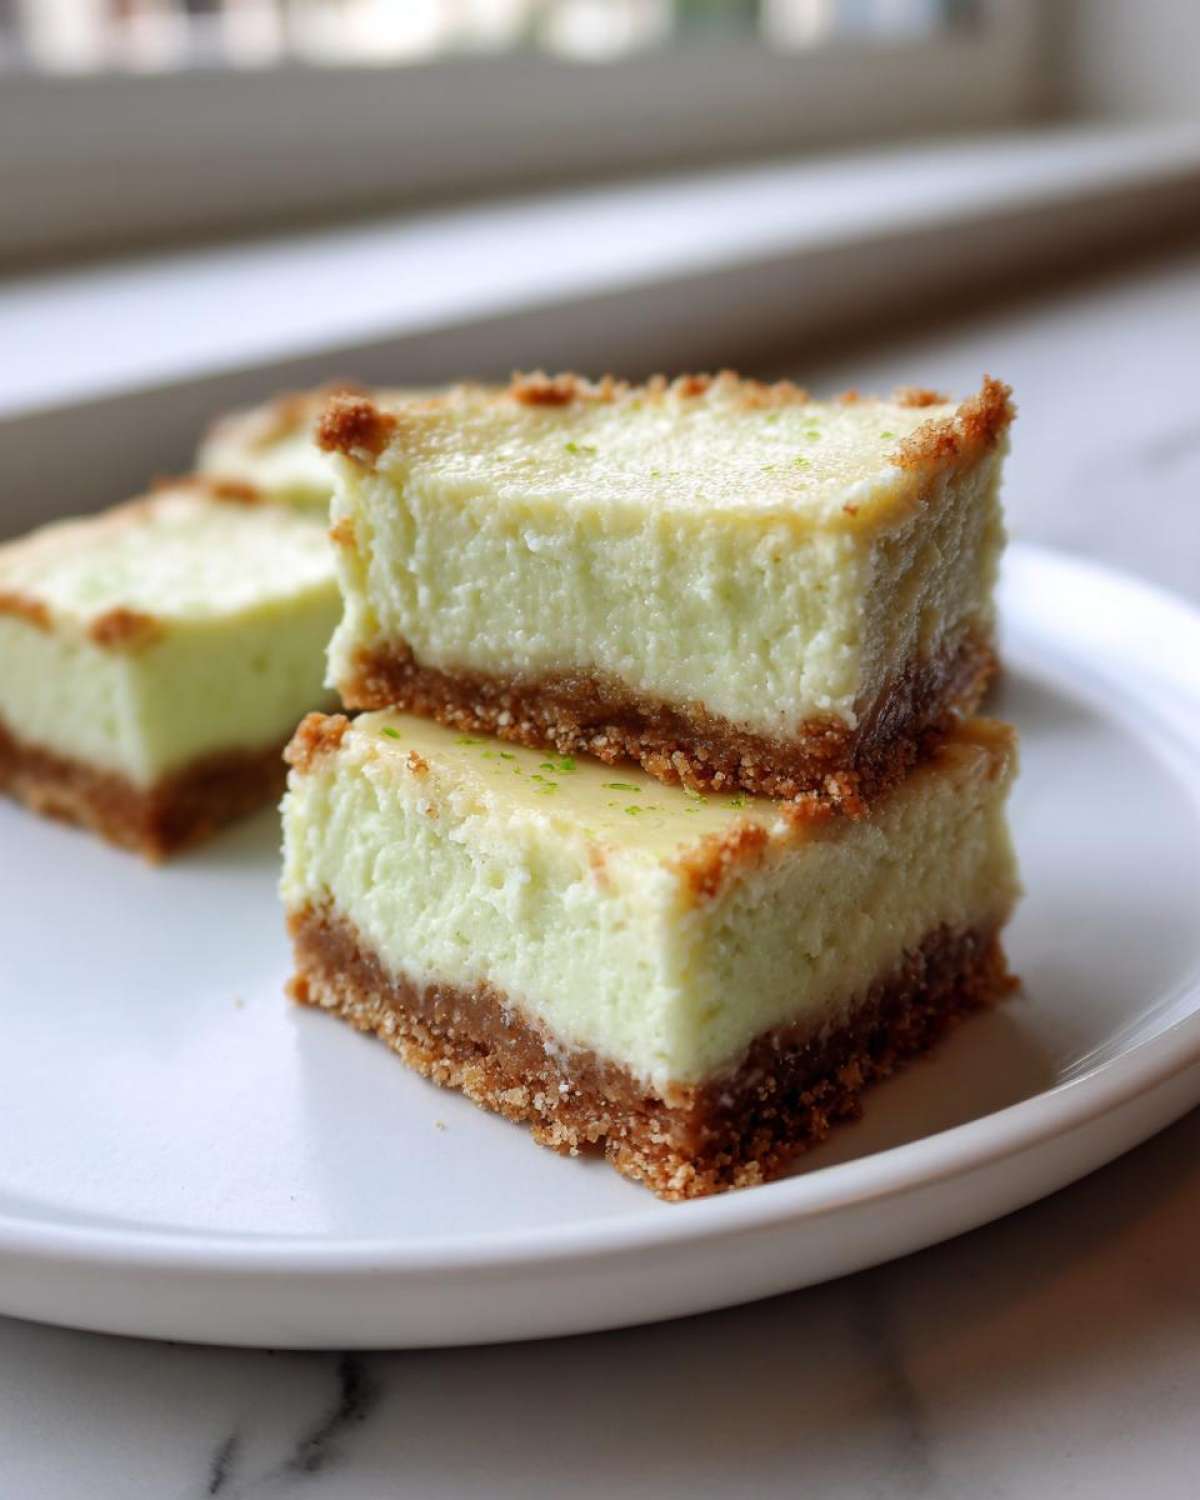
Here’s how I guarantee a clean slice every single time:
- Make sure those bars are thoroughly chilled. If they are even slightly warm or soft from being on the counter too long, they will drag. They need to be refrigerator-cold!
- Grab a long, sharp chef’s knife. The longer the better, as it lets you press straight down without sawing back and forth.
- I fill a tall glass with very hot water right next to my cutting board. Dip the whole knife blade into the hot water for about ten seconds.
- Quickly wipe the blade totally dry with a clean towel.
- Make your first cut with that hot knife. The heat melts the surface just enough so it glides through cleanly.
- Before you make the next cut, dip it in the hot water again and wipe it dry! Repeat this process for every single cut. You wipe the knife clean between every slice.
If you want to see how slicing works with one of my other bar recipes, check out my tips for getting perfect edges on pumpkin cheesecake bars over here: Pumpkin Cheesecake Bars. It’s the exact same technique, and it works like a charm on these tangy lime squares!
Storage and Reheating Instructions for Your Key Lime Cheesecake Bars
So, the toughest part is that you’re likely going to have leftovers, because this recipe makes 16 squares, and they disappear fast! No worries there, because these hold up beautifully in the fridge. They actually taste even better on day two, those flavors just keep mingling.
The most important thing is keeping them covered. If you leave them out uncovered, they start to dry out just a little on the edges, and nobody wants that. Place your cut squares in an airtight container, making sure you don’t stack them too tightly unless you put a layer of wax paper between the layers. I find wax paper works best!
You can safely store your Key Lime Cheesecake Bars in the refrigerator for up to four days. Remember, these are served cold, so there’s no need to reheat them at all! If you want to get fancy when you serve them the next day, I highly recommend grabbing that extra lime zest you saved or just topping each square with a tiny dollop of fresh whipped cream right before serving. That little flourish takes these Perfect Chilled Lime Bars to a whole new level of impressive!
Variations on Simple Key Lime Dessert Bars
Okay, while I stand by my original Key Lime Cheesecake Bars recipe being the absolute pinnacle of perfection, I know sometimes you want to shake things up! These bars are so sturdy and reliable that they handle additions really well. They are perfect candidates for creative toppings, which is why I love seeing what people come up with!
If you’re feeling adventurous beyond the straight graham cracker crust, I have a couple of easy ways you can switch things up without ruining that creamy lime heart. You can check out my churro cheesecake bars if you want some serious crust inspiration, but for these lime bars, try one of these two ideas for your next batch!
Swap the Crust Base: If you don’t have graham crackers on hand, or you just really love butter cookies, swap them out! You can use crushed vanilla wafers or even shortbread cookies instead of the graham crackers. You’d use the same amount of crumbs and the same amount of melted butter. It completely changes the flavor profile, making it a bit sweeter and less spicy, which is a fun contrast to the tart lime.
The Meringue Topper: This one is for when you want to impress! After you’ve baked and cooled your bars (this step must happen *after* chilling, so we don’t melt the meringue!), you can top them with a thick layer of Italian or Swiss meringue. You just whip up your favorite meringue recipe, spread it gently over the chilled bars, and then—very quickly—blast it with a kitchen torch until it gets those beautiful golden peaks. Wowza! That toasted marshmallow flavor against the cold Key lime is divine.
The Extra Sour Cream Layer: This is a less dramatic, but amazing addition for ultimate smoothness. Before you pour the lime filling over the crust, just mix up another half cup of sour cream with two tablespoons of powdered sugar. Gently spread that mixture over the pre-baked crust and let it sit for about five minutes. Then, pour the lime filling right on top of that layer. It diffuses the lime flavor slightly but adds an incredible, almost velvety softness to the bottom half of the cheesecake layer. It makes them feel extra fancy!
Frequently Asked Questions About Key Lime Cheesecake Bars recipe
I figure that after reading all my rambling about butter ratios and cooling times, you probably have a few little questions buzzing around! That’s totally okay! Cheesecake bars can feel tricky, but once you know the little quirks, they are so easy. I’ve pulled together the most common things people ask me about making the Best Key Lime Bars easy.
If you are having trouble with little cheesecakes, I put a whole guide together for mini ones too, which use similar techniques!
Can I use regular lime juice instead of Key lime juice in these Key Lime Cheesecake Bars?
Oh, that’s a great question! You absolutely can, but it’s going to taste different. Regular limes (Persian limes) are bigger and have a sharper, more acidic flavor. Key limes are smaller, more floral, and honestly, they have a unique aromatic quality that’s famous in those classic Key lime desserts. If you only have regular lime juice, reduce the amount you use by about one tablespoon, and maybe add an extra 1/2 teaspoon of lime zest to try and bring back some of that floral aroma. It’ll still be delicious, just not quite the authentic Key lime flavor profile.
What is the difference between baked and No bake Key Lime Cheesecake Bars?
This is where texture comes into play big time! My recipe here is the Baked Key Lime dessert bars kind. Because we use eggs and bake it low and slow, the result is super dense, rich, and creamy—almost like baked fudge, but lime-flavored! If you look up No bake Key Lime Cheesecake Bars, those usually rely on gelatin or whipped cream folded in to set. No-bake versions are lighter, fluffier, more mousse-like, and they usually have a slightly less intense flavor profile. I prefer the density of the baked version, but both are great summer treats!
Why does the center of my cheesecake wobble when I take it out of the oven?
Don’t panic! That wobble is your sign of success! As I mentioned under the baking instructions, a slight jiggle in the very middle—maybe a coin-sized spot—is exactly what you want. It means the proteins in the eggs haven’t over-coagulated. If you bake it until that wobble is gone, the bars will cool down stiff and brittle, and you’ll end up with a dry, crumbly texture rather than a creamy consistency. The residual heat hanging around when you prop the oven door open finishes the cooking process perfectly. Every great creamy lime cheesecake recipe relies on this gentle finish!
Nutritional Estimate for Creamy Lime Cheesecake Recipe
Now, let’s talk numbers. I have to be upfront, because these are rich and decadent thanks to all that cream cheese and butter in the crust, they aren’t exactly a diet food! But hey, we deserve a treat now and then, especially one this good. These estimates are based on making 16 squares exactly as written in the recipe, and these are just general guidelines—your exact results might vary depending on the brands you use.
Consider these values a happy little guide, not a strict rulebook for your Summer Key Lime treats!
- Serving Size: 1 bar
- Calories: 280
- Sugar: 22g (Yes, sugar contributes to that glorious texture!)
- Fat: 18g
- Saturated Fat: 11g
- Carbohydrates: 26g
- Protein: 5g
- Cholesterol: 65mg
- Sodium: 150mg
It’s worth noting that most of the fat content comes from the wonderful, necessary butter in the crust and the cream cheese in that fantastic filling. But look at that protein content! That’s the eggs and cream cheese coming through!
Share Your Tart and Sweet Lime Dessert Creations
I truly hope you get as much joy out of making and eating these Key Lime Cheesecake Bars as I do! Honestly, seeing your results is the best part of sharing these recipes with you all. Baking is supposed to be fun and delicious, and I love when we get to share our kitchen wins.
When you give this recipe a try, please come back here and let me know how it went! Did you stick to the classic look, or did you try that amazing meringue topping? Were you able to get those perfectly clean slices?
Leave a star rating right down below—it really helps other bakers decide if this is their next must-try dessert. And if you snap a picture of your incredible, creamy squares, tag me on social media! I love seeing those bright green hues glistening on the counter. We’re all learning together, and your feedback helps build that trust and experience for everyone in our community.
If you’re curious about who I am and why I share all these tips and tricks, you can always pop over to my About Us page to read a little more about my kitchen adventures!
PrintCreamy Baked Key Lime Cheesecake Bars
Follow this recipe to make rich, creamy cheesecake bars with a tart Key lime flavor set atop a buttery graham cracker crust.
- Prep Time: 20 min
- Cook Time: 35 min
- Total Time: 4 hours 55 min
- Yield: 16 bars
- Category: Dessert
- Method: Baking
- Cuisine: American
- Diet: Vegetarian
Ingredients
- 1 1/2 cups graham cracker crumbs
- 1/4 cup granulated sugar (for crust)
- 6 tablespoons unsalted butter, melted
- 16 ounces cream cheese, softened
- 1 cup granulated sugar (for filling)
- 3 large eggs
- 1/2 cup Key lime juice, fresh or bottled
- 1 teaspoon lime zest
- 1/4 cup sour cream
Instructions
- Preheat your oven to 325 degrees Fahrenheit. Line an 8×8 inch baking pan with parchment paper, leaving an overhang for easy removal.
- Prepare the crust: Mix graham cracker crumbs, 1/4 cup sugar, and melted butter until combined. Press the mixture firmly into the bottom of the prepared pan. Bake for 10 minutes. Let cool slightly.
- Prepare the filling: In a large bowl, beat the softened cream cheese and 1 cup sugar until smooth. Beat in the eggs one at a time, mixing well after each addition.
- Stir in the Key lime juice, lime zest, and sour cream until just combined. Do not overmix.
- Pour the filling over the cooled crust.
- Bake for 30 to 35 minutes, or until the edges are set and the center has only a slight jiggle.
- Turn off the oven and prop the door open slightly. Let the bars cool in the oven for 30 minutes.
- Remove from the oven and cool completely on a wire rack.
- Chill the bars in the refrigerator for at least 4 hours, or preferably overnight, before slicing.
- Lift the bars out of the pan using the parchment overhang and cut into squares.
Notes
- For the cleanest slices, use a long, sharp knife dipped in hot water and wiped dry between each cut.
- Store leftover bars covered in the refrigerator for up to 4 days.
- Garnish with extra lime zest or a dollop of whipped cream before serving.
Nutrition
- Serving Size: 1 bar
- Calories: 280
- Sugar: 22
- Sodium: 150
- Fat: 18
- Saturated Fat: 11
- Unsaturated Fat: 7
- Trans Fat: 0
- Carbohydrates: 26
- Fiber: 1
- Protein: 5
- Cholesterol: 65