

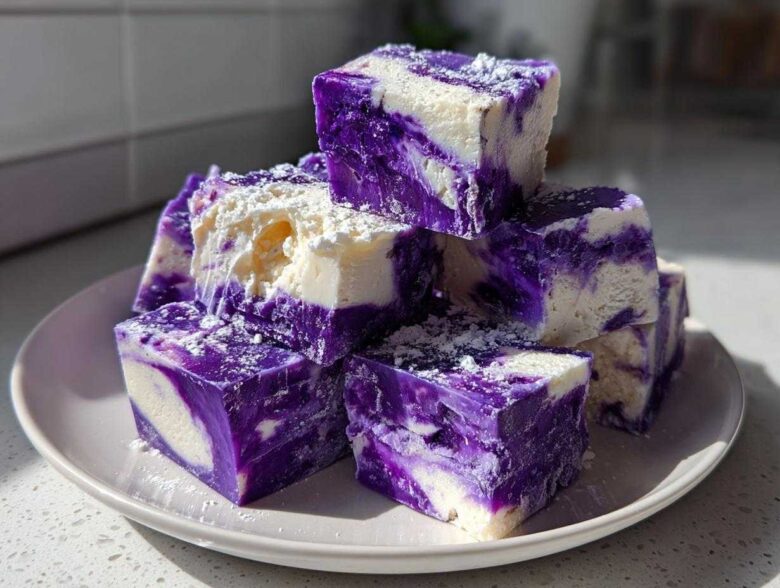
When I tell people I make candy, they usually picture me wrestling with a giant copper pot and wearing safety goggles! Honestly, making treats from scratch used to scare me stiff—it felt like I needed a chemist’s degree to avoid grainy sugar crystals. But trust me, that’s why I am so thrilled about this recipe. Forget everything you know about complicated stovetop cooking; we’re making the creamiest, smoothest **Blueberry Fudge** imaginable, and it uses white chocolate to bring that perfect luxurious backdrop.
This particular batch relies on simplicity. I’ve perfected the technique so you don’t need a candy thermometer, which is a total game-changer! You just need patience while stirring everything gently over low heat. If you’ve ever wanted to impress someone with homemade candy that tastes gourmet but requires practically zero effort, this is the one you’ll bookmark immediately.
Why This Easy Blueberry Fudge Recipe Works So Well
I know exactly why you clicked this recipe, you want that dreamy, soft fudge without all the fuss, right? That’s exactly what this **easy blueberry fudge recipe** delivers! It’s one of those magical **no bake blueberry treats** where the magic happens with just two main ingredients melting together. You get all the rich flavor complexity of homemade candy, but without standing over a bubbling pot waiting for 240 degrees on a thermometer.
This method is perfect for beginners, but it’s definitely my go-to when I need a fast, impressive dessert for gifts or parties. If you love my peanut butter treats, you’ll adore this quick sweet confection too; check out my recipe for classic no-bake chocolate peanut butter balls for more simple candy inspiration!
Achieving Creamy Homemade Fudge Texture
The biggest fear with fudge is that grainy texture, where it suddenly feels like you’re eating sugar crystals instead of silk. My secret right here in this recipe is controlling the heat. We are melting—not cooking, melting! You’ll want to keep that heat on low. Stir constantly, but gently, until that white chocolate is just liquidated into the condensed milk.
My expert tip for that perfect smooth finish is simple: Stop stirring the second everything looks uniform. If you keep beating it after everything is combined, you risk introducing too much air or overheating it slightly, which sets up that dreaded graininess. Just mix until homogenous and pour immediately. That’s the key to a truly **creamy homemade fudge guide** success story!
Gathering Ingredients for Your Blueberry Fudge
Okay, gathering ingredients for this **blueberry fudge** is almost as easy as melting the chocolate itself! Since this recipe relies heavily on the quality of what goes in, I want you to pay close attention to the berries. We need just a few simple powerhouse items to create this magic, mostly coming straight out of your pantry and fridge.
Don’t feel intimidated by the list—it’s short, sweet, and designed for success. The beauty of this confection is that it doesn’t demand specialty items, which keeps it firmly in the realm of a quick, delightful homemade candy project. Grab your ingredients, and let’s look at what actually makes this one special.
Ingredient Notes and Substitutions for Blueberry Fudge
The main star besides the chocolate is obviously those lovely blueberries. If you’re wondering about the best type, remember that the recipe calls for them to be lightly chopped. This just ensures they distribute nicely without sinking to the bottom.
Now, here’s a crucial tip from my kitchen: If you only have frozen berries, that’s perfectly fine! You don’t even need to thaw them. I find folding them in while they are still frozen helps prevent all that gorgeous purple juice from bleeding into the entire white base too early. And speaking of the base, we are definitely using white chocolate here—that’s what makes this a specific **white chocolate blueberry fudge**. It gives us that beautiful, pale canvas for the berries to pop against, giving you a truly gourmet homemade fudge experience!
- 1 (14 ounce) can sweetened condensed milk
- 1 (12 ounce) package white chocolate chips
- 1 teaspoon vanilla extract
- 1/4 teaspoon salt
- 1 cup fresh or frozen blueberries, lightly chopped
- 1 tablespoon powdered sugar (for dusting, optional)
How to Make Blueberry Fudge: A Simple Step-by-Step Tutorial
Ready for the easiest candy you’ll ever make? This is where we put the theory into practice. If you follow these directions exactly, I promise you’ll have a batch of perfectly smooth **Blueberry Fudge** that sets up beautifully. This truly is a **no fail fudge tutorial**, especially because you aren’t risking burning sugar on the stovetop—we are just carefully melting things together!
Don’t forget to check out my easy Oreo fudge recipe if you want another simple, no-fuss candy idea for next time! Now, let’s get focused on getting this berry confection perfect.
Preparing the Pan and Melting the Base for Blueberry Fudge
First things first, let’s get your vessel ready. You need an 8×8 inch pan, and the absolute best way to guarantee you get that fudge out in one perfect slab is using parchment paper. Line the pan so you have an overhang on two sides—think of these as built-in handles for lifting the whole thing out later! Give that parchment a very light grease, too, just for insurance.
Next, grab a medium saucepan. Keep the heat set to low—I mean really low! You need to combine your sweetened condensed milk and the white chocolate chips. Now, you must stir constantly. I mean it: move that spatula or wooden spoon around the bottom and sides until every single chip is gone and the mixture is glossy and uniform. Pay close attention to this part: Do not let this mixture boil. We are melting, not reducing. Once it’s melted, whisk in your vanilla and that tiny bit of salt for balance, then take it straight off the heat.
Folding in Berries and Setting the Quick Blueberry Fudge
With the pan off the burner, it’s berry time! Now you gently fold in your chopped blueberries. Use a big sweeping motion; you just want them mixed in so they are nestled in the chocolate base, not beaten into a mush. Don’t stir for more than 10 seconds here!
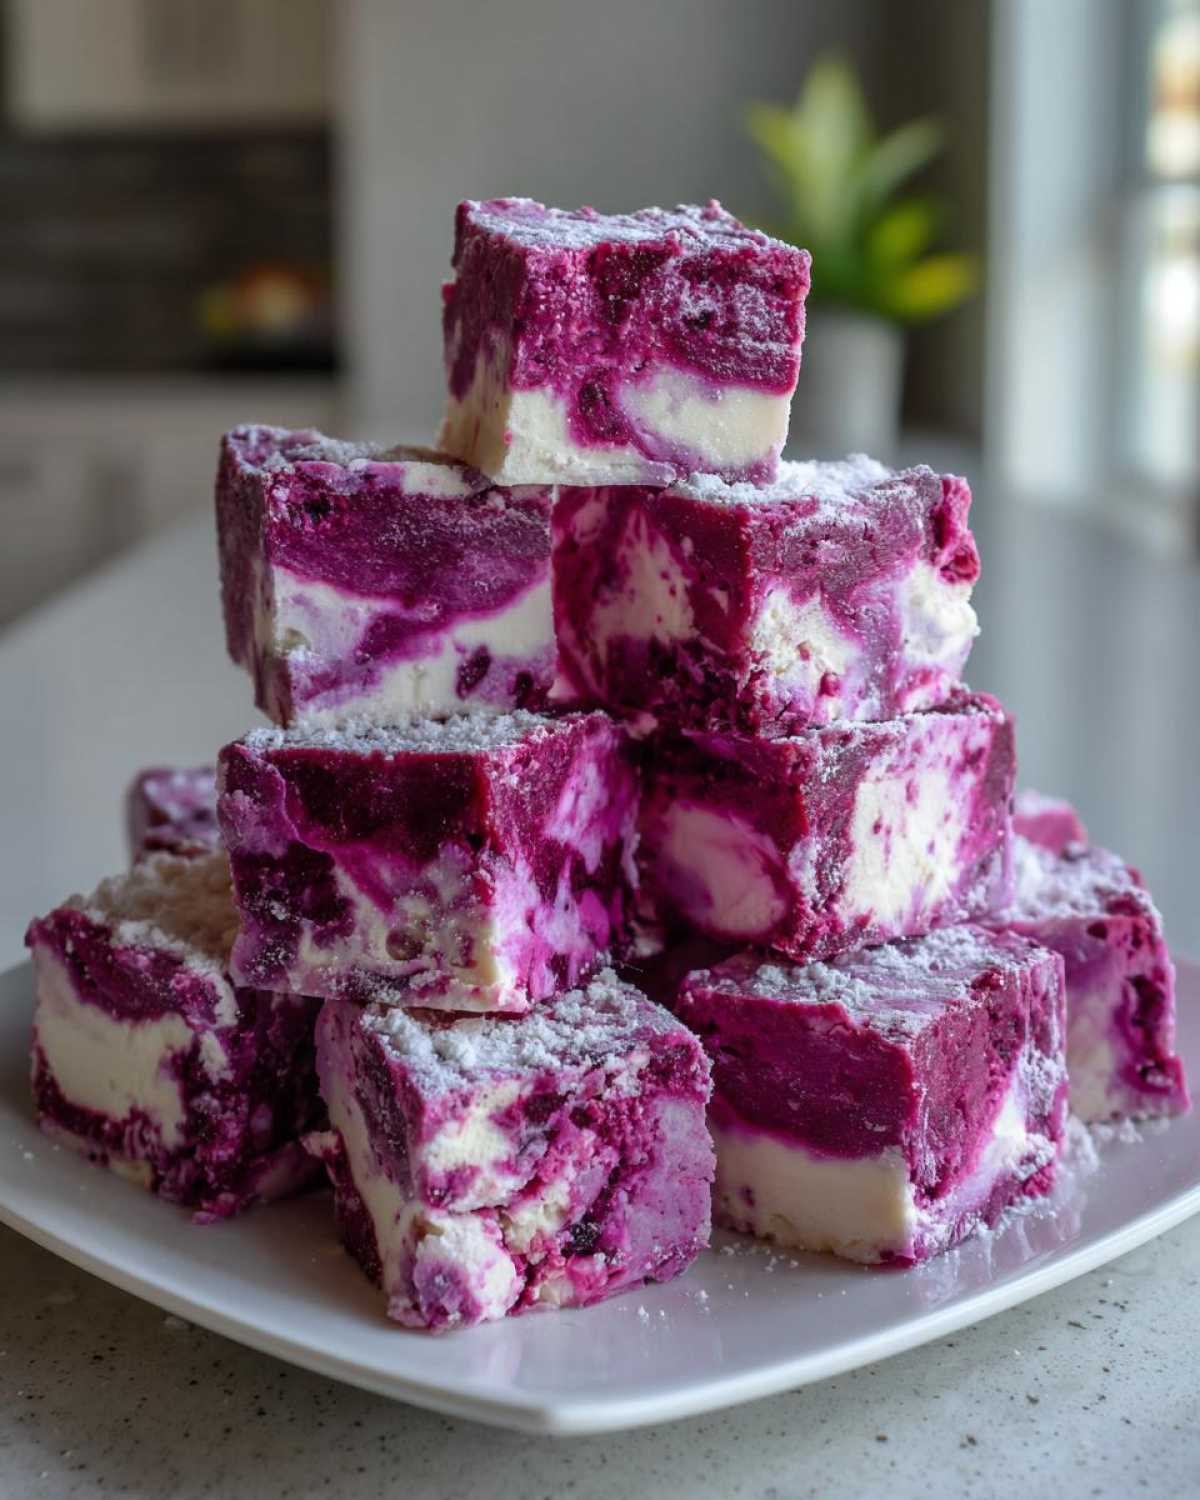
Scrape that beautiful, purple-flecked batter into your prepared pan and smooth the top. That’s it for the assembly! Now comes the one hard part: waiting. You need to cover this gently and get it into the refrigerator for at least three hours. This is the **quick blueberry fudge** setting time. If you try to cut it too early, you’ll just end up with messy blueberry goo everywhere! Patience rewards you with perfect squares.
Tips for Perfect Creamy Homemade Fudge
Even with the easiest recipe, sometimes things go slightly awry, right? Don’t panic if your fudge seems a little softer than you expected or if you’re worried about color bleeding. Getting that amazing texture isn’t just about melting the chocolate—it’s about knowing the final moments of the process. If you want your **fudge setting tips** to result in firm, beautiful squares every single time, listen up!
I briefly mentioned using frozen berries, and that’s a huge texture savior. If you use fresh berries that are piping warm or thawed, that extra liquid bleeds out and can make your base weep while it sets. Keeping them frozen helps them integrate into the thick base without watering it down prematurely. Remember, we want solid, creamy candy, not flavored sludge!
Another thing people worry about is texture variation. This particular recipe relies on the emulsification power of the white chocolate and condensed milk, so heating it gently is more important than hitting a specific temperature. However, if you *do* have a candy thermometer and want that extra insurance for very firm bars, you could push the mixture up to about 235 degrees Fahrenheit. I usually skip that extra step because I trust the ingredients, but if you’re nervous, it’s a good backup plan. For more dessert inspiration that stays firm, check out my recipe for a rich fudge pie—it gives you that decadent texture in a different format!
Variations on Classic Blueberry Fudge
While I absolutely adore this classic **Blueberry Fudge** just the way it is, I always enjoy tweaking things once I get the basic structure down pat. Once you master making that creamy base—and trust me, you have—you can start dreaming up incredible **berry fudge flavor combinations**!
Since we are using white chocolate, it acts like a nearly blank canvas ready for pairing. You could swap out half the white chocolate chips for dark if you prefer a slight cocoa undertone, though you’ll want to be careful since dark chocolate melts differently. Or, if you are looking for more zing, try adding some zest or almonds.
If you love rich hot chocolate, you’ll enjoy the flavor profile notes in my white hot chocolate recipe; using those same warm spices here can be lovely!
Making Gourmet Homemade Fudge with Lemon Zest
My absolute favorite way to elevate this simple confection is by introducing some brightness. Blueberries and lemon are a match made in heaven, aren’t they? For an intentionally **gourmet homemade fudge**, try grating the zest of one whole lemon directly into the mixture right after you take it off the heat with the vanilla. That citrus oil just explodes with freshness!
You don’t need to change anything else in the main recipe! The lemon zest pairs beautifully with the tartness of the berries and cuts through the sweetness of the white chocolate just enough to make it complex. It’s still incredibly easy, but it certainly tastes like you spent all day fussing over it!
Serving Suggestions for Your Simple Blueberry Confection
Once you’ve successfully chilled and cut your beautiful squares, the fun part—the presentation—begins! This **simple blueberry confection** is so versatile, making it perfect for everything from a casual Tuesday night treat to a fancy dessert platter. They look so lovely on their own, but a little wrapping or pairing goes a long way.
Since they are so colorful, these always feel celebratory. They are fantastic when packed up as **holiday blueberry sweets**—just tie a little twine around small wax paper bags filled with four or five squares. They look beautiful next to darker candies, like chocolate caramel chews, because the white base really pops!
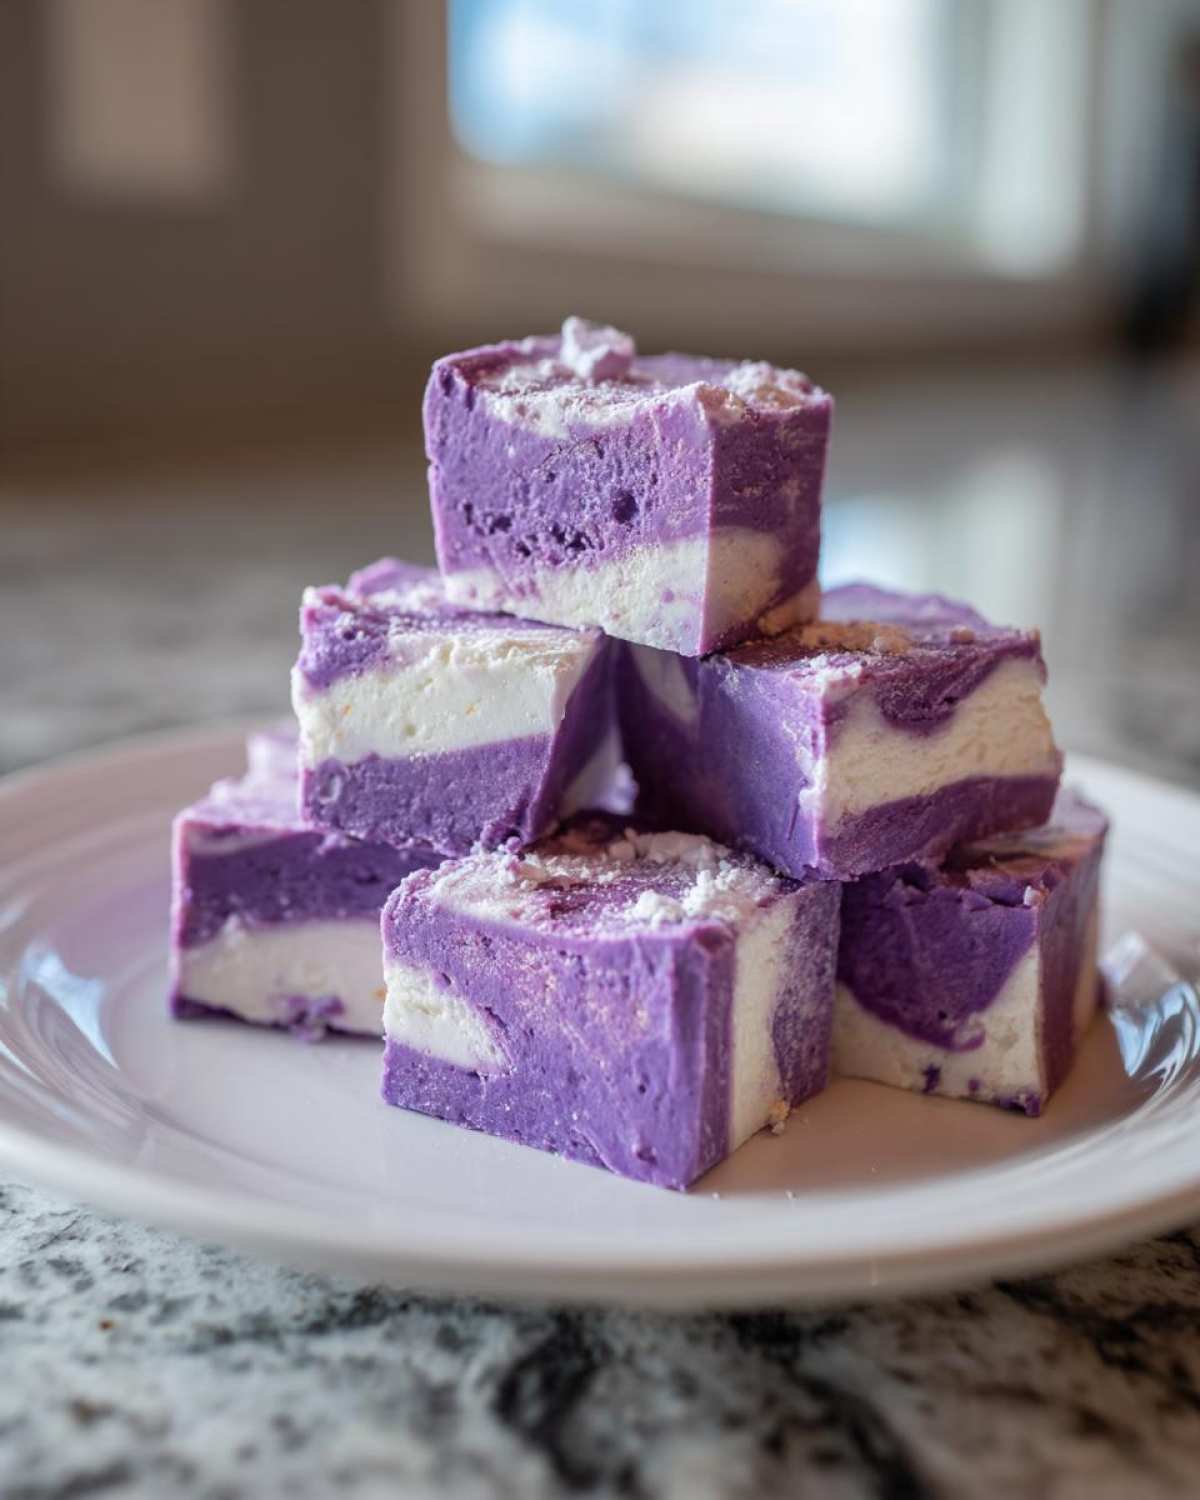
If you’re serving them right away, I love setting them out with a strong cup of coffee or a hot tea. The richness of the fudge stands up perfectly to a slightly bitter drink. If you’re looking for other great holiday treats that travel well, you have to see my recipe for the best soft and chewy sugar cookies—they always disappear first!
Storage and Reheating Instructions for Blueberry Fudge
The best part about making **Blueberry Fudge** is knowing you have a batch of delicious, creamy candy ready to go whenever a craving strikes! The downside of homemade sweets is that they don’t have those shelf-stabilizing additives that store-bought candy does, so we need to treat them kindly.
Good news: this recipe stores beautifully! You want to make sure it stays firm since it sets up soft in the first place. That means we are keeping it cool. The recipe notes mention keeping them in an airtight container, and I want to stress *airtight*.
If you just leave them in an open Tupperware container on the counter, they can start absorbing odors from the fridge or just get a little dry around the edges. I always layer mine between sheets of parchment paper inside a sturdy, sealable container. Since this fudge has high sugar and fat content from the white chocolate, it stays perfectly good in the refrigerator for up to a full week. Seriously, test them on Day 7—they still taste amazing! I haven’t tried freezing them, but I imagine short-term freezing (like a month) would also work if you wrap them super tight.
Frequently Asked Questions About Blueberry Fudge
I always get the same few questions when people try this **Blueberry Fudge** for the first time, especially my friends who swear they could never make candy before! Honestly, most concerns center around texture or making substitutions. I’ve gathered the most common ones here so you can bake with total confidence.
If you try something new and it doesn’t work out exactly, don’t worry! Candy making is always an adventure. For more general beginner tips, you can always check out my main recipe index to see what else I’ve been whipping up!
Can I use blueberry extract instead of fresh fruit in this easy blueberry fudge recipe?
Oh, you certainly can, but it completely changes the character of the fudge! Using extract falls under the **easy blueberry fudge recipe** umbrella, but here is my honest take: extract gives you flavor without the texture. This recipe relies on those beautiful, chopped **fresh or frozen blueberries** to provide a little bit of textural chew and that gorgeous visual fleck throughout.
If you use extract—maybe a teaspoon or two dissolved in a splash of extra vanilla—you get a pure flavor without any moisture, which could potentially make the fudge a bit too soft or crumbly. For that real ‘wow’ factor where people ask where you bought this **homemade blueberry candy**, stick to the fruit!
Is this considered a no bake blueberry treat?
Yes, absolutely! This is definitely one of my favorite **no bake blueberry treats**, even though we touch the stovetop briefly. Real traditional fudge requires heating sugar to specific high temperatures (the hard ball stage, usually 235°F or higher), which requires constant, careful monitoring. That’s scary stuff!
With this simple white chocolate and condensed milk method, we are only melting the ingredients until they are smooth and combined—we aren’t cooking them long enough to change the sugar structure. As long as you keep that heat low, you are safe! Once it melts, you just chill it. It’s pure stovetop magic resulting in a wonderful **no bake blueberry treat**.
Estimated Nutritional Data for Blueberry Fudge
Now, I always joke that if you’re eating homemade candy, you probably aren’t worried about the nutrition label, but I know some of you like to keep track! Because this **Blueberry Fudge** is made with white chocolate and sweetened condensed milk, it’s definitely a treat!
These numbers are just estimates based on the ingredients I listed for the recipe—remember, if you use different brands or add extra mix-ins, that data will shift. Always take these figures with a grain of salt!
For full transparency and more information on how we calculate these estimates, you can check out our standard recipe disclaimer.
- Serving Size: 1 square
- Calories: 105
- Sugar: 15g
- Fat: 4.5g
- Protein: 1.5g
- Carbohydrates: 16g
Easy Blueberry Fudge Recipe
Make creamy, smooth blueberry fudge using white chocolate and fresh or frozen blueberries. This simple recipe sets up well for a delicious homemade candy.
- Prep Time: 10 min
- Cook Time: 5 min
- Total Time: 3 hours 15 min
- Yield: About 64 small squares
- Category: Dessert
- Method: Stovetop
- Cuisine: American
- Diet: Vegetarian
Ingredients
- 1 (14 ounce) can sweetened condensed milk
- 1 (12 ounce) package white chocolate chips
- 1 teaspoon vanilla extract
- 1/4 teaspoon salt
- 1 cup fresh or frozen blueberries, lightly chopped
- 1 tablespoon powdered sugar (for dusting, optional)
Instructions
- Line an 8×8 inch baking pan with parchment paper, leaving an overhang on two sides for easy removal. Lightly grease the paper.
- In a medium saucepan over low heat, combine the sweetened condensed milk and white chocolate chips. Stir constantly until the chocolate is completely melted and the mixture is smooth. Do not let it boil.
- Remove the pan from the heat. Stir in the vanilla extract and salt.
- Gently fold in the chopped blueberries. Mix just until they are distributed throughout the fudge base.
- Pour the mixture into the prepared baking pan and spread it evenly.
- Refrigerate for at least 3 hours, or until the fudge is firm enough to cut.
- Lift the fudge out of the pan using the parchment paper overhang. Place on a cutting board.
- Cut the fudge into 1-inch squares. Dust lightly with powdered sugar before serving, if desired.
Notes
- If using frozen blueberries, do not thaw them first; fold them in while still frozen to prevent excess bleeding of color.
- For a firmer fudge, you can cook the mixture slightly longer, stirring until it reaches 235 degrees Fahrenheit on a candy thermometer, but this recipe relies on the chocolate and milk base for texture.
- Store leftover fudge in an airtight container in the refrigerator for up to one week.
Nutrition
- Serving Size: 1 square
- Calories: 105
- Sugar: 15
- Sodium: 35
- Fat: 4.5
- Saturated Fat: 3
- Unsaturated Fat: 1.5
- Trans Fat: 0
- Carbohydrates: 16
- Fiber: 0.2
- Protein: 1.5
- Cholesterol: 10