

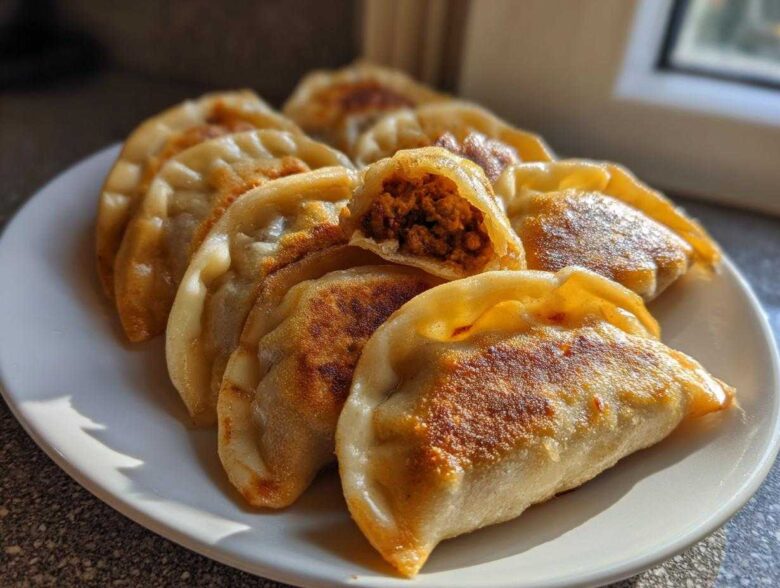
There is just nothing in this world that hits the soul quite like food you’ve made with your own two hands, right? It just tastes better! If you ask me, the pinnacle of true comfort food has to be handmade dumplings. Forget the frozen bags, seriously. We are talking about going completely from scratch today—dough, filling, everything!
I spent years chasing that perfect, slightly chewy, yet tender wrapper texture when I first tried making this recipe. I swear, my first attempts looked more like little doughy potato sacks than anything you’d want to dip in sauce! But I finally cracked the code on getting that authentic texture without needing fancy equipment. This guide is going to walk you through my foolproof method for classic pork and cabbage dumplings, so you can skip my messy trial-and-error phase and get straight to the juicy, savory goodness!
Why You Will Love These Homemade Dumpling Recipes
Honestly, once you taste these fresh, vibrant pork and cabbage dumplings, you might never go back to store-bought wrappers. Making them yourself is such a rewarding process! Sure, it takes a little time, but the payoff is huge. These are the homemade dumpling recipes you’ll keep tucked away forever.
Here’s what makes trudging through the dough process worth every minute:
- The flavor is just miles beyond anything premade because you control the freshness of every single spice and herb.
- There’s nothing quite like the satisfaction of creating perfect little pockets of deliciousness right there on your counter!
- You get to choose your adventure! Whether you want them crispy on the bottom after pan-frying or soft and tender after steaming, this recipe supports it all.
Trust me, come visit my kitchen sometime, and I’ll teach you the folding tricks. It’s way easier than it looks!
Essential Ingredients for Perfect Pork and Cabbage Dumplings
Okay, let’s talk about what goes inside these little parcels of joy. When we make from scratch dumplings, the filling has to taste amazing because the wrapper is going to wrap it up so nicely. I always divide my ingredients into two groups—the dough stuff and the filling stuff. For the filling, you need a pound of ground pork, and trust me, go for something around 80/20 fat content; that fat is pure flavor, buddy! Then we load it up with one cup of finely chopped Napa cabbage, a quarter cup of bright green scallions, two big tablespoons of soy sauce, one tablespoon of lovely sesame oil, a teaspoon of fresh, grated ginger, and just a little salt and white pepper to wake everything up.
The dough is super simple—just two cups of all-purpose flour and roughly three-quarters of a cup of warm water. That’s it! No weird eggs or oils in the wrapper here, which helps us get that classic, pliable texture.
Ingredient Notes and Substitutions for Your Dumplings
This is where I want you to slow down for just a second, because one step here makes all the difference in delivering the best dumpling filling ideas. See that cabbage on the list? You absolutely MUST blanch it first! Boil it for just a minute and then wring out EVERY drop of moisture using a clean kitchen towel. If you don’t, you’ll end up with thin, soggy dough because the cabbage releases water while cooking. It’s my top tip!
If pork isn’t your jam, don’t stress out. Ground chicken works great, though you might need to add an extra splash of sesame oil because chicken is leaner. Ground turkey is fine too, but you’ll definitely want to keep that cabbage squeezing step extra diligent. Just remember that leaner meats sometimes cook a touch faster, so keep an eye on things.
Crafting Authentic Dumpling Dough Recipe From Scratch
Alright, now for the real heart of these amazing dumplings—the wrappers! When I set out to learn Chinese dumpling recipes, the dough was the hardest part to master, but once you do it, you realize how easy it is. You just need flour and water, but how you treat them matters!
For the authentic dumpling dough recipe, mix the two cups of flour with your warm water. I use water that feels really warm between my fingers, but not boiling hot—that’s my personal trick for getting a soft yet elastic dough. Mix it until it looks all messy and shaggy, then dump it onto a lightly floured surface. Now, get ready to work it! You need to knead this dough for a good 8 to 10 solid minutes. Seriously, don’t cheat this part; you’re building structure!
Once it’s wonderfully smooth—like a baby’s bottom, honestly—wrap it tight in plastic wrap (or put it in a bowl covered with a damp towel) and let it chill out for at least 30 minutes. This rest time is non-negotiable; it lets the gluten relax so you can roll it thin without it fighting you back. If you ever need to get in touch about a recipe disaster or success, you can always shoot me a message on my contact page!
Tips for How to Fold Dumplings Perfectly
Once resting is done, it’s showtime! Take the rested dough and roll it into long ropes, then slice those ropes into about 1-inch pieces. I use a little rolling pin I grabbed online—it’s smaller than a regular one—to flatten each piece into a thin, 3-inch circle wrapper. You want the edges a little thinner than the center, if you can manage it!
To fill them, put about a teaspoon of that savory filling right in the middle. Moisten the edge with a tiny bit of water—just a finger swipe is enough—and fold it over. Now, you can do a simple U-shape, just pinching the middle tight, or you can go for the fancy look. If you want those classic pleats (which look amazing!), start making small folds along one side of the wrapper edge, pressing them against the flat side of the other edge as you move along. It sounds complicated, but practice makes perfect once you see it in action. Just make sure they are sealed tight so that gorgeous filling doesn’t escape!
Assembling the Best Dumpling Filling Ideas
Now that you’ve got your dough resting like it deserves, let’s get back to the star of the show: that vibrant filling! This is where you get bold with your seasoning. Grab a big bowl—you need room to work here. Dump in that seasoned pork, the blanched and squeezed-dry cabbage, your scallions, soy sauce, sesame oil, ginger, salt, and pepper.
The key to truly great pork and cabbage dumplings is making sure everything is perfectly combined. You have to mix it until it looks completely uniform, almost like a paste, rather than just bits of meat sitting next to bits of cabbage. Mixing it thoroughly helps the meat bind everything together beautifully. Once you mix it well, your best dumpling filling ideas suddenly become reality—it’s fragrant and ready to go. Feel free to take a tiny, tiny taste test if you’re brave enough, though I recommend waiting until they’re cooked!
If you are looking for more inspiration for your mains, you can always peek at my dinner ideas over on my dinner category page!
Step-by-Step Instructions for Cooking Your Dumplings
You’ve made the dough, you’ve made the filling, and you’ve folded about thirty little beauties—now for the best part! You have a few options here: boiling, steaming, or my personal favorite, the pan-fry/steam combo that gives you that amazing crunchy bottom. For beginners, I always recommend the pan-fry method because that golden crust is just addictive.
Grab your big non-stick skillet. You need about one tablespoon of oil, and set the heat to medium-high. We want the pan properly hot before these babies even think about hitting the surface. Once the oil is shimmering, carefully place your dumplings flat-side down—don’t crowd the pan! Let them sit there, undisturbed, for about two minutes until you see that bottom turn a beautiful, rich golden brown. This is the first step to achieving that fantastic texture you find in great Chinese dumpling recipes.
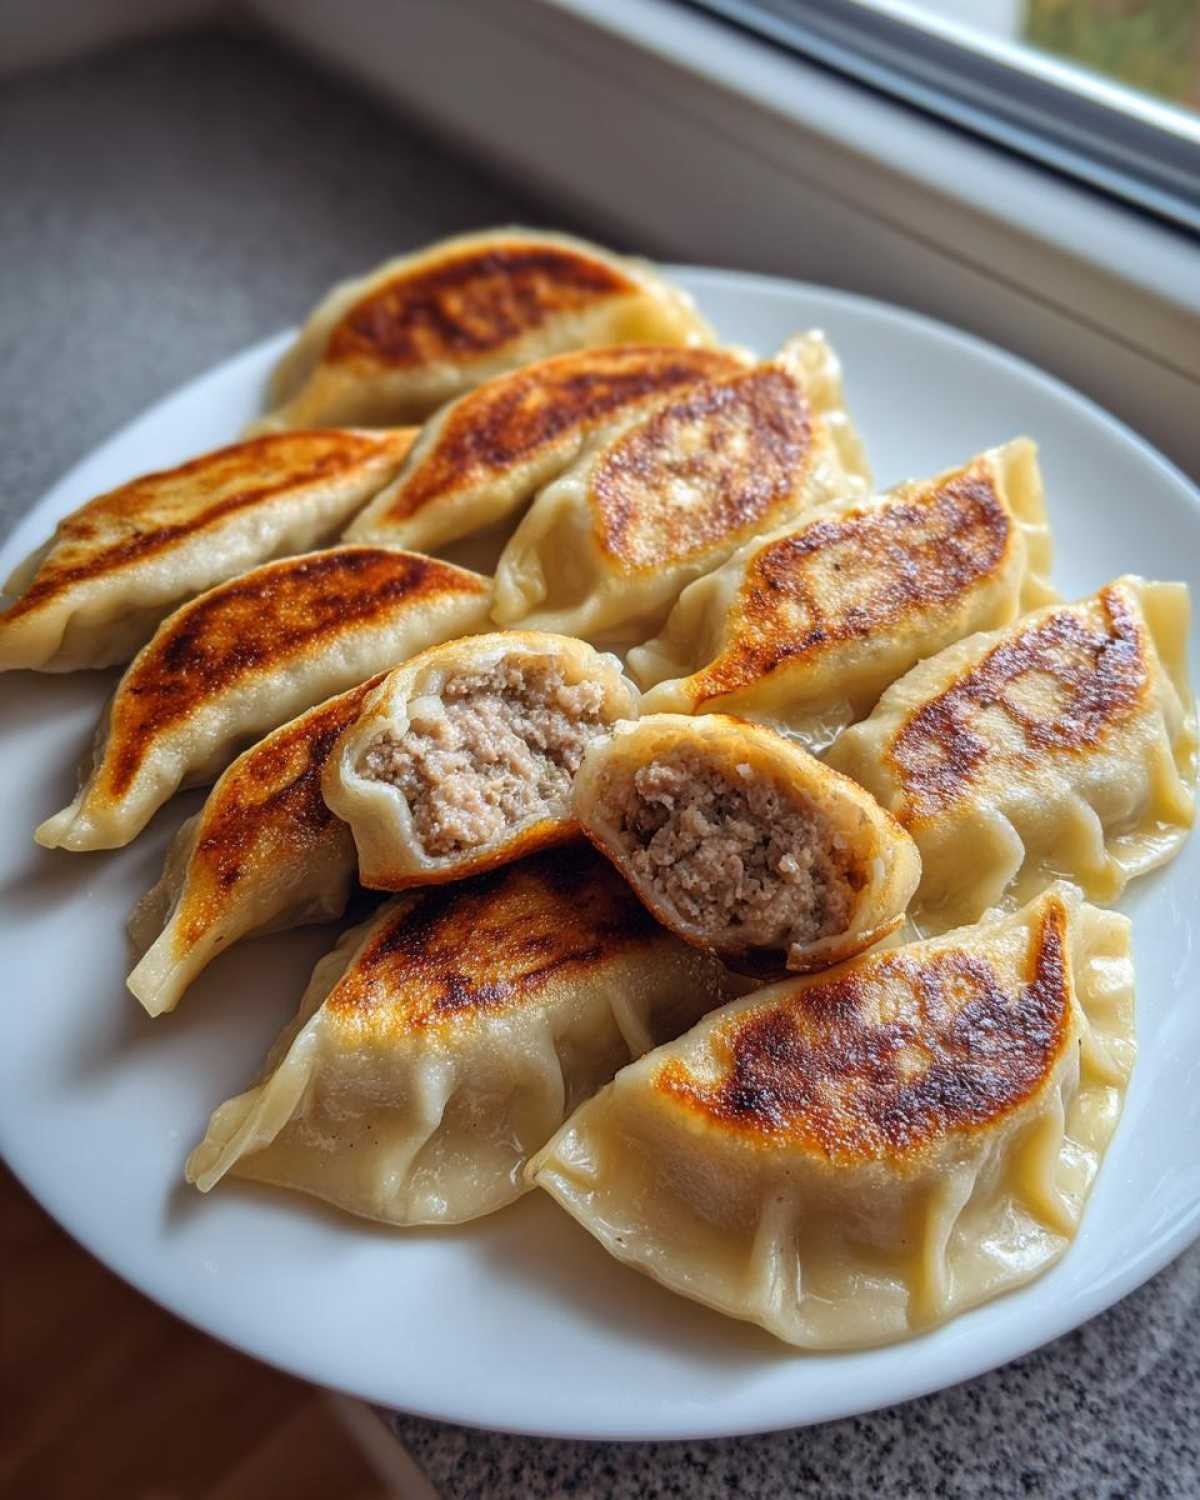
Right after that initial sear, here is the critical move: carefully pour in about a half cup of plain old water—be careful, it might steam up! Immediately clap that lid onto the skillet. You want to trap that steam. Let them steam away like that for about six to eight minutes, or until all that water has completely evaporated and you know the pork inside is cooked through. Once the water is gone, the bottoms crisp up again. And that’s it! Perfectly cooked, juicy, and crisp. You can check out how I do a similar thing with noodles over here for a quick dinner trick.
Mastering the Pan Fried Dumplings Secret
Seriously, the pan fried dumplings secret isn’t just the hard sear; it’s the steam combo. If you only fry them, the filling near the bottom of the wrapper can feel a bit tough or undercooked. By adding the water and covering it, you create a mini-steam oven right inside your skillet! This ensures the pork filling cooks through evenly while the bottom gets perfectly craggy and crisp.
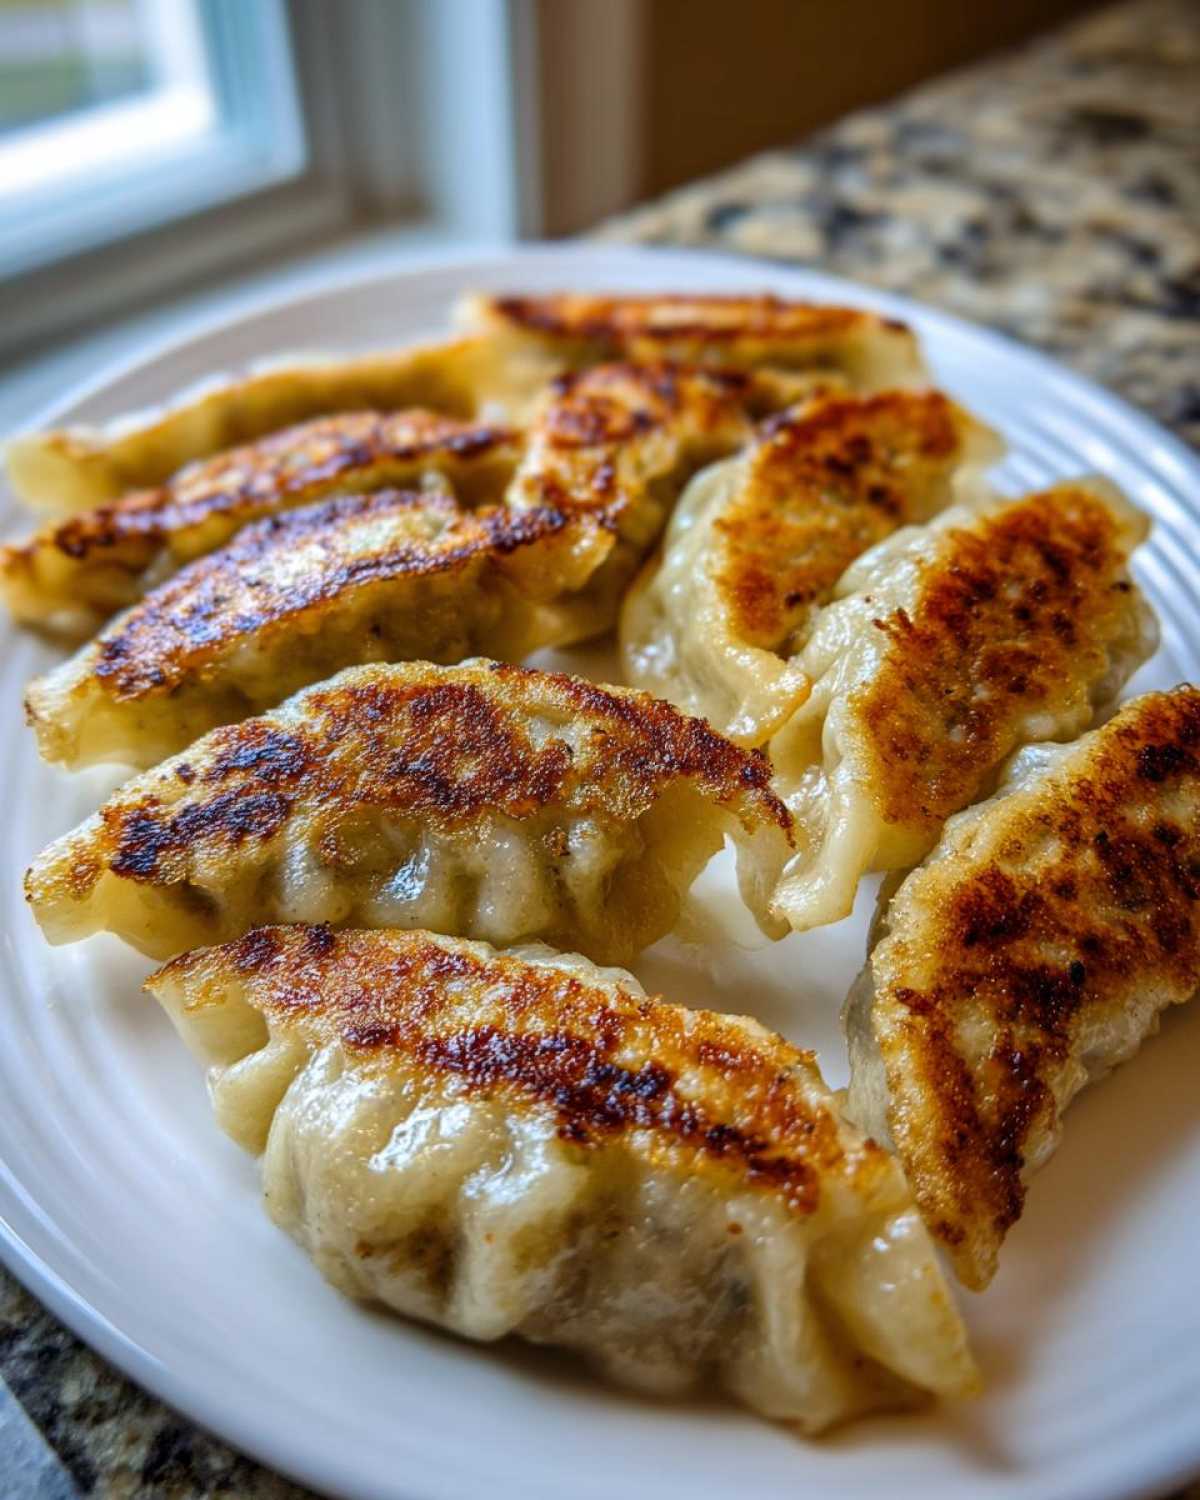
Don’t peek too early after you add the water! That steam needs time to work its magic. You’ll know it’s ready when you lift the lid and see no more pooling liquid; the dumpling top should look plump and slightly translucent. If you manage to keep them all intact through the cooking process, you’ve officially mastered the technique. Give yourself a pat on the back!
Quick Dumpling Dipping Sauces
You can’t eat a perfect dumpling without the right partner in crime, which is why we need a killer dipping sauce to go with them! Luckily, these quick dumpling dipping sauces take about thirty seconds to mix up, so you don’t add any extra time to your cooking marathon. You only need three things, really.
Mix three parts soy sauce, one part rice vinegar, and then just add a few drops of chili oil if you like a little kick. Taste it! If it needs more tang, add a drip more vinegar. That combination? It is sharp, salty, and cuts through the richness of the pork filling perfectly. You do not need anything complicated, trust me. Just mix and serve immediately!
Storing and Making Freezer Friendly Dumplings
Now, if you’re anything like me, you probably made about five hundred dumplings instead of the thirty the recipe said. Whoops! The good news is that these freeze like champs, which is why I always keep a stash ready to go. Having freezer friendly dumplings on hand is like having a secret weapon against those nights when you’re too tired to cook but need something amazing.
The key to freezing them without them turning into one giant, tangled dumpling mess is *flash freezing*. You cannot just throw them all into a Ziploc bag uncooked; they will fuse together into one giant frozen brick of disappointment. Take all your uncooked dumplings and lay them out in a single layer on a baking sheet that you’ve lined with parchment paper first. Make sure none of them are touching!
Pop that whole tray into the freezer, and leave it there for at least an hour, or until those little pockets are rock hard. Once they are solid little icy nuggets, you can carefully transfer them all into a proper freezer bag or airtight container. They’ll keep beautifully for months!
When you’re ready to cook them straight from the freezer, just add a couple of extra minutes to your steaming or boiling time. If you’re planning on pan-frying, it’s best to let them thaw slightly first so they don’t shock the skillet too much. It’s always great to have extra snacks ready to grab from the freezer too, so check out my snack section for more ideas!
Frequently Asked Questions About Making Dumplings
I get so many questions whenever friends see my kitchen covered in flour and cabbage bits! It’s totally normal to have questions when diving into making from scratch dumplings. So, here are the things I hear most often when people try this recipe for the first time.
Can I use store-bought wrappers instead of making the dough?
Oh, absolutely you can! If you’re short on time, using wrappers labeled as “round dumpling wrappers” is a totally valid shortcut. I won’t tell anyone, promise! Just remember that homemade wrappers have that specific chewiness we worked so hard to achieve with the authentic dumpling dough recipe. If you use store-bought, make sure you’re still aiming for the best filling possible, maybe going for a slightly different mix than the pork and cabbage. It’s a great way to make Chinese dumpling recipes accessible on a Tuesday night!
What are some other great vegetarian dumpling recipes filling ideas?
That’s a fantastic question! If you’re looking to switch things up or have folks avoiding meat, I love using finely minced shiitake mushrooms mixed with shredded carrots, spinach (squeezed dry, just like the cabbage!), cellophane noodles, and a touch of tofu that’s been pressed really well. Season that mix with a little extra ginger and maybe some white pepper for warmth. The key to any good vegetarian dumpling recipes filling is making sure you drain out *all* the excess liquid so your wrappers don’t get soggy.
How do I know for sure when the pork filling is actually cooked, especially when steaming?
The pork needs to reach 165°F internally, but who wants to pull out a thermometer for twenty little dumplings? Here’s my reliable visual cue: When they are done steaming, the wrapper goes from looking opaque and crumbly to slightly translucent and glossy. If you carefully pull one apart, the pork inside should be uniformly light grey or pale tan, definitely not pink in the middle. If you follow that six to eight-minute steam time after the initial sear, they should be perfect!
Do I have to pan-fry them, or is the steamed dumpling tutorial version better?
Both are incredible in their own way! If you’re looking for that beautiful contrast—crispy on the bottom and soft everywhere else—the steamed dumplings tutorial part of the process (the steam after the initial sear) is essential for perfect, tender insides. If you just want a soft, pillowy experience, you can skip the frying entirely and just steam them for about 10 to 12 minutes total right from raw. It’s really a matter of texture preference, so try both ways!
If you ever have any legal questions because you’re running a massive dumpling operation, I’m not a lawyer, so please check out my official disclaimer page!
Estimated Nutritional Data for These Dumplings
Okay, I know some of you are tracking macros, and others are just curious about what exactly goes into these wonderful little wraps. Since these are made completely from scratch with fresh ingredients, everything is pretty straightforward! Below you’ll find the estimated nutritional breakdown for five of these glorious cooked pork and cabbage dumplings.
Just remember, these numbers are estimates based on the exact ingredients listed in the recipe card above. What you use, how much oil you soak up during the pan-fry, or if you swap pork for chicken will change the final count slightly. But honestly, when something tastes this good, I try not to stress too much about the totals!
- Serving Size: 5 dumplings
- Calories: 280
- Total Fat: 14g (Saturated Fat: 5g)
- Carbohydrates: 25g (Fiber: 1g)
- Protein: 15g
- Sodium: 450mg
- Cholesterol: 55mg
See? Pretty balanced for a truly satisfying meal! These are what I consider my ideal Asian comfort food dumplings because they fill you up without feeling overly heavy.
PrintClassic Pork and Cabbage Dumplings
A recipe for making traditional Chinese pork and cabbage dumplings from scratch, including dough and dipping sauce.
- Prep Time: 45 min
- Cook Time: 15 min
- Total Time: 60 min
- Yield: About 30 dumplings
- Category: Main Course
- Method: Pan-Frying/Steaming
- Cuisine: Chinese
- Diet: Low Fat
Ingredients
- 2 cups all-purpose flour
- 3/4 cup warm water (plus more if needed)
- 1 pound ground pork
- 1 cup finely chopped Napa cabbage
- 1/4 cup chopped scallions
- 2 tablespoons soy sauce
- 1 tablespoon sesame oil
- 1 teaspoon grated fresh ginger
- 1/2 teaspoon salt
- 1/4 teaspoon white pepper
Instructions
- Make the dough: Mix flour and warm water in a bowl until a shaggy dough forms. Knead on a floured surface for 8 to 10 minutes until smooth. Cover the dough and let it rest for 30 minutes.
- Prepare the filling: In a large bowl, combine ground pork, cabbage, scallions, soy sauce, sesame oil, ginger, salt, and white pepper. Mix well until the mixture is uniform.
- Roll out wrappers: Divide the dough into four equal pieces. Roll each piece into a long rope and cut into 1-inch pieces. Roll each piece into a thin, 3-inch circle wrapper.
- Fill and fold: Place about 1 teaspoon of filling in the center of a wrapper. Moisten the edges with water. Fold the wrapper in half and crimp the edges to seal, creating pleats if desired.
- Cook the dumplings: You can steam, boil, or pan-fry them. For pan-frying, heat 1 tablespoon of oil in a non-stick skillet over medium-high heat. Place dumplings flat-side down and cook until the bottoms are golden brown, about 2 minutes. Add 1/2 cup of water, cover immediately, and steam until the water evaporates and the filling is cooked through, about 6 to 8 minutes.
- Serve immediately with your preferred dipping sauce.
Notes
- For best results, blanch the chopped cabbage for 1 minute in boiling water, squeeze out all excess moisture before mixing it into the filling.
- You can freeze uncooked dumplings by placing them on a parchment-lined tray until solid, then transferring them to a freezer bag.
- A simple dipping sauce uses 3 parts soy sauce, 1 part rice vinegar, and a few drops of chili oil.
Nutrition
- Serving Size: 5 dumplings
- Calories: 280
- Sugar: 2
- Sodium: 450
- Fat: 14
- Saturated Fat: 5
- Unsaturated Fat: 9
- Trans Fat: 0
- Carbohydrates: 25
- Fiber: 1
- Protein: 15
- Cholesterol: 55