

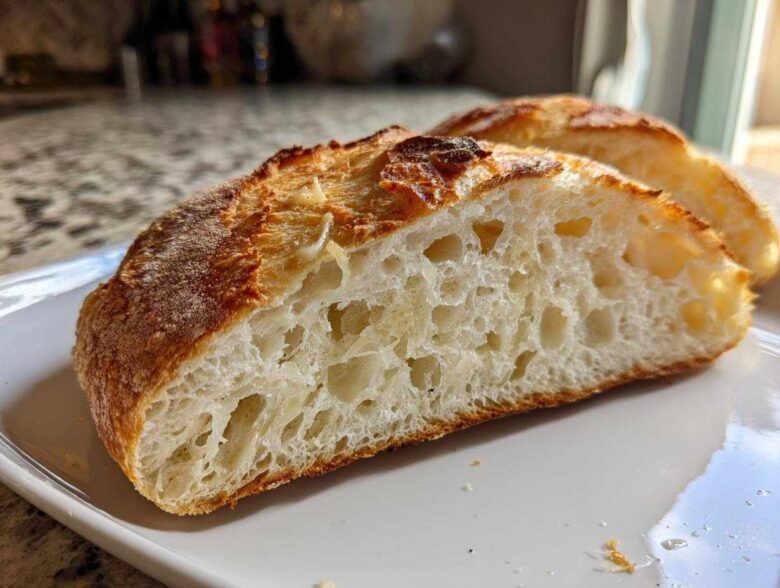
You know that feeling when you walk into a bakery and the smell just hits you? That perfect mix of sharp cheese, deep garlic, and warm, crusty bread? I spent years trying to replicate that magic in my own kitchen. I used every machine, tried every fancy technique, and honestly, I ended up with some real doorstops!
But trust me, the secret isn’t complicated machinery. It’s patience! This Parmesan Garlic Artisan Bread is the recipe that finally cracked the code for me, combining that intense savory flavor with an incredible, crackly crust. We’re using the famed no-knead method here, letting time do all the heavy lifting so you can achieve that bakery-quality loaf with almost zero effort. I actually wrote down my very first successful no-knead attempt because I knew it was special—you can see my initial thoughts on easy no-knead artisan bread recipe. Pulling this beautiful, golden thing out of the Dutch oven is honestly one of the best feelings in home baking.
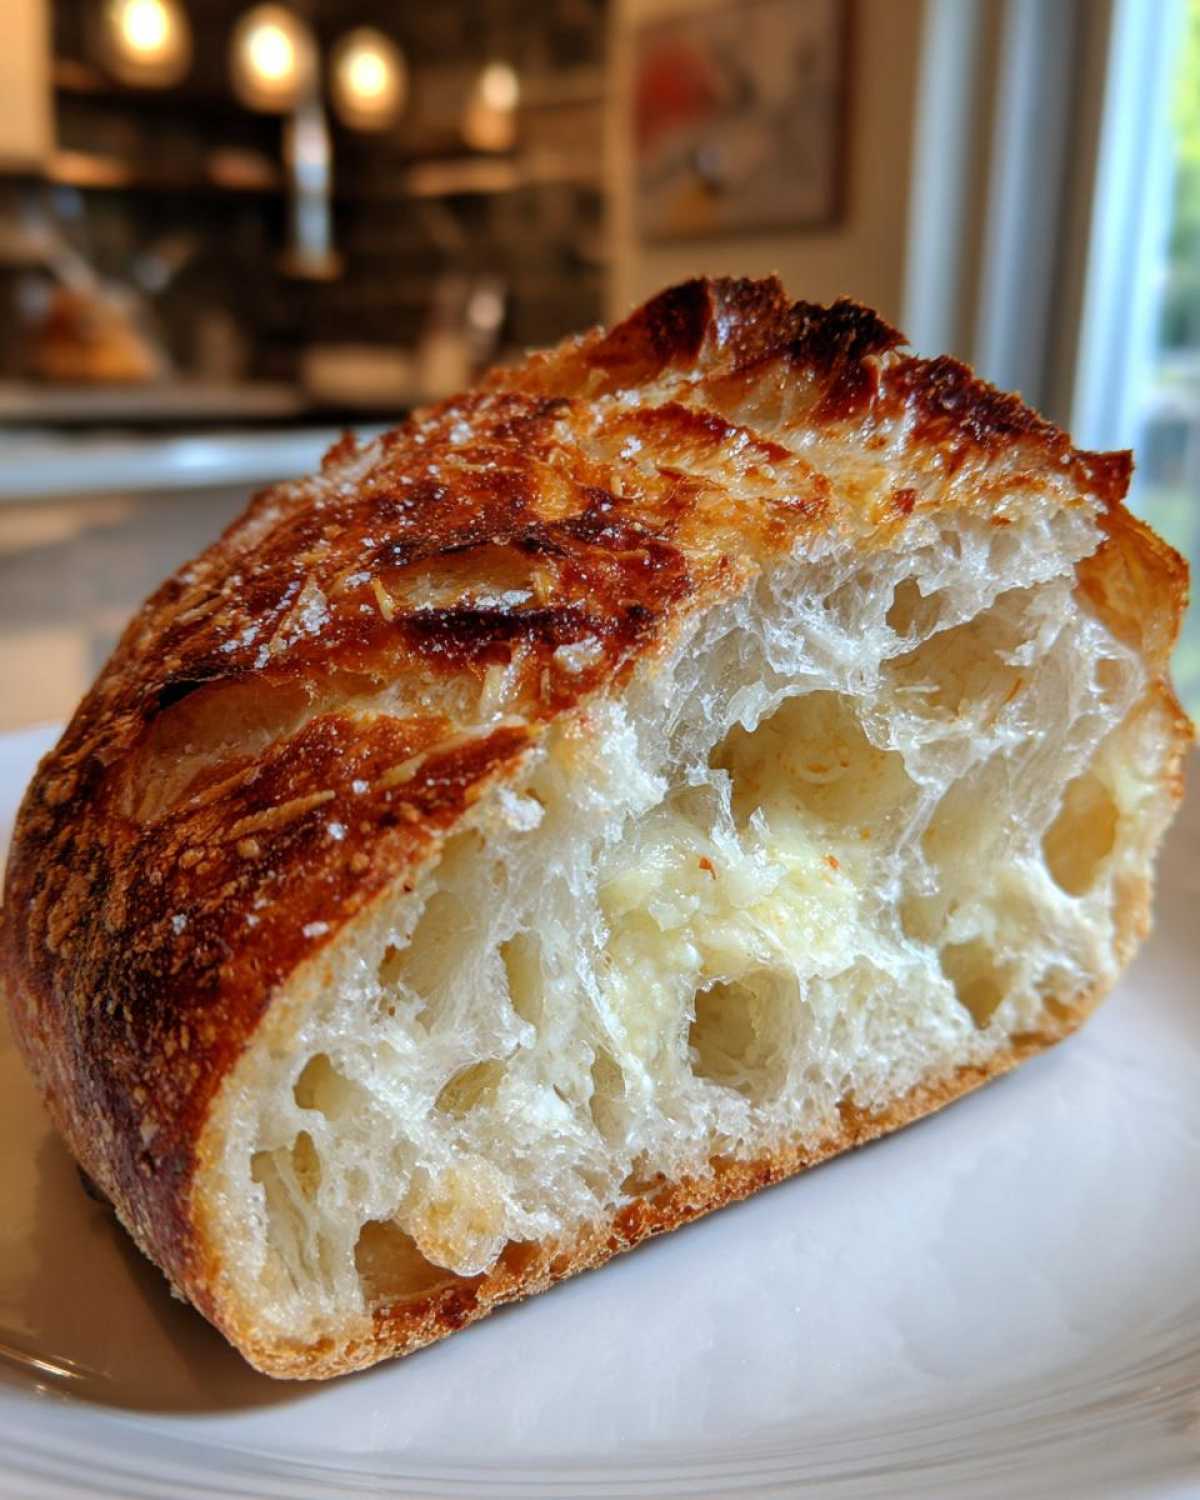
Why This Parmesan Garlic Artisan Bread Recipe Works (Expert Tips)
I know, I know, sometimes the instructions for artisan bread look intimidating, especially when you see the 18-hour rest time listed! But that’s the real trade secret right there. This method isn’t about kneading strength; it’s about time creating structure and incredible depth of flavor. We’re using the famed no-knead method here, letting time do all the heavy lifting so you can achieve that bakery-quality loaf with almost zero effort. For more background on mastering this style, check out my guide on how to make artisan bread at home. Pulling this beautiful, golden thing out of the Dutch oven is honestly one of the best feelings in home baking.
The Parmesan and garlic aren’t thrown in until the very end, which is intentional. If we mixed them early on, the salt from the cheese would interfere with the yeast’s long slumber. Plus, folding them in late keeps those little pockets of cheesy goodness intact so you get bursts of flavor in every slice!
The Magic of Slow Fermentation for Flavorful Homemade Bread
That long, slow rest at room temperature is everything. Think of it like letting a rich wine age a little bit! The yeast works slowly, creating those beautiful, complex organic acids that give truly Flavorful Homemade Bread its signature slight tang. You get the airy texture you crave without ever touching a kneading surface. It’s baking magic, honestly!
Achieving the Crusty Homemade Loaf with Dutch Oven Bread Baking
If you want that perfect, shatteringly crisp exterior, you absolutely need steam. Since most of us don’t have professional steam injectors, we cheat beautifully with a heavy pot—the Dutch oven! Preheating it makes the bottom of your bread bake fast and hard, giving you that impressive Crusty Homemade Loaf. It traps all of the dough’s natural moisture right where we want it during the first half of the bake. It’s the cornerstone of successful Dutch Oven Bread Baking at home.
Gathering Ingredients for Your Parmesan Garlic Artisan Bread
Okay, let’s talk about what you need! Because we aren’t doing much work here, the quality of what goes in really matters to ensure we get that ultimate savory punch. This list seems short, but every item plays a specific role in creating that gorgeous, Rustic Parmesan Bread crust and crumb.
- 3 cups All-Purpose Flour
- 1 1/2 teaspoons Salt
- 1/4 teaspoon Instant Dry Yeast (See, I told you—just a tiny bit!)
- 1 1/4 cups Cold Water (Don’t skip the cold part!)
- 1/2 cup Grated Parmesan Cheese, plus 2 tablespoons for topping (This is crucial!)
- 3 cloves Garlic, minced (Fresh is best, trust me on this one)
- 1 tablespoon Olive Oil
Ingredient Notes and Substitutions for Rustic Parmesan Bread
When it comes to the cheese, please, please use the genuine hard block of Parmesan and grate it yourself. The bagged stuff has anti-caking agents that stop your bread from melting beautifully, and we want pockets of salty goodness, not powdery clumps! For the garlic, you can absolutely roast it first if you want a sweeter, mellower background flavor instead of that sharp bite from fresh cloves. Also, make sure you grab *instant* yeast. This no-knead recipe relies on that specific type to activate slowly over those long hours without needing to bloom it first. For other flavor boosters, you could even look at my guide for easy garlic butter recipe suggestions to brush on right after baking!
Step-by-Step Instructions for the Best Parmesan Garlic Bread
This is where the minimal effort pays off big time! Seriously, the hard work is done hours before you even turn on the oven. We mix it, forget it, and then just prepare for the payoff. When you get to the point of incorporating the cheese and garlic, you need to be gentle—we want to keep all those bubbles we waited 18 hours for!
Remember, once you pull this loaf out, resisting the urge to slice it right away is the final, toughest test. Trust me, that cooling time is essential for a perfect crumb structure. For super detailed advice on getting that beautiful exterior, don’t skip my tips on crispy crust bread tips.
Mixing the Dough and Initiating the Slow Fermentation
Grab your bowl and mix your flour, salt, and yeast together first. Honestly, it takes 30 seconds. Then, pour in that cold water and just mix it with a sturdy spoon until you can’t see any dry flour streaks left. That’s it for the mixing! You want a shaggy, sticky mess—no kneading allowed here! Cover that bowl up tight and put it somewhere out of the way for 12 to 18 hours. The cold water is key here for initiating the Slow Fermentation Bread process correctly. If you knead it now, you’re actually hurting the final texture, so resist the temptation!
Incorporating Cheese and Garlic into Your Savory Artisan Yeast Bread
Once your dough is bubbly and soft, scrape it out gently onto a floured counter. Now for the fun part! Sprinkle your 1/2 cup of Parmesan and that minced raw garlic all over the top. You have to fold the dough over itself just a few times—gently!—to try and trap those flavor bombs inside without squishing all the air out. Shape it into a rough ball, put it back into the oily bowl, cover it, and let it hang out for just 30 more minutes for that second, short rest.
The Final Bake: Creating the Perfect Parmesan Garlic Artisan Bread
While that dough rests for the final half hour, crank your oven up to 450°F (232°C) with your empty Dutch oven inside. This needs to get screaming hot! When it’s ready, carefully lift your dough into the hot pot—watch your fingers! Drizzle the top with olive oil and sprinkle on that last 2 tablespoons of Parmesan because we want a cheesy top crust! Pop the lid on and bake for 30 minutes. Then, take the lid off and bake for another 10 to 15 minutes until your Parmesan Garlic Artisan Bread is deep brown and gorgeous. Cool it completely on a rack before you even think about slicing!
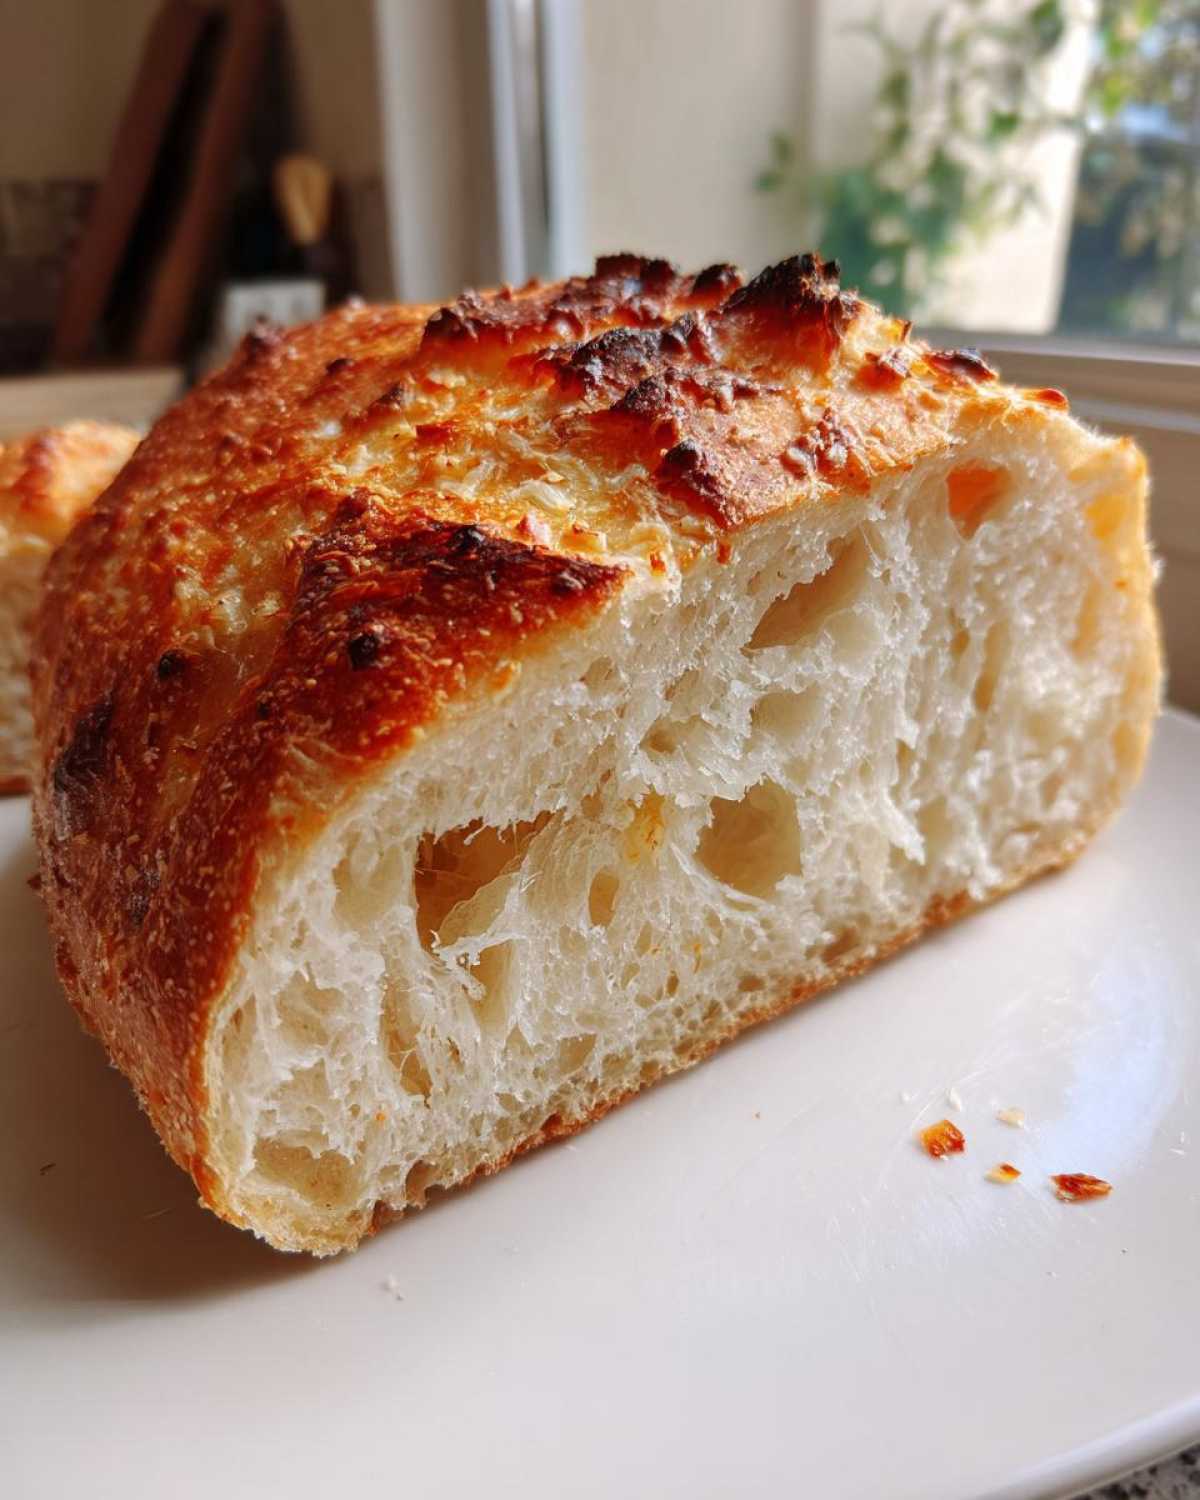
Tips for Success with Your Rustic Parmesan Bread
Getting that bakery look at home really just boils down to respecting the heat and handling the dough delicately once it’s developed its structure. Don’t rush that preheat time for the Dutch oven; if the pot isn’t scorching hot, you won’t get that immediate spring and crust formation we’re aiming for in this Rustic Parmesan Bread. Seriously, give it a full 30 minutes at 450°F before you even look at the dough.
When you go to fold in the cheese and garlic, treat that dough like a newborn baby—gently, gently! We want to incorporate the flavor, not punch out all the hard work the yeast did during that long sleep. Also, if your kitchen is really cold, maybe stick that covered bowl on top of your fridge for the 18-hour rest; a warmer spot speeds up fermentation just slightly. This keeps your loaf from being too dense! If you’re ever curious about adding aromatics like onions, check out some of my ideas over on caramelized onions ultimate guide recipe for inspiration on flavor layering.
Variations on the Parmesan Garlic Artisan Bread Flavor Profile
While this specific recipe nails the intense Parmesan and raw garlic punch, it’s such a solid base you can totally play around with it! If you want to make something approaching a decadent Cheesy Garlic Bread Recipe without losing the artisan structure, try swapping out half the minced raw garlic for roasted garlic cloves. Oh my goodness, the sweetness it brings is unbelievable!
Don’t stop there, though. Rosemary loves sage, and sage loves Parmesan. Try folding in about a tablespoon of fresh, finely chopped rosemary right along with the cheese and garlic for an earthier note. If you’re feeling really bold, try substituting 1/4 cup of the Parmesan with sharp Pecorino Romano for an extra salty kick. You can find some great pairings ideas over at my mushroom pasta recipe creamy garlic page that would perfectly match a herbed version of this loaf!
Serving Suggestions for This Incredible Garlic Bread Flavor
Honestly, this loaf is so savory and flavorful, it doesn’t need much company, but I love serving it alongside something brothy! It’s perfect for dunking into a rich soup, especially something creamy because the crust holds up so well. I highly recommend making a big batch of my Zuppa Toscana right when you bake this loaf—the textures just sing together!
If you’re having it for an appetizer, keep it simple. A small bowl of good quality olive oil mixed with a splash of balsamic vinegar is all you need for dipping. The Incredible Garlic Bread Flavor shines through when paired with something sharp or acidic. You’ll find you don’t need butter when the bread itself is this good, but slicing it thin and serving it beside Zuppa Toscana Soup is my personal favorite way to enjoy it!
Storage and Reheating Instructions for Homemade Artisan Bread Recipe
Okay, this is really important, because leftover artisan bread can go downhill fast if you’re not careful! Never, ever stick this loaf in the fridge. Cold temperatures make bread go stale quicker, and we’ve worked too hard for that!
The best way to store your Homemade Artisan Bread Recipe leftover is in a paper bag, sitting on the counter, with the cut side down. This keeps the air from drying out the interior while letting the crust breathe a little so it doesn’t go soft. If you want to bring that crust back to life? Pop the entire loaf (or what’s left) back into that 450°F oven for about five minutes! It’s like magic, honestly. For softer options later on, you can always peek at how I keep my dinner rolls perfect over at soft buttery garlic dinner rolls.
Frequently Asked Questions About Parmesan Garlic Artisan Bread
I get so many messages asking little clarifying questions once people start baking this recipe, which is awesome! It means you’re really trying to nail that perfect loaf. Nine times out of ten, the issue is placement or temperature, so let’s address those fears now so your Parmesan Garlic Artisan Bread comes out flawlessly every time. While you’re thinking about interesting additions, you can check out my recipe for best coquito recipe puerto rican holiday drink if you’re looking for something festive to serve later!
Can I use sourdough starter instead of commercial yeast in this No Knead Artisan Loaf?
You absolutely can, but you have to adjust your expectations! Since we are using commercial instant yeast for a predictable 18-hour rise, swapping to starter means changing the whole timeline. If you use a mature, active starter, you’ll likely need to reduce the amount of flour and water slightly, and the rest time might shorten or lengthen depending on your kitchen’s warmth. Keep it in the fridge overnight if the dough seems too active too early!
My dough didn’t rise much after 18 hours; what went wrong with my Parmesan Cheese Bread Baking?
Oops! If your dough looks flat after the long rest, it’s usually one of two things: old yeast or a chilling spot. If your yeast isn’t fresh, it won’t produce enough gas. Or, if your kitchen is drafty and cold—say below 65°F—the yeast just slows way, way down. Try moving the bowl somewhere warmer next time; even the top of the fridge works wonders! Don’t stress though—it will still bake up flatter but should still taste amazing because of all that cheese!
How do I make this recipe without a Dutch oven for my Crusty Homemade Loaf?
This is a super common question for anyone trying How to Make Artisan Bread at Home! If you don’t have a Dutch oven, don’t worry; you can still get a great Crusty Homemade Loaf. You need a sturdy, oven-safe pot or a cast-iron skillet to place your loaf on, and crucially, you need big source of steam. Place a broiler pan or an old metal baking sheet on the rack beneath your bread. When you put your bread in the oven, carefully pour one cup of boiling water onto that hot pan below, close the door FAST, and let it steam for the first 20 minutes. It mimics the Dutch oven effect pretty well!
Sharing Your Parmesan Garlic Artisan Bread Experience
Wow, you made it! You took the time, you waited patiently (that 18 hours is no joke!), and now you have this incredible, cheesy, garlicky masterpiece sitting on your counter. I genuinely want to know how it turned out for you!
Seriously, leave a comment down below and tell me what you served it with. Did you go classic soup dunking, or did you just stand there eating slices in the kitchen like I usually do? If you snapped a picture of that gorgeous, crackly crust, tag me on social media—I love seeing your bakes! You can always explore more of what’s baking in my kitchen right here on the main blog.
Rate this recipe using the stars provided, and if you have any burning questions that didn’t make the FAQ list, drop them in the comments section. Happy baking, everyone, and enjoy every single piece of that savory bread!
PrintNo-Knead Parmesan Garlic Artisan Bread
Bake a rustic, crusty loaf of artisan bread featuring a strong flavor of sharp Parmesan cheese and fresh garlic using a simple no-knead method.
- Prep Time: 15 min
- Cook Time: 45 min
- Total Time: 13 hours 0 minutes
- Yield: 1 loaf
- Category: Bread
- Method: Baking
- Cuisine: American
- Diet: Vegetarian
Ingredients
- 3 cups All-Purpose Flour
- 1 1/2 teaspoons Salt
- 1/4 teaspoon Instant Dry Yeast
- 1 1/4 cups Cold Water
- 1/2 cup Grated Parmesan Cheese, plus 2 tablespoons for topping
- 3 cloves Garlic, minced
- 1 tablespoon Olive Oil
Instructions
- In a large bowl, mix the flour, salt, and yeast together.
- Add the cold water and mix with a wooden spoon until just combined into a shaggy dough. Do not overmix.
- Cover the bowl tightly with plastic wrap and let it rest at room temperature for 12 to 18 hours. The dough will become bubbly and increase in volume.
- After the long rest, gently scrape the dough onto a lightly floured surface.
- Sprinkle the 1/2 cup of Parmesan cheese and the minced garlic over the dough. Gently fold the dough over itself a few times to incorporate the cheese and garlic without deflating the air too much. Shape it into a rough ball.
- Lightly oil the bowl you used earlier. Place the dough ball back in the bowl, cover, and let it rest for a second rise for 30 minutes.
- About 30 minutes before baking, place a Dutch oven with its lid inside your oven and preheat the oven to 450 degrees Fahrenheit (232 degrees Celsius).
- Carefully remove the hot Dutch oven from the oven. Gently place the dough into the hot pot. Drizzle the top with olive oil and sprinkle with the remaining 2 tablespoons of Parmesan cheese.
- Cover the Dutch oven and bake for 30 minutes.
- Remove the lid and bake for an additional 10 to 15 minutes, or until the crust is deep golden brown and crisp.
- Carefully remove the bread from the pot and let it cool completely on a wire rack before slicing.
Notes
- For the best artisan texture, use a kitchen scale to measure the flour accurately.
- If you prefer a milder garlic flavor, roast the garlic cloves before mincing and adding them to the dough.
- The cold water is key to the slow fermentation process that develops the artisan flavor and structure.
Nutrition
- Serving Size: 1 slice
- Calories: 250
- Sugar: 1
- Sodium: 450
- Fat: 5
- Saturated Fat: 3
- Unsaturated Fat: 2
- Trans Fat: 0
- Carbohydrates: 45
- Fiber: 2
- Protein: 8
- Cholesterol: 10