

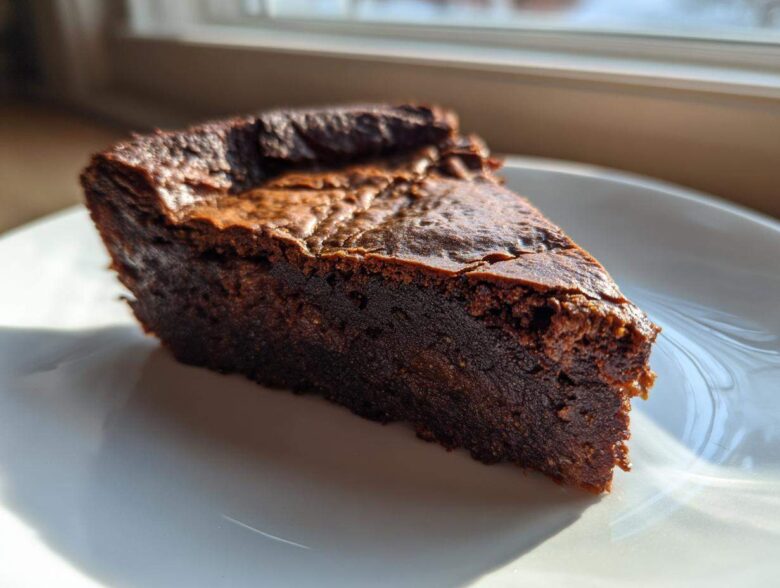
Oh, you are just going to scream when you take your first bite of this pie. Forget everything you think you know about chocolate desserts, because this Rich Old-Fashioned Fudge Pie is the absolute definition of indulgence. This isn’t some light, airy mousse situation; this is deep, dark, satisfying chocolate that hits you right in the comfort zone. I’ve made countless desserts in my life, but this specific fudge pie recipe—the one I guard with my life—always wins. It’s tried, it’s true, and it delivers that magical combination: a thin, crisp, crackly top giving way to a center that is impossibly gooey and rich. Trust me, once you make this, it’s going into your regular rotation!
Why This Rich Chocolate Dessert is the Best Fudge Pie Recipe
You need this recipe in your life because it solves the biggest dessert dilemma: how do you get maximum decadence with minimum fuss? This isn’t just another chocolate pie; it’s engineered to be flawless every single time. It manages to taste like a holiday centerpiece but comes together faster than most weeknight dinners. I promise you, once you see those chips melt, you’ll never go back to store-bought mixes.
- It nails the texture perfectly—it’s the ideal crossover between a classic gooey chocolate pie and a dense, satisfying brownie pie recipe.
- Seriously, it’s an easy fudge pie! The batter mixes up in one bowl in about ten minutes flat. You mix, you pour, you bake. That’s it!
- The flavor profile is pure, unadulterated decadence. It’s a straight-up rich chocolate dessert that whispers sophistication but shouts comfort food.
Achieving the Perfect Gooey Chocolate Pie Texture
What’s the trick? It’s all in the simple ratio of sugar, flour, and butter. We skip the traditional creamed method of standard pies, which keeps things easy. Instead, the small amount of flour mixed with the sugar and cocoa creates a matrix that sets up around the melted chocolate. That’s what traps all that gorgeous, molten goo inside. It sets just enough on the edges but stays beautifully soft in the middle. It truly is the best part of this whole experience, and you can read more about my general baking standards over at my disclaimer page, just so you know exactly where I’m coming from!
Gathering Ingredients for Your Homemade Fudge Pie
Okay, let’s talk supplies! This is where the magic starts, and honestly, it’s why this recipe earns the title of easy chocolate dessert. We are keeping things straightforward here. If you need speed, grab a quality 9-inch pie crust—it’s perfectly acceptable! This lets us focus all our energy on that heavenly filling.
Make sure you have your ingredients ready: that’s 1/2 cup of good unsalted butter, melted, two large eggs, lightly beaten, and definitely measure out your semi-sweet chocolate chips to sprinkle on top later. Everything else is standard pantry fare, which is just perfect for an impromptu dessert craving!
Ingredient Notes and Substitutions for Fudge Pie
Listen up, because ingredient choices matter, even in simple recipes! If you want to kick up the intensity of that dark chocolate flavor—and I highly recommend you do—swap out your regular cocoa powder for a dark or black cocoa powder. It gives the filling such a dramatic, rich color!
Now, about that crust: while I love the convenience of store-bought for a quick fudge pie, if you have an hour to spare, using a buttery crust pie recipe that you press into the pan yourself makes a huge difference in richness. Another quick tip: always use room temperature milk, even though the batter gets mixed cold. It helps everything combine without seizing up!
Step-by-Step Instructions for the Old Fashioned Fudge Pie
This is where we turn ingredients into pure heaven! Don’t panic when you see the word “baking”—this is really just mixing in one bowl, and you’re basically done before your oven even hits temperature. The instructions are simple, but sticking to the sequence ensures that beautiful, rich structure we are after in our pie with brownie texture.
First things first: Fire up that oven to 350 degrees Fahrenheit. Get your pie crust sitting on a sturdy baking sheet—this helps keep the bottom from getting soggy, which is a crucial step for any great old fashioned fudge pie.
Mixing the Fudge Pie Batter Correctly
We start dry. Grab a medium bowl and whisk together your sugar, flour, cocoa powder, and that pinch of salt. Whisk it well so there are absolutely no hidden lumps of flour lurking in there! Now, pour in your wet stuff: the melted butter, the eggs, the vanilla, and the milk. Mix it all gently until it’s smooth. Seriously, stop mixing when you see it come together!
If you overmix this batter, you’ll develop the gluten, and guess what? You get a tough, cakey texture instead of the glorious, fudgy center we want. Keep it gentle, people! After it’s just smooth, pour that gorgeous liquid into your waiting pie crust and sprinkle those semi-sweet chocolate chips right over the top!
Baking and Testing the Hot Fudge Pie
Bake this glorious creation for about 40 to 45 minutes. You’re looking for visual confirmation that it’s ready. The edges of the pie should look set and maybe even a little firm, but the very center should still have a slight, almost beautiful wobble to it. Don’t mistake that wobble for raw batter—that’s the good stuff!
When you do the toothpick test—and you must do the toothpick test—you want it to come out holding moist crumbs, not wet, dripping batter. If it comes out totally clean? Oops! You’ve baked a chocolate bar instead of a hot fudge pie!
Now, here is the hardest part: you HAVE to let it cool completely. I mean it. Leave it alone on a wire rack for a minimum of three hours. This resting period is non-negotiable because it’s what allows that gooey center to properly set into that dense, incredible state. Patience makes the best fudge pie, I promise!
Tips for the Ultimate Chocolate Pie Success
Even though this recipe is incredibly straightforward—trust me, it’s one of my favorite easy chocolate desserts—a few little tricks will elevate your pie from great to ‘I need the recipe immediately’ territory. The cooling process is, without a doubt, the key to unlocking that perfect melt in your mouth pie texture.
You absolutely cannot rush the cooling. I know! Waiting three hours when you have a rich chocolate dessert staring at you is torture, but if you try to cut it warm, you’ll end up scooping chocolate soup onto your plates. Let it sit on that wire rack until it’s fully cooled. Seriously, it needs that time to restructure into that dense, fudgy goodness we’re aiming for.
When it finally comes time to slice this beauty, use a long, thin knife—one that you’ve dipped in hot water and wiped clean between every single slice. That hot blade glides through the fudge center so cleanly, giving you those beautiful, intact wedges that look professional. Nobody wants a messy slice, right?
And finally, regarding serving: while chilling it slightly helps those first few slices cut a little cleaner (a neat trick if you need that immediate cut!), the best flavor and texture come when the pie has warmed up just a touch. Let it sit out on the counter for about 30 minutes before serving if you chilled it. That little bit of warmth reactivates that gooey factor! I learned this the hard way when I rushed dessert at a party. You can read a little about my journey in the kitchen over on my About Us page!
Serving Suggestions for Your Decadent Chocolate Dessert
Okay, we’ve baked the perfect fudgy dessert recipe, and now comes the fun part: deciding how to present this magnificent creation! Because this chocolate fudge pie is so intensely rich and decadent on its own, you really don’t need to do much to it. In fact, the best accompaniments are the simplest ones because they provide that perfect cool, creamy contrast to the warm, dense chocolate.
My absolute, number-one, can’t-live-without-it pairing is high-quality vanilla ice cream. That’s not just any ice cream, either—grab the good stuff! When you set a slice of this pie, still slightly soft, next to a scoop of creamy, cold vanilla bean ice cream, the combination is just heavenly. As the ice cream starts to melt down the side of the slice, mixing with that fudgy filling? Wow! It’s the definition of a comfort food dessert.
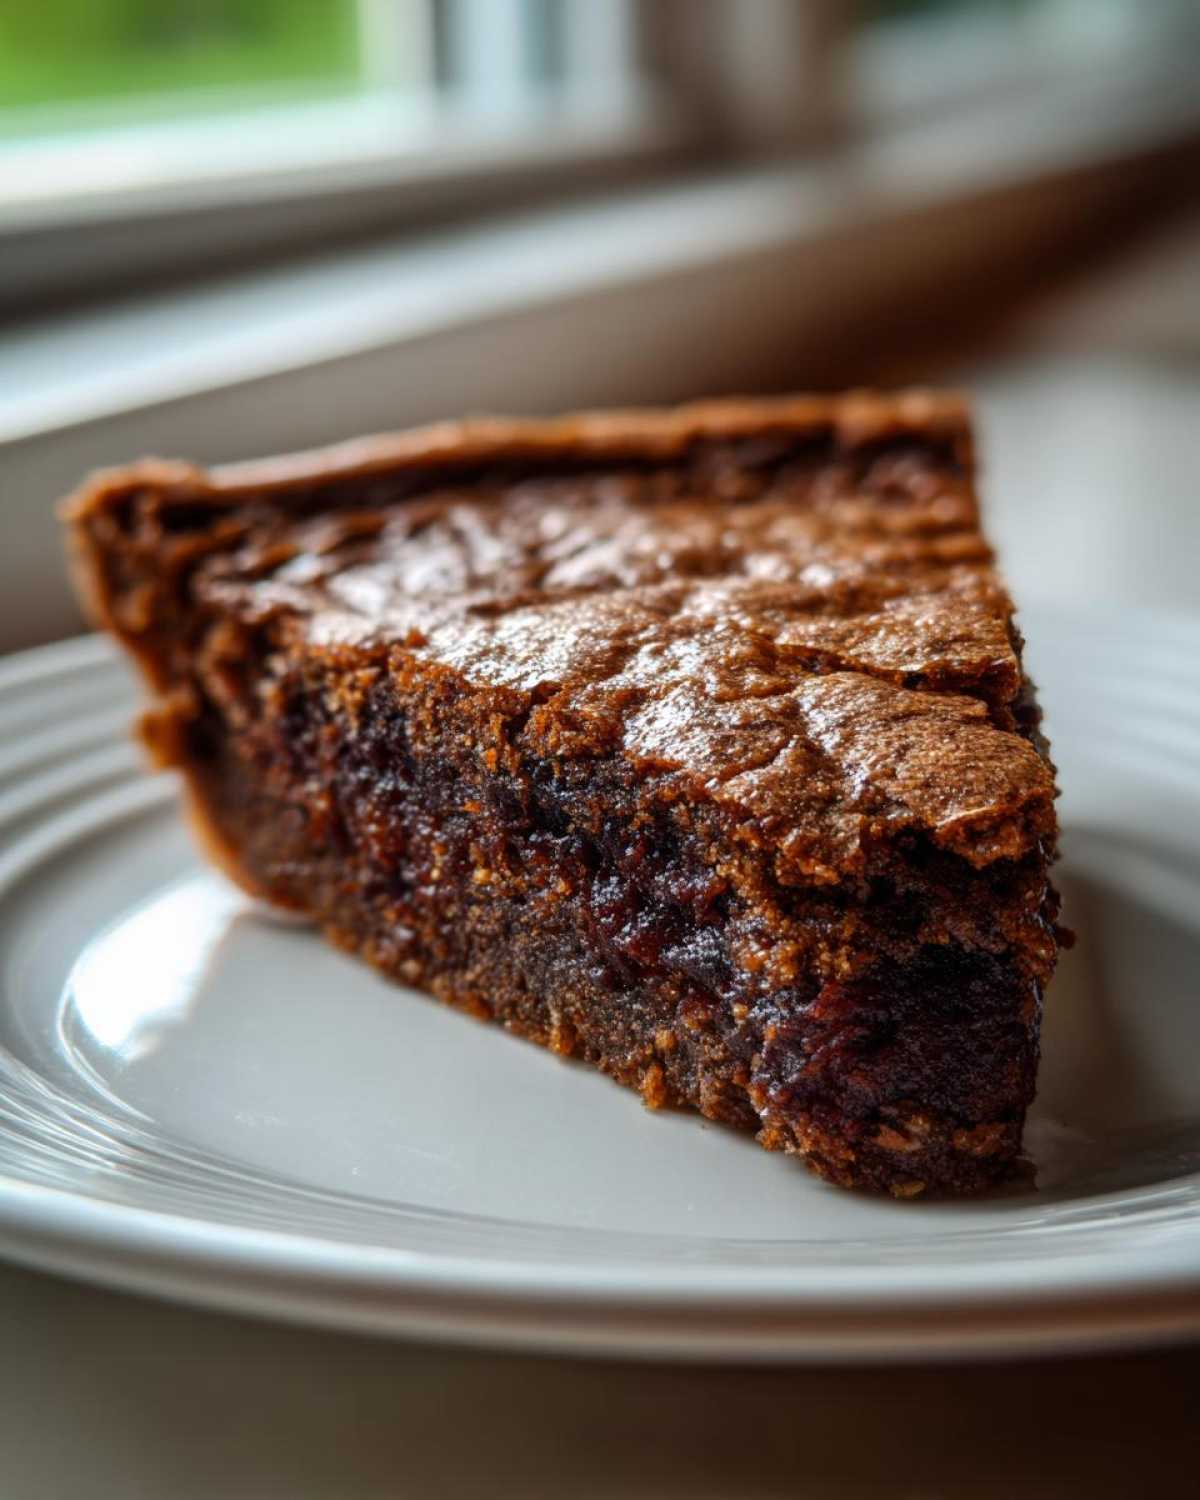
If you’re serving a crowd and whipped topping just feels easier, make sure you whip your own heavy cream! Store-bought stuff is fine in a pinch, but nothing beats fresh heavy cream whipped with just a whisper of sugar and a tiny splash of vanilla. It’s light, airy, and it cuts through the richness of the pie so perfectly. A generous dollop on top makes it look so inviting for any holiday chocolate pie gathering.
Honestly, keep it simple. Don’t feel like you need to drown this beautiful homemade fudge pie in drizzles or nuts unless you really want to. The incredible flavor and texture of the pie itself should be the star of the show. Just a little something cool and creamy alongside it is all you need for the ultimate experience!
Storage and Reheating Instructions for Fudge Pie
Alright, so you’ve managed to save some of this amazingness? Good job! Because this is such a rich dessert, proper storage is key to keeping that fantastic fudgy dessert texture intact for the next day. This isn’t like a regular fruit pie that can just sit on the counter; the nature of this super-moist filling means we need to treat it a little better.
You must cover the leftover pie loosely. I mean truly loosely—use plastic wrap, but don’t press it directly onto the filling unless you want it to stick horribly when you pull it off later. Refrigeration is necessary here. Pop it into the fridge for up to four days. Once chilled, that fudge layer becomes much firmer, almost like a dense truffle!
When you get ready to enjoy your slice of homemade fudge pie the next day? Don’t eat it straight from the fridge! That’s when it’s too hard. To bring back that melt-in-your-mouth quality, you have two options.
Option one, my favorite, is letting it sit on the counter for about 30 to 45 minutes before you plan to serve it. This brings it back up to a lovely room temperature that lets the gooeyness return.
If you absolutely need a warm slice right now because you’re impatient (I get it!), here’s the safe reheating instruction. Take a single slice—don’t warm the whole thing!—and wrap just that slice loosely in a piece of parchment paper. Microwave it on 50% power for about 15 to 20 seconds. Keep checking it! You want it slightly warm, not hot enough to melt the entire structure into liquid. We are aiming for that perfect hot fudge pie warmth, not soup!
Frequently Asked Questions About Fudge Pie
I always get so many wonderful questions after people try this recipe! It’s so common, especially when dealing with that magical gooey center, that folks want to double-check their steps. I’ve pulled together some of the most common things I hear so you feel completely confident making this easy fudge pie, or whatever other fudgy dessert recipes you might try next!
Can I make this fudge pie ahead of time?
Yes, absolutely! This is actually one of the best things about this chocolate fudge pie. Since it *needs* that long chilling/setting time anyway, making it a day ahead is perfect. You can cool it completely on the day you bake it, cover it tightly with plastic wrap (but not pressing down!), and pop it in the fridge overnight. When you’re ready to serve, just pull it out about an hour before slicing so it warms up just slightly from fridge-cold to the perfect room temperature for that ideal melt factor. It tastes even better the next day, if you ask me!
How do I ensure my fudge pie has a crackly top?
That glossy, crackly crust is my favorite part—it feels so sophisticated, doesn’t it? To get that perfect finish on your old fashioned fudge pie, it actually comes down to two things: the initial bake and the immediate cooling. Make sure your oven temperature is spot-on 350°F, and don’t peek too early! It needs that last blast of heat to form that thin shell on top.
But the real secret? As soon as you pull it out of the oven and let it cool on the wire rack, resist the urge to cover it for the first hour. Letting it sit uncovered allows the steam to escape properly as the surface cools down more quickly than the center. That quick surface cooling is what sets that beautiful, thin, shiny crackle. Once it’s cooled for an hour, then you can cover it loosely for the rest of the setting process.
Can I use dark chocolate chips instead of semi-sweet?
You are speaking my language! If you love a really intense, deep chocolate flavor that verges on bittersweet—which I absolutely do—then yes, substituting dark chocolate chips for the semi-sweet chips is a fantastic move. It really anchors the richness and prevents the overall pie from tasting too sweet. Just remember that if you use high-quality bittersweet chips, you might want to add an extra tablespoon of milk to the batter just to keep that viscosity flowing nicely when you mix it up! It makes for a truly ultimate chocolate pie experience.
Why is my fudge pie still wet in the center after cooling?
Oh, don’t stress! This is usually an issue of impatience, which I totally get when dealing with something this tempting! If your center is still liquidy after the full three-hour cooling time, it just needs more time to set up. The structure of this pie relies on that cooling time to firm up the fats and sugars. If it’s still too gooey to slice cleanly even after three hours, try popping it into the fridge for another hour or so. It really firms up when cool, and patience pays off with the best slice!
Estimated Nutritional Data for This Chocolate Fudge Pie
Now, I always feel like I need to give you a little disclaimer here. This is a seriously decadent, no-holds-barred rich chocolate dessert, so the numbers aren’t exactly diet-friendly, and that’s okay! This is for enjoying on a special evening. Since we all use different brands of butter, different types of milk, and whether or not you use a store-bought or homemade buttery crust pie makes a difference, these are just estimates for one generous slice.
These numbers are based on using the ingredients listed above in the recipe. Always remember, baking is an art, not an exact science, especially when it comes to nutrition! You can see my full data policies over here on the privacy policy page, but for now, here’s the rundown on what you’re likely getting in this incredible slice of fudge pie:
- Calories: Around 380 per slice. Plenty of energy for a happy evening!
- Fat: Roughly 22 grams. That’s where all that buttery richness comes from!
- Carbohydrates: About 45 grams, thanks largely to that perfect sugar balance.
- Protein: A modest 5 grams, thanks to the eggs and a little help from the cocoa.
See? It’s a perfect slice of indulgent comfort food dessert. Don’t worry about the numbers when the flavor is this good!
Share Your Experience with Our Rich Chocolate Dessert
Okay, now that you’ve experienced the absolute joy of a perfect, gooey slice of this Rich Old-Fashioned Fudge Pie, I just have to know what you thought! Seriously, this recipe is such a staple in my house for any last-minute need for an ultra-decadent chocolate dessert, and I’m dying to hear if it became a favorite in your house, too.
Did you manage to wait the full three hours for it to cool? Be honest! And did you add any fun twists? Maybe you tried that dark cocoa powder I mentioned, or perhaps you used homemade pastry for your buttery crust pie base? Don’t keep all the secrets to yourself!
Please, please leave a comment down below! Rate the recipe for those other bakers looking for the best fudge pie out there. A star rating or just a few words about how much your family loved this comfort food dessert means the world to me. Seeing photos of your results makes my entire week!
If you baked it up for a holiday or a special weekend treat, snap a picture and share it! Tag me on social media—I love checking out everyone’s beautiful creations. If you have any lingering questions about technique or timing, pop those into the comments too, and I’ll get right back to you. I’m always hanging around, ready to chat about amazing chocolate! You can reach me directly anytime using the contact page if you have anything pressing!
I hope this fudgy dessert brings as much pure, chocolatey happiness to your table as it does to mine. Happy baking, and I can’t wait to read your reviews!
PrintRich Old-Fashioned Fudge Pie
Make a rich, gooey chocolate fudge pie with a crackly top and a dense, brownie-like center. This recipe is simple to prepare for a decadent dessert.
- Prep Time: 15 min
- Cook Time: 45 min
- Total Time: 240 min
- Yield: 8 servings
- Category: Dessert
- Method: Baking
- Cuisine: American
- Diet: Vegetarian
Ingredients
- 1 pre-made 9-inch pie crust (or homemade)
- 1 cup granulated sugar
- 1/2 cup all-purpose flour
- 1/2 cup unsweetened cocoa powder
- 1/2 teaspoon salt
- 1/2 cup (1 stick) unsalted butter, melted
- 2 large eggs, lightly beaten
- 1 teaspoon vanilla extract
- 1/2 cup milk
- 1/2 cup semi-sweet chocolate chips
Instructions
- Preheat your oven to 350 degrees Fahrenheit. Place the pie crust on a baking sheet.
- In a medium bowl, whisk together the sugar, flour, cocoa powder, and salt until combined.
- Add the melted butter, eggs, vanilla extract, and milk to the dry ingredients. Mix until the batter is smooth. Do not overmix.
- Pour the batter into the unbaked pie crust. Sprinkle the chocolate chips evenly over the top of the batter.
- Bake for 40 to 45 minutes. The edges should look set, and the center should still be slightly soft and fudgy. A toothpick inserted near the edge should come out with moist crumbs, not wet batter.
- Let the pie cool completely on a wire rack for at least 3 hours before slicing. This allows the fudgy center to set properly.
- Serve at room temperature or slightly warm with whipped cream or ice cream.
Notes
- For a deeper chocolate flavor, use dark cocoa powder instead of regular unsweetened cocoa powder.
- If you prefer a slightly firmer texture, bake the pie for an additional 5 minutes.
- Chill the pie for 30 minutes before slicing if you want cleaner cuts.
Nutrition
- Serving Size: 1 slice
- Calories: 380
- Sugar: 35
- Sodium: 210
- Fat: 22
- Saturated Fat: 13
- Unsaturated Fat: 9
- Trans Fat: 0.5
- Carbohydrates: 45
- Fiber: 3
- Protein: 5
- Cholesterol: 70