

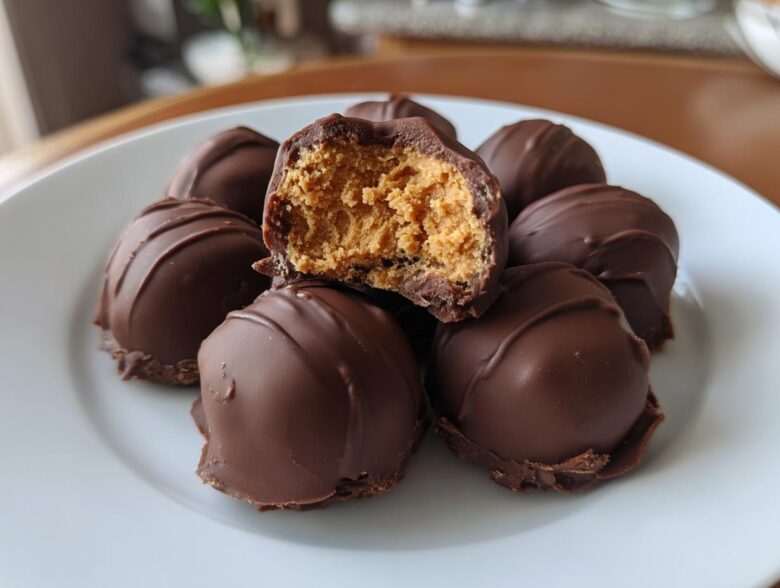
Forget complicated ovens and long cooling times; we’re talking about the absolute king of quick, crowd-pleasing candy: the classic no-bake chocolate covered peanut butter balls. Seriously, these are the treats that disappear first at every holiday gathering we attend! When I first tried making these, I was shocked how something so simple tasted so rich and decadent. Trust me when I say this recipe for peanut butter balls, which gives you that amazing creamy center just like a perfect buckeye, is the only one you’ll ever need.
We’re using maybe five core ingredients for the filling, and the whole thing comes together faster than most recipes even take to preheat. If you’re looking for that perfect combination of salty, sweet, and chocolatey goodness, you’ve landed in the right spot. I’m sharing the exact method I use so yours turn out perfectly firm and dip beautifully every single time. For more about who we are and why we share recipes we love, you can always check out our About Us page!
Why You Will Make These Peanut Butter Balls Often
Honestly, these are my go-to when I need a holiday candy in a pinch, but they’re so good we make them year-round! The best part about these classic peanut butter balls is how foolproof they are. You don’t even need an oven involved. They are simply the easiest homemade candy recipes I’ve ever encountered.
- They are completely no-bake – seriously, zero actual cooking involved!
- The creamy filling freezes perfectly, making party prep super manageable.
- They are rich enough to feel decadent but use just a handful of pantry staples.
Quick Preparation Time for Easy Homemade Treats
You won’t believe this, but the actual mixing and rolling time is only about 20 minutes. That means you can whip up a huge batch of these quick peanut butter snacks before anyone even realizes you’re baking! Since they don’t require baking time, you save loads of energy too.
Gathering Ingredients for Perfect Peanut Butter Balls
Okay, the ingredient list for these chocolate peanut butter balls is super short, which is exactly why I love them! But you have to use the right stuff, or the texture just won’t be right. You need exactly one cup of creamy peanut butter—and I mean the standard stuff, not the natural, oily kind you have to stir, trust me on this one! We also need half a cup of unsalted butter, and this needs to be completely softened, like room temperature soft, not melted and sloppy.
Then we bulk it up with three cups of powdered sugar and a splash of vanilla extract. For the coating, you’ll need 12 ounces of semi-sweet chocolate chips. I always add a tablespoon of shortening or coconut oil to the chocolate; it keeps the coating smooth and less likely to crack when you bite into your peanut butter fudge balls.
Ingredient Notes and Substitution Tips
Listen up, because the butter quality matters here. If your butter is too cold, the mixture won’t come together right, and you’ll end up with sugar clumps. Let it sit out for an hour! Also, while some recipes go for those 3 ingredient peanut butter balls by skipping the vanilla or butter, I highly discourage it. The butter helps prevent the texture from being too crumbly and dry.
When it comes to the peanut butter, stick to brands like Jif or Skippy. I’ve tried natural peanut butter, and honestly, the filling ends up too soft and oily after mixing. We need that solid backbone for rolling, especially if these are going to be Christmas candy recipes that sit out for a bit.
Step-by-Step Guide to Making No Bake Peanut Butter Balls
This is where the real magic happens, and it’s so straightforward! We’re going to tackle the filling first, which is the secret to all great no bake peanut butter balls. You want everything combined until it looks like a thick, almost crumbly dough that you can totally handle.
Once you have that dough ready, roll it into small, neat balls—I usually aim for about one inch across. Pop those onto a parchment-lined sheet and shove them in the freezer for at least 30 minutes. Seriously, don’t skip this freeze time! If they aren’t rock solid, they’ll just melt right off when they hit the warm chocolate. This is crucial for success!
Mixing the Peanut Butter Fudge Balls Base
Start by dumping your peanut butter, softened butter, powdered sugar, and vanilla into a big bowl. At first, it looks like a mess, but keep mixing! After you incorporate most of the sugar, it’s time to get personal with the dough. I always end up taking it out and kneading it a little with my hands to make sure every bit of butter and sugar is fully combined. You’re looking for a stiff, smooth, almost play-dough consistency before you start rolling them up.
Achieving the Perfect Chocolate Peanut Butter Balls Coating
Now for the chocolate part! Put your chips and that tiny bit of shortening in a microwave-safe bowl. Heat it for 30 seconds, then stir it really well—even if it doesn’t look melted yet. Keep doing these short bursts until it’s silky smooth. If you rush it, the chocolate will get grainy, and that’s just sad.
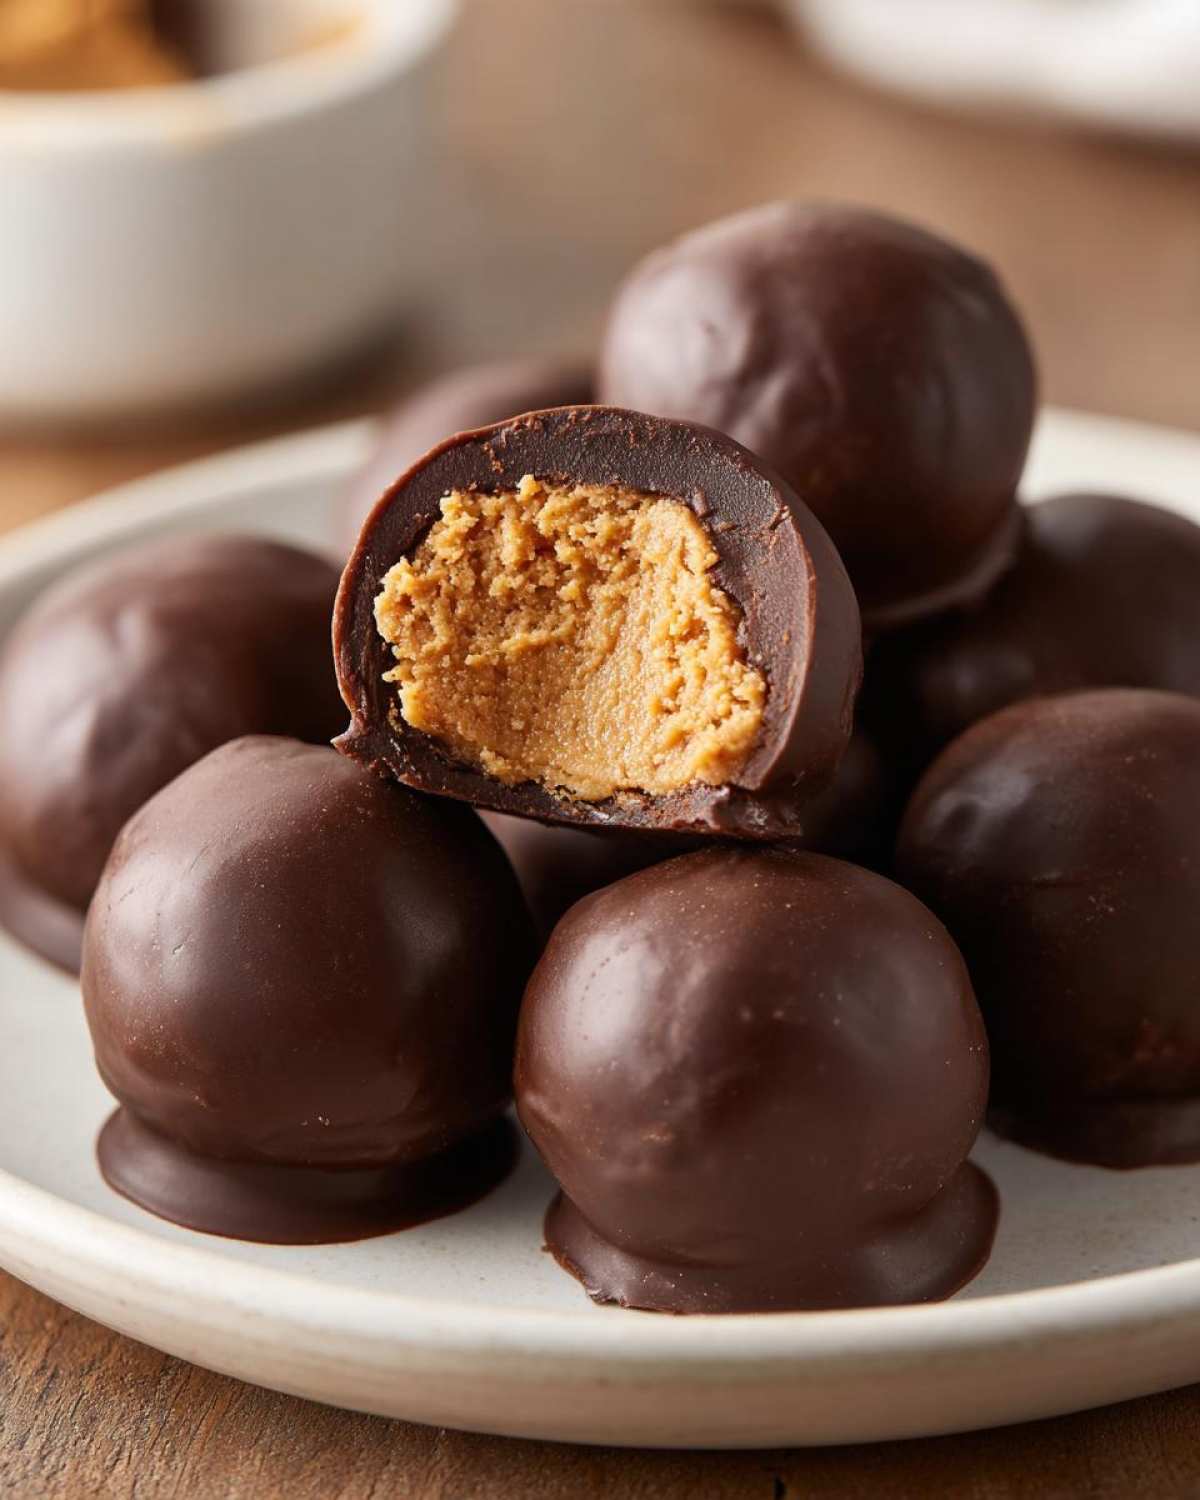
Here’s my pro tip for that classic look: stick a toothpick right into the middle of a frozen ball, dip it until only about a quarter of the peanut butter is showing, and leave that little circle exposed. Pull the toothpick out slowly and set the candy back on the paper. The hole will smooth itself out as the chocolate sets up in the fridge!
Tips for Perfect Buckeye Style Peanut Butter Balls
Getting these peanut butter balls absolutely perfect is all about timing and temperature control. The most important piece of advice I can give you is to make sure those centers are frozen solid before they ever see melted chocolate. If they are even slightly soft, they act like little sponges soaking up the chocolate, and then they’ll just slide right off when you try to lift them!
Always use that toothpick trick for dipping! It gives you those beautiful, professional-looking circles that everyone associates with buckeye balls recipe. It saves you from having to smooth over a giant thumbprint in the chocolate coating later. Keep the coated balls chilly in the fridge until the chocolate is totally hard. That temperature difference makes sure your creamy peanut butter balls keep their perfect shape!
Variations for Your Simple Dessert Balls
While I am totally devoted to the classic combination of creamy peanut butter and semi-sweet chocolate, sometimes you just need to shake things up a little, right? These are robust enough that you can definitely play around with the mix-ins without ruining the texture of your simple dessert balls. Just remember, since these are best friends with the refrigerator, heavy additions might affect the final firmness.
My absolute favorite little tweak is adding some texture inside the filling. If you have some leftover graham crackers or vanilla wafers, crush them up finely—we’re talking dust! Fold about a half cup of those crumbs into the peanut butter dough mix when you add the powdered sugar. It gives a lovely, slightly grainy, sandy texture that you just can’t beat. It’s like having a tiny graham cracker crust inside every bite!
You can also swap out the dipping chocolate! If you’re making these for a big party, try dividing your melted chocolate into three bowls. Leave one semi-sweet, add a little peanut butter to the second one for a richer look, and then stir in some espresso powder or a pinch of cayenne pepper to the third bowl for a spicy kick. Or, if you’re sharing these with kids, milk chocolate is always a huge hit instead of the standard semi-sweet chips.
Serving Suggestions for These Creamy Peanut Butter Bites
Since these are such easy homemade treats, they fit in almost anywhere! They are practically mandatory during the Christmas season—you can’t have a holiday candy platter without some type of chocolate peanut butter candy on it. I always stack them high on a tiered tray next to brightly colored fudge or peppermint bark.
But don’t save them just for Christmas! These creamy peanut butter bites are the ultimate no bake dessert for parties. Think about summertime BBQs or game days—they require no oven space, which is a lifesaver when your oven is tied up with actual baking. Since they store so well in the fridge, you can make them days ahead of time, which helps relieve so much stress when you’re hosting.
They pair amazingly well with coffee if you’re having a mid-afternoon treat. Or, if you’re serving them after dinner, put a couple next to a scoop of vanilla bean ice cream. The contrast between the cold, creamy ice cream and the firmer, rich peanut butter center is just divine. Because they’re so rich, one or two is usually plenty, making them perfect for sampling lots of different holiday peanut butter treats!
Storage and Reheating Instructions for Homemade Candy Recipes
Now that you’ve gone through all the effort to make these incredible chocolate peanut butter balls, you absolutely need to know how to keep them tasting fresh! Because we use real butter in the filling, these homemade candy recipes are happiest when they are chilled. They will get soft and start to sweat if you leave them out on the counter for too long, especially if your kitchen runs warm.
The best way to store them is in an airtight container. I always put a layer of wax paper or parchment paper between the layers so the chocolate coating doesn’t stick to the layer above it. They last great in the refrigerator for easily up to two weeks. If you’re making them way ahead of time for major holiday candy platters, you can definitely freeze them too!
When freezing, they can keep well for about three months. Just store them the same way—layered with wax paper in a heavy-duty freezer bag. When you want to serve them, pull them out and let them thaw slowly in the fridge for a few hours. If you just can’t wait, you can eat them straight out of the freezer, but they’ll be much harder, almost like a fudgy ice cream texture!
Remember, these stay at their very best when kept below 70 degrees Fahrenheit, so if you’re taking them to a party, keep them in a cooler until it’s time to put them out. If you ever have questions about how we run our site, you can read up on our Terms and Conditions here.
Frequently Asked Questions About Peanut Butter Balls
I get so many questions about tweaking these simple dessert balls, and I love hearing how everyone makes them their own! Here are the big ones I get asked all the time when people are making these delicious homemade candy recipes.
Can I use natural peanut butter for these no bake peanut butter balls?
This is the big one! Honestly, I really advise against it for this particular recipe. Natural peanut butter tends to separate, meaning the oils pool out when you mix it with the butter and sugar, making your filling too oily and soft to roll properly. You really need the stabilizers in creamy peanut butter to get those firm, perfect centers so they don’t fall apart when you dip them. Stick to the standard creamy kind for the best results!
Can these chocolate peanut butter balls be made ahead of time?
Absolutely! In fact, I encourage it! Since these are stored in the fridge, they are fantastic for making a few days before any party or holiday event. Just make sure they are in an airtight container. They actually taste better on day two once the flavors really settle into each other. This makes them one of the best quick peanut butter snacks for busy weeks.
What should I do if my melted chocolate seizes up?
Oh no, that’s the worst! Seized chocolate looks grainy and thick instead of smooth, and it usually happens when even a tiny drop of water gets in there. If this happens, don’t panic! Just stir in about a teaspoon of vegetable oil or the shortening you used for the coating. Stir vigorously, and sometimes that extra fat can save the melt. If it still won’t smooth out, you might have to start melting a new small batch of chips.
Can I make 3 ingredient peanut butter balls using this method?
You definitely can try to trim this down, but I won’t lie, the texture will change. The 3 ingredient peanut butter balls usually skip the butter and vanilla and just use peanut butter, powdered sugar, and sometimes a graham cracker crumb mix instead of sugar. If you try it with just the PB and sugar, it will be noticeably drier and maybe even crumbly, not as rich as these. If you skip the butter, you’ll miss out on that amazing creamy melt!
If you have any more burning questions about achieving the best chocolate covered peanut butter results, feel free to reach out through our Contact page!
Nutritional Estimates for Chocolate Peanut Butter Balls
I always like to give a general idea of what you’re taking in, though please remember these are just rough numbers since we are dealing with homemade candy recipes! These amounts are based on a serving size of two balls.
- Calories: About 250
- Fat: 16g (but remember most of that is the good fat from the peanut butter!)
- Carbohydrates: 24g
- Protein: 6g
- Sugar: 25g (That’s why we only eat two!)
This estimate assumes you are dipping them mostly but leaving that little bit of peanut butter exposed in the buckeye style. If you fully submerge them in chocolate, the sugar and fat will be a little higher. For a full breakdown of our policies, check the Disclaimer page.
Share Your Experience Making These Peanut Butter Balls
I really want to know how these turned out for you! Did you take my advice and make them Buckeye style, or did you dip them completely? If you tried adding those crushed graham crackers or used milk chocolate instead of semi-sweet, drop me a quick note in the comments below. Don’t be shy—I read every single comment! If you made a batch of these fantastic peanut butter balls, please take a second to leave a star rating right under the recipe card so other bakers know how much you loved them!
Nutritional Estimates for Chocolate Peanut Butter Balls
I always like to give a general idea of what you’re taking in, though please remember these are just rough numbers since we are dealing with homemade candy recipes! These amounts are based on a serving size of two balls.
- Calories: About 250
- Fat: 16g (but remember most of that is the good fat from the peanut butter!)
- Carbohydrates: 24g
- Protein: 6g
- Sugar: 25g (That’s why we only eat two!)
This estimate assumes you are dipping them mostly but leaving that little bit of peanut butter exposed in the buckeye style. If you fully submerge them in chocolate, the sugar and fat will be a little higher. For a full breakdown of our policies, check the Disclaimer page.
Share Your Experience Making These Peanut Butter Balls
I really want to know how these turned out for you! Did you take my advice and make them Buckeye style, or did you dip them completely? If you tried adding those crushed graham crackers or used milk chocolate instead of semi-sweet, drop me a quick note in the comments below. Don’t be shy—I read every single comment! If you made a batch of these fantastic peanut butter balls, please take a second to leave a star rating right under the recipe card so other bakers know how much you loved them!
PrintClassic No-Bake Chocolate Covered Peanut Butter Balls

Make easy, no-bake peanut butter balls dipped in chocolate. This recipe yields a creamy, rich candy similar to buckeyes.
- Prep Time: 20 min
- Cook Time: 5 min
- Total Time: 25 min
- Yield: About 30 balls
- Category: Dessert
- Method: No Bake
- Cuisine: American
- Diet: Vegetarian
Ingredients
- 1 cup creamy peanut butter
- 1/2 cup (1 stick) unsalted butter, softened
- 3 cups powdered sugar
- 1 teaspoon vanilla extract
- 12 ounces semi-sweet chocolate chips
- 1 tablespoon shortening or coconut oil (optional, for dipping)
Instructions
- In a large bowl, combine the peanut butter, softened butter, powdered sugar, and vanilla extract.
- Mix the ingredients thoroughly until a stiff dough forms. You may need to use your hands to fully incorporate everything.
- Roll the dough into small, uniform balls, about 1 inch in diameter. Place them on a baking sheet lined with parchment paper.
- Freeze the peanut butter balls for at least 30 minutes until firm. This prevents them from falling apart during dipping.
- Melt the chocolate chips and shortening (if using) together in a microwave-safe bowl in 30-second intervals, stirring well after each interval, until smooth.
- Dip each frozen peanut butter ball into the melted chocolate, leaving a small circle of peanut butter exposed at the top (Buckeye style), or dip completely if preferred.
- Return the coated balls to the parchment-lined sheet.
- Refrigerate the chocolate peanut butter balls until the chocolate sets completely, about 1 hour.
Notes
- For easier dipping, use a toothpick inserted into the ball to hold it while dipping, then remove the toothpick and smooth the hole.
- Store leftover peanut butter balls in an airtight container in the refrigerator.
- If you prefer a firmer texture, reduce the amount of butter slightly.
Nutrition
- Serving Size: 2 balls
- Calories: 250
- Sugar: 25
- Sodium: 120
- Fat: 16
- Saturated Fat: 6
- Unsaturated Fat: 10
- Trans Fat: 0
- Carbohydrates: 24
- Fiber: 1
- Protein: 6
- Cholesterol: 15