

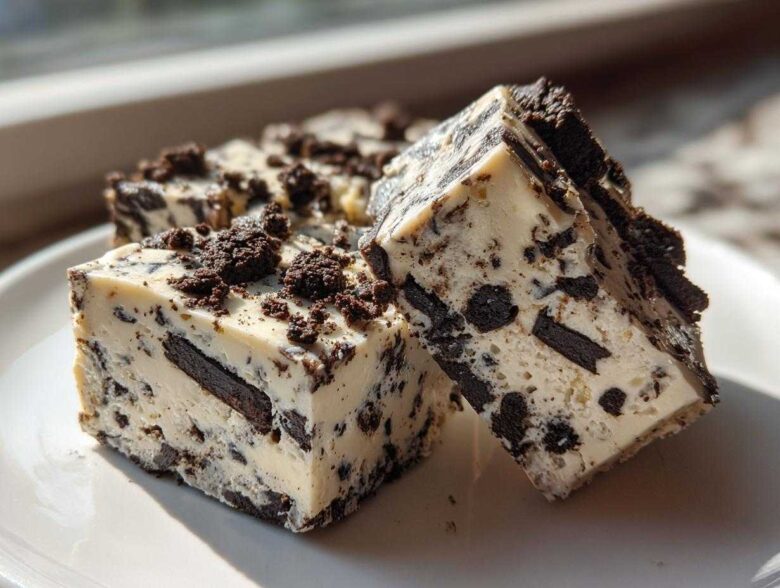
Oh my gosh, do you ever just get that craving late at night? That desperate need for something incredibly sweet, creamy, and deeply satisfying, but the idea of turning on the oven makes you tired? Me too! That’s why this oreo fudge recipe is basically my secret weapon. Seriously, this is the easiest, creamiest 3-ingredient white chocolate oreo fudge recipe you will ever stumble upon. I first threw this together during the holidays when my kitchen was too crowded for baking, and I haven’t looked back. It’s pure magic in just three items!
Why This Easy Oreo Fudge Recipe Works So Well
When I say this recipe is simple, I mean it! This isn’t some complex caramelization disaster waiting to happen. It’s designed for when you need a fix right now. It hits all the high notes: it’s fast, it requires zero oven time, and it delivers that amazing cookies and cream flavor we all crave.
- Guaranteed creamy fudge payoff every single time.
- It falls squarely into the category of fuss-free no bake desserts—perfect for summer or busy days.
- The contrast between the smooth base and crunchy Oreos is just heavenly.
- It makes a great last-minute gift!
Achieving the Perfect Creamy Fudge Texture
You don’t have to boil sugar to get that melt-in-your-mouth feel. The secret sauce here is just the magic reaction between the sweetened condensed milk and the melted white chocolate. It sets up perfectly in the fridge, giving you that dense, smooth block of flavor without any fuss.
The Speed of This 3 Ingredient Fudge
Honestly, the prep time is about ten minutes, tops. You’re literally melting two things and stirring in the third. This is the definition of a 3 ingredient fudge success story. Since these are no oven desserts, you skip all the preheating stress. The only real wait is chilling time, and trust me, you’ll pace nervously by the fridge until it’s done!
For all the fine print and legal stuff about what goes into my recipe testing, you can check out my disclaimer here: recipe standards.
Gathering Ingredients for Your Oreo Fudge
Okay, this is the best part because there are only three things you need! That’s right, three main players for this incredible oreo fudge. Don’t let that simplicity fool you, though; the quality of what you bring home matters big time here. Since there are so few ingredients, they need to shine!
Here is exactly what you’ll need for 16 satisfying squares:
- One 14-ounce can of sweetened condensed milk. (Make sure it’s the condensed kind, not evaporated milk—they are totally different beasts!)
- 2 cups of white chocolate chips.
- 2 cups of crushed Oreo cookies.
Ingredient Notes and Substitutions for White Chocolate Fudge Recipe
Regarding the white chocolate, please, please, please use actual chips if you can. The wafers sometimes melt strangely or give a waxy finish. For the Oreos, use the whole sandwich—the cream filling helps everything bind! If you absolutely must change it up, dark chocolate or milk chocolate work fine for this white chocolate fudge recipe, but the final taste will be less sweet, so keep that in mind.
Step-by-Step Instructions for Your Easy Oreo Fudge Recipe
Getting this amazing, quick dessert ready is unbelievably simple. You’re going to be shocked how fast this comes together. Just follow these steps, and you’ll have beautiful, ready-to-set oreo fudge waiting for the fridge in under ten minutes.
Preparing Your Pan and Melting the Base
First things first: grab an 8×8 inch pan and line it with parchment paper. Make sure you leave a good overhang on two sides—use that like a little slingshot handle later to pull the fudge out! Now, combine your white chocolate chips and the condensed milk in a sturdy, microwave-safe bowl. Microwave it on medium power for just 30 seconds at a time. You have to stir it well after every zap. Keep repeating that until it’s perfectly smooth. Don’t rush this, or you risk scorching the chocolate and getting a grainy easy fudge recipe.
Combining and Setting the Cookies and Cream Fudge
Once that base is glossy and smooth, gracefully fold in your crushed Oreos. I mean it, fold! Don’t beat them in hard, or you’ll deflate all the airiness you just worked for. You just want them evenly mixed throughout the cookies and cream fudge base. Scoop that mixture into your prepared pan and give it a gentle spread to level it out. Then, the hardest part: place it in the refrigerator for at least 2 hours, or until it’s totally firm. If you need more details on how I usually manage the kitchen prep, check out my page about how I cook!
Tips for Perfect Homemade Candy Recipes
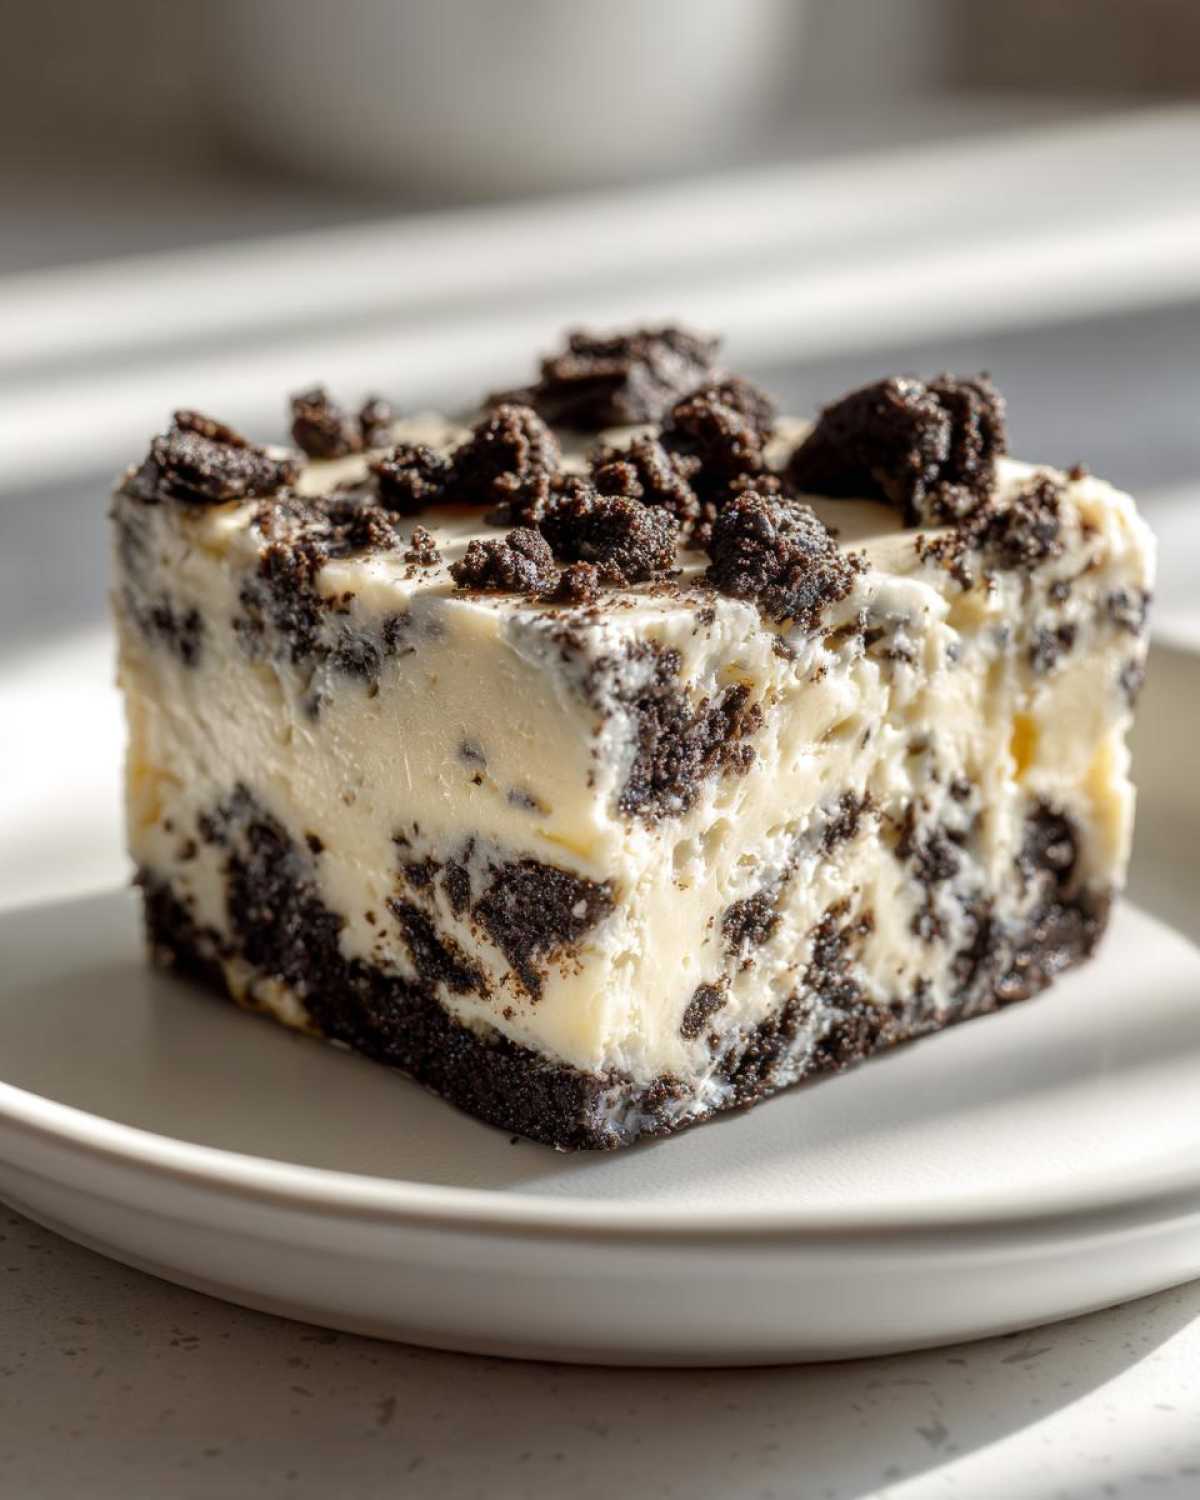
Even though this is super simple, a few tiny tricks make the difference between good oreo fudge and absolutely show-stopping fudge. Listen, the way you crash those cookies totally changes the eating experience. For a truly luxurious, creamy fudge mouthfeel, I like placing the cookies in a large Ziploc bag and just gently squishing them with the bottom of a heavy mug or rolling pin. I like a little texture, so I don’t crush them into dust!
When you’re spreading the mixture into your pan, use an offset spatula if you have one—it helps make that top surface nice and flat. That way, when you cut the squares later, they look professional for your homemade candy recipes gathering. Don’t try to press it down too hard, though; just smooth it gently, and then let the fridge do the heavy lifting!
Serving Suggestions for Sweet Treats for Parties
Once your glorious block of oreo fudge chills out and firms up, it’s time for the fun part: cutting and showing off! Since this recipe yields about 16 squares, it’s perfect for slicing up for small gatherings or just having a tasty stash for yourself.
To get those clean edges, make sure the fudge is super cold. Use a large, sharp knife that you wipe clean between cuts—that keeps the white chocolate smooth instead of dragging.
For presentation, especially if you are bringing these sweet treats for parties, you can make them look extra fancy with almost zero effort. Right after you pour the mixture into the pan, before it chills, sprinkle a few extra crushed Oreos right on top. They’ll stick perfectly to the surface!
Another idea? Once you cut the squares, dust them lightly with a fine dusting of powdered sugar for a nice visual contrast against that dark cookie crumb. They look amazing piled high on a platter next to some fresh fruit. Honestly, though, even just plain squares disappear first!
Storage and Reheating Instructions for Oreo Fudge
Now that you’ve made this perfect little block of oreo fudge, you’re probably wondering how long you can keep it around. Good news! Since this is a no-bake creation, keeping it fresh is super straightforward. You definitely want to store it somewhere cool.
My golden rule is to keep any leftovers in an airtight container. If you just set the container on the counter, the fudge might get a little soft and sticky, especially if your kitchen runs warm. Since it has that creamy texture from the chocolate, the fridge is its best friend!
If you keep it tucked away in an airtight container in the refrigerator, you can easily keep this fudge yummy for up to a week. Seriously, a whole week of snacking potential! I’ve never tested it past seven days because, frankly, it never lasts that long in my house. If you want something super firm to handle easily, chill it for a bit longer before cutting the squares.
You don’t actually need to reheat this kind of fudge at all, because it’s completely meant to be enjoyed cold or at a cool room temperature. If you take it out to serve a bit early, just let it sit on the counter for maybe 15 minutes so it softens just *slightly*—that’s when the texture is absolute perfection!
If you ever have questions about my recipes or need help troubleshooting a batch, please don’t hesitate to reach out on my contact page. I love hearing from you all!
Frequently Asked Questions About This Simple Fudge
I always get questions when people try this recipe for the first time, mainly because it seems too simple to work! I promise it does, but let’s conquer any lingering doubts about your simple fudge making process right here. I tried to pull the most common worries from my inbox about these oreo dessert recipes.
Can I make this oreo fudge without white chocolate?
Yes, you absolutely can switch things up if white chocolate isn’t your jam! You can definitely use milk chocolate or even dark chocolate chips. But listen up: the flavor profile changes dramatically. White chocolate is super sweet, which balances the slight saltiness and deep chocolate flavor of the Oreos perfectly. If you use dark chocolate, your final cookies and cream fudge will be much less sweet overall. Just something to keep in mind!
Is this considered a 5 Minute Fudge?
This is a sneaky one! While the prep itself—the melting and mixing—is definitely done in under ten minutes, which makes it a fantastic quick dessert idea, it’s not a true ‘ready to eat in 5 minutes’ situation. You have to account for the chilling time. That mandatory refrigeration period is what solidifies the mixture, so you’re looking at about two hours minimum before you can slice it. It’s fast prep, but plan ahead for the cooling!
If you’re worried about ingredients or terms in the recipe, don’t forget to review my detailed privacy policy over at the site: your privacy matters.
Understanding the Nutrition in This Quick Dessert
I know many of you are curious about what exactly goes into this sweet, quick treat. While this is absolutely a joyful indulgence and not something you eat every day, I always believe in being transparent about the ingredients shining through!
Keep in mind that since we are dealing with processed cookies and chocolate chips from various brands, these numbers are just estimates based on the standard ingredients used in my testing. Your results might shift a tiny bit based on which brand of white chocolate or Oreos you choose. This is just a guideline for your oreo fudge!
Here is the breakdown for one square (assuming 16 servings):
- Calories: Roughly 240 per square. Yes, they are rich, but they are tiny!
- Sugar: About 28 grams. That’s where the satisfaction comes from!
- Fat: Around 13 grams total.
- Protein: A small boost, usually around 3 grams.
For full transparency about how I handle all the data and sources on my site, you can always peek at my cookie policy details anytime you like.
Share Your Experience Making This Oreo Dessert Recipes
Now that you have the secrets to the easiest, creamiest oreo fudge in your back pocket, I really, really want to know how it turned out for you! Seriously, these easy fudge recipes are best when they bring joy to others.
Did you manage to wait the full two hours for it to chill? Tell me! Drop a rating for this recipe down below—five stars if you think it’s the best no bake dessert you’ve ever whipped up in 10 minutes. I’m always beaming when someone tries one of my super simple favorites.
If you snapped a picture of your beautiful squares—maybe you garnished them differently or used dark chocolate instead—please share it! Tag me on social media if you’re posting photos. Seeing those cookies and cream blocks pop up everywhere is the highlight of my week.
I work hard testing these ultra-simple recipes to make sure they’re foolproof, so hearing that they worked perfectly for you means the world to me. And hey, if you have any tweaks or variations you discovered while making these sweet treats for parties, please share those in the comments too! We all learn something new from each other.
For the full legal agreement regarding using the site and submitting reviews, you can always glance over my terms and conditions.
PrintEasy 3-Ingredient White Chocolate Oreo Fudge

Make this simple, no-bake fudge using only three ingredients for a quick and creamy cookies and cream treat.
- Prep Time: 10 min
- Cook Time: 0 min
- Total Time: 2 hours 10 min
- Yield: 16 servings
- Category: Dessert
- Method: No-Bake
- Cuisine: American
- Diet: Vegetarian
Ingredients
- 14 ounces sweetened condensed milk
- 2 cups white chocolate chips
- 2 cups crushed Oreo cookies
Instructions
- Line an 8×8 inch pan with parchment paper, leaving an overhang for easy removal.
- Place the white chocolate chips and sweetened condensed milk in a microwave-safe bowl.
- Microwave on medium power for 30 seconds, stir, and repeat until the chocolate is fully melted and smooth. Stir well to combine.
- Fold in the crushed Oreo cookies until evenly distributed throughout the mixture.
- Pour the fudge mixture into the prepared pan and spread it evenly.
- Refrigerate for at least 2 hours, or until firm.
- Lift the fudge out using the parchment paper overhang and cut it into squares before serving.
Notes
- Crush the Oreos finely for a smoother texture, or leave them slightly chunky for more crunch.
- You can substitute milk chocolate or dark chocolate for white chocolate, but adjust the sweetness level if needed.
- Store leftovers in an airtight container in the refrigerator for up to one week.
Nutrition
- Serving Size: 1 square
- Calories: 240
- Sugar: 28g
- Sodium: 120mg
- Fat: 13g
- Saturated Fat: 8g
- Unsaturated Fat: 5g
- Trans Fat: 0.1g
- Carbohydrates: 30g
- Fiber: 1g
- Protein: 3g
- Cholesterol: 15mg