

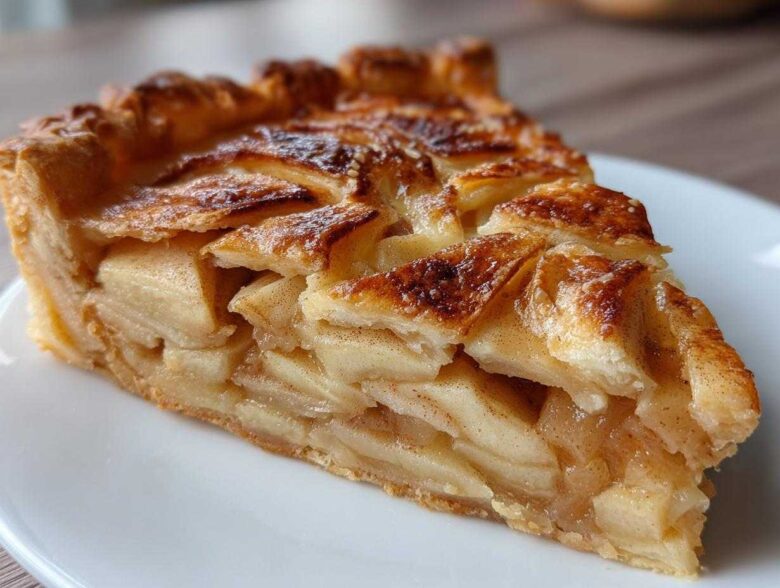
You know those desserts that look like they took days of fussy work, but actually come together with just a little bit of love? That’s exactly what this Rustic French Apple Tart is! Forget those perfectly molded, overly complicated things; I love the beauty in imperfection, which is why this recipe, showcasing a superior flaky crust, is permanently etched into my baking rotation. I’ll never forget my first attempt at a true Tarte aux Pommes. I messed up the pastry base so badly it crumbled when I tried to move it! But I figured out that making that buttery crust cold and treating it gently is the real secret to a stunning apple tart.
If you want to know a bit more about my kitchen philosophy, check out my About Me page! This one is all about beautiful, thinly sliced apples draped over that homemade shell, ready for the oven. It smells like heaven while it bakes, trust me!
Why This Rustic French Apple Tart Recipe Works So Well
This recipe just nails it every time, and I think that’s because we focus on texture and simplicity. We aren’t striving for perfect rows of apples; we’re going for that beautiful, slightly undone look that screams homemade goodness. It’s easily the best apple tart recipe I’ve found for capturing that real seasonal vibe. It’s a perfect centerpiece for all your fall dessert recipes!
- We embrace the rustic fold! It saves time and actually locks in the juices better than a crimped edge, believe it or not.
- The high oven temperature helps the dough puff up quickly before the apple moisture has a chance to run wild.
- This recipe lets the high-quality apples be the star, not tons of heavy sugar or spices.
Achieving the Perfect Apple Tart with Flaky Crust
Listen, the biggest failure point for any tart is the soggy bottom. That’s why we treat the pastry dough like a stranger: handle it fast and keep it icy cold. If you see big chunks of butter staying intact when you mix the flour, you’re doing it right! Those cold little butter pockets steam in the oven, creating those amazing, airy layers that keep the base wonderfully crisp, not chewy.
Tips for Your Homemade Apple Tart
I have a few non-negotiables to ensure your final apple tart is a winner. First, use lemon juice on your sliced apples immediately—it keeps them bright and stops them from turning brown on the counter while you prep the dough.
Second, don’t overthink the arrangement of the fruit; just get them layered well on the dough. And finally, warm your apricot jam *before* you brush it on. A warm brush spreads so much smoother than cold, gloppy jam!
Essential Ingredients for Your Apple Tart Recipe
Okay, this is where we talk brass tacks. The beauty of a rustic apple tart is that it doesn’t need twenty fancy things; it needs the *right* things handled correctly. We only have two main components here: the pastry, which needs to be perfectly flaky, and the apples, which need to hold their shape. Everything else just adds a little sparkle.
For the crust, you absolutely need your 8 tablespoons of unsalted butter to be practically frozen and cut into small cubes. If the butter melts before it hits the flour, your crust is going to look more like a cracker than a pastry base, and we simply can’t have that!
When prepping the fruit, make sure you have about 4 medium apples ready to go. They need to be peeled, cored, and sliced very thinly—I mean scary thin! That thinness is what lets them bake evenly without turning into mush by the time the crust is golden brown. You’ll mix them with just a touch of sugar, some lemon juice, and cinnamon to wake up those fall flavors.
Selecting the Best Apples for an Apple Tart
Choosing your apples is critical for texture! If you use something too soft, even if it tastes great raw, it’ll completely collapse in the oven. I strongly recommend sticking to firm, slightly tart varieties.
Granny Smith is always my go-to because its tartness cuts beautifully through the buttery crust, and it keeps a fantastic structure. If you want something a bit sweeter but still firm enough, Honeycrisp apples are amazing placeholders. The goal is to avoid anything that’s mushy when you squeeze it lightly. We want bite, not baby food!
How to Prepare the Flaky Crust for Your Apple Tart
This is the make-or-break moment for your beautiful apple tart. If the crust fails, everything just feels a bit sad, right? So, let’s get this buttery, flaky foundation perfect. Remember: cold, cold, cold! That’s the mantra I repeat while I’m working the butter into the flour.
Start by mixing your flour and salt together—make sure they are fully combined first. Then, toss in those 8 tablespoons of ice-cold butter cubes. I don’t use a fancy food processor for this; I use my fingertips or a pastry blender. You’re looking for the butter pieces to be about the size of large peas. If the butter starts turning into sand, your hands are too warm, so stop and stick the bowl back in the fridge for five minutes!
Next, add the ice water, just a tablespoon at a time. You only add enough for the dough to barely hold together if you squeeze a small piece. When it’s ready, it’ll look shaggy, but it won’t crumble apart when you press it. Form it quickly into a flat disk—don’t knead it, or you develop the gluten and lose the flakiness. Wrap that disk up tight in plastic wrap and let it chill in the fridge for at least 30 minutes. Seriously, don’t skip that chilling time, or rolling it out later turns into a sticky nightmare!
Assembling and Baking Your Rustic Apple Tart
Now for the fun part where we create the visual magic for our apple tart! First things first, make sure your oven is preheated to 400 degrees Fahrenheit (that’s 200 Celsius, for my friends using metric). Line a sturdy baking sheet with parchment paper—this saves your crust from any potential sticking disaster.
Pull that chilled dough out and, on a lightly floured surface, roll it into a rough circle, probably about 12 inches across. Remember, this is rustic, so don’t stress about perfect circles; mine usually look a bit like slightly melted ovals! Carefully transfer it onto your parchment-lined sheet.
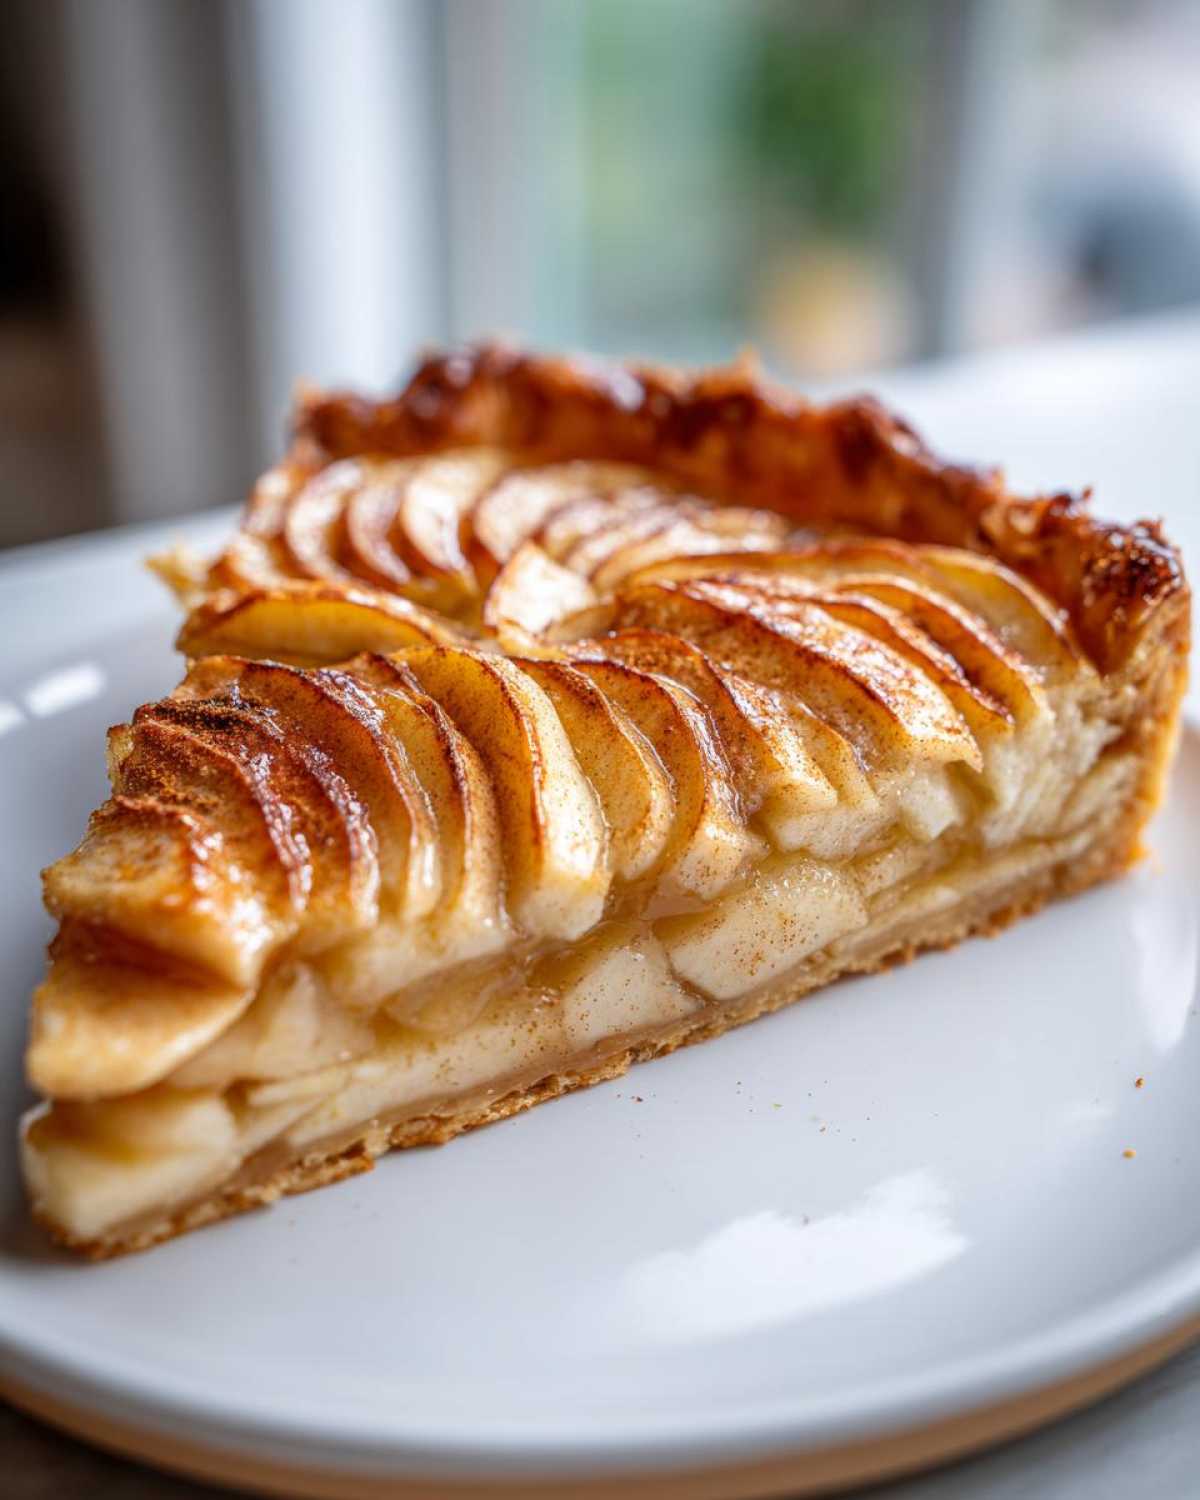
Next up are those wonderfully spiced apples. Lay them out across the dough, making sure they slightly overlap. Crucially, leave a good 1 1/2-inch border all the way around the edge. This is the secret to the rustic look: just fold that edge up and over the apples slightly. It creates a natural, sturdy wall that holds everything in place while still showing off that filling! Pop it into the hot oven and let it bake for about 30 to 35 minutes. You’re looking for a crust that’s deeply golden brown and those apple edges to look nice and tender.
Finishing Touches: Glazing the Apple Tart
The tart is officially baked, but we aren’t quite done yet! This step is optional, but it adds the perfect shine, just like you see in those fancy bakery windows. While the tart is still warm—and I mean just a couple of minutes out of the oven—you need to warm up a tablespoon of apricot jam. You can do this quickly in the microwave for about ten seconds.
Once it’s runny, take a pastry brush and gently wash that thin layer of warmed jam right over the apples. It seals in moisture and gives everything a beautiful, slightly sticky, glossy finish. Let it cool down just enough so you don’t burn your mouth off, and then stand back and admire your beautiful work!
If you’re ever worried about the legalities of what you’re baking versus what’s protected, just quickly review my disclaimer, though I promise baking recipes are safe! Enjoy slicing into that perfectly crisp, buttery base!
Making an Easy Apple Tart with Puff Pastry Substitution
Okay, I totally get it. Sometimes the craving for an apple tart hits hard, but you just don’t have an hour to fuss with making pastry dough from scratch. That’s why I love that you can pivot this recipe into a truly easy apple tart by swapping out the homemade base for store-bought puff pastry. Don’t feel guilty about it—even I pull this move out when time is tight!
If you choose this route, you can completely skip that whole section on chilling butter and praying for flakiness. Just grab one package of all-butter puff pastry. When you unroll your dough, you’ll notice it usually comes in a perfect rectangle, but that’s fine! We aren’t striving for perfection here, remember? We’re aiming for deliciousness fast.
When using the puff pastry apple tart method, you’ll actually roll the dough out slightly larger than you did for the homemade version, maybe aiming for about a 13-inch rough circle or square shape. Transfer it directly onto your parchment-paper-lined baking sheet. This is crucial for catching all those buttery bits that puff up!
The rest of the steps for preparing the apples—tossing them with sugar, cinnamon, and lemon juice—work exactly the same. You just pile those lovely spiced slices right onto the center of the puff pastry, leaving that generous border. You fold that border up and over, just like before, creating that rustic frame. Since puff pastry has its own built-in leavening, it puffs up like crazy, which is super satisfying!
You bake this version at the same 400 degrees Fahrenheit, but because puff pastry cooks up a bit quicker, keep a sharper eye on it. It usually takes around 25 to 30 minutes. You want that pastry golden brown and ridiculously layered underneath the tender apples. Trust me, this simple switch turns this gorgeous French recipe into a lightning-fast weeknight treat!
Serving Suggestions for Tarte aux Pommes
Now that you’ve pulled this masterpiece out of the oven, shimmering slightly from that gentle jam glaze, you might be wondering, “How do I make this moment even better?” That’s what I love about rustic desserts—they are so versatile! This tart is fantastic all on its own, especially when it’s still warm and the apples are just tender, but a little something extra just elevates the whole experience.
My absolute favorite companion, hands down, is a giant scoop of high-quality vanilla bean ice cream. The contrast between the warm, spiced fruit and the cold, creamy vanilla is just heaven. As the ice cream melts slowly into the buttery crust, it creates its own little sauce. It’s pure comfort, friends.
If you’re looking for something a bit more sophisticated, perhaps for a dinner party, skip the ice cream and go straight for crème fraîche. Don’t be intimidated by the name; it’s basically fancy, tangy sour cream. A dollop of that on top provides a beautiful, sharp acidity that cuts right through the sweetness of the cooked apples and complements the richness of the pastry. It really highlights the slight tartness we built in with the lemon juice!
For a simple touch, especially if you’re serving this in the colder months, try a really good drizzle of slightly warmed caramel sauce. Not too much—just a thin, beautiful ribbon across the top. And if you’re feeling adventurous, mix a tiny splash of vanilla extract or a pinch of finely ground cardamom into the caramel first for a warm, unexpected note. But honestly, even a fresh cup of black coffee alongside a warm slice makes for the best afternoon treat!
Storage and Reheating Instructions for Your Apple Tart
Don’t you hate when leftovers lose their magic? We have to treat this delicate apple tart kindly so the crust stays crisp! If you have any left (good luck getting this far), skip the fridge if you can. The moisture will slowly ruin that flaky base. Store it loosely covered at cool room temperature for up to two days.
When you want to enjoy that glorious slice again, reheating is key. Pop a piece directly onto a baking sheet in a 350-degree oven for about 8 to 10 minutes. This quick blast of dry heat re-crisps the crust perfectly. Microwaving an apple tart is a definite no-no—it turns the beautiful pastry chewy!
Frequently Asked Questions About This Apple Tart Recipe
I get so many questions after people first try this recipe! Baking should be fun, not stressful, so let’s clear up any worries you have about your apple tart recipe before you get too deep into the mixing bowl! Most of the questions I get are about keeping that crust perfect or dealing with the fruit.
Here are a few things I’ve learned over the years about making this a successful simple apple dessert.
How can I absolutely guarantee my bottom crust won’t get soggy?
Ah, the dreaded soggy bottom! This is the number one fear when making any open-faced tart. Since we are using a homemade crust, the best trick is to chill that rolled-out dough on the baking sheet for 15 minutes *after* you’ve arranged the apples and folded the edges, but *before* it goes into the oven. This gives the butter one last chance to firm up. Also, make sure your oven is fully preheated to 400 degrees! That initial blast of high, dry heat sets the crust immediately. If you are making a caramelized apple tart, be extra careful about adding extra liquid, which can cause sogginess.
Can I use other fruit in this recipe instead of apples?
You totally can! While this is designed around the structure and tartness of firm apples, this general method works beautifully with firm pears or even thinly sliced plums. If you use something much softer, like berries, you might want to add a small sprinkle of flour or cornstarch over the dough before layering the fruit, just to help absorb any excess juice. I love making a summer version with peaches, but I always use Granny Smith apples for at least half the fruit to give it some backbone!
My apples tend to brown really fast while I’m working; what’s the trick?
That happens because of oxidation, and it’s why we use lemon juice! As soon as you slice your apples, drop them directly into a bowl of cool water that has a hefty squeeze of fresh lemon juice in it. Take them out in small batches right before you toss them with the sugar and cinnamon. This slows down the browning process significantly. Don’t worry; the little bit of lemon juice left on them actually brightens the flavor of your cinnamon apple tart!
What is the difference between a French apple tart and an American pie?
It all comes down to structure, really! A classic American apple pie usually has a bottom crust and a full top crust, or maybe a lattice top. It’s usually deeper, baked in a pie dish, and is all about keeping all that sweet filling contained. This French apple tart, or Tarte aux Pommes, is structurally different. It’s traditionally open-faced—meaning no top crust—and it’s usually much flatter, baked on a baking sheet, and made with a noticeably thinner, buttery pastry base. The focus here is really about showcasing those beautifully arranged apple slices!
Understanding the Nutrition in Your Apple Tart
I always get asked about the heavy stuff when something tastes this good! Since this is a rich, buttery, homemade creation, it’s definitely meant to be an indulgent treat, not a daily snack. I’ve included the estimated nutritional breakdown based on the ingredient amounts listed for my buttery crust tart recipe.
Keep in mind that these numbers are just estimates, especially since the exact size of apples can vary wildly! If you use the puff pastry trick, those numbers will shift a little, usually increasing the fat content slightly since store-bought pastry often uses different fats.
Here is what you’re looking at for one slice of this amazing homemade apple tart:
- Serving Size: 1 slice
- Calories: About 310
- Sugar: 18 grams (mostly natural fruit sugars and added baking sugar)
- Fat: 16 grams
- Carbohydrates: 38 grams
- Protein: 4 grams
See? It’s actually quite reasonable for a homemade dessert! If you’re keeping track, you can see the calories hover around that sweet spot for a decadent seasonal apple bake. Just remember that these estimates don’t account for any creamy sauce you might add on top when serving!
For more information on how we calculate these details, feel free to peek at our cookie policy page, though thankfully this information isn’t stored in cookies!
Understanding the Nutrition in Your Apple Tart
I always get asked about the heavy stuff when something tastes this good! Since this is a rich, buttery, homemade creation, it’s definitely meant to be an indulgent treat, not a daily snack. I’ve included the estimated nutritional breakdown based on the ingredient amounts listed for my buttery crust tart recipe.
Keep in mind that these numbers are just estimates, especially since the exact size of apples can vary wildly! If you use the puff pastry trick, those numbers will shift a little, usually increasing the fat content slightly since store-bought pastry often uses different fats.
Here is what you’re looking at for one slice of this amazing homemade apple tart:
- Serving Size: 1 slice
- Calories: About 310
- Sugar: 18 grams (mostly natural fruit sugars and added baking sugar)
- Fat: 16 grams
- Carbohydrates: 38 grams
- Protein: 4 grams
See? It’s actually quite reasonable for a homemade dessert! If you’re keeping track, you can see the calories hover around that sweet spot for a decadent seasonal apple bake. Just remember that these estimates don’t account for any creamy sauce you might add on top when serving!
For more information on how we calculate these details, feel free to peek at our cookie policy page, though thankfully this information isn’t stored in cookies!
PrintRustic French Apple Tart with Flaky Crust
Make a simple, rustic French apple tart featuring thinly sliced apples arranged over a buttery, flaky homemade crust.
- Prep Time: 25 min
- Cook Time: 35 min
- Total Time: 60 min
- Yield: 6 servings
- Category: Dessert
- Method: Baking
- Cuisine: French
- Diet: Vegetarian
Ingredients
- 1 1/4 cups all-purpose flour
- 1/2 teaspoon salt
- 8 tablespoons cold unsalted butter, cut into cubes
- 3-4 tablespoons ice water
- 4 medium apples (Granny Smith or Honeycrisp), peeled, cored, and thinly sliced
- 2 tablespoons granulated sugar
- 1 tablespoon lemon juice
- 1 teaspoon ground cinnamon
- 1 tablespoon apricot jam, warmed (for glaze)
Instructions
- Prepare the crust: In a bowl, combine the flour and salt. Cut in the cold butter using a pastry blender or your fingers until the mixture resembles coarse crumbs with some pea-sized pieces of butter remaining.
- Add the ice water one tablespoon at a time, mixing until the dough just comes together. Form the dough into a disk, wrap it in plastic, and chill for at least 30 minutes.
- Preheat your oven to 400 degrees Fahrenheit (200 degrees Celsius). Line a baking sheet with parchment paper.
- On a lightly floured surface, roll the chilled dough into a rough 12-inch circle. Transfer the dough to the prepared baking sheet.
- In a separate bowl, gently toss the sliced apples with the granulated sugar, lemon juice, and cinnamon.
- Arrange the apple slices over the dough, leaving a 1 1/2-inch border around the edge. Fold the border up over the apples to create a rustic edge.
- Bake for 30 to 35 minutes, or until the crust is golden brown and the apples are tender.
- While the tart is still warm, brush the top of the apples with the warmed apricot jam for a light glaze. Let cool slightly before slicing and serving.
Notes
- Use firm, slightly tart apples like Granny Smith for the best texture and flavor balance.
- If you prefer a quicker version, substitute the homemade crust with one sheet of store-bought puff pastry.
- For extra richness, sprinkle 1 tablespoon of turbinado sugar over the apples before baking.
Nutrition
- Serving Size: 1 slice
- Calories: 310
- Sugar: 18
- Sodium: 150
- Fat: 16
- Saturated Fat: 10
- Unsaturated Fat: 6
- Trans Fat: 0
- Carbohydrates: 38
- Fiber: 3
- Protein: 4
- Cholesterol: 45