

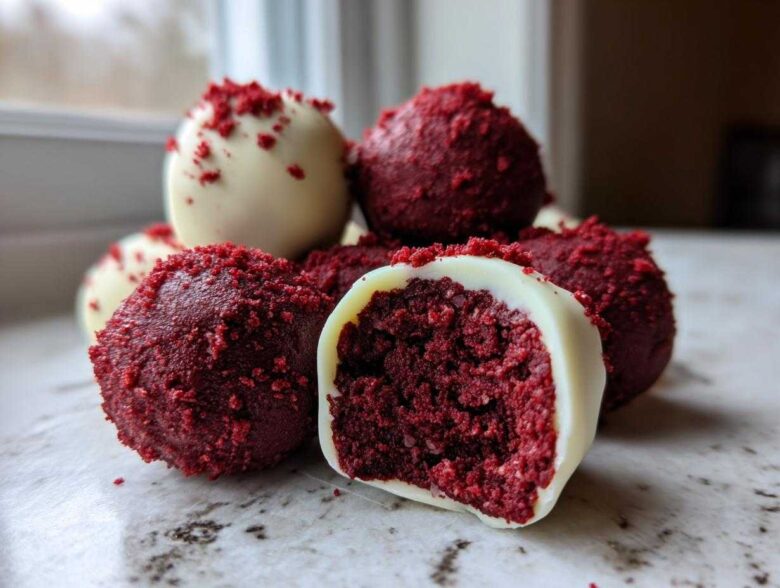
Oh my goodness, if you are looking for a dessert that looks like it took you all day but actually took you about 20 minutes of actual work, then stop right there! Seriously, my kitchen counter right now is covered in tiny, perfect rounds of pure bliss. Getting the ratio exactly right in these little treasures took me ages—I’ve tried every trick in the book, from using actual leftover cake to going full-on cake mix shortcuts, and I’ve finally landed on the absolute best version. Forget fussy, elaborate pastries; these **red velvet cake balls** are rich, creamy, beautifully crimson, and they are totally no-bake. Trust me, once you make these, they’ll become your go-to, especially when you need a quick, show-stopping party dessert. I’ve learned so much about dessert consistency over the years, and that’s why I know this method works. You can read a little more about where all my baking craziness comes from over here if you’re curious!
Why You Will Love This Easy No-Bake Red Velvet Cake Balls Recipe
Honestly, I don’t know why anyone bothers with the messy layers when you can have these! These are super simple, totally creamy, and you don’t even need the oven if you have some leftover cake. If you need the real deal, these **red velvet cake balls** deliver that rich flavor everyone craves. Seriously, they are game-changers for quick treats.
- They are completely no-bake—just mix, roll, chill, and dip!
- The cream cheese frosting makes them unbelievably moist and flavorful.
- They look beautiful without requiring any piping skills.
Perfect for Parties and Holiday Cake Balls
I make massive batches of these all the time. They are just the perfect size for handing out at gatherings. Whether you’re looking for cute Valentine dessert ideas that aren’t fussy, or just need some dependable party dessert recipes that disappear instantly, this batch size is perfect. They always look so elegant once they get that shiny white chocolate shell, even though they take hardly any effort!
Gathering Ingredients for Cream Cheese Cake Balls
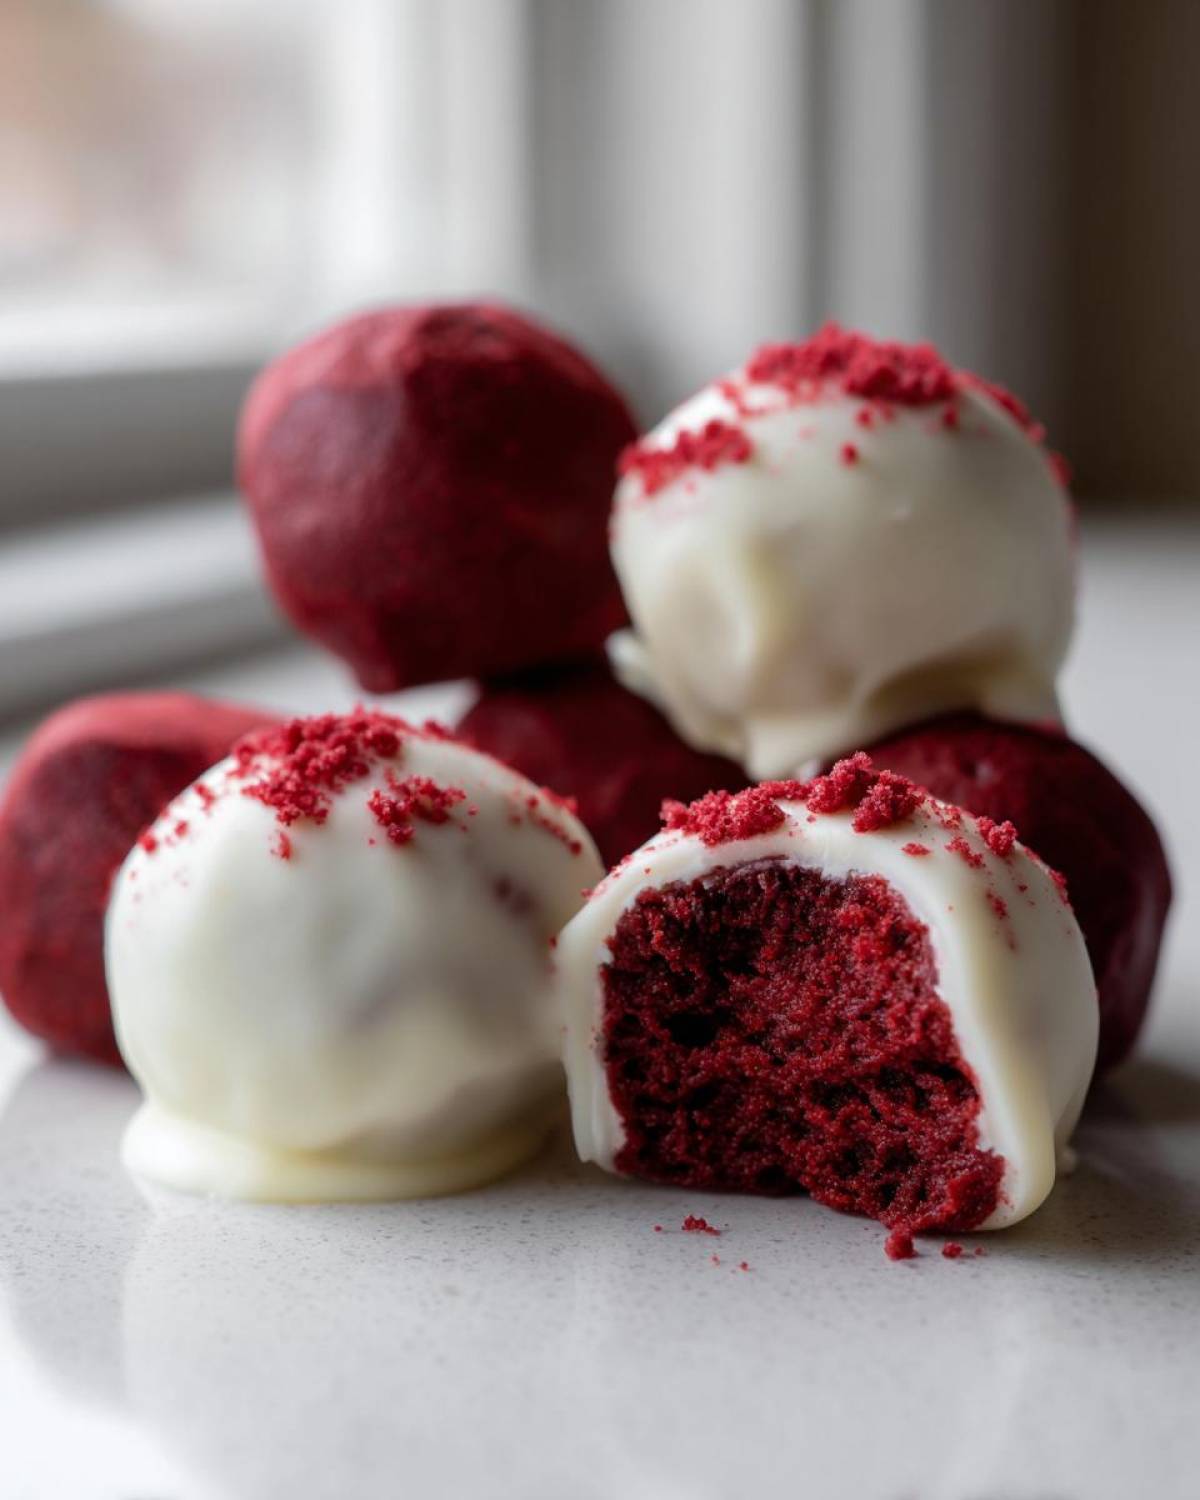
Okay, this is where things get incredibly simple, which is why I love this **cream cheese cake balls** recipe so much! We aren’t making anything from scratch here except the ‘truffle’ dough itself. You need just four things, and one of them is only optional! Seriously, it’s just the cake mix, the frosting, the lovely white chocolate for dipping, and maybe a tiny bit of oil to make that chocolate super silky.
When you shop, grab a standard box of red velvet cake mix—no need for specialty flavors here, we keep it easy! The next non-negotiable item is a tub of quality cream cheese frosting. It has to be frosting already made; we are not making that from scratch today, or we’d be here all weekend!
Make sure you grab the white chocolate wafers, not just regular chips. This makes a huge difference in the final look, which is important when you want those pretty **white chocolate covered cake balls**.
Ingredient Notes and Substitutions for Red Velvet Cake Balls
Let’s talk specifics, because ingredient choices really shine through in this simple dessert. Since we are using a boxed mix, we are already saving time, so let’s use that time to pick the best dipping chocolate.
For the coating, please, please use melting wafers or candy melts if you can find them. Standard white chocolate chips always seem to seize up on me or end up too thick when melted. If you only have chips, you can make it work, but you absolutely must add that optional coconut oil (or shortening) to the chocolate when you melt it. That little bit of fat loosens everything up so you get that professional, thin shell around your **white chocolate covered cake balls**.
Also, I want to point out that this is the ‘easy cake balls recipe’ because we are bypassing the baking step by using a mix! If you happen to have leftover, fully baked, and cooled red velvet cake sitting around, use that instead of baking the mix. It cuts down on the total time by about thirty minutes but yields the exact same delicious result.
Step-by-Step Instructions for Perfect Red Velvet Cake Balls
Alright, this is the payoff section! Following these steps carefully is what separates a slightly mushy red velvet ball from a perfectly structured, dipping-ready friend. The biggest rule I have for making amazing **red velvet cake balls**? Patience during cooling and chilling! If the cake is warm, the frosting melts, and then you’ve got soup, not dough.
First, we need a baked cake. Mix up your box of red velvet cake according to the package directions—use the eggs and oil it calls for. Once it’s baked, you absolutely must let it cool completely. I mean COOL. Like, maybe even let it sit on the counter overnight if you baked it late. Then, when it’s totally cool, take it apart with your hands, crumbling it into a big bowl. Get rid of any scorched edges or overly dry spots.
- Crumble that cooled cake into a large bowl, making sure to get rid of any hard edges or dry bits that won’t incorporate well.
- Dump in the whole tub of cream cheese frosting. Don’t be shy!
- Mix that together. You’ll need to use your hands for the last bit to really get a uniform mass. You want a thick, uniform dough that feels firm but pliable.
- Roll your dough pieces into balls about one inch wide. Consistency is key here, so try to keep them all the same size. Line a baking sheet with parchment paper—this is a lifesaver later!
- Place the sheet of lovely red dough balls into the refrigerator. Chill them for at least thirty minutes. This chilling step is major! It firms them up beautifully for dipping.
- Now for the chocolate! Melt the white chocolate wafers slowly. I use 30-second bursts in the microwave, stirring thoroughly between each one. If you are using the coconut oil, stir that in now until everything is smooth as silk.
- Take the tray out and dip each chilled ball into the melted white chocolate. Use a fork or a dipping tool to roll it around so it’s totally covered. Let the excess chocolate drip right back into the bowl—tap the fork gently against the side of the bowl.
- Place the coated balls back onto that parchment-lined sheet.
- Let them sit until the chocolate sets. Room temperature is fine, or you can pop them in the fridge for 10 minutes if you are in a huge rush!
If you have any questions about making these or need some troubleshooting help, feel free to reach out to me through my contact page!
Mixing the Dough for Homemade Cake Truffles
When you start mixing the cake crumbs and the frosting, you might feel like you’re mixing sand to cement! Keep going! You have to work that frosting in until there are no dry streaks visible. That’s when you know you have that perfect texture for your **homemade cake truffles**.
My secret tip here is checking the stickiness: if your dough still feels very crumbly and won’t hold a shape when you squeeze it, add maybe one extra tablespoon of frosting. If it’s sloppy and sticks way too much to your hands, add a couple of tablespoons of the leftover dry cake crumbs back in until you hit that sweet spot. It should feel like playdough, something you can easily roll without it cracking or squishing out the sides.
Achieving Smooth White Chocolate Dipped Cake Balls
I cannot stress enough the importance of chilling those balls before they meet the warm chocolate! If they are even slightly cool instead of properly chilled, the heat from the melted coating will start softening the dough immediately. You’ll end up with sad, lopsided mounds of red velvet goo, not pretty **chocolate dipped cake balls**.
When dipping, use a fork underneath the ball and dip quickly. Once fully submerged, lift it out and let it hang right over the bowl for a good 10 seconds. You want that chocolate to set thinly and evenly. If you leave it hanging too long, you’ll get a huge chocolate puddle at the bottom of the ball as it sets, which looks messy. Quick dip, quick drain, then set them down fast!
Tips for Success with No Bake Red Velvet Truffles
I’ve rolled hundreds of these things, and I’ve definitely learned a few tricks the hard way so you don’t have to! When it comes to making these **no bake red velvet truffles** look professionally made, it really comes down to temperature control and consistency in size.
First, let’s talk about rolling size. People always tend to make them too big, and that makes them harder to coat and riskier when chilling. I use a level measuring teaspoon—you know, the one you use for baking soda—to scoop out portions of the dough. That gives you a really consistent size every single time, which means they all chill at the same rate and dip beautifully.
My second big tip is about the chocolate temperature, especially with white chocolate. White chocolate is notorious for overheating! If you feel it getting stiff while you’re working, don’t just blast it in the microwave for another minute. Take it out, stir it hard, and if it’s still too thick to smoothly coat, add just a tiny drop—like half a teaspoon—of neutral oil (I prefer coconut oil if I didn’t put it in initially) and stir until it loosens up. It’s better to add small amounts of fat than to risk scorching the whole bowl.
Also, don’t skip that initial chill! I know everyone is in a rush, but that 30 minutes in the fridge firms up the cream cheese frosting binding everything. If you try to roll warm, sticky dough, you’ll just end up with crumbs stuck all over your hands and not enough ball left on the parchment paper! Plus, chilled dough holds its shape so much better when it hits that warm chocolate.
Storage and Reheating Instructions for Bite Size Red Velvet Treats
Okay, so you’ve made these incredible **bite size red velvet treats**, and now you are wondering how to make them last? The good news is they are super easy to store, but since these are no-bake and rely on cream cheese frosting as the main binder, refrigeration is your best friend.
Make sure whatever container you use is airtight! If you leave them uncovered in the fridge, two things happen: they start to dry out a tiny bit faster, and they absorb any funky smells from your leftovers. Nobody wants a faintly onion-flavored red velvet ball, trust me!
I keep mine in a single layer if I can, but if they need to stack, just place a small piece of parchment or wax paper between the layers. They last beautifully for about a week in the refrigerator.
Now, here’s where texture comes in. Because they are so rich, they firm up quite a bit once they are fully chilled. If you plan on serving them straight from the fridge, they will be almost fudge-like, which some people love! But if you prefer that softer, almost melt-in-your-mouth texture where the cake inside feels richer, just pull them out about 20 minutes before you plan to serve them. That little bit of tempering time makes all the difference in how creamy they feel on your tongue. You definitely cannot microwave these, or your beautiful white chocolate coating will turn into a greasy puddle instantly!
Variations on Red Velvet Dessert Bites
The basic recipe for these **red velvet dessert bites** is fantastic, but honestly, half the fun is messing around with them! Once you nail that perfect creamy dough consistency, you can go wild with coatings and mix-ins. Why just stick to one look when you can create a whole dessert platter?
My boys always insist that we need at least three different kinds whenever I make a batch. We stick to the same perfect cake ball base, but the outside gets totally transformed. It’s amazing how a change in coating completely changes the entire dessert experience!
If white chocolate isn’t your jam—maybe you find it a little too sweet—you have so many options. Dark chocolate is incredible here! The slightly bitter quality of a good quality dark chocolate coating really cuts through the sweetness of the cream cheese filling. You need to melt that dark chocolate carefully, maybe adding a tiny bit of butter instead of oil for a richer mouthfeel. Once the dark chocolate is set, those vibrant red centers look so dramatic peeking through!
We also play around with the toppings a ton. For Valentine’s Day, I’ll use that tip from the notes and use a mixture of bright red and pink sprinkles while the chocolate is still wet. For Christmas, I crush up some candy canes and dust them lightly over the top. They become these beautiful, minty-chocolatey bombs!
Another fun variation I tried recently was turning them into **red velvet cheesecake balls**. I mixed about four ounces of softened cream cheese directly into the dough mixture right before rolling. It made the interior even creamier, almost like a fudge center! Just be warned, if you add extra cream cheese, you might need to chill them for a little longer before dipping so they firm up properly.
Don’t forget about texture! If you want crunch, try rolling the dipped balls in crushed pecans or finely chopped Oreos before the chocolate sets. It adds a wonderful contrast to the smooth dough inside. These little tweaks turn a simple recipe into something that feels totally custom-made every single time you whip up a batch.
Frequently Asked Questions About Simple Dessert Balls
It’s funny how many questions pop up once people realize how simple these **simple dessert balls** are to make! People always want to know about shortcuts or if they can prep them ahead of time, and the answer is usually a resounding “yes!” I’ve tried most substitutions over the years, so let me clear up the most common ones.
Can I skip baking the cake mix entirely for this easy cake balls recipe?
Absolutely! That’s one of the biggest time savers for this **easy cake balls recipe**. You do not have to bake the cake mix if you don’t want to. If you happen to have any leftover, fully baked red velvet cake—maybe from a birthday party or a failed batch of cupcakes—just make sure it’s completely cooled and use that instead of baking the mix. Even better? You can actually substitute parts of the mix with store-bought baked brownies or even a sheet cake! Just make sure whatever you use is dense and fully cooled before you start crumbling it. It works a treat!
What’s the difference between these cake balls and cake pops?
That’s an excellent question that trips people up! Technically, the ingredients and the base dough are identical—they are both rolled from that creamy, delicious cake and frosting mixture. The difference is purely presentation. Cake balls are finished as little truffle-like spheres that sit flat on a sheet when setting. Cake pops just means you stuck a stick into the chilled ball *before* you dipped them in the coating. If you want **red velvet dessert bites** that are easy to serve on a platter, go for balls. If you need something cute for individual grabs at a party, just stick a lollipop stick in them before the chill step!
How far ahead of time can I make these treats?
These do really well when made ahead of time, which is why I love them for holiday baking prep! You can generally make the dough, roll the balls, and chill them in the fridge for up to 24 hours before you dip them in chocolate. The very best way to store the finished, chocolate-coated ones is in an airtight container in the refrigerator for up to a week. If you’re taking them somewhere, just give them 15-20 minutes on the counter beforehand to reach peak creaminess for the best flavor experience!
Do I need cream cheese frosting, or can I use vanilla?
While this recipe specifically calls for cream cheese frosting because that tangy cream cheese flavor perfectly balances the richness of the red velvet, you *can* swap it out if you are in a major pinch. If you use plain vanilla frosting, you will still get delicious **homemade cake truffles**, but you will lose that signature slight tartness that makes red velvet so addictive. If you use vanilla, maybe add a tiny splash of lemon juice to the mixture to mimic that tang!
If you have any legal questions about using recipes shared online, you can always review the disclaimer information over here.
Estimating Nutrition for Red Velvet Cake Balls
I always get asked about the nutrition, especially since these look so deceivingly small! Remember, these are decadent, fun treats, not health food, so we measure them in joy, not macros, really! But for those who track everything, I put together some rough estimates using the standard boxed mix and the recipe amounts. Keep in mind that every brand of frosting and chocolate coating changes these numbers!
- Serving Size: 1 ball (estimate about 24 total)
- Calories: Roughly 180 per ball
- Sugar: About 18g – that’s the white chocolate and the cake mix talking!
- Fat: Around 10g total
- Protein: A couple of grams, mostly from the little bit of egg/milk in the mix.
So, they aren’t low-cal, but they are definitely low-effort! Enjoying these **red velvet cake balls** is all about moderation—one or two is usually plenty to hit that sweet spot!
Share Your Bite Size Red Velvet Treats
I absolutely live to see your creations! When you try this recipe and wrap up your own perfect chocolate-dipped creations, please snap a picture and tag me online. Seriously, seeing the different sprinkles and coatings people use inspires me so much for my next batch!
And if you loved how incredibly simple this was, please consider dropping a quick star rating at the top of the recipe card. It helps other bakers know they can trust this method. Happy rolling, and I can’t wait to see your beautiful **bite size red velvet treats**!
If you have any feedback or want to share your experience, you can check out my terms for sharing your wonderful creations here.
Estimating Nutrition for Red Velvet Cake Balls
I always get asked about the nutrition, especially since these look so deceivingly small! Remember, these are decadent, fun treats, not health food, so we measure them in joy, not macros, really! But for those who track everything, I put together some rough estimates using the standard boxed mix and the recipe amounts. Keep in mind that every brand of frosting and chocolate coating changes these numbers!
- Serving Size: 1 ball (estimate about 24 total)
- Calories: Roughly 180 per ball
- Sugar: About 18g – that’s the white chocolate and the cake mix talking!
- Fat: Around 10g total
- Protein: A couple of grams, mostly from the little bit of egg/milk in the mix.
So, they aren’t low-cal, but they are definitely low-effort! Enjoying these **red velvet cake balls** is all about moderation—one or two is usually plenty to hit that sweet spot!
Share Your Bite Size Red Velvet Treats
I absolutely live to see your creations! When you try this recipe and wrap up your own perfect chocolate-dipped creations, please snap a picture and tag me online. Seriously, seeing the different sprinkles and coatings people use inspires me so much for my next batch!
And if you loved how incredibly simple this was, please consider dropping a quick star rating at the top of the recipe card. It helps other bakers know they can trust this method. Happy rolling, and I can’t wait to see your beautiful **bite size red velvet treats**!
If you have any feedback or want to share your experience, you can check out my terms for sharing your wonderful creations here.
PrintEasy No-Bake Red Velvet Cake Balls
Make simple, rich red velvet cake balls using cream cheese frosting and a white chocolate coating. This no-bake recipe is quick and perfect for parties.
- Prep Time: 20 min
- Cook Time: 30 min
- Total Time: 50 min
- Yield: 24 servings
- Category: Dessert
- Method: No-Bake
- Cuisine: American
- Diet: Vegetarian
Ingredients
- 1 box (15.25 oz) red velvet cake mix
- 1 container (16 oz) cream cheese frosting
- 12 oz white chocolate melting wafers
- 1 teaspoon coconut oil (optional, for smoother dipping)
Instructions
- Bake the red velvet cake according to the package directions using the amount of eggs and oil specified on the box. Let the cake cool completely.
- Crumble the cooled cake into a large bowl, removing any hard edges.
- Add the entire container of cream cheese frosting to the cake crumbs. Mix well until a thick, uniform dough forms.
- Roll the dough into small, uniform balls, about 1 inch in diameter. Place them on a parchment-lined baking sheet.
- Chill the cake balls in the refrigerator for at least 30 minutes to firm them up.
- Melt the white chocolate wafers in a microwave-safe bowl in 30-second intervals, stirring between each interval, until smooth. Stir in the coconut oil if using.
- Dip each chilled cake ball into the melted white chocolate, ensuring it is fully coated. Let excess chocolate drip off.
- Return the coated cake balls to the parchment-lined sheet.
- Allow the chocolate coating to set completely at room temperature or chill briefly until firm.
Notes
- For a smoother dip, use candy melts instead of standard white chocolate chips.
- You can use store-bought baked cake or leftover cake if you prefer not to bake from a mix.
- For Valentine’s Day, add red sprinkles before the chocolate sets.
Nutrition
- Serving Size: 1 ball
- Calories: 180
- Sugar: 18
- Sodium: 110
- Fat: 10
- Saturated Fat: 6
- Unsaturated Fat: 4
- Trans Fat: 0
- Carbohydrates: 21
- Fiber: 0
- Protein: 2
- Cholesterol: 25