

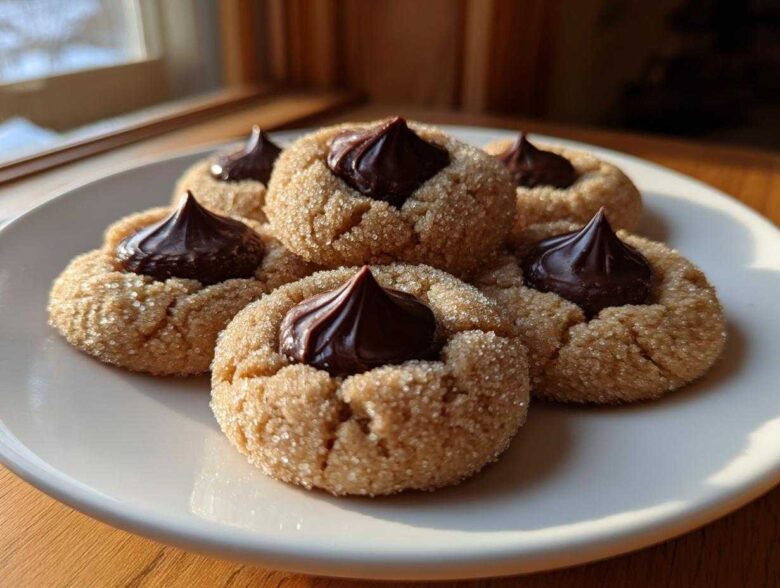
Oh my goodness, there is nothing—and I mean *nothing*—that smells more like home for me than a fresh batch of peanut butter blossom cookies cooling on the rack. Remember those tiny little cookies you’d sneak off the tray when you were supposed to be helping set the table? I totally crushed my first batch when I was about ten, thinking I was a baking pro. Well, I’ve been chasing that perfect texture ever since, and you guys, I finally cracked the code!
Forget everything you’ve heard about dry, crumbly peanut butter cookies. This recipe is absolutely the best soft and chewy version you will ever find. We’re talking melt-in-your-mouth goodness before that chocolate kiss even gets a chance to settle on top! Keep reading, because these are going to be your new go-to cookies for every single holiday gathering, trust me on this one. You can read a little more about my own kitchen journey right over here!
Why This Soft and Chewy peanut butter blossom Recipe Stands Out
Listen, there are a million peanut butter cookie recipes out there, but most of them come out tasting like sad, grainy cardboard after a day. Not these! We are laser-focused on texture here. This recipe is different because it uses both brown sugar *and* white sugar, plus the perfect ratio of leavening agents, which locks in that amazing softness.
- We aim for a cookie that is soft in the middle but robust enough to hold its shape.
- The final product stays wonderfully chewy, even if you aren’t eating them right off the sheet.
- The balance of peanut butter ensures a deep flavor without being greasy.
Achieving the Perfect Crackle Top on Your peanut butter blossom
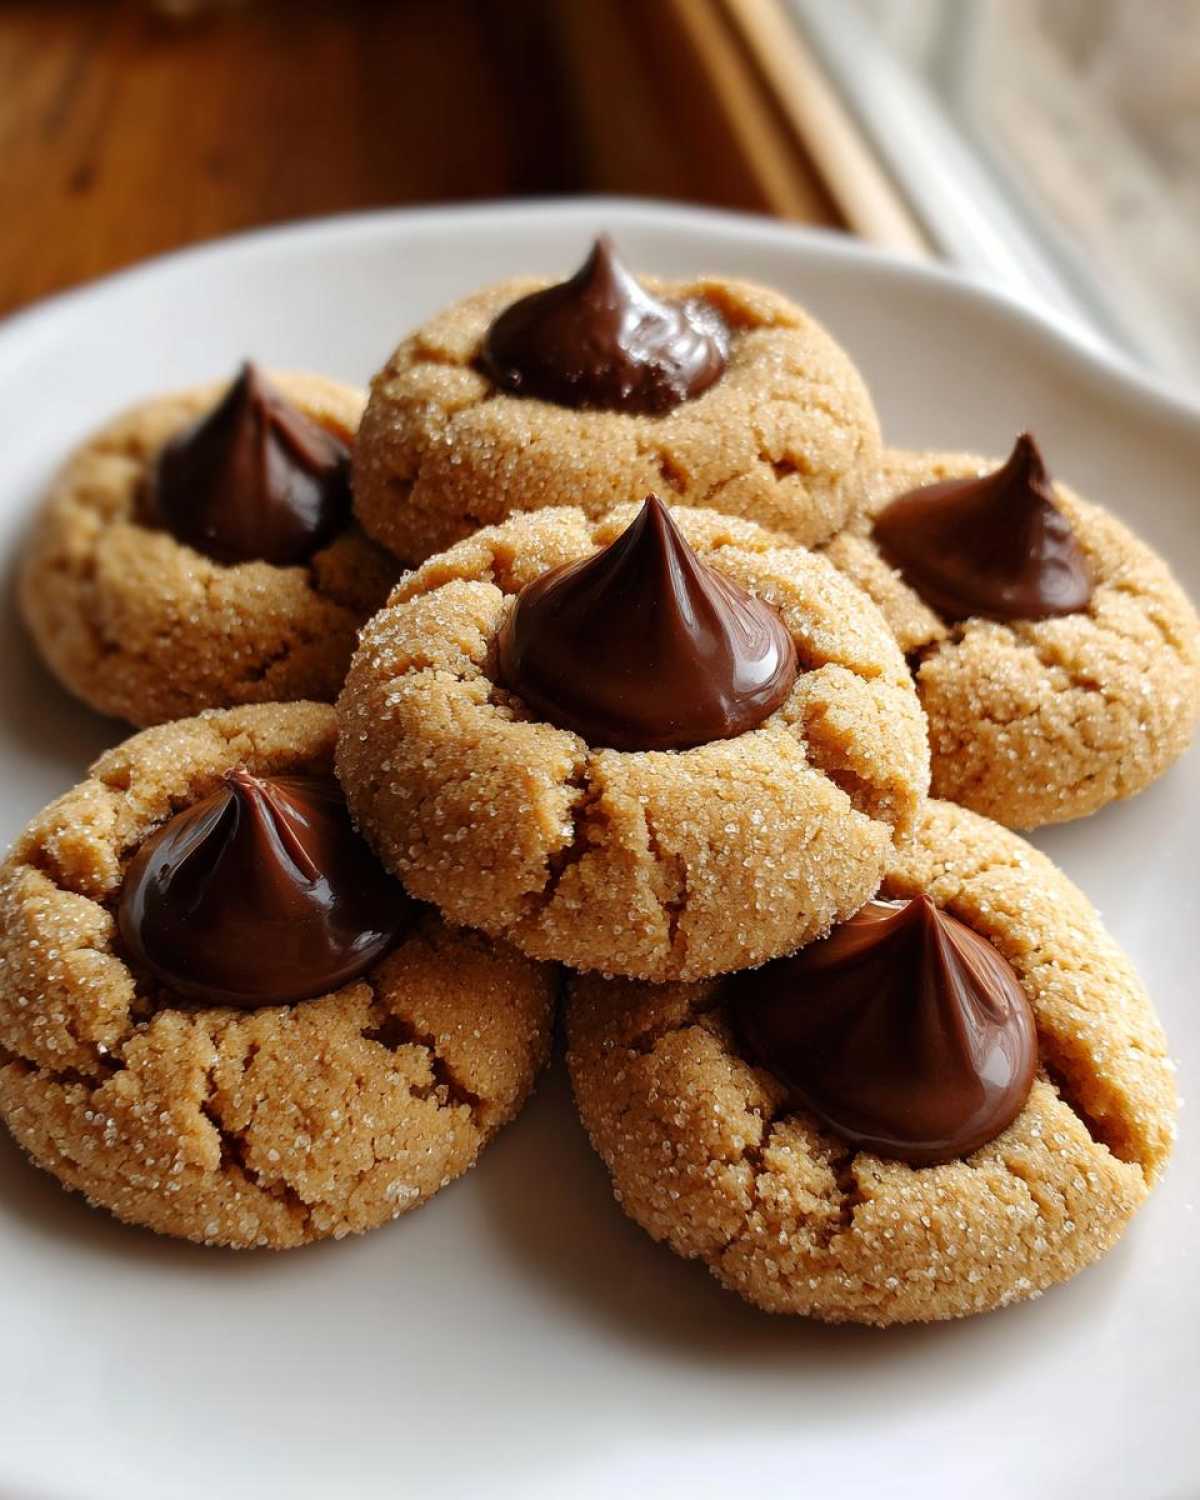
That classic cracked surface? That’s the signature look, and it happens because of a little bit of kitchen magic. When you roll those soft dough balls in granulated sugar and then bake them right away, the outside begins to set quickly while the inside puffs up. As the cookie cools slightly, the set top sinks just a bit, forcing those beautiful little fissures to appear.
The trick is getting that chocolate pressed right into the center immediately when they come out of the oven. If you wait even a minute too long, the base sets too much and you won’t get the nice, deep indentation needed for the kiss to melt just right.
Gathering Your Ingredients for Classic peanut butter blossom
Okay, before we even think about turning on the oven, we need to talk about what goes *into* these beauties. You know I preach about quality because if your starting ingredients are iffy, your cookies will be iffy! Luckily, this recipe uses mostly pantry staples, which means less running around and more baking.
This recipe is generous, too. If you follow these measurements exactly, you should end up with about 4 dozen perfect cookies—plenty for sharing, and certainly plenty for sneak-tasting later. Let’s get everything out on the counter!
Ingredient List for the peanut butter blossom Dough
The base cookie is where we build all that soft, chewy structure. Pay close attention to the sugar measurements here; the mix of white and brown is key to getting the right moisture level.
- 1 cup unsalted butter, and it needs to be softened—not melted, just soft!
- 1 cup granulated sugar
- 1 cup packed light brown sugar (make sure it’s tightly packed in that cup!)
- 2 large eggs
- 1 teaspoon vanilla extract
- 1 cup creamy peanut butter (smooth is best for combining evenly)
- 2 3/4 cups all-purpose flour
- 1 teaspoon baking soda
- 1/2 teaspoon baking powder
- 1/2 teaspoon salt
- 1/4 cup extra granulated sugar—this is just for rolling the balls in before they bake!
The Essential Chocolate Kiss Component
No substitutions here, friends! The famous little chocolate hat is non-negotiable for this classic treat. You need about 48 Hershey’s Kisses, and here is a pro tip: unwrap every single one *before* you even start creaming the butter. Seriously, do it now!
Why? Because once those cookies come out of the oven, you have about thirty seconds to press that kiss in before the surface of the cookie sets too hard. If you’re fumbling with foils while your cookies are getting cold, the whole process falls apart. Get them unwrapped and ready to go!
Step-by-Step Instructions for the Best peanut butter blossom
Alright, deep breaths! This is where we turn those lovely ingredients into cookies that look like they came straight from a picture book. Don’t worry if the oven seems hot or the timing is tight; that’s what makes them special. We’re keeping the dough unchilled, so we move pretty quickly here. If you need a quick refresher on our cookie standards before we dive in, you can check out our cookie policy page, but honestly, just focus on the steps below!
Mixing the peanut butter blossom Dough Base
First things first: grab that big mixing bowl. You need to beat that softened butter together with both types of sugar—granulated and brown—until it looks light and really creamy. That step adds the air we need later for softness! Next, we add the eggs one by one, making sure each one is blended before adding the next. Vanilla and the peanut butter go in last until everything looks unified, a lovely pale tan color.
Now for the dry stuff. Whisk those together separately—flour, baking soda, baking powder, and salt. Add this dry mix slowly to the wet ingredients, but stop the mixer as soon as those streaks disappear! I cannot stress this enough: do not overmix. Overmixing is how you get tough cookies. We want soft, tender dough!
Shaping and Rolling for the peanut butter blossom
Time to make the signature little spheres. Roll the dough into nice, neat 1-inch balls. Not too big, not too small—aim for uniformity so they all bake evenly. Pour that extra 1/4 cup of granulated sugar into a shallow plate. Roll each dough ball generously in the sugar until it’s coated all over. This coating is essential; it’s what gives the outside of the cookie that delightful crunch that contrasts with the soft interior.
Place your sugared balls about two inches apart on your parchment-lined baking sheets. They need room to spread out a little bit while they balloon up!
Baking and Adding the Chocolate Kiss to Your peanut butter blossom
Set that oven—which should be preheated to 375 degrees F—and bake those beauties for just 8 to 10 minutes. Watch them closely! You want the edges to look set, but look right at the center of the cookie and see if it still looks a little puffy and soft. That’s the sweet spot.
The second those trays come out of the 375°F heat, grab those pre-unwrapped Kisses. Gently, but firmly, press one right into the dead center of each *hot* cookie. If you press hard enough, you’ll see that beautiful crackle form right around the base of the chocolate. Seriously, work fast!
Tips for Success with Soft Peanut Butter Cookies Recipe
Getting truly soft peanut butter cookies that don’t crumble when you pick them up takes a little know-how. I’ve learned a few tricks over the years, especially concerning the peanut butter itself. You absolutely must use standard, creamy peanut butter here. Don’t try to use those natural, oily brands where the separation happens really quickly!
Why? Because those natural butters change the moisture balance, and we need consistency for this soft peanut butter cookies recipe to work right. Also, when you’re mixing the peanut butter in with the creamed butter and sugars, make sure it’s fully incorporated before you start adding your dry ingredients. If you have streaks of peanut butter when you add the flour, you’ll end up with pockets of dense cookie.
The final, crucial tip for chewy Christmas cookies satisfaction is the pulling-them time: Don’t leave them in the oven a second too long! If you bake them until a toothpick comes out totally clean, they will set up hard as rocks once they cool. Remember, the residual heat on the cookie sheet is still cooking them for those five minutes we let them rest before moving them. Watch for those slightly gooey centers!
Variations on the Traditional peanut butter blossom
Okay, once you’ve mastered the classic, that’s when the fun really starts! While I stand by the original ingredients for the absolute best experience, sometimes you want to jazz things up a little, right? Maybe you’re out of Hershey’s Kisses, or maybe you’re just feeling adventurous. The great thing about this peanut butter base is that it’s really forgiving—it handles little tweaks like a dream!
We aren’t changing the core structure here—we still want that soft, sweet peanut butter flavor—but we can absolutely play with the toppings and even the spices mixed into the dough for a completely new vibe. These are easy swaps that keep everything practical for quick holiday baking sessions.
Making Chewy Christmas Cookies Alternatives
If you want to lean into the “chewy Christmas cookies” side of things even more, here are two quick changes you can make. The first is swapping out the chocolate atop the cookie. If you don’t have Kisses, try pressing in a good-quality milk chocolate Rolo candy instead. It melts beautifully and adds a hint of caramel flavor, which is just divine with peanut butter.
Another little trick for texture is the spice level. Our main recipe keeps the spice very understated, but if you like a little warmth, try mixing 1/2 teaspoon of ground cardamom into your dry ingredients along with the flour. It sounds weird, but it adds this sophisticated, barely-there floral note that pairs amazingly well with the peanut butter. It doesn’t compromise the chewiness at all, but it definitely gives people a second wave of curiosity about what makes your cookie so special!
Storage and Keeping Your peanut butter blossom Fresh
One of the best parts about these cookies is how well they keep! Unlike some delicate shortbreads or crispy cookies, these peanut butter blossoms actually get better overnight. The moisture from the cookie base has time to redistribute, making them even softer and more flavorful the next day.
The biggest question I always get is about the chocolate. You need to make sure that chocolate kiss is fully set before you even think about stacking them up. As I mentioned before, letting them rest on that warm baking sheet for five minutes helps the chocolate firm up so it doesn’t smear everywhere when you move them. After that initial cooling, you can absolutely move them to your cooling rack to finish setting.
For storage, keep things simple. These are happy at room temperature! Find a good, airtight container—a cookie jar works great if you have one. Just be careful how you stack them. It’s best to place a single sheet of parchment paper or wax paper between layers if you’re stacking more than two cookies high. They should stay perfectly fresh and bakery-soft for about four to five days. If you’re trying to keep them longer than that, you can absolutely freeze them! Just make sure the chocolate is rock solid first. You can learn more about our policies on sharing data gathered from recipe attempts on our disclaimer page if you’re curious about that sort of thing!
Frequently Asked Questions About peanut butter blossom
I always get asked the same few things when people try this recipe for the first time—usually about timing the chocolate or achieving that perfect texture. Baking is science, but sometimes it feels like guesswork, so let’s clear up some of the common hiccups right here. Feel free to drop me a line over at the contact page if your question isn’t covered below!
Do I need to chill the peanut butter blossom dough before baking?
Nope! And this is one of the best parts about this recipe, trust me. It’s perfect for those last-minute holiday baking emergencies because we designed this to be a no-chill cookie dough situation. Chilling dough is great if you want a thicker, puffier cookie that doesn’t spread much, but chilling would actually work against the texture we are chasing here—we want that nice spread and that immediate crackle top!
If you *did* chill this dough, it would likely bake up much denser and you’d have to let it soften up quite a bit just to get those 1-inch balls rolled properly. So, no chilling required, which makes this one of the easiest cookie recipes around for quick assembly.
What if my Hershey Kiss sinks completely into the peanut butter blossom?
Oh, that just breaks my heart every time it happens! If your Kiss sinks all the way down and disappears into the cookie crater, it means one of two things: either your cookie wasn’t hot enough when you pressed the chocolate in, or you baked them too long.
If the cookie has been out of the oven for more than thirty seconds, the surface has already firmed up and acts like a solid wall, so the Kiss just sits on top and might slide off later. If you bake them too long, the entire cookie structure is too solid underneath, creating a deep hole instead of a gentle sag. Remember, we want that slightly underbaked, soft center right when they come out of the oven so the kiss dips in neatly and the outer edges support it as it melts slightly.
Estimated Nutritional Data for a Single peanut butter blossom
I always get asked about the macros, which is totally understandable! When you’re baking this many cookies, you want to keep a rough tally, right? Now, listen, I’m a baker, not a nutritionist, so please take these numbers with a giant grain of salt. They are just estimates based on standard, off-the-shelf ingredients for one cookie—that’s about 1/48th of the batch. If you use fancy organic peanut butter or a different brand of chocolate, things might shift a little bit!
We aimed for that perfect balance of flavor and texture in this recipe, and usually, that means a little bit of everything. For those of you keeping track, below I’ve laid out the key numbers based on a standard serving size of one cookie. You can always find our full data policy over at this link if you’re interested in the fine print!
- Serving Size: 1 cookie
- Calories: 140
- Total Fat: 7g (including 3g Saturated Fat)
- Carbohydrates: 18g
- Sugar: 12g
- Protein: 3g
- Sodium: 75mg
See? Not too bad for such a rich, delicious, classic holiday treat! Enjoy them, because these are definitely worth every single calorie when they taste this good.
Share Your Homemade Blossoms Experience
Now that you have a full batch of these wonderfully soft peanut butter blossoms cooling, I genuinely want to hear all about them! Did you manage that immediate chocolate press perfectly? Did you lean more toward the soft side or the extra chewy side? Your feedback really helps fellow bakers know what to expect.
Don’t be shy! Please take a moment to leave a star rating right here on the recipe card. I check those comments constantly because your successes (and yes, even your little baking oopsies!) teach me new things about this classic recipe, too. If you made a batch for a party or a family holiday, I would absolutely love to see your beautiful crackle tops!
Tag me on social media when you post a picture—I promise to share my favorites on my stories! It’s so much fun seeing all of our kitchens filled with the smell of peanut butter and chocolate. If you have any other little insider tips you discovered while making these, drop them below for others checking out the recipe page. I’ve bookmarked this page so I can follow along with all your baking adventures! You can manage your own saved recipes over on your bookmarks page if you want to save this one for later!
Happy baking, everyone!
PrintSoft and Chewy Classic Peanut Butter Blossoms
A recipe for classic peanut butter cookies topped with a chocolate kiss, focused on achieving a soft and chewy texture.
- Prep Time: 20 min
- Cook Time: 10 min
- Total Time: 30 min
- Yield: About 4 dozen
- Category: Dessert
- Method: Baking
- Cuisine: American
- Diet: Vegetarian
Ingredients
- 1 cup unsalted butter, softened
- 1 cup granulated sugar
- 1 cup packed light brown sugar
- 2 large eggs
- 1 teaspoon vanilla extract
- 1 cup creamy peanut butter
- 2 3/4 cups all-purpose flour
- 1 teaspoon baking soda
- 1/2 teaspoon baking powder
- 1/2 teaspoon salt
- 1/4 cup granulated sugar for rolling
- About 48 Hershey’s Kisses, unwrapped
Instructions
- Preheat your oven to 375 degrees F. Line baking sheets with parchment paper.
- In a large bowl, beat the softened butter, granulated sugar, and brown sugar together until creamy.
- Beat in the eggs one at a time, then mix in the vanilla extract and peanut butter until combined.
- In a separate medium bowl, whisk together the flour, baking soda, baking powder, and salt.
- Gradually add the dry ingredients to the wet ingredients, mixing on low speed until just combined. Do not overmix.
- Place the remaining 1/4 cup of granulated sugar in a shallow dish.
- Roll the dough into 1-inch balls. Roll each ball in the sugar to coat lightly.
- Place the sugared balls about 2 inches apart on the prepared baking sheets.
- Bake for 8 to 10 minutes. The edges should be set, but the centers should still look slightly soft.
- Immediately upon removing the cookies from the oven, gently press one unwrapped chocolate kiss into the center of each warm cookie.
- Let the cookies cool on the baking sheet for 5 minutes before transferring them to a wire rack to cool completely. The chocolate will set as the cookie cools.
Notes
- For the best crackle top, press the chocolate kiss into the cookie immediately after it comes out of the oven while the cookie is still hot.
- If you prefer a chewier cookie, slightly underbake them (closer to 8 minutes).
- Store cookies in an airtight container at room temperature.
Nutrition
- Serving Size: 1 cookie
- Calories: 140
- Sugar: 12
- Sodium: 75
- Fat: 7
- Saturated Fat: 3
- Unsaturated Fat: 4
- Trans Fat: 0
- Carbohydrates: 18
- Fiber: 1
- Protein: 3
- Cholesterol: 15