

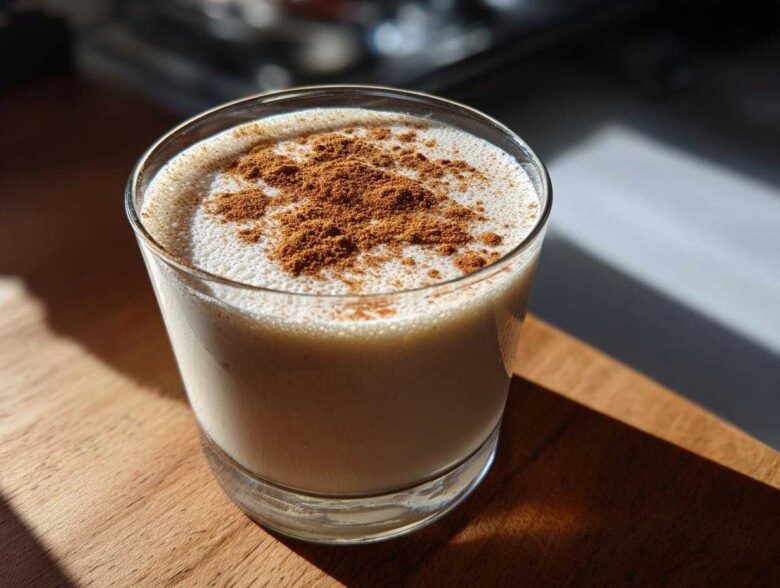
There’s just something about the holidays, isn’t there? That feeling hits you right around early December when the air gets crisp, and suddenly, all you can think about is family and tradition. For me, that feeling means reaching for the blender because it’s time to make my authentic Coquito. This isn’t some adaptation I found online last year; this is *the* Puerto Rican holiday drink that my mother insists is the best she’s ever tasted, and honestly, she’s right!
I must have made hundreds of batches over the years, tweaking and perfecting it until I landed on this combination that just sings. If you’re tired of runny drinks or ones that taste too sweet, stop scrolling right now. This homemade Coquito is packed with rich coconut flavor, perfectly spiced, and has that signature creaminess that makes everyone go back for seconds, or thirds, I won’t judge! Trust me, once you master this recipe, you won’t need another one. We’re talking creamy, we’re talking spicy, and we’re talking pure holiday magic in a glass. I’m so happy to finally share the exact formula with you all. You owe it to yourself this year to see what a truly great Coquito tastes like. For more on our commitment to sharing trusted recipes, feel free to check out our About Us page.
Why This is the Best Coquito Recipe You Will Ever Make
I know, I know, everyone says their recipe is the “best,” but stick with me here. This particular Coquito recipe is the one that wins the family taste test every single year. It’s all about achieving that beautiful, velvety mouthfeel without needing any eggs, which can sometimes complicate things or change the texture. We keep it purely coconut-focused and perfectly spiced, which is why it’s always such a crowd-pleaser at our parties.
This version focuses on incredible richness. You get that warm hug from the spices and the perfect amount of sweetness counterbalanced by the spirit. It’s simply the most reliable way I’ve found to make truly authentic Coquito.
Key Benefits of Our Homemade Coquito
- It blends up incredibly smooth; you won’t find any graininess here, I promise.
- The balance between the cinnamon, nutmeg, and rum is absolutely spot-on—it’s festive, not sharp.
- It relies on canned milks and coconut products, making the rich texture easy to achieve every time.
- It sets perfectly when chilled, almost like a thin, pourable coconut custard.
Gathering Ingredients for Authentic Coquito
Okay, listen up, because this is where the magic starts to happen—it’s all in the ingredients! If you want that deeply satisfying, truly creamy coconut rum cocktail experience, you cannot skimp on what goes into that blender. This traditional Puerto Rican beverage relies heavily on layers of coconut and milk solids to get that signature thickness that makes it famous.
I learned the hard way that you absolutely need both full-fat coconut milk *and* cream of coconut. They serve different jobs! The coconut milk gives it body, but the cream of coconut (you know, the sweet stuff, like Coco Lopez) is what brings that essential, velvety layer we all crave. Don’t try to substitute one for the other, or you’ll end up with something watery. When you gather these items, make sure everything is room temperature or slightly cool before you blend it all up!
Essential Components for Coquito
- One 13.5 ounce can of full-fat coconut milk (this is the one you need for richness!)
- One 15 ounce can of cream of coconut (this is the sweetener and the velvety base).
- One 14 ounce can of sweetened condensed milk for that perfect dessert sweetness.
- One 12 ounce can of evaporated milk for body.
- About 1 cup of white rum (you can tweak this later, but start with a good, clean white rum).
- 1 teaspoon of pure vanilla extract.
- 1/2 teaspoon of ground cinnamon, plus extra for sprinkling on top later!
- A little pinch of ground nutmeg and ground cloves to make it truly warm and festive.
Step-by-Step Instructions: How to Make Coquito
Making this truly authentic Coquito is surprisingly easy! Honestly, about 90% of the work is just letting the blender do its thing and then hiding the bottles in the back of the fridge, away from grabby hands. We start by building that creamy foundation. The goal here is zero lumps and a completely homogenous mixture before we even think about adding that glorious rum.
If you’re worried about your blender overheating—which mine definitely used to do before I upgraded—I have a little trick for you: add the alcohol last and just pulse, or better yet, stir it in by hand after everything else is totally smooth. That way, you don’t risk breaking down the dairy solids too much with high-speed blending once the alcohol is present. Trust me, this way ensures the silkiest possible result for your Coquito.
Blending the Base of Your Spiced Coconut Beverage
First things first, get all those lovely canned liquids into your blender jar. That means the full-fat coconut milk, the sweet cream of coconut, the sweetened condensed milk, and the evaporated milk. Pour them all right in there.
Next come the warming spices that make this tradition so special: the vanilla extract, the ground cinnamon, the nutmeg, and that tiny whisper of clove. You’re going to blend this mixture on medium speed. Keep going until it looks absolutely uniform—like liquid velvet. We’re talking a solid minute or two here, making sure every speck of potential graininess is gone. You want this base to be perfectly smooth before we move on.
Adding Rum and Chilling Your Coquito
Now for the fun part! Pour in your cup of white rum. If you’re nervous about blending it, just pulse the blender a couple of times until it’s incorporated, or pour it in the jar after you transfer the mix to a big bowl, and stir it in with a whisk. It’s totally up to you!
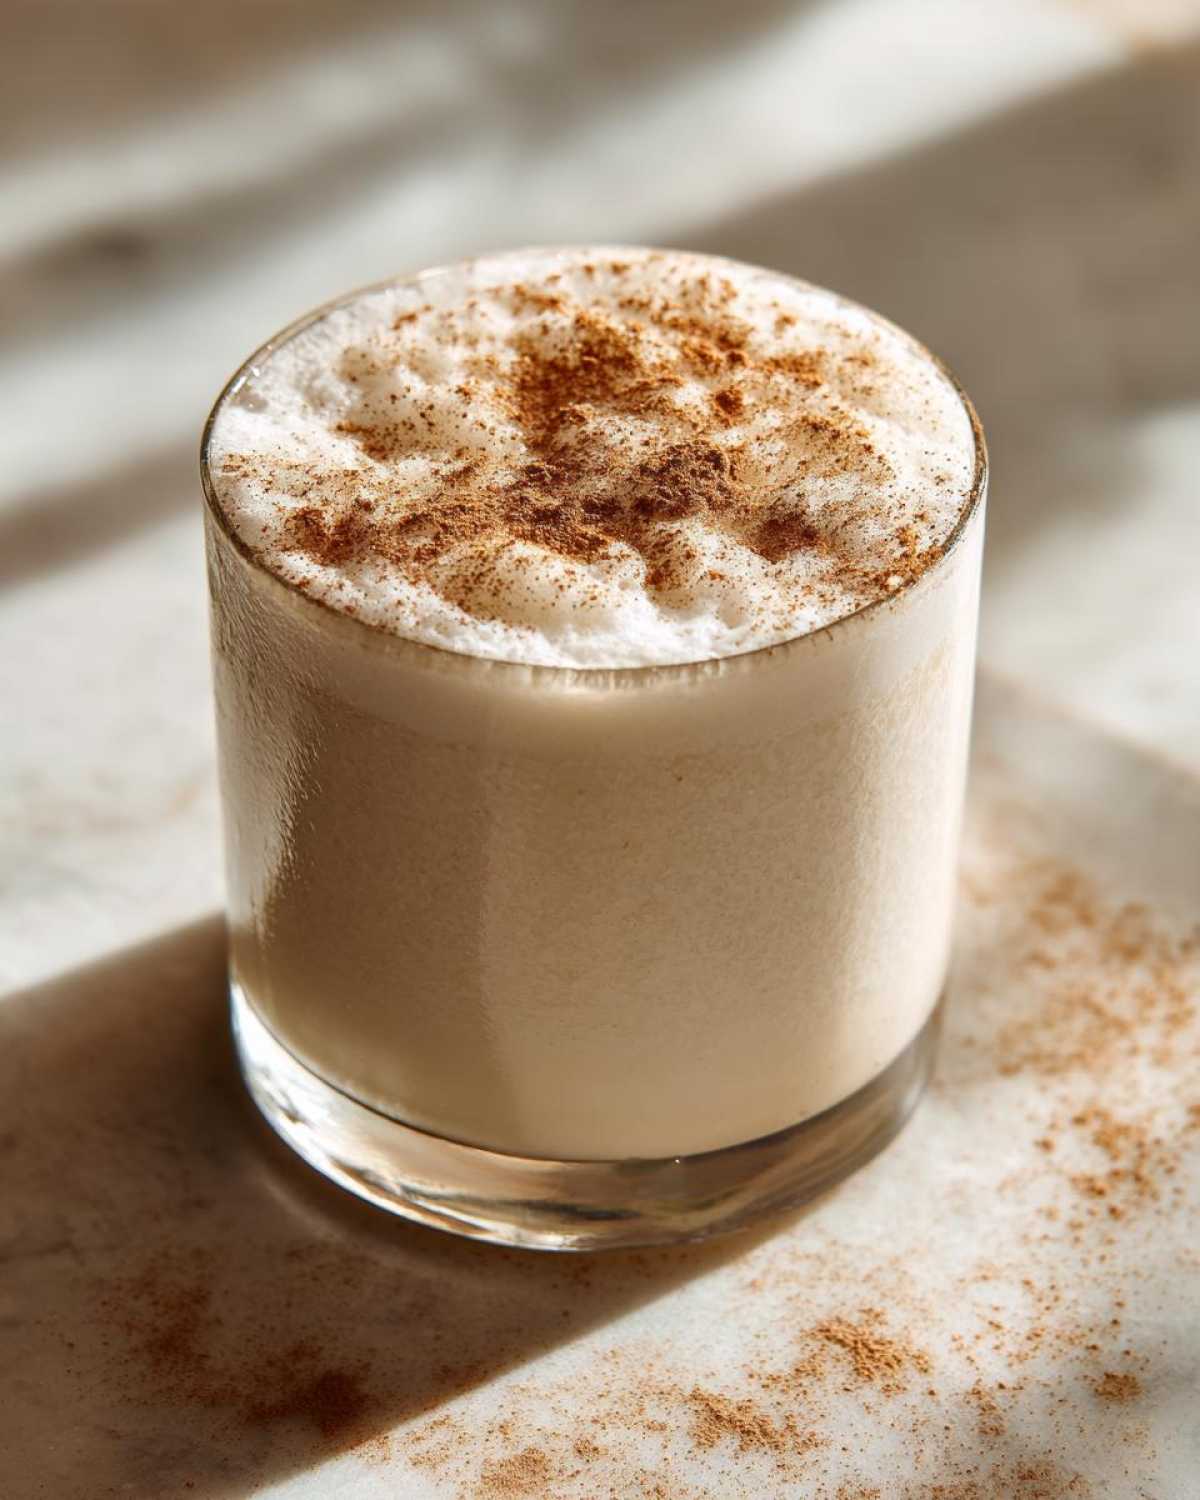
Once it’s mixed, transfer the whole batch right into clean glass bottles or jars. Seal them up tight. This next step is non-negotiable for the *best* flavor: you have to refrigerate it for at least four hours. Seriously, if you can wait overnight, the spices completely bloom, and the texture firms up perfectly. When you’re ready to serve, make sure it’s ice cold and top each glass with a tiny sprinkle of fresh cinnamon before enjoying your holiday treat!
Tips for Success When Making Coquito
Making a fantastic batch of Coquito isn’t just about dumping ingredients in a jar; it’s about knowing when to tweak things based on what you have on hand or what you prefer! I’ve learned a few things over the years experimenting with this recipe, especially when I run out of one specific canned milk or decide I want a stronger flavor profile. Don’t freak out if your local store is out of white rum; there are easy fixes!
The main goal is that smooth, luscious texture, so any adjustment you make should keep that richness in mind. Also, everyone likes their drink a little different—some people like it strong, some like it thick. This is your famous holiday cocktail, so make it yours, but use these tips as your safe starting point!
Rum Substitutions and Texture Adjustments
So, you grabbed dark rum instead of white rum? No problem at all! Dark rum gives your Coquito a richer, slightly deeper, maybe even a hint of caramel flavor profile. It’s delicious, just different from the brightness of white rum. Just switch it one-for-one; you won’t need to change anything else in the recipe.
Now, let’s talk texture. Are you finding your batch a little too thin for your liking? Maybe the can of evaporated milk you bought was a little thinner than usual. Here’s the secret: simply use a bit less evaporated milk next time! If you use three-quarters of the can instead of the full 12 ounces, you’ll get a much thicker, almost spoonable consistency—perfect if you love that rich mouthfeel.
And in case you have family who can’t have spirits, remember you can easily make this a non-alcoholic treat. Just skip the rum entirely! To keep the volume right, pour in an extra half-cup of something neutral. I usually reach for an extra splash of water or, even better, an extra bit of that yummy evaporated milk to keep the creaminess factor high. It turns into a fantastic coconut eggnog recipe substitute!
Serving Suggestions for Your Tropical Holiday Cocktails
Once your batch is perfectly chilled—and I mean *ice-cold*, this stuff tastes best when it’s practically slushy—you have to make it look as good as it tastes! Presentation is everything when you’re the host of the holiday party, right? Don’t just pour it into any old glass!
I usually pull out my prettiest stemmed glasses, maybe something small like a coupe or small wine glass. People tend to sip this slowly because it’s so rich, so serving it in smaller portions is smart!
Garnishing and Presentation Ideas
- Serve it straight from the fridge after it’s had a good shake—refrigeration is key to the texture!
- Instead of just ground cinnamon dust, try placing a whole cinnamon stick right in the glass for guests to stir with.
- For an extra festive touch, I sometimes grate a tiny bit of fresh nutmeg right over the top just before serving. The smell is amazing!
- You could even line the rim lightly with some crushed pecans if you aren’t worried about nut allergies.
Storage and Reheating Instructions for Homemade Coquito
This is great news for all you party planners out there: once you make a huge batch of this perfect Coquito, you don’t have to drink it all in one night! In fact, it tastes even better the next day, and honestly, it lasts for a good while in the fridge. You made such a rich, perfect Puerto Rican holiday drink, you deserve to enjoy it all season long.
The key is keeping it sealed up tight under refrigeration. Since we used zero eggs in this recipe, it’s actually quite stable, unlike some other creamy holiday drinks that spoil fast. You definitely want to use airtight glass bottles or jars, just like I mentioned when we were bottling it up.
If you open a bottle a week after you make it, don’t panic if you see a little layer of coconut fat sitting up top—that’s totally normal! Those fatty solids might solidify a bit or separate slightly when the drink is super cold. All you need to do is grab the bottle, put the cap on tight, and give it a really good, vigorous shake. That’s usually enough to re-emulsify everything and bring back that luscious, smooth texture we worked so hard to achieve. If it’s been sitting for ages, a good shake will restore its full glory before serving it ice-cold again!
Variations on the Classic Coquito Recipe
Look, as much as I preach about sticking to tradition, sometimes you just want to mix things up for the Christmas party, right? It’s fun to offer guests something familiar but with a little surprise twist! Since this base recipe is so wonderfully creamy and robust, it stands up beautifully to adding new flavor profiles. It’s just a really solid foundation for experimentation, which is what makes it so adaptable!
We stick to the classic creamy coconut flavor most of the time because that’s what everybody expects when they come over, but I always like to have one experimental batch going in the back of the fridge just for myself! It’s a great way to use up leftover spirits or try out new warming spices if you want to skip the nutmeg one year.
Making Pistachio Coquito
One of the most exciting variations I’ve tried lately is the green one—yes, I’m talking about Pistachio Coquito! It sounds fancy, but it’s incredibly simple to pull off using the steps we already perfected for the classic recipe. You’re basically following the exact same process: blend your milks and spices until they are super smooth.
The key here is the pistachio flavor. You have a couple of options, and I prefer the paste method because it gives a richer flavor without adding too much liquid. You’ll want to grab a high-quality pistachio paste—the kind used for baking—and gently whisk about 1/4 cup into your final blended mixture before you chill it. If you can’t find paste, a teaspoon of high-quality pistachio extract mixed with a few drops of green food coloring (if you want that signature color!) works in a pinch. Taste as you go, though! Pistachios can be strong, so you want to enhance the base, not drown out that beautiful coconut flavor.
Frequently Asked Questions About Coquito
I get so many messages asking about the little details when folks try to make their first batch of this amazing Puerto Rican holiday drink. That’s wonderful! Getting the small stuff right makes all the difference between a good drink and a truly great one. Here are some of the things I hear most often when people are getting ready to blend up their Coquito.
Can I make Coquito without eggs?
Absolutely, you can! In fact, the recipe I shared with you today doesn’t use any eggs at all! That’s one of the things that makes ours so reliable and smooth compared to some older recipes or heavy coconut eggnog recipes you might see floating around. My formula relies entirely on the fats and solids from the three types of canned milk we use to create that luxurious, thick texture. So if you’re worried about raw egg worries, you can skip those concerns entirely with this blend!
How long does homemade Coquito last?
This is the best part about using canned dairy products instead of fresh cream—it lasts! Because we keep everything cold and sealed tight in the refrigerator, this homemade Coquito should be perfectly good for up to two weeks. I’ve pushed it to almost three weeks once before, but I always recommend sticking to that two-week window just to be safe and make sure you’re serving it at its peak flavor and texture. Remember what I said: if you see a little layer on top after a few days, just give that bottle a fierce shake!
If you have any questions about the ingredients or process, please remember to check out our full disclaimer here on the site. I always try to be totally upfront about what goes into my kitchen!
Nutritional Snapshot of This Creamy Coconut Rum Cocktail
Okay, I know we all love this drink because it tastes like a vacation crammed into a glass, but let’s be real—it’s definitely a treat! Since this is a rich, sweet, and spirit-forward beverage, it does pack a little punch, nutritionally speaking. I certainly don’t serve this every day! I pulled these numbers together so you know exactly what you’re pouring when you reach for that chilled bottle of homemade goodness.
Please remember that these estimates are based on the standard can sizes I use for this recipe and a set amount of rum. If you load up on extra liquor or use a different brand of condensed milk, these numbers might shift a little. Think of this as a reliable baseline for your creamy coconut rum cocktail.
Here is the estimated breakdown per 1-cup serving size:
| Component | Amount |
|---|---|
| Calories | 550 |
| Sugar | 65g |
| Fat | 30g |
| Saturated Fat | 25g |
| Protein | 8g |
| Cholesterol | 45mg |
If you are interested in learning more about how we handle user information on the site, you can always check out our Privacy Policy. Enjoy responsibly!
Share Your Coquito Experience
Alright, now that you have the secrets to the absolute best Coquito, I want to hear all about it! You made it; you chilled it; now it’s time to enjoy it and tell the world how amazing it turned out.
Seriously, please let me know what you think! Did you try the white rum, or did you sneak in some dark rum for a little kick? That’s the important feedback I need to know. Don’t be shy about it.
If you followed my steps to make this amazing Puerto Rican holiday drink, drop a rating down below. Five stars, please! It helps other people find this reliable recipe!
And I absolutely live for seeing your pictures! Snap a photo of your beautiful, creamy glass—maybe you garnished it with that cinnamon stick like I suggested—and tag me on social media. Seeing your festive cocktails warms my heart more than the spices in the drink itself. Enjoy that tropical holiday cheer, everyone!
PrintTraditional Puerto Rican Coquito Recipe
Make authentic, creamy Coquito, a traditional Puerto Rican holiday cocktail made with coconut milk, cream, rum, and warm spices.
- Prep Time: 10 min
- Cook Time: 0 min
- Total Time: 10 min
- Yield: About 6 cups
- Category: Beverage
- Method: Blending
- Cuisine: Puerto Rican
- Diet: Vegetarian
Ingredients
- 1 (13.5 oz) can full-fat coconut milk
- 1 (15 oz) can cream of coconut (like Coco Lopez)
- 1 (14 oz) can sweetened condensed milk
- 1 (12 oz) can evaporated milk
- 1 cup white rum (adjust to taste)
- 1 teaspoon vanilla extract
- 1/2 teaspoon ground cinnamon, plus extra for garnish
- 1/4 teaspoon ground nutmeg
- Pinch of ground cloves
Instructions
- Combine the coconut milk, cream of coconut, sweetened condensed milk, and evaporated milk in a blender.
- Add the vanilla extract, ground cinnamon, nutmeg, and cloves to the blender.
- Blend the mixture until it is completely smooth and well combined.
- Pour in the white rum. Pulse the blender a few times to mix, or stir it in by hand if you prefer not to blend the alcohol.
- Taste the mixture and add more rum if you want a stronger drink.
- Pour the Coquito into glass bottles or jars.
- Refrigerate for at least 4 hours, or preferably overnight, to allow the flavors to meld.
- Serve chilled, garnished with a sprinkle of ground cinnamon on top.
Notes
- For a thicker texture, reduce the amount of evaporated milk slightly.
- You can substitute the white rum with dark rum for a deeper flavor profile.
- If you want a non-alcoholic version, omit the rum completely and add 1/2 cup of water or extra evaporated milk.
- Store sealed Coquito in the refrigerator for up to two weeks.
Nutrition
- Serving Size: 1 cup
- Calories: 550
- Sugar: 65
- Sodium: 150
- Fat: 30
- Saturated Fat: 25
- Unsaturated Fat: 5
- Trans Fat: 0
- Carbohydrates: 55
- Fiber: 2
- Protein: 8
- Cholesterol: 45