

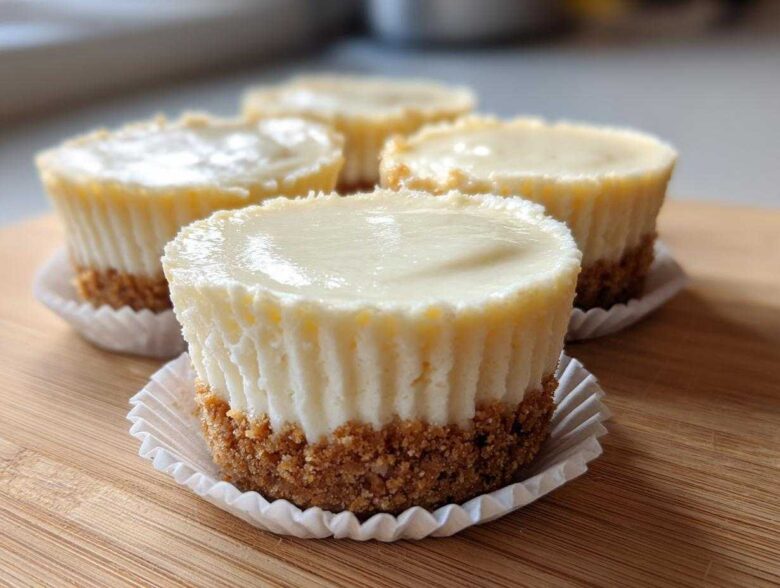
Oh my gosh, stop everything you are doing right now! If you ever thought cheesecake was too rich, too fussy, or just too much effort for a weeknight, you haven’t met my **mini cheesecake** bites yet. Seriously, friends, these are the ultimate portion-controlled dessert—perfect little mouthfuls of heaven.
I remember the first time I tried making these. I dumped them onto a platter for a gigantic book club meeting, and they vanished so fast I barely got to try one! That’s how you know you’ve nailed a recipe. These are without a doubt the easiest, creamiest little wonders you will ever whip up. We dive into why they succeed later on, but trust me, you want this simple cheesecake recipe in your life immediately. Head over to my ‘About Me’ page if you want to know more about my baking philosophy!
Why This is the Best Mini Cheesecake Recipe You Need (E-E-A-T)
Forget those giant, cracking cheesecakes that take forever to bake and chill! The brilliance of these individual cheesecakes comes down to three things: texture, simplicity, and size. You get that dense, rich flavor you expect from a New York style dessert, but without the massive headache.
I use this very specific method—especially how I treat the eggs—because it guarantees a creamy cheesecake center every single time. You don’t need a water bath! It’s truly a simple cheesecake recipe that gives you professional results, making them perfect party desserts for when you need a reliable crowd-pleaser.
Key Features of These Bite Sized Cheesecake Treats
- Guaranteed Creaminess: We use sour cream alongside room-temperature cream cheese, which knocks out any graininess so you get that velvety smooth mouthfeel.
- Perfect Crust Stability: The graham cracker crust is pressed firmly and baked for just a few minutes before the filling goes in, meaning these little guys stay sturdy!
- Portion Controlled Dessert Heaven: No slicing required! Everyone gets a perfect little slice, and you don’t have to worry about messy serving spoons.
- No Cracked Tops: Thanks to the gentle, slow cool-down process we use right in the oven, your tops stay smooth and ready for your favorite toppings.
Gathering Ingredients for Your Mini Cheesecake
Okay, let’s talk shopping! Getting the right stuff is half the battle when you’re going for that deeply satisfying, rich flavor. Don’t skip on quality here, especially with the main star. When we talk **creamy cheesecake**, we are talking about the cream cheese–it needs to be good, full-fat stuff, not the low-fat versions, trust me on that one.
We are making 12 incredible little guys, so buy accordingly! I’ve broken the list down by what goes where, but realistically, it’s just crust stuff and filling stuff. Keep everything measured out before you start mixing—it makes the whole process so much smoother when you’re moving fast.
Crust Components: The Cheesecake with Graham Cracker Crust Base
The foundation has to be strong, or your **individual cheesecakes** will be wobbly messes! We only need three things here, and it comes together in about two minutes.
- 1 1/2 cups graham cracker crumbs (I usually crush them myself in a zip-top bag—it’s faster than cleaning the food processor!)
- 1/4 cup granulated sugar
- 6 tablespoons unsalted butter, melted (make sure it’s fully melted, not just soft!)
When you mix these, you want it to look like wet sand. Firmly press about a tablespoon of that mixture into the bottom of each paper liner. Press it down hard! Use the back of a spoon or the bottom of a small drinking glass to really pack it in there.
Filling Ingredients for Perfect Mini Cheesecake Bites
This is where the magic happens. Remember my expert tip? Make sure both your cream cheese and your eggs have been sitting out on the counter for at least an hour before you even think about turning on the mixer. Cold ingredients lead to lumps, and we do **not** want lumps!
- 16 ounces cream cheese, softened
- 1/2 cup granulated sugar
- 2 large eggs (room temperature, remember?)
- 1 teaspoon vanilla extract
- 1/4 cup sour cream (this is my secret weapon for extra velvety texture!)
Having everything at the right temperature ensures that when you beat that cream cheese smooth, you incorporate tiny, perfect air pockets, setting you up for the best **mini cheesecake bites** imaginable.
Step-by-Step Guide to Making Easy Mini Cheesecakes
Okay, now that we have our crust ready and our main ingredients at room temperature, let’s get these sweet little things into the tins. This process is super straightforward, but timing is everything, especially when we get to the cooling part. That slow cool-down is honestly the secret handshake for amazing, crack-free **individual cheesecakes**.
Remember, we are moving fast but mixing gently. We want smooth, combined batter, but we definitely don’t want to over-aerate it, which leads to domes or—gasp—cracks!
Preparing the Crust and Preheating
First thing: get your oven set to 325°F (160°C). While it heats up, line your standard 12-cup muffin tin with those nice paper liners; they make cleanup ridiculously easy. Once your crumbs, sugar, and melted butter are mixed like wet sand, use a measuring spoon to scoop about 1 tablespoon into each cup. Now, grab the back of a metal spoon or the base of a small glass and press that crust down firmly. I mean *firmly*! You want a solid little base for the filling.
Mixing the Creamy Cheesecake Filling
Take your freshly beaten cream cheese and sugar—it should be light and fluffy now. Add those eggs one at a time. This is important! Mix the first egg in until it’s *just* incorporated, scrape the bowl, and then add the next. Don’t try to beat it aggressively once the eggs are in there. Once the eggs are mixed, gently stir in the vanilla extract and the sour cream until everything is smooth. Don’t even think about turning the mixer up high again! That overmixing traps too much air.
Baking and Cooling for the Best Mini Cheesecake Texture
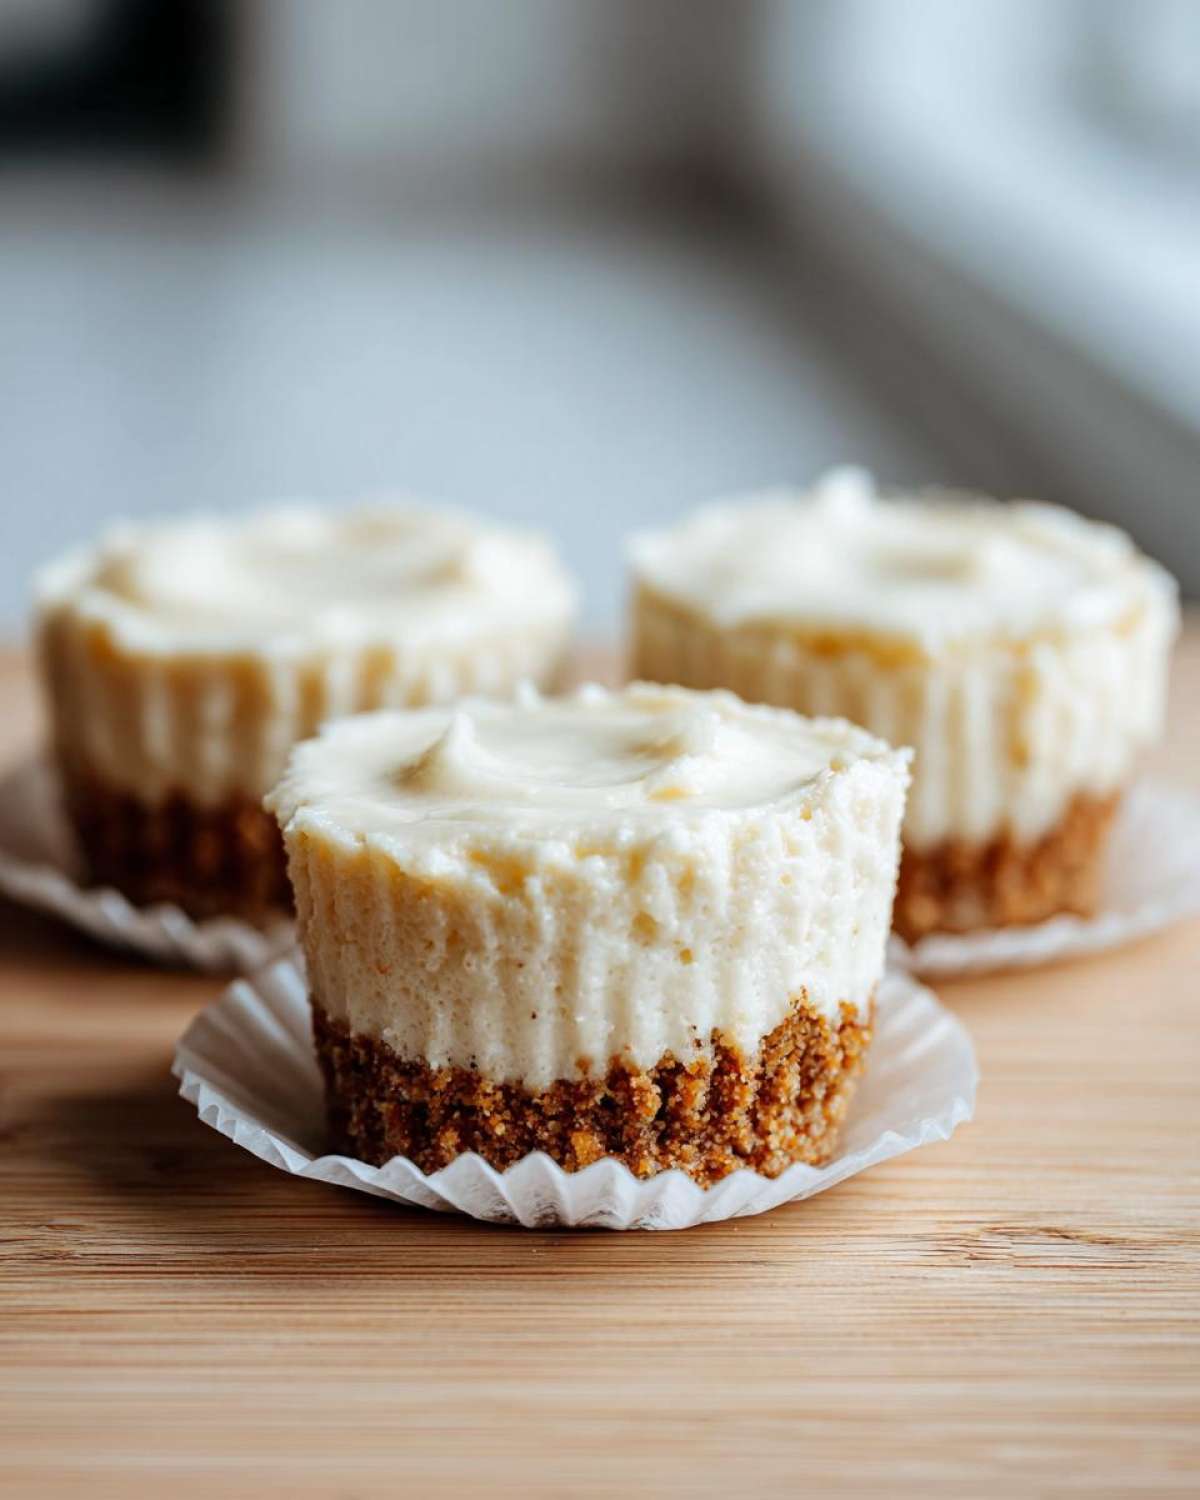
Pour that gorgeous, thick batter right over your crusts, filling them about three-quarters full. Pop them into the oven for about 18 to 20 minutes. Pull them out when the edges look set, but the very center still has a tiny, adorable wobble to it. Now for the crucial step for the **best mini cheesecake** texture: Turn the oven off, crack the door open just a tiny bit, and leave them inside for a full 30 minutes. This slow temperature reduction stops them from shrinking or cracking. After that, let them chill on a wire rack until they are totally cool before tucking them into the fridge for the minimum four hours. Patience earns you the creamiest result!
If you need to review the legal terms about using this recipe, you can check the Terms and Conditions here.
Cheesecake Toppings Ideas for Your Mini Cheesecake
Alright, once these beautiful little **individual cheesecakes** are perfectly chilled—and trust me, you must wait that four hours, it’s worth it!—it’s time for the fun part: dressing them up! This is where you can turn a single recipe into a dozen different **party desserts**. Honestly, the baked cheesecake base is only the canvas; the toppings are the paint!
If you’re serving these right away, you might just need a quick sprinkle, but if you’re making them for a special holiday spread, you’ve got to get a little creative. We want maximum visual impact and flavor complexity when it comes to **cheesecake toppings ideas**!
Simple Fruit and Sauce Cheesecake Toppings Ideas
You can never go wrong with fresh fruit, but I like to add a little simmer to mine to make them more luxurious. Don’t just plop store-bought jam on top; cook it for five minutes! It makes all the difference.
- Quick Berry Reduction: Toss a handful of fresh or frozen mixed berries with a tablespoon of sugar and a tiny squeeze of lemon juice in a small pan. Cook until they break down and become syrupy—maybe five minutes. Spoon a little bit over each chilled cheesecake. Delicious!
- Tangy Lemon Curd: If you buy good quality lemon curd, you don’t even have to cook anything. It offers such a bright, tart contrast to the rich sweetness of the filling.
- Silky Chocolate Ganache: This sounds fancy, but it’s so easy. Just heat up heavy cream until it’s simmering, pour it over chopped semi-sweet chocolate, let it sit for five minutes, then whisk until glossy. Drizzle it on top—it sets up almost perfectly at room temperature.
Flavor Variations: Creating New York Style Mini Cheesecakes or Oreo Mini Cheesecakes
If you want to lean into a specific flavor profile, you can bake it right into the batter, which is even better than just topping it! These adaptations are amazing when you want to offer variety on a dessert table.
For incredible **New York Style Mini Cheesecakes**, you need that hint of bright citrus. Before you add the eggs to the filling mixture, add the zest of one whole lemon into the cream cheese mixture. You can also substitute the vanilla extract for a teaspoon of good quality almond extract for a slightly different profile. They stay just as creamy, but with that classic New York zing!
If you or your guests are chocolate cookie fanatics, you absolutely must try making **Oreo Mini Cheesecakes**. Instead of using just graham crackers for the crust, swap out half of the graham cracker crumbs for finely crushed Oreos, including the creamy filling. For an extra punch, you can fold about a half cup of crushed Oreos right into the filling *after* you mix in the eggs and sour cream. Just be gentle when folding!
Tips for Perfect Portion Controlled Dessert Results
Listen, even with the best recipe in the world, sometimes things try to go sideways. That’s why I want to share a couple of my hard-won tips for making sure your **individual cheesecakes** come out looking exactly like they do in the pretty pictures. The biggest fear is always cracking, right? Remember that trick I mentioned about turning the oven off and letting them sit inside? That slow cooldown is your #1 defense against cracks because it prevents the rapid temperature change that causes shrinkage.
Another thing that drives me crazy is a soggy crust. If you press that crust mixture down really, really tightly, you create a barrier against the filling. Plus, baking it alone for those first few minutes helps it set up before the wet batter hits it. If you follow those two rules—firm crust and slow cooling—you’ve basically guaranteed success for all these **portion controlled dessert** snacks!
If you ever need to check the site’s policies regarding recipes or tips, please read the Disclaimer page.
Storage and Serving Suggestions for Party Desserts
Storing these little guys is unbelievably easy, which makes them the ultimate win for anyone prepping **party desserts** ahead of time! Once they are fully chilled—and please give them that minimum four-hour nap in the fridge—they keep beautifully in an airtight container for up to five days.
Seriously, they taste even better on day two! If you’re making a huge batch, you can freeze them too! Just place the **mini cheesecake** in a freezer-safe bag after they are fully set. They thaw perfectly on the counter in about an hour when you are ready to serve them. I actually prefer serving them semi-chilled, just slightly warmer than fridge-cold, for the absolute best creamy texture.
Frequently Asked Questions About Mini Cheesecake Recipe
I get so many questions every time I post these, which just proves how much everyone loves making **bite sized cheesecake** snacks! Here are the things I hear most often when readers try to tackle this simple cheesecake recipe for the first time. Don’t worry, most issues are super easy to fix!
Can I make a No Bake Mini Cheesecake version?
That’s a great question! While these baked beauties are what I recommend for that classic, rich flavor, you absolutely *can* make a **no bake mini cheesecake**—it just requires a switch-up. Since we aren’t using eggs to set the filling, you need an extra stabilizer. Usually, that means swapping out the sour cream for an extra 4 ounces of cream cheese combined with about a half-cup of heavy whipping cream beaten to soft peaks, which you fold in at the very end. The crust base stays the same, but you have to chill those **mini cheesecake bites** for at least six hours, maybe even overnight, to get them firm enough to serve as proper **individual cheesecakes**!
What size muffin tin works best for these individual cheesecakes?
I always use a standard 12-cup muffin tin. The measurements provided—1 1/2 cups of crumbs for the crust and enough filling for 12—are perfectly balanced for that size. If you use mini-muffin tins (which makes 24 tiny **miniature desserts**), you’ll need to cut the bake time way down—maybe just 12 to 14 minutes—and keep a close eye on them.
My crusts always stick! How do I easily release my cheesecake cupcakes?
Ugh, sticking is the worst, especially when you’re making pretty **cheesecake cupcakes** for a crowd! My number one tip is to make sure you use good quality paper liners, and press that crust down really well! If you’re worried, you can line the entire muffin tin with large aluminum foil liners instead, which leaves you a little “sling” to lift the whole set cheesecake out at once. That foil sling trick is a lifesaver for clean removal!
Do these freeze well for making party desserts in advance?
Yes, they freeze like a dream! Once they are completely set in the fridge, pop the whole liner out of the tin and place them directly into a large freezer-safe, airtight container or bag. I usually put a small piece of parchment paper between the layers if I stack them. They keep beautifully for up to two months. Thaw them in the fridge overnight, and they are ready to go!
If you have any questions about privacy or cookies on the site, please see the Cookie Policy.
Understanding the Nutrition in Your Mini Cheesecake Bites
Now, I know some of you are reading this thinking, “Wow, that looks amazing, but what am I actually eating here?” Because these are such great **party desserts** and perfect for that craving, I wanted to be upfront about what’s inside—even if they are technically **portion controlled dessert** snacks!
I’ve pulled together the estimated nutritional breakdown based on the standard ingredients listed in the recipe above. Remember, this is just an approximation, because nobody measures their cream cheese down to the gram, right? How much sugar you add to your berries or what brand of graham crackers you use makes a huge difference!
So, for one single, delicious **mini cheesecake bite**, here’s what the math looks like:
- Serving Size: 1 cheesecake
- Calories: 250
- Sugar: 18g
- Sodium: 180mg
- Fat: 16g (with 10g Saturated Fat)
- Carbohydrates: 22g
- Protein: 5g
- Cholesterol: 55mg
This is just a guideline, folks! If you top yours with a huge dollop of salted caramel, that number is going to climb. But honestly, if you are sticking to the base recipe and maybe a few fresh raspberries, this is a fantastic, slightly indulgent treat.
For full details on our site guidelines and how we handle your information, please take a peek at our Privacy Policy!
Share Your Thoughts on This Simple Cheesecake Recipe
Whew! We made it to the end, and now I’m already thinking about making another batch because they are just that addictive. I truly hope you give these **easy mini cheesecakes** a try the next time you need amazing **party desserts** that look way fancier than the effort they take!
I put so much love and testing into making sure this **simple cheesecake recipe** stayed true to that classic, rich, New York style flavor while slimming down on the fuss. Your feedback helps me know I’m on the right track and keeps this recipe alive for other bakers!
So, when you finish chilling yours and you take that first bite of that **creamy cheesecake**, please come back and tell me all about it! You can rate the recipe right here on the page—I’m hoping for five stars, wink wink! And more importantly, what topping did you try first?
Did you stick to the classics like fresh strawberries, or did you go wild with something unexpected? Let me know your favorite topping combinations in the comments below—I’m always looking for new ideas for the next time I bake up a batch of these little gems! And hey, if you have any more questions beyond what we covered in the FAQs, drop those in the comments too. You can always reach out to me directly using the Contact Form as well!
PrintEasy Mini Cheesecake Bites
Make creamy, bite-sized cheesecakes with a simple graham cracker crust. This recipe is perfect for parties or portion control.
- Prep Time: 20 min
- Cook Time: 20 min
- Total Time: 4 hours 40 min
- Yield: 12 servings
- Category: Dessert
- Method: Baking
- Cuisine: American
- Diet: Vegetarian
Ingredients
- 1 1/2 cups graham cracker crumbs
- 1/4 cup granulated sugar
- 6 tablespoons unsalted butter, melted
- 16 ounces cream cheese, softened
- 1/2 cup granulated sugar
- 2 large eggs
- 1 teaspoon vanilla extract
- 1/4 cup sour cream
Instructions
- Preheat your oven to 325°F (160°C). Line a 12-cup standard muffin tin with paper liners.
- Combine graham cracker crumbs, 1/4 cup sugar, and melted butter in a bowl. Mix until the crumbs are evenly moistened.
- Press about 1 tablespoon of the crumb mixture firmly into the bottom of each muffin liner to form the crust.
- In a separate large bowl, beat the softened cream cheese and 1/2 cup sugar with an electric mixer until smooth.
- Beat in the eggs one at a time, mixing just until combined after each addition.
- Mix in the vanilla extract and sour cream until the batter is smooth. Do not overmix.
- Spoon the batter evenly over the crusts, filling each liner about three-quarters full.
- Bake for 18 to 20 minutes, or until the edges are set and the centers are slightly jiggly.
- Turn off the oven and crack the door open slightly. Let the cheesecakes cool in the oven for 30 minutes.
- Remove from the oven and cool completely on a wire rack. Chill in the refrigerator for at least 4 hours before serving.
Notes
- For a New York style flavor, use full-fat cream cheese and add 1 teaspoon of lemon zest to the batter.
- Top with fresh berries, chocolate ganache, or caramel sauce after chilling.
- If you prefer Oreo mini cheesecakes, replace half the graham cracker crumbs with finely crushed Oreo cookies.
Nutrition
- Serving Size: 1 cheesecake
- Calories: 250
- Sugar: 18
- Sodium: 180
- Fat: 16
- Saturated Fat: 10
- Unsaturated Fat: 6
- Trans Fat: 0
- Carbohydrates: 22
- Fiber: 1
- Protein: 5
- Cholesterol: 55