

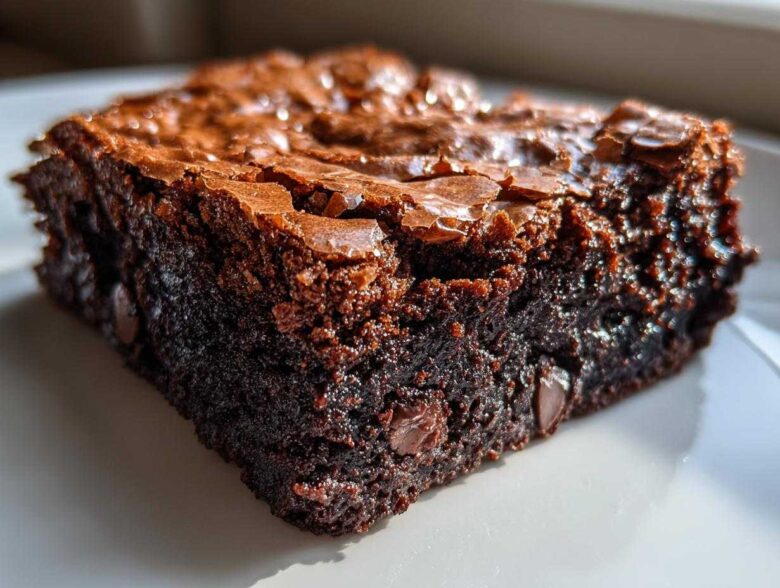
Oh, chocolate! Sometimes only a dense, intensely rich square of pure cocoa goodness will do the trick, right? I get it. For years, I chased that mythical perfect bar—the one that melts in your mouth with that impossibly fudgy texture but somehow still manages to sport that beautiful, shiny, crackly top. After what felt like a thousand batches of crumbly messes and greasy disappointments, I finally cracked the code. Trust me when I say that these **Brownies** are the ultimate baked good. Forget those cakey imposters; this is the real deal, rich chocolate goodness that makes you close your eyes when you take that first bite.
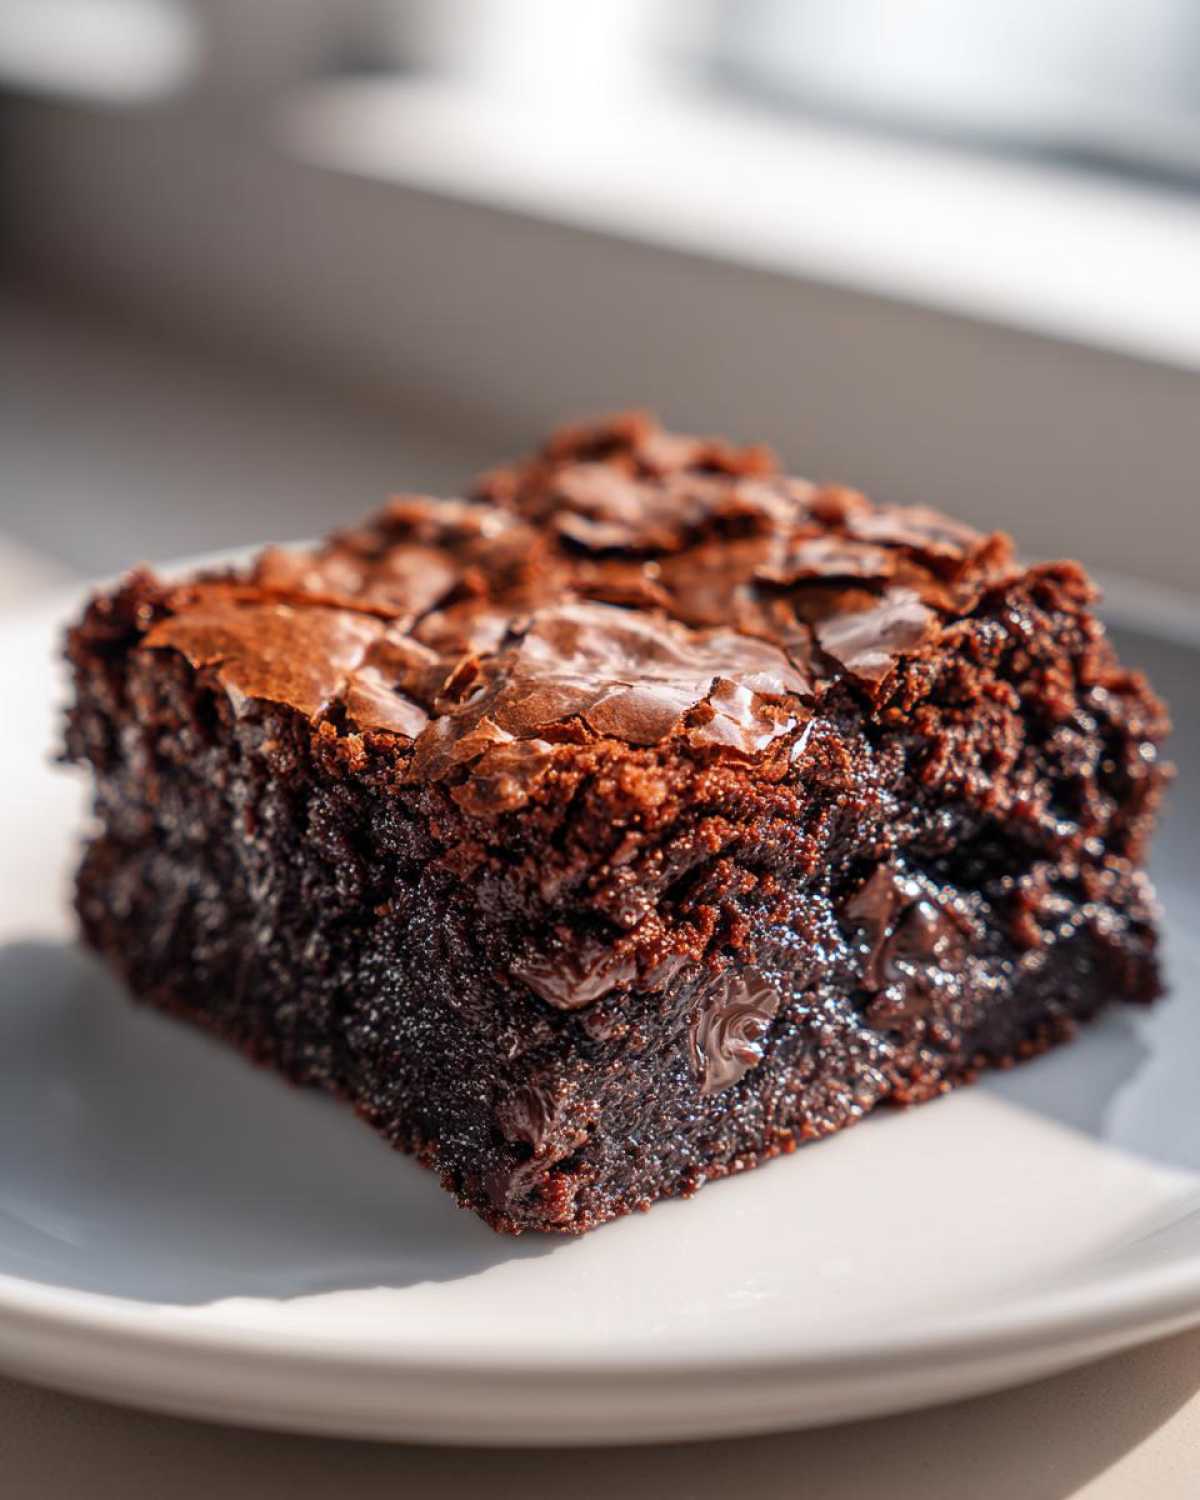
Why This Is the Ultimate Brownie Recipe with Crackly Top
I’m not exaggerating when I tell you this recipe nails it every single time. If you’ve been searching for the holy grail of chocolate squares, you’ve found it. Making these **Brownies** is surprisingly easy, but the results taste like they came straight from a high-end bakery case.
- Unbeatable fudgy texture that stays moist for days.
- That glossy, beautiful, crackly top that everyone tries to achieve but rarely masters.
- They come together fast, meaning less time waiting for the chocolate fix!
We’re building flavor and texture from the beginning, which means fewer weird steps and more guaranteed deliciousness. Ready to see the magic? You can check out my slightly less fudgy but equally delicious fudge pie recipe too, but for pure brownie perfection, stick with this one.
Gathering Ingredients for Perfect Brownies
Okay, now that we’re excited, let’s talk about what you need. Unlike some fussy recipes, this one uses simple things you probably already have in the pantry, but the ratios matter a TON for that fudgy texture we are chasing. Don’t even think about substituting the sugar right now; we need that granulated white sugar for the crackly top!
- 1 cup (2 sticks) unsalted butter, melted
- 2 cups granulated sugar
- 4 large eggs
- 1 tablespoon vanilla extract
- 3/4 cup unsweetened cocoa powder
- 1 cup all-purpose flour
- 1/2 teaspoon salt
- 1 cup semi-sweet chocolate chips (optional)
Here’s a little secret that makes a huge difference, especially in these **Brownies**: the cocoa powder. Seriously, buy the good stuff. If you use a low-quality, thin cocoa, your final bars will taste flat. I swear by a deep, dark unsweetened cocoa powder because it gives you that rich chocolate flavor that screams ‘bakery style’ without needing a ton of melted chocolate in the mix.
Ingredient Notes and Substitutions for Your Brownies
Let’s quickly discuss the star components. You might be tempted to swap out some of that granulated sugar for brown sugar, but I strongly advise against it here. Brown sugar adds moisture, which is great for cookies, but it fights against that beautiful, shiny crust we want on top of our bars. Granulated sugar dissolves differently and is key to that signature look.
Also, if you’re skipping the optional chips, you’ll get a purer, more classic flavor. If you are using them, grab decent semi-sweet chips. Don’t use anything labeled ‘milk chocolate’ because it will throw off the necessary bitterness balance needed to cut through all that sugar and butter richness.
Step-by-Step Guide: How to Make Perfect Brownies
Now for the fun part! This process is all about technique, especially when we are aiming for those **Best fudgy brownies** that look like they came from a professional bakery. First thing’s first: Preheat that oven to 350°F (175°C). Trust me, an oven that isn’t fully warmed up just guarantees flatness. Always prepare your 9×13 pan by greasing it lightly and lining it with parchment paper, making sure that paper hangs over the edges. Those paper ‘handles’ are lifesavers later when you need to lift the entire slab out! If you love exploring different chocolate bars, you should check out my recipe for hot chocolate brownies too!
The first mixing step is non-negotiable if you want that glossy finish. Get your melted butter and the full two cups of sugar into a big bowl. You need to whisk this mixture together until it looks completely unified. Next, the eggs go in, one at a time. Beat well after each addition—and I mean **beat**. You are dissolving that sugar into the eggs and fat, which is what creates the structure for that amazing crackly top later on. Don’t rush this part! Once the eggs are incorporated and you mix in the vanilla, you can see the mixture look slightly lighter and glossier.
When it comes time for the dry stuff—the cocoa powder and salt—add them slowly. Use a whisk or spatula to gently incorporate the cocoa mixture into the wet ingredients. The cardinal sin of making **Brownies** is overmixing here! As soon as you stop seeing white streaks of flour, stop stirring! If you mix too long, you develop gluten, and gluten means cake, not fudgy bars.
If you’re using those chocolate chips, gently fold them in by hand—we don’t want to deflate all the air we just worked so hard to get in there. Pour that lovely, thick batter into your prepared pan and spread it out evenly. It’s going to be thick, so don’t worry if it doesn’t look thin! If you love cream cheese fillings, you might want to try my red velvet brownies sometime next week.
Achieving the Signature Shiny Top on Your Brownies
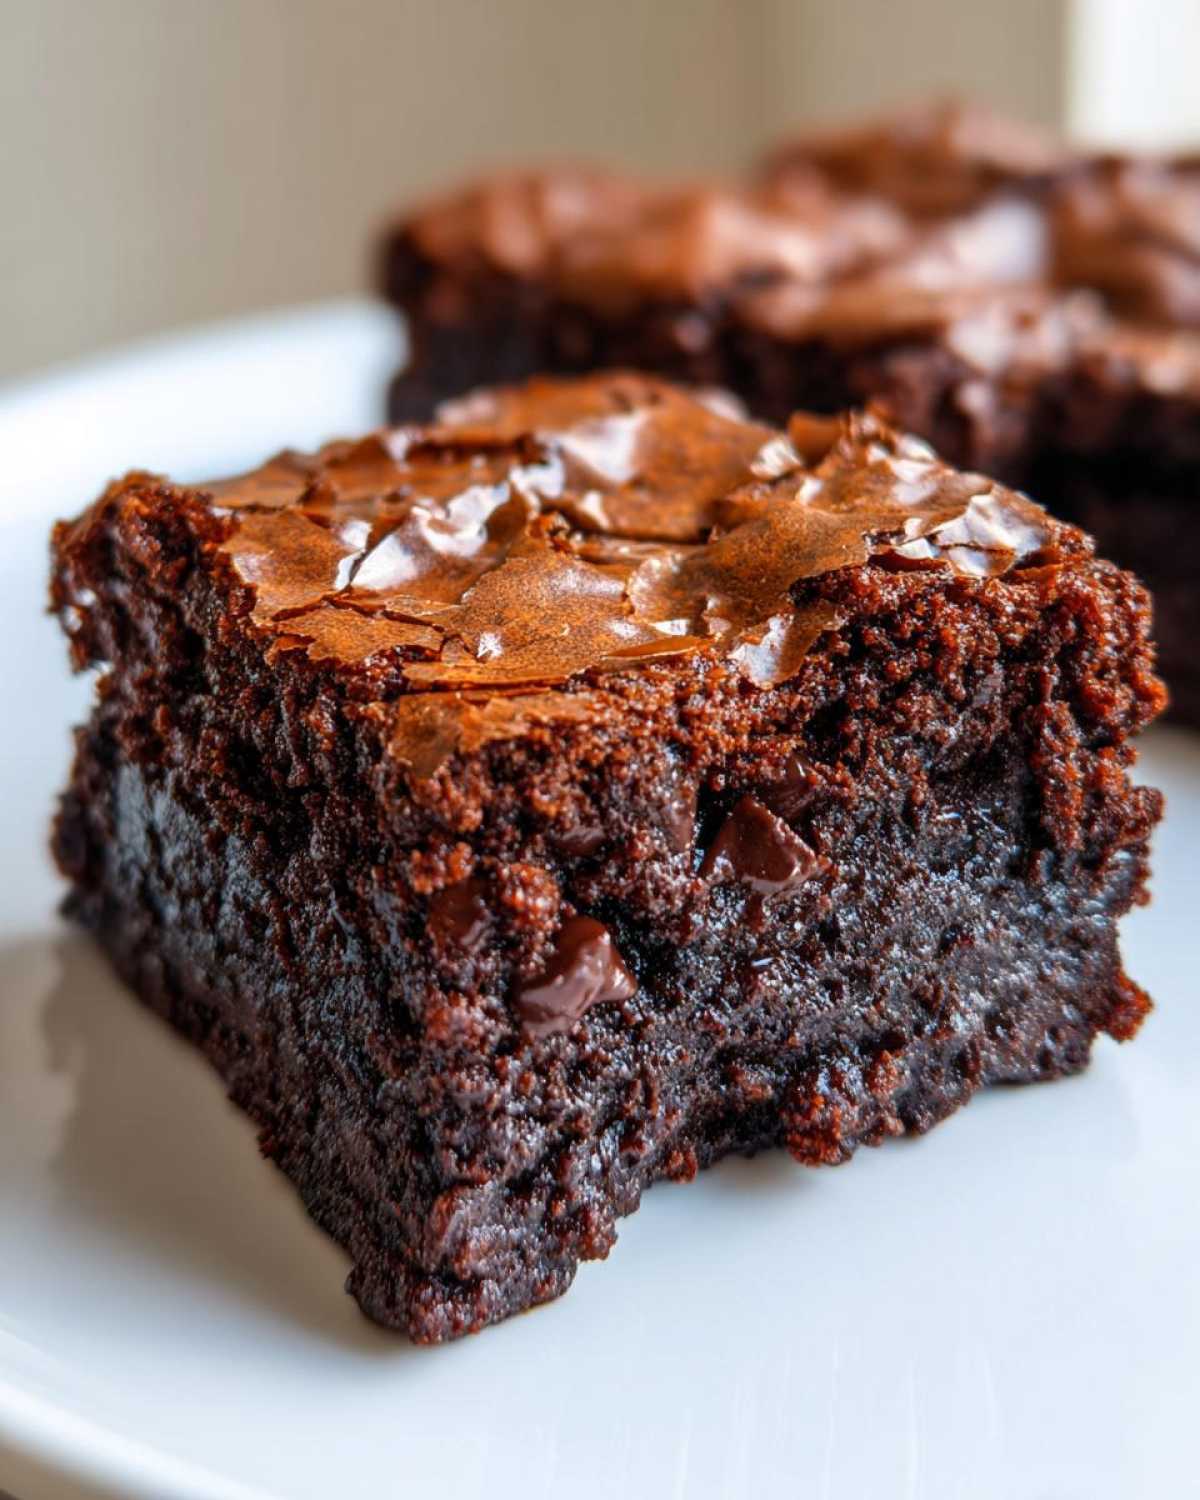
This is the secret sauce, the key to getting a **brownie recipe with crackly top** that everyone asks for. It all comes back to that initial vigorous whisking of the butter, sugar, and eggs. When you beat them together long enough (think 3 to 5 minutes with purpose), the sugar crystals partially dissolve into the eggs. As the batter bakes, the sugar mixture rises to the surface and dries out into that thin, delicate, shatter-prone crust. If you just lightly combine the wet ingredients, that sugar stays trapped below the surface, giving you a matte, dull top instead of that gorgeous sheen. A little arm work pays off huge!
Baking Time and Doneness for Fudgy Brownies
This is where most people ruin their beautiful batter! For truly fudgy **brownies**, you absolutely must avoid overbaking. The recipe calls for 25 to 30 minutes, but ovens vary wildly. You aren’t looking for a clean toothpick! If you stick a toothpick in and it comes out completely clean, congratulations—you’ve made a cakey brownie. For the best fudgy texture, you want that toothpick to come out with moist, gooey crumbs clinging to it. Maybe a single tiny wet streak visible, but definitely not dripping batter. That residual heat will continue to cook them as they cool in the pan, which is exactly what we want for our **chewy chocolate brownies**.
Tips for Success When Making These Brownies
Making truly fantastic **brownies** isn’t just about following the steps; it’s about knowing the little pitfalls to avoid. If you want these to be the absolute best, listen up—I’ve learned these the hard way!
First, and I know I’ve said it before, but cooling is paramount. Seriously, do not try to cut these warm. They will look like chocolate soup, and you’ll end up with a sticky mess that crumbles when you try to move it. You need to let them cool completely in that pan. I usually give mine a good hour on the counter, and sometimes I even pop the whole pan (carefully!) into the fridge for 30 minutes once it’s cooled down a bit. This allows the fats to re-solidify, giving you those perfect, clean squares.
Another thing that helps prevent that dry texture is to weigh your flour, even if you don’t weigh everything else. Scooping flour directly from the bag packs it down way too much, and suddenly you’ve added an extra quarter cup of flour, which equals a dry bar. For the thickest **brownies** you can manage, make sure you are spreading that batter evenly into the pan before baking, ensuring consistent heat hits every square.
If you want to add some depth beyond just chocolate, try this secret little trick: before you add the cocoa powder to the wet mixture, whisk a teaspoon of instant espresso powder into the cocoa. It won’t make your **brownies** taste like coffee, but it brings out the deep, earthy notes of the chocolate flavor, turning them into a gourmet experience. For other chewy favorites in my kitchen, you might want to check out my chewy chocolate chip cookies recipe for a totally different texture adventure!
Storage and Reheating Brownies
So, you’ve managed to stop eating the entire pan of **Brownies** in one sitting? Good job! Now you need to know how to keep these things perfect for later. Luckily, because they are so ridiculously fudgy, they stay fantastic for days. The high fat and sugar content means we don’t need to worry too much about them turning quickly.
The best way to store them is airtight. I just leave them right in the 9×13 pan, covered tightly with plastic wrap, or I cut them and stack them in a good Tupperware container. If you cut them first, place a small square of parchment paper between the layers—this stops them from sticking and getting messy. Kept on the counter at room temperature, these babies will stay perfectly moist and chewy for about four days. Seriously, four days! No fridge needed.
Now, if you want to bring back that moment-of-baking gooeyness, reheating is your best friend. Just take one of your beautiful, **simple chocolate squares recipe** portions and microwave it for about 10 to 15 seconds. Don’t go longer than that, or you risk overheating the sugar and making it sweaty! Ten seconds is enough to warm that center up just enough so it feels warm and melty when you bite into it. Perfection!
Understanding Cakey Brownies Versus Fudgy Brownies
This is a huge debate in the world of chocolate lovers, isn’t it? People often ask me if they can adapt this recipe to be more cake-like, and honestly, I just tell them no—because you shouldn’t mess with perfection! The difference between **fudgy brownies** and cakey ones comes down to basic baking physics, and it all centers around the ratio of fat and flour to the rising agents.
For a cakey texture, you need more flour, a bit less fat, and usually some chemical leavening like baking powder. Think of it this way: cakey bars are essentially flat, dense cakes. They are lighter, more airy, and they won’t give you that satisfying, dense chew when you bite down. They also won’t have that shiny top we worked so hard for!
Our recipe here leans heavily on fat—the melted butter and the eggs—and it uses just enough flour to hold itself together without activating too much gluten. That abundance of fat is what keeps the structure dense, moist, and profoundly fudgy. When you look at my instructions, notice how minimally we mix the flour in; we want to keep that batter feeling heavy.
If you are curious about other texture experiments, I did try adding a slight cream cheese swirl to cut the intense richness in one batch, and you can check out how that turned out here! But if you want the classic, dense experience, stick to this method. You want those **Brownies** to feel almost heavy in your hand before you even take the first bite!
Frequently Asked Questions About Making Brownies
I know you might have a few lingering questions bouncing around about getting these just right. It’s okay! Every baker has questions, especially when trying to nail these **easy homemade brownies recipe**. If you want to know more about our methods in general, feel free to check out our About Us page!
Can I use melted butter versus softened butter in these Brownies?
Oh, stick to melted butter for this recipe unless you want a totally different texture! If you use softened butter, you’re going to have to cream it with the sugar much longer, and frankly, you’re heading toward a cakier texture. Melted butter, which you stir right into the sugar, helps weigh everything down just a bit. That fat content, when combined with the right amount of sugar whisking, is precisely what contributes to that dense pound-cake-like interior of a proper fudgy bar. Melting it is quick and crucial!
What is the secret to achieving deep dark chocolate Brownies?
For those really intense, rich chocolate desserts vibes, you have two options, both of which I employ depending on my mood. The first, and easiest, is simply using a high-quality, Dutched process cocoa powder. It’s darker and smoother than natural cocoa—it truly elevates the taste. The second, and my personal favorite trick for a truly gourmet brownie experience, is adding about a teaspoon of instant espresso powder right into your dry mixture with the cocoa. It deepens the chocolate flavor so much; I promise, no one will guess your secret ingredient!
How long do I need to cool these simple chocolate squares recipe before cutting?
This is the hardest part of the whole process, I won’t lie! You have to let them cool completely. I mean it! If you try slicing them while they are even slightly warm, you’ll destroy the fudgy texture you worked so hard to create. The cooling time is when those fudgy internal structures set up properly. Seriously, give them at least two good hours on the counter, or even pop them in the fridge for a quick chill if you’re impatient. Handling them warm just leads to crumbling and sticking to your knife. Learn from my impatience!
Serving Suggestions for Your Rich Chocolate Desserts
You’ve made them, they’re perfectly set, and now it’s time to enjoy these incredible **Brownies**! Honestly, enjoyed standing over the sink with a fork and zero regrets is totally acceptable. But if you’re feeling a little fancy and want to elevate these simple chocolate squares into a full-blown dessert experience, I have a few foolproof ideas.
First up: ice cream, obviously. A scoop of high-quality vanilla bean ice cream melting slightly over a warm (reheated for 10 seconds!) fudgy brownie is pure heaven. The contrast between the warm chocolate and the cold creaminess is just divine. If you want something a little richer to pair with that dark chocolate intensity, try a scoop of salted caramel ice cream.
If you’re aiming for a less decadent but still lovely pairing, dust those beautiful crackly tops with a sprinkle of flaky sea salt just before serving. That salt enhances the deep dark chocolate notes immensely. And for a totally different vibe—especially on a chilly evening—pair your **rich chocolate desserts** with a truly decadent hot drink. You absolutely have to try my recipe for white hot chocolate alongside these; it’s a sweet, unexpected counterpoint to the dark fudginess.
Remember, these bars are already intensely satisfying on their own, so don’t feel obligated to dress them up. Sometimes, just a square of the best fudgy brownies is exactly what the day calls for!
Estimated Nutritional Information for These Brownies
Now, I’m definitely not a nutritionist, so take this part with a massive grain of salt—literally and figuratively! I bake these **Brownies** out of love, not because I’m counting macros, but I know some of you are curious about what goes into a square of this chocolate heaven.
This information is calculated based on the recipe breakdown above, assuming you get exactly 16 standard squares. These are estimates, of course, because sometimes I cut mine a little wider when I’m feeling generous. If you use chocolate chips, your numbers will shift slightly, so remember that!
Here’s a rough look at what one single, glorious serving contains:
- Serving Size: 1 square
- Calories: 250
- Fat: 14g (with 8g saturated)
- Carbohydrates: 32g
- Sugar: 28g (Yep, that’s where the joy is!)
- Protein: 3g
- Sodium: 100mg
See? They are rich! But honestly, every single one of those 28 grams of sugar is working overtime to deliver that amazing texture and crackly top. Don’t worry about the details too much; just know that when you make these **rich chocolate desserts**, you’re treating yourself to something truly special and worth every bite. Enjoying homemade baked goods is about joy, not just the numbers!
Share Your Best Fudgy Brownies Experience
Okay, I’ve given you all my secrets for the **best fudgy brownies**—from the aggressive whisking that guarantees that crackly top to the patience you need while they cool. Now it’s your turn! There is nothing I love more than seeing your creations flooding my social media feeds or reading your success stories in the comments below.
When you make this **simple chocolate squares recipe**, please let me know how it worked out for you! Did you get that amazing sheen on top? Did you manage to wait for them to cool completely? Or, if you had a little trouble, ask away! I’m here to troubleshoot and cheer you on. Don’t be shy about sharing your questions; trust me, I’ve made every mistake possible while perfecting these **brownies** over the years.
If you loved these, I always appreciate you taking a moment to rate the recipe. Those little stars really help other home bakers find the ultimate chocolate fix. And if you post your photos, tag me! I love seeing how you serve these rich chocolate desserts, whether you keep them plain or pair them with ice cream. You can find all my other baking adventures and updates over on the main blog page. Happy baking, friends! Don’t forget to make another batch soon!
PrintBest Fudgy Brownies with Crackly Top
A straightforward recipe for making rich, fudgy brownies that feature a desirable shiny, crackly top layer.
- Prep Time: 15 min
- Cook Time: 30 min
- Total Time: 45 min
- Yield: 16 servings
- Category: Dessert
- Method: Baking
- Cuisine: American
- Diet: Vegetarian
Ingredients
- 1 cup (2 sticks) unsalted butter, melted
- 2 cups granulated sugar
- 4 large eggs
- 1 tablespoon vanilla extract
- 3/4 cup unsweetened cocoa powder
- 1 cup all-purpose flour
- 1/2 teaspoon salt
- 1 cup semi-sweet chocolate chips (optional)
Instructions
- Preheat your oven to 350°F (175°C). Grease and line a 9×13 inch baking pan with parchment paper, leaving an overhang on the sides for easy removal.
- In a large bowl, whisk the melted butter and sugar together until well combined.
- Beat in the eggs one at a time, mixing well after each addition. Stir in the vanilla extract.
- In a separate bowl, whisk together the cocoa powder and salt. Gradually add this dry mixture to the wet ingredients, mixing until just combined. Do not overmix.
- Gently fold in the chocolate chips, if using.
- Spread the batter evenly into the prepared pan.
- Bake for 25 to 30 minutes. A toothpick inserted near the center should come out with moist crumbs attached, not wet batter.
- Let the brownies cool completely in the pan on a wire rack before lifting them out using the parchment overhang and cutting into squares.
Notes
- For the best crackly top, ensure your sugar and eggs are thoroughly mixed before adding the dry ingredients.
- Do not overbake; slightly underbaking results in a fudgier texture.
- Cooling completely before cutting prevents the brownies from crumbling.
Nutrition
- Serving Size: 1 square
- Calories: 250
- Sugar: 28g
- Sodium: 100mg
- Fat: 14g
- Saturated Fat: 8g
- Unsaturated Fat: 6g
- Trans Fat: 0g
- Carbohydrates: 32g
- Fiber: 2g
- Protein: 3g
- Cholesterol: 65mg