

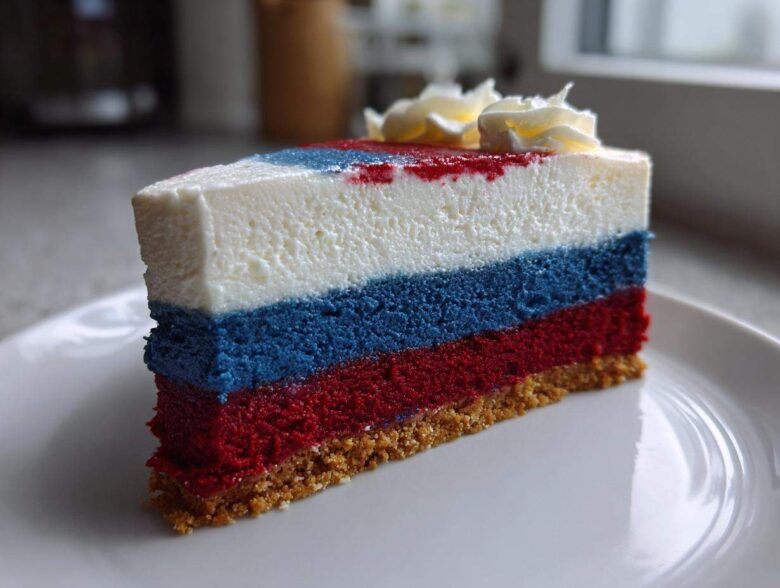
Oh my gosh, is it summer yet? Because the moment the weather warms up, I immediately start thinking about fireworks, backyard BBQs, and, most importantly, desserts that can steal the show! Forget those tired old brownies; we are stepping up our game this year with the ultimate centerpiece: a gorgeous, creamy, show-stopping Red White and Blue Cheesecake. I remember the first time I tried layering this bad boy, I almost cried because the colors looked so crisp! It took a few messy attempts, but trust me, once you nail this technique, you’ll have the go-to 4th of July Dessert Idea forever. This recipe is easy enough for a casual gathering, but fancy enough to feel really special.
I actually based the technique for keeping these layers separate on my favorite non-crack New York style recipe, which you can check out here: cheesecake recipe no crack. That foundation is why this patriotic wonder shines so brightly!
Why This Red White and Blue Cheesecake Recipe Works for Any Celebration
Look, I bake desserts year-round, but nothing makes me happier than whipping up something specifically for a big summer bash. This isn’t just another dessert; it’s practically required food for Memorial Day or the Fourth of July! It looks like you spent all day fussing, but honestly, the active time isn’t bad at all. You get maximum visual impact for surprisingly little effort.
- It brings that necessary ‘wow’ factor to any dessert table.
- The balance of tart berries against the sweet, creamy filling is just dreamy.
- It’s robust enough to travel well, making it perfect for potlucks.
I talk all about making your holiday desserts shine in my guide to the best holiday cheesecake recipes, too!
The Perfect Festive Look: Layered Cheesecake Recipe
When you slice into this thing, that vibrant layering is just *chef’s kiss*. We aren’t messing around with simple swirls here; we are building structure! Each separate color layer—red, white, and blue—makes this Red White and Blue Cheesecake a true showstopper. It’s the best way to deliver huge patriotic vibes without needing five different baked items.
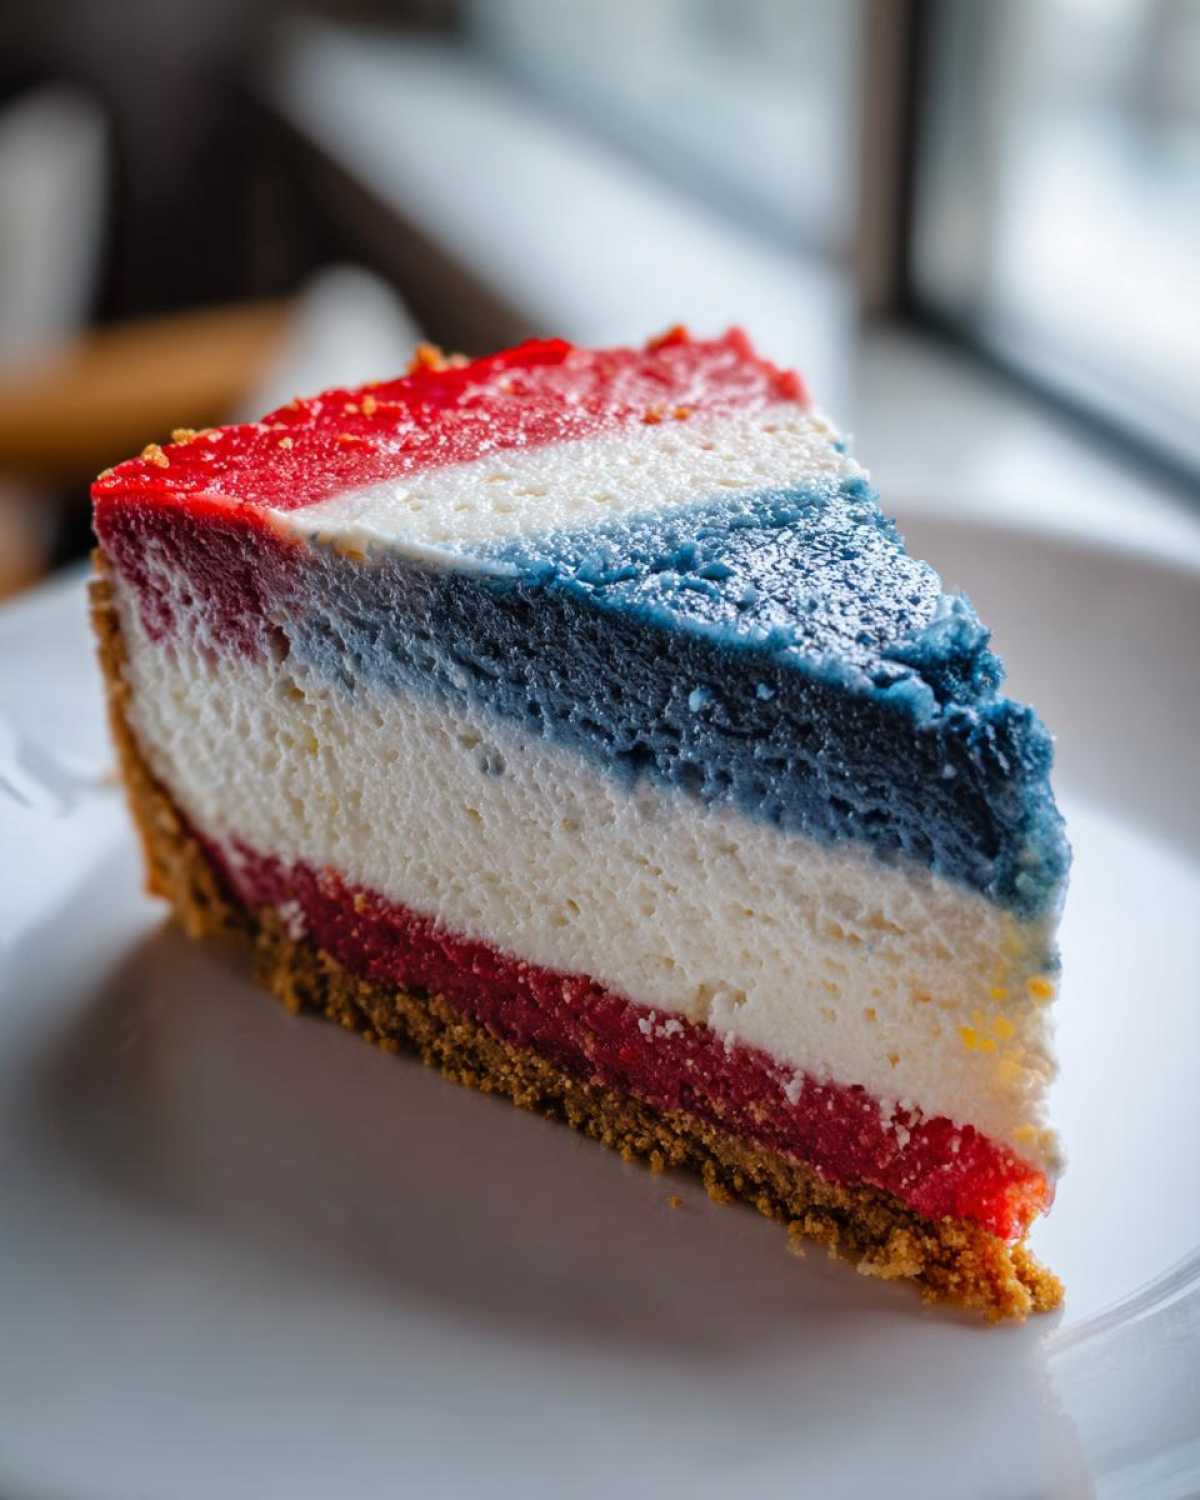
Quick Prep for Your Fourth of July Celebration Food
Sure, the total time seems long because it needs to chill forever (and you absolutely must chill it!), but your hands-on prep is only about 30 minutes. You spend maybe 15 minutes mixing the batter, dividing it, and pouring it in. Then you just let the oven and fridge do the heavy lifting for your Fourth of July celebration food!
Gathering Ingredients for Your Red White and Blue Cheesecake
Okay, let’s talk supplies! This recipe needs premium ingredients, especially since the simple flavors really shine through. You can’t cheat on the cream cheese for this one, and fresh, gorgeous berries are non-negotiable if you want that bright pop of flavor. We need ingredients for three distinct sections—the crust, the body of the cake, and the coloring. Once you gather everything, setting up the layers is surprisingly straightforward!
Crust Components
We start simple, just like any good cheesecake! You’ll need 1 1/2 cups of graham cracker crumbs, 1/4 cup of granulated sugar mixed in, and 6 tablespoons unsalted butter, melted. That’s it for the base!
The Creamy Cheesecake Filling Ingredients
For the main event, make sure your dairy is room temperature! Grab 3 (8 ounce) packages cream cheese—softened, please! Plus 1 1/2 cups granulated sugar, 1 teaspoon vanilla extract, 1/4 cup sour cream for that nice tang, and 4 large eggs, added carefully.
Coloring and Fruit for the Patriotic Cheesecake Recipe
Now for the fun part! We’re using 1/2 cup fresh blueberries and 1/2 cup fresh raspberries or strawberries, chopped. The most important tip here is the coloring: you absolutely must use gel food coloring, not the liquid kind. We need Blue food coloring (gel preferred) and Red food coloring (gel preferred) to keep the batter thick and vibrant.
Step-by-Step Instructions for the Layered Cheesecake Recipe
Oh good, we have the pretty ingredients ready! Now for the actual construction work. We need to be precise here, but don’t stress—it’s just physics keeping those colors separate! I always put on some good music for this part because it’s relaxing once you get into the rhythm. Remember, this is how we make sure our Red White and Blue Cheesecake looks fantastic when cut!
Preparing the Crust and Pan for Your Red White and Blue Cheesecake
First thing, fire up that oven to 325 degrees F. Now, this is critical, even if we aren’t making a water bath today: wrap the outside of your 9-inch springform pan super tight with heavy-duty aluminum foil. This stops any potential leaks! Once wrapped, mix your graham crumbs, sugar, and melted butter right in the pan, pressing it down nice and firm on the bottom. Pop that crust in the oven for exactly 10 minutes. When it comes out, let it cool so it doesn’t melt the cold batter we put on top of it later.
Mixing the Base Batter and Dividing for Color
In a big bowl, cream up that softened cream cheese with the 1 1/2 cups of sugar until it’s smooth as silk. Add your vanilla and sour cream, then beat in the eggs one by one. Seriously, wait until the first egg is just incorporated before adding the next one. Overmixing eggs adds air, and we don’t want cake-like texture; we want dense and creamy! Once totally smooth, carefully divide the whole batch of batter equally into three separate bowls. Precision helps keep the layers the same size!
Creating the Red, White, and Blue Layers
This is where the magic for your Vibrant Summer Cheesecake happens! Take Bowl #1 and gently fold in your blueberries. Bowl #2 gets the chopped red fruit. For Bowl #3, add just a few drops of blue gel coloring and mix until you get a light sky blue. If your red fruit looks pale, add a touch more red gel to Bowl #2. Remember to *fold* gently, just enough to combine. We are treating this batter lightly so it stays rich!
Baking and Cooling the Showstopping Berry Cheesecake
Pour the pure white batter gently over your cooled crust. Bake that layer for 15 minutes. Next, carefully spoon the blue batter onto the white layer—try not to disturb the first layer too much! Bake another 15 minutes. Finally, spoon the red batter on top. This final layer takes the longest, usually 45 to 55 minutes. You want the edges set, but the center should still have a tiny wobble. Turn the oven off, prop the door open slightly, and let it sit inside for a full hour. This slow cooling prevents cracking! Then, move it to a rack, let it chill for 6 hours minimum (overnight is best), and enjoy your glorious layered cheesecake recipe!
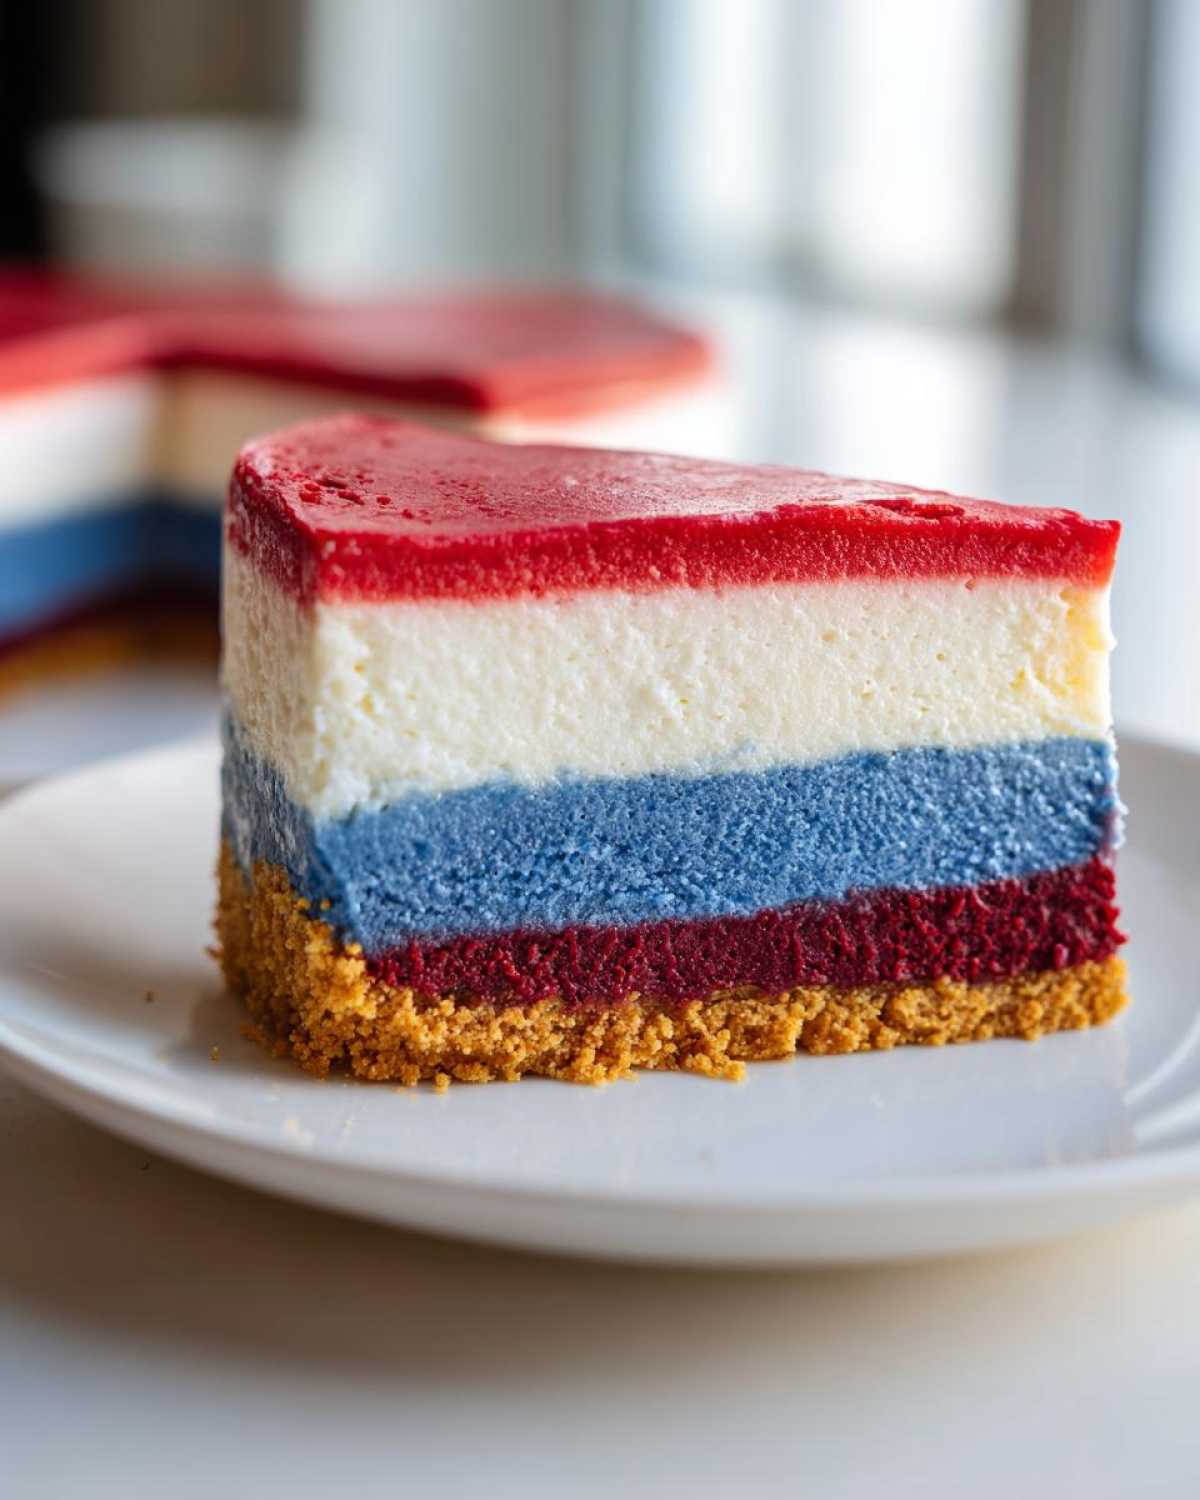
Tips for Success Making Your Patriotic Cheesecake Recipe
Cheesecake is super rewarding, but it can be fussy, right? I’ve ruined more cheesecakes than I care to admit because I rushed the temperature game! My biggest tip for any good recipe, whether it’s for this Red White and Blue Cheesecake or something complex like my savory caramelized onions guide, is paying attention to ingredient temperature.
If your cream cheese is rock hard, your batter will be lumpy, period. Speaking of lumps, don’t forget the slow cool-down! That hour sitting in the turned-off oven is non-negotiable for me. It’s the secret sauce to preventing those awful hairline cracks that ruin photographs.
Achieving Intense Color in Your Red White and Blue Cheesecake
When you’re aiming for true Fourth of July colors, you need intensity. Liquid food coloring is basically just water, and adding too much thins out the dense cream cheese batter we worked so hard to mix. That’s why I insist on gel coloring! A little dab goes a long way—I mean, a tiny toothpick amount is often enough to turn that batter a brilliant blue or red. You want vibrancy, not a runny mess!
Preventing Cracks During Cooling
Seriously, make sure everything for the batter is room temperature—the cream cheese, the sour cream, the eggs. Cold ingredients fight each other, and that struggle translates into a cracked top later on! Then, you absolutely must use that slow cooling method: oven off, door propped for an hour. When I finally pulled one out too fast during a blizzard of heat, the center collapsed like a sad pancake!
Easy Red White and Blue Dessert Topping Ideas
Now that you have that perfectly smooth, chilled, layered beauty, we have to talk about the grand finale! You don’t want to throw a bunch of messy, heavy frosting on top of your careful work, right? Since this **Red White and Blue Cheesecake** is already so beautiful underneath, we keep the topping simple and focused on presentation.
My absolute favorite approach for these kinds of **Festive Cheesecake with Berries** is just letting the fresh fruit do the talking. Skip the heavy frosting altogether! You can create a gorgeous border around the very edge of the top with alternating fresh raspberries and blueberries. It looks so intentional and clean.
If you *must* have a little something extra, a very light dusting of powdered sugar over half the top gives you that snowy white effect, contrasting perfectly with the berries on the other side. It’s stunning and it takes literally thirty seconds. If you’re feeling ambitious, you could also make a quick drizzle using leftover melted white chocolate or even a light vanilla glaze, like the one I use for my vanilla frosting recipe, but keep it thin!
Storage and Chilling for the Best Red White and Blue Cheesecake
This tip is just as important as the baking itself, promise! You absolutely cannot serve this cheesecake warm, or it’ll be a gloppy mess. Once it’s completely cooled on the rack, wrap that springform pan tightly in plastic wrap—I usually do two layers of wrap to keep the fridge smells out. It needs a minimum of 6 chilling hours, but honestly, you’re making this for a holiday, so make it the day before!
Overnight chilling is the secret to letting the flavors truly meld and getting those clean slices we talked about. When you’re ready to serve your **Red White and Blue Cheesecake**, just carefully release the sides, top it with those fresh berries, and bring it out to the party!
Variations: Turning This Into a No Bake Cheesecake Patriotic Option
I know, I know. Sometimes it’s ninety degrees outside, and you just do *not* want to turn the oven on for an hour plus cooling time. It happens! If you’re looking for the easiest route to your **No Bake Cheesecake Patriotic** dream, we can absolutely adapt this recipe. You’ll still want that graham cracker crust, but you bake that one for 10 minutes just to set it, then let it chill completely.
For the filling, you skip the eggs and the oven time entirely! Instead, use the note I included: whip 1 cup of heavy cream until it forms stiff peaks. Then, gently fold that whipped cream into your standard cream cheese/sugar/sour cream mixture. This creates unbelievable lightness! You’ll still divide it into three bowls to color them red, white, and blue, just like before. Pop that whole thing in the fridge for longer—at least 8 hours—and you’ve got a fantastic, lighter summer version. You can see how I handle the base cream cheese mix in my no-bake pecan pie recipe, which uses a similar stability method!
Frequently Asked Questions About This Festive Cheesecake with Berries
I always get questions when I post pictures of this dessert on social media because people want to make sure they get that perfect look! Cheesecake recipes can seem tricky, but honestly, most issues just come down to timing or temperature. Here are the things everyone asks me when they tackle this **Red White and Blue Cheesecake** for the first time.
Can I skip the food coloring in the Red White and Blue Cheesecake?
You definitely *can* skip it! If you’re trying to keep the recipe totally natural, just fold some raspberries into the red batter, blueberries into the blue batter, and leave the white layer plain. However, I have to warn you: the red fruit usually bleeds a little, and the blueberries don’t provide enough *blue*. If you want that crisp, bright, patriotic look, you gotta use that gel coloring. It’s the difference between a pretty berry cheesecake and a true **USA Themed Desserts** masterpiece!
What is the best way to serve this Creamy Layered Dessert?
Serving is all about the slice! Make absolutely sure that cheesecake is fridge-cold—I mean rock hard—after that overnight chill. That’s essential for clean cuts. Before you slice, take a sharp, thin knife and dip it in very hot water, wipe it dry, and *then* cut a piece. Rinse and repeat this process for every single slice. It melts just the tiniest bit of the edge, letting you get that perfect, clean wedge of your **Creamy Layered Dessert** without smearing the colors everywhere.
How far in advance can I make this USA Themed Desserts recipe?
My personal sweet spot is making it the day before serving, so the night before your BBQ. This allows the cheesecake base to fully set up against the slight moisture from the fruit layers, and the flavor just deepens beautifully overnight. You can technically make it up to 48 hours ahead of time, but I wouldn’t push it past that. It keeps perfectly wrapped in the fridge, but you want to serve it when it’s truly fresh!
If you have more burning questions about how I run things in my kitchen, you can always learn more about me and my philosophy on baking over on the About Us page!
Estimated Nutritional Information for Your Red White and Blue Cheesecake
Now, listen up, my friends! While this Red White and Blue Cheesecake is absolutely worth every single glorious bite, it’s a treat, not an everyday snack, let’s be real. Here are the estimates based on my standard recipe measurements. Remember, these numbers are just a guideline—your exact calorie count will shift depending on your brand of cream cheese or how thick you slice it! I always point people to my official disclaimer page for the real talk on nutrition.
- Serving Size: 1 slice
- Calories: 450
- Sugar: 40g
- Fat: 28g
Red White and Blue Layered Cheesecake
Make a visually striking, layered cheesecake featuring red, white, and blue colors perfect for patriotic celebrations.
- Prep Time: 30 min
- Cook Time: 1 hr 15 min
- Total Time: 8 hr 45 min
- Yield: 12 servings
- Category: Dessert
- Method: Baking
- Cuisine: American
- Diet: Vegetarian
Ingredients
- 1 1/2 cups graham cracker crumbs
- 1/4 cup granulated sugar
- 6 tablespoons unsalted butter, melted
- 3 (8 ounce) packages cream cheese, softened
- 1 1/2 cups granulated sugar
- 1 teaspoon vanilla extract
- 1/4 cup sour cream
- 4 large eggs
- 1/2 cup fresh blueberries
- 1/2 cup fresh raspberries or strawberries, chopped
- Blue food coloring (gel preferred)
- Red food coloring (gel preferred)
Instructions
- Preheat your oven to 325 degrees F. Wrap the outside of a 9-inch springform pan with heavy-duty aluminum foil.
- Combine graham cracker crumbs, 1/4 cup sugar, and melted butter. Press the mixture firmly into the bottom of the prepared springform pan. Bake for 10 minutes. Let cool.
- In a large bowl, beat the softened cream cheese and 1 1/2 cups sugar until smooth. Beat in the vanilla extract and sour cream.
- Beat in the eggs one at a time, mixing just until combined after each addition. Do not overmix.
- Divide the batter evenly into three separate bowls.
- In the first bowl, gently fold in the blueberries.
- In the second bowl, gently fold in the chopped red fruit.
- In the third bowl, add a few drops of blue food coloring and mix until you achieve a light blue color. Add a few drops of red food coloring to the red fruit mixture if the color is not intense enough. Leave the third portion white.
- Pour the white batter layer over the cooled crust. Bake for 15 minutes.
- Gently spoon the blue batter layer over the white layer. Bake for 15 minutes.
- Gently spoon the red batter layer over the blue layer. Bake until the edges are set but the center still jiggles slightly, about 45 to 55 minutes total baking time for all layers.
- Turn off the oven and prop the door open slightly. Let the cheesecake cool in the oven for 1 hour.
- Remove the cheesecake from the oven and let it cool completely on a wire rack.
- Chill the cheesecake in the refrigerator for at least 6 hours, or preferably overnight, before serving.
Notes
- Use gel food coloring for brighter colors that do not thin the batter.
- For a decorative top, arrange fresh berries in a pattern on the chilled cheesecake before serving.
- If you prefer a no-bake version, substitute the eggs with 1 cup of heavy cream whipped to stiff peaks and use a stabilized whipped topping base.
Nutrition
- Serving Size: 1 slice
- Calories: 450
- Sugar: 40g
- Sodium: 350mg
- Fat: 28g
- Saturated Fat: 17g
- Unsaturated Fat: 11g
- Trans Fat: 0.5g
- Carbohydrates: 45g
- Fiber: 1g
- Protein: 7g
- Cholesterol: 120mg