

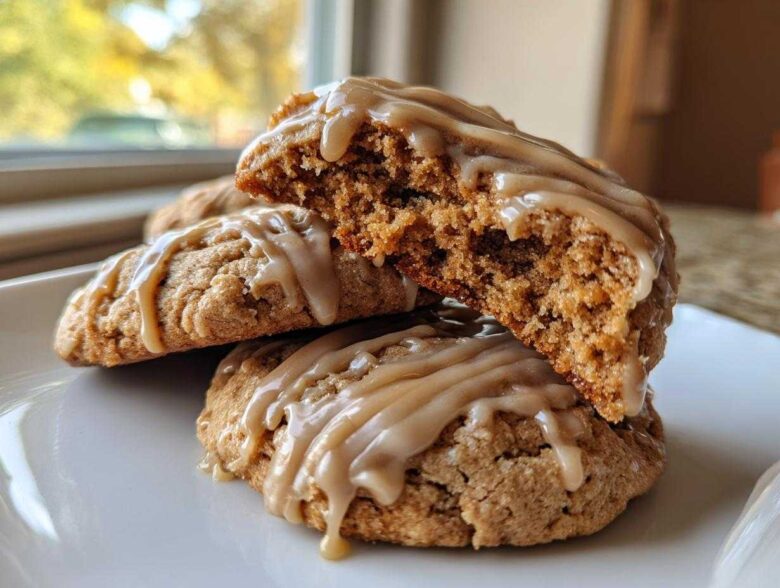
Oh, hello there! Nothing says cozy autumn evenings and happy holiday baking quite like the scent of real maple filling the kitchen, right? I finally cracked the code on what I think are the absolute best maple cookies you will ever eat. Forget those dry, crumbly things—we’re aiming for perfectly soft centers, a chewy bite, and, the real showstopper, a rich, nutty brown butter maple glaze on top.
I spent what felt like a hundred weekends testing different batches until I got the texture and that deep maple flavor *just* right. Trust me, once you try this combination of pure syrup and browned butter, you won’t look back! I’m so excited to share exactly how I make them so they turn out perfect every single time. I even linked my baking philosophy page if you want to know more about how I approach testing recipes!
Why You Will Love These Soft Maple Cookies
Seriously, these little beauties hit every sweet spot we look for when it comes to classic comfort baking. You’re going to want to make huge batches of these because they disappear so fast!
- They are gloriously soft and delightfully chewy—never hard or brittle.
- That punch of pure maple flavor comes straight from the source; pancake syrup just won’t cut it here!
- The brown butter glaze elevates everything. It adds a warm, nutty background note that makes them taste truly bakery-style.
- They come together surprisingly fast, making them perfect for last-minute cozy mornings.
Gathering Ingredients for Perfect Maple Cookies
Okay, getting ready to bake is half the fun, right? But you’ve got to have the right crew of ingredients standing by. For these maple cookies, we’re using real, high-quality stuff, especially when it comes to the syrup. You absolutely must use the good, pure stuff—not the colored corn syrup that just says ‘pancake syrup’ on the bottle. That’s where all the incredible depth of flavor comes from!
We’ll mix up the cookie base first, and then we’ll focus on the star of the show: that nutty brown butter glaze. Don’t worry if you’ve never browned butter before; it’s easier than you think, and it makes all the difference in the world.
For the Soft Maple Cookies Dough
- 1 cup unsalted butter, softened
- 1 cup packed light brown sugar (make sure it’s packed in there!)
- 1/2 cup granulated sugar
- 2 large eggs
- 1/4 cup pure maple syrup (the real deal!)
- 1 teaspoon vanilla extract
- 2 3/4 cups all-purpose flour
- 1 teaspoon baking soda
- 1/2 teaspoon salt
For the Brown Butter Maple Icing
This part is where we get that beautiful, rich top layer that sets up perfectly.
- 1/2 cup (1 stick) unsalted butter for glaze (we’re going to brown this!)
- 2 cups powdered sugar
- 1/4 cup pure maple syrup for glaze (yes, we use it twice!)
- 1/2 teaspoon vanilla extract
How to Make Soft Maple Cookies with Brown Butter Glaze
Okay, now for the fun part where we turn those ingredients into actual, amazing cookies! This is where patience pays off, especially when we’re dealing with the texture of these maple cookies. We want them soft, remember? So don’t rush the creaming or the cooling steps. I always double-check my recipe notes just before I start mixing so I don’t forget anything important, like checking the site disclaimer before following any specific guidance!
Preparing the Cookie Dough Base
First things first, get your oven warmed up to 350°F (175°C) and get those baking sheets lined with parchment paper; this saves so much cleanup later! We start the creaming process just like any great cookie recipe: beat that softened butter with both the brown and white sugars until it’s really light and fluffy—it should look pale, not like sludge. After the eggs go in one at a time, add that beautiful 1/4 cup of pure maple syrup and the vanilla. Remember, this is the main maple punch for the cookie itself!
In a separate bowl, whisk your dry stuff—flour, baking soda, and salt—to make sure everything is nicely distributed. Then, you just add the dry mixture into the wet mixture gradually. Stop mixing the second you see the last bit of flour disappear! Overmixing the flour is what turns a soft cookie into a tough hockey puck, and we absolutely do not want that today.
Baking and Cooling Your Maple Cookies
Scoop rounded tablespoons of dough onto your lined sheets, spacing them about two inches apart so they have room to spread happily. Bake them for just 9 to 11 minutes. This is crucial for achieving those soft maple cookies! You are looking for the edges to look set, but the very middle should still look a tiny bit soft and underdone—it will firm up as it cools. Leave them right on that hot sheet for about five minutes before carefully moving them to a wire rack to cool completely. If you rush this, they might just fall apart on you.
Creating the Brown Butter Maple Icing
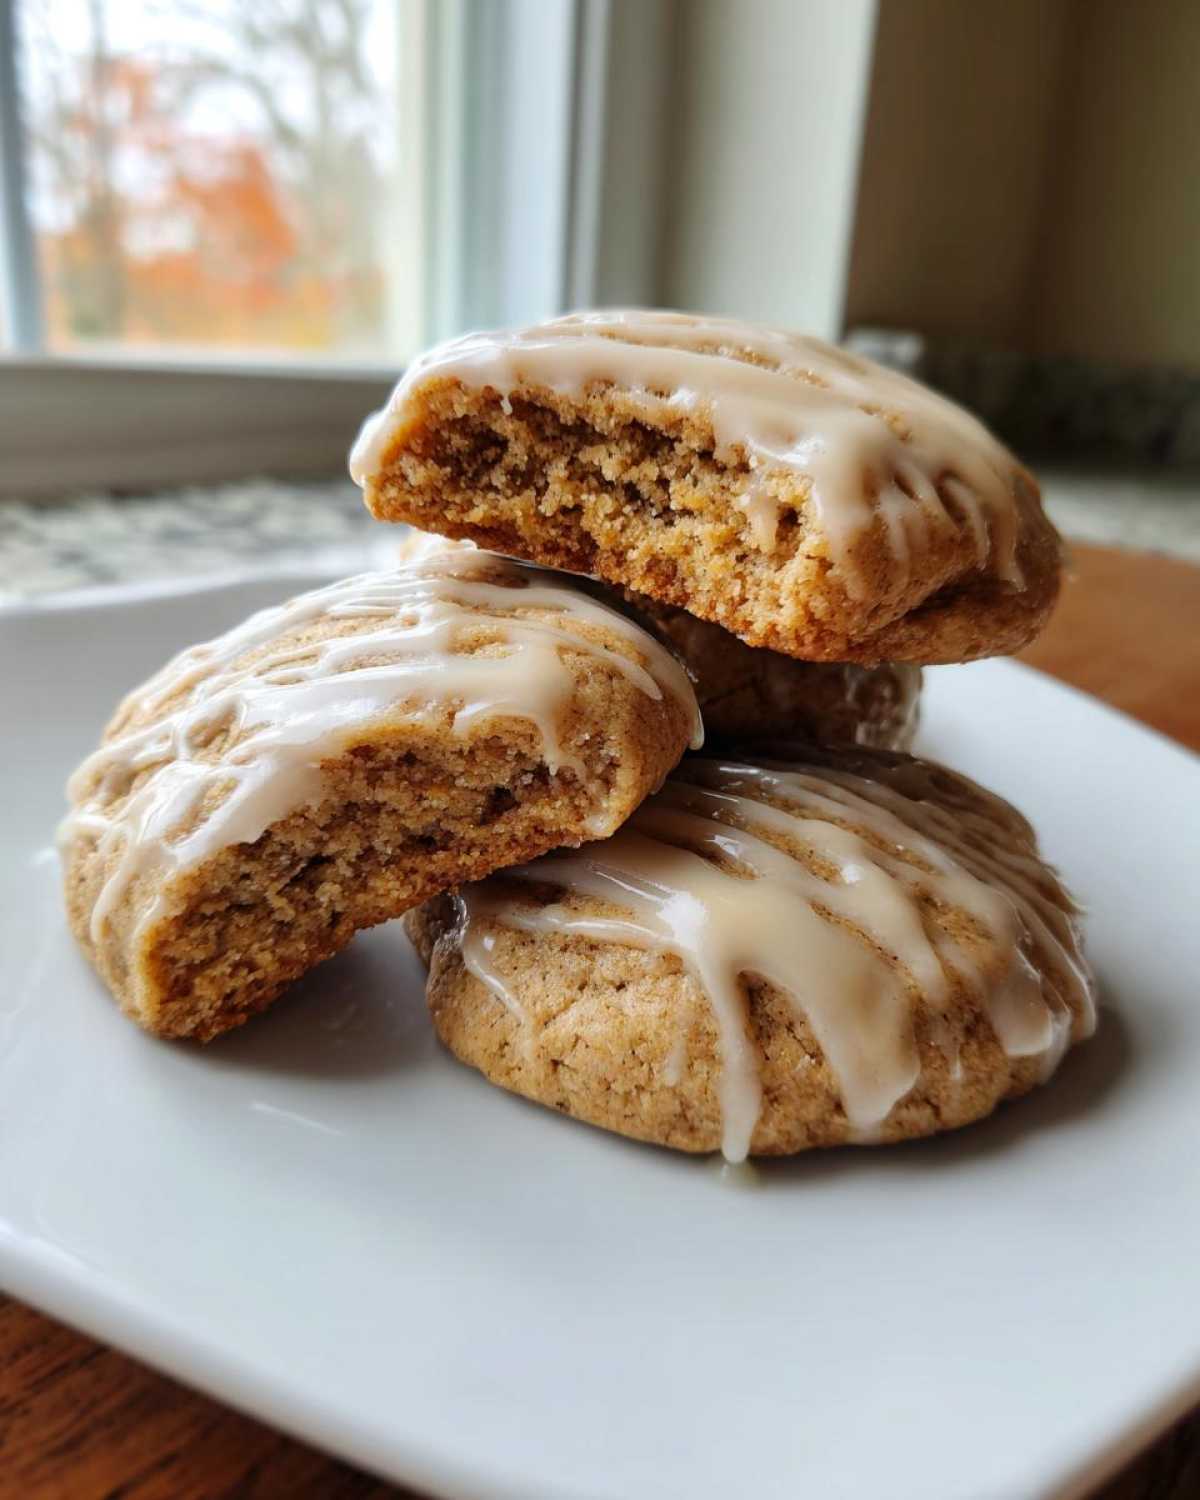
While the cookies cool down (seriously, let them get to room temperature—I learned the hard way!), we tackle that glorious glaze. Put your second half-cup of butter in a small pan over medium heat. Watch it carefully! It will melt, then it will foam up, and then you’ll start seeing little brown specks forming at the bottom, and it will smell wonderfully nutty. That’s brown butter! Pull it off the heat immediately once you smell that nutty aroma and let it cool down for just a minute so it doesn’t melt all our powdered sugar.
Whisk the powdered sugar, the second measure of maple syrup, and vanilla together. Then, slowly whisk in that slightly cooled brown butter until everything is silky smooth. If it’s too thick, add a tiny splash more syrup. If it’s too thin, add a spoonful more powdered sugar.
Finishing Your Maple Cookies with Icing
Once the cookies are totally, one hundred percent cool to the touch—and I mean cool—you can go ahead and drizzle that amazing glaze over the top. I like to use a fork to make thin ribbons across the tops. Give the glaze a little bit of time to set up before you try stacking them or moving them into a container. If you seal them up while the glaze is wet, you’ll just end up with sticky messes!
Expert Tips for the Best Maple Cookies
I always tell people that baking is about listening to the dough, and these maple cookies are no different! My biggest tip, which I mentioned before but it bears repeating, is that quality matters when it comes to maple syrup. If you use the basic breakfast stuff, all you’re getting is extra sugar, not that deep, earthy maple character we want. Stick to pure, grade A or B maple syrup!
Also, don’t skip the chill time if your kitchen is hot. If you find that your dough is really soft and spreading too much in the oven, just pop the scooped dough balls into the fridge for 20 or 30 minutes before baking. A firmer dough spreads less, and that keeps our cookies thick and chewy. That little bit of prep ensures you get those beautiful, soft centers we’re aiming for every single time.
Ingredient Notes and Substitutions for Maple Cookie Recipes
I know sometimes we all have to shop the pantry based on what we have on hand, so let’s have a quick chat about some ingredient swaps for these maple cookie recipes. The maple syrup situation is the most important one here. Please, please, please use 100% pure maple syrup. Pancake syrup is basically just flavored corn syrup, and it won’t give you that distinct, woody, caramelized flavor that makes these cookies special. It’s worth the extra trip to the store to get the good stuff!
Now, about the brown butter? Gosh, I love that flavor, but if you’re in a rush or just not feeling it, you *can* substitute the 1/2 cup of butter used for the glaze with regular melted butter. Just make sure it’s melted, not hot, when you mix it into the sugar. You’ll lose that nutty depth, but you’ll still have a tasty maple glaze cookie!
If you need to brush up on any pantry policies or agreements while you’re baking, you can always check out my cookie policy page, though I promise these cookies are way more fun than reading fine print!
Variations on These Chewy Maple Cookies
Part of the joy of finding a great base recipe like this is tweaking it for the season or just because you feel like experimenting! These chewy maple cookies are so versatile. If you want to lean into that warm spice flavor that screams autumn, you can make a quick maple cinnamon version.
Simply add about a half teaspoon of ground cinnamon right into your dry ingredients when you mix the flour, baking soda, and salt. Wow, that smells amazing! For something even more fun, try folding in a handful of toffee bits right before you drop the dough onto the sheet. That maple-toffee combination is just divine.
If you want to lean into the popularity of Maple Snickerdoodles, skip the glaze entirely! Instead, roll the dough balls in a mix of sugar and a bit more cinnamon before baking. They won’t have that sharp glaze finish, but the soft cookie texture will be even more pronounced.
Storage and Reheating Instructions for Homemade Maple Treats
We need to protect these delicious homemade maple treats once they are totally done! Since we have that lovely brown butter glaze on top, the best method is keeping them at room temperature. Pop them into a good airtight container—a nice cookie tin works perfectly—and they should stay wonderfully soft for about four or five days. Don’t put them in the fridge, though; that tends to dry out the cookie part! If you happen to have plain cookies without the glaze, you can store those the same way, but you can pop them into the microwave for just 8 seconds if you want that melt-in-your-mouth warmth again.
Frequently Asked Questions About Maple Glaze Cookies
I get so many messages asking about how to make these cookies perfect, especially concerning that famous chewiness and the glaze! It’s normal to have questions when you’re working with something as special as pure maple syrup in your maple glaze cookies.
How do I make my maple cookies chewier?
That’s the million-dollar question, isn’t it? For maximum chewiness in these soft maple cookies, you need two main things. First, make sure you use the full amount of brown sugar in the dough—it holds more moisture than white sugar does! Second, and this is vital: slightly underbake them! Pull them out when the centers still look soft, maybe even a little wet. They continue to bake on the hot pan, and that slight underbake turns into the perfect chewy texture once they fully cool.
Can I use artificial maple flavoring instead of pure syrup in these maple cookies with icing?
Oh goodness, please don’t! If you want that truly deep, comforting flavor that makes these the best maple cookies, you have to use pure maple syrup in both the dough and the glaze. Artificial flavoring—even the really expensive stuff—is just candy flavoring. It’s flat, and it doesn’t have that woody, earthy background note we get from real boiled-down tree sap! Using pure syrup is the biggest quality indicator for these homemade maple treats, so take a look at my contact page if you need tips on where to source good stuff!
If you try these out, let me know in the comments if you decided to skip the glaze or if you went all-in with the brown butter version—I love hearing what everyone decides!
Sharing Your Maple Cookies Experience
Now it’s your turn! Give these fantastic maple cookies a try and let me know how they turned out. Did you love the brown butter glaze, or did you go for a different topping? Please leave a star rating below and drop a comment with your results. You can check out my terms and conditions while you’re here, but mostly, I just want to see photos of your beautiful batches!
PrintSoft Maple Cookies with Brown Butter Glaze
Make soft, chewy maple cookies flavored with pure maple syrup, topped with a rich brown butter maple glaze.
- Prep Time: 20 min
- Cook Time: 11 min
- Total Time: 31 min
- Yield: 24 cookies
- Category: Dessert
- Method: Baking
- Cuisine: American
- Diet: Vegetarian
Ingredients
- 1 cup unsalted butter, softened
- 1 cup packed light brown sugar
- 1/2 cup granulated sugar
- 2 large eggs
- 1/4 cup pure maple syrup
- 1 teaspoon vanilla extract
- 2 3/4 cups all-purpose flour
- 1 teaspoon baking soda
- 1/2 teaspoon salt
- 1/2 cup (1 stick) unsalted butter for glaze
- 2 cups powdered sugar
- 1/4 cup pure maple syrup for glaze
- 1/2 teaspoon vanilla extract
Instructions
- Preheat your oven to 350°F (175°C). Line baking sheets with parchment paper.
- In a large bowl, cream together the softened butter, brown sugar, and granulated sugar until light and fluffy.
- Beat in the eggs one at a time, then mix in the 1/4 cup maple syrup and vanilla extract.
- In a separate bowl, whisk together the flour, baking soda, and salt.
- Gradually add the dry ingredients to the wet ingredients, mixing until just combined. Do not overmix.
- Drop rounded tablespoons of dough onto the prepared baking sheets, spacing them about 2 inches apart.
- Bake for 9 to 11 minutes, or until the edges are set but the centers are still soft. Let cookies cool on the baking sheet for 5 minutes before moving them to a wire rack to cool completely.
- To make the glaze, melt the 1/2 cup butter in a small saucepan over medium heat. Cook, swirling occasionally, until the butter foams and brown bits form at the bottom and it smells nutty (about 5 minutes). Remove from heat and let cool slightly.
- In a medium bowl, whisk together the powdered sugar, 1/4 cup maple syrup, and vanilla extract. Slowly whisk in the slightly cooled brown butter until smooth.
- Once cookies are completely cool, drizzle or spread the brown butter maple glaze over the tops. Let the glaze set before serving.
Notes
- For the best maple flavor, use high-quality pure maple syrup, not pancake syrup.
- Chill the dough for 30 minutes before scooping if your dough seems too soft.
- You can add 1/2 teaspoon of ground cinnamon to the dry ingredients for a maple cinnamon cookie variation.
Nutrition
- Serving Size: 1 cookie
- Calories: 250
- Sugar: 25
- Sodium: 120
- Fat: 14
- Saturated Fat: 9
- Unsaturated Fat: 5
- Trans Fat: 0
- Carbohydrates: 32
- Fiber: 0
- Protein: 2
- Cholesterol: 50