


If you’ve ever taken a bite of a store-bought lemon pie and thought, “Where’s the zing? And why is the meringue so sad?”—then believe me, you are in the right place! I spent years chasing that perfect, face-puckeringly tart filling balanced by a towering, cloud-like meringue, and I finally nailed it. Forget those box mixes; we’re making a genuine, classic homemade lemon meringue pie completely from scratch. Learning how to get that fluffy meringue topping to hold its shape and not shrink away from the crust was a journey, I won’t lie! But this recipe simplifies the entire process so you can achieve that showstopper dessert without the kitchen panic. If you want to read a little more about my baking philosophy and how I approach recipes like this, you can check out my story over at my baking journey. Get ready to meet your new favorite lemon meringue recipe!
Why This Classic lemon meringue Pie Recipe Works (EEAT)
Look, there are a million quick and easy lemon desserts out there, but none of them deliver the sheer satisfaction of a truly from scratch pie. The secret to this classic lemon meringue pie isn’t just one thing; it’s how the rich lemon flavor cuts through the sweetness. My filling has such a fantastic kick because we use fresh juice and zest—it’s the best way to make intense tangy lemon desserts.
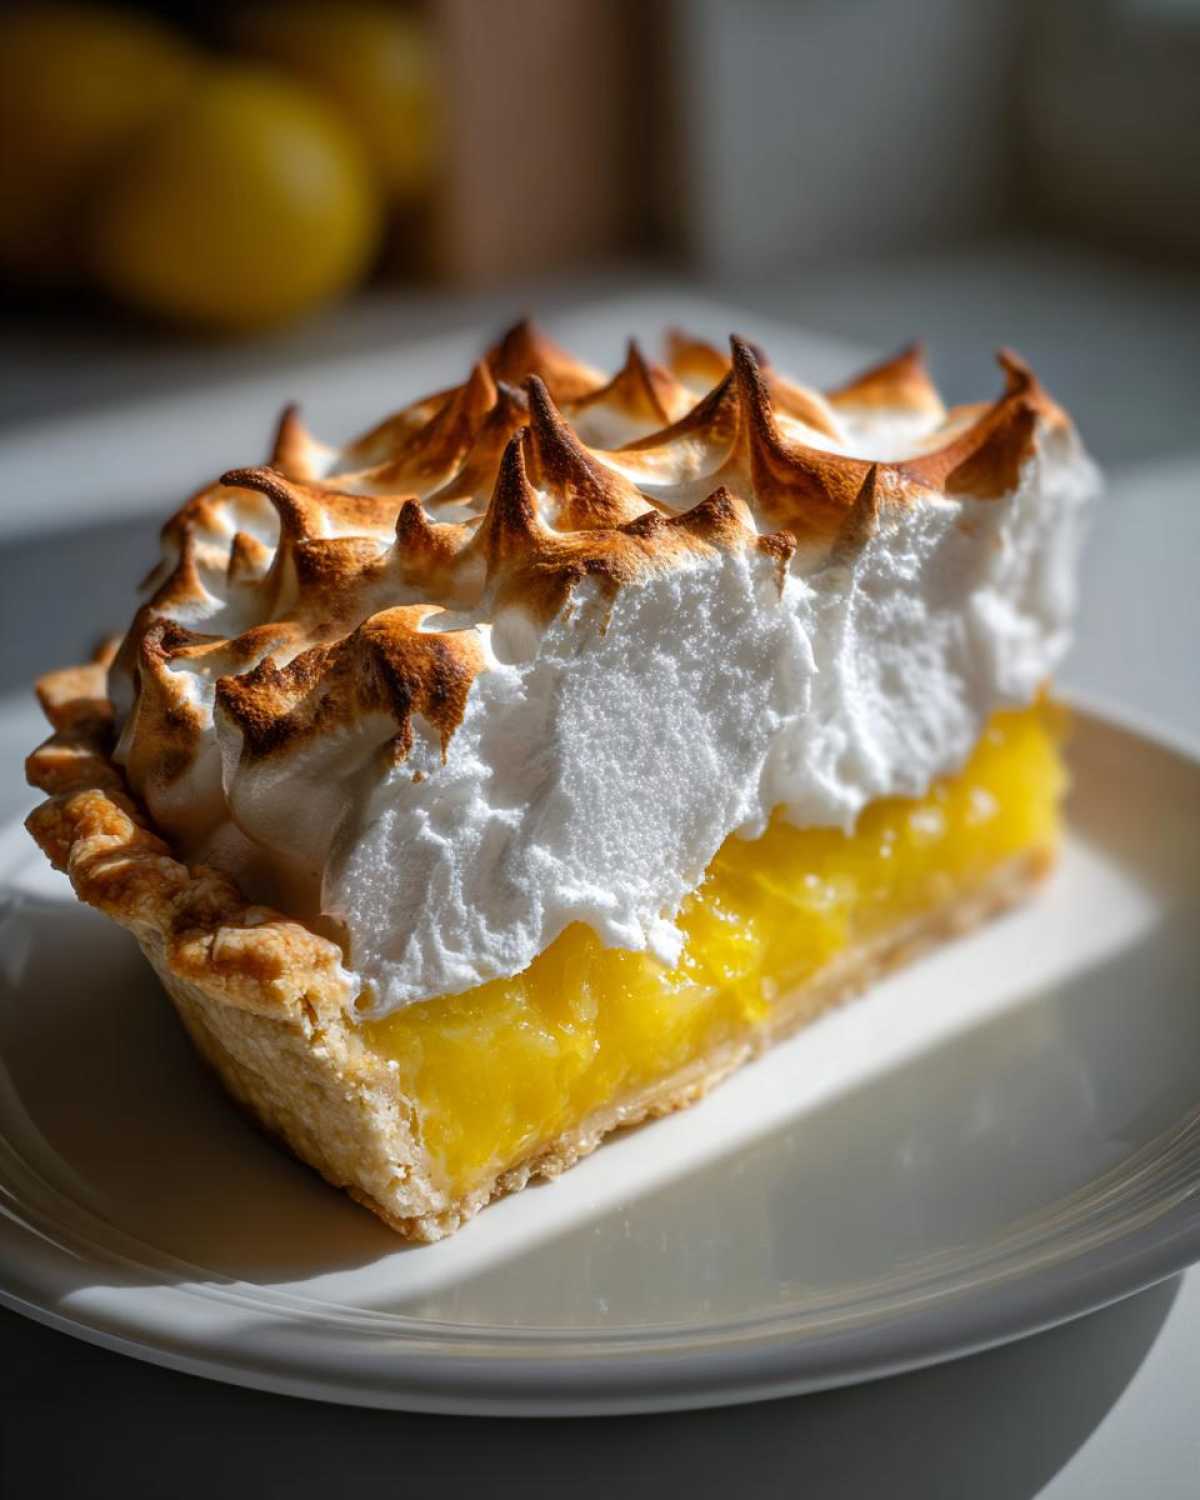
Also, let’s talk structure. Quick methods often use stabilizers that leave you with a filling that’s just okay. Here, we cook the starch properly. That brief boil that the recipe calls for? It’s crucial! That’s what sets up the filling beautifully so it doesn’t turn soupy. When you get that balance right, you have the perfect sweet and tart dessert that always makes people rave.
Gathering Ingredients for Your homemade lemon meringue pie
This is where the magic—and the flavor—are decided! Since we’re making everything from scratch, the quality of your components really shines through here. Don’t skimp on real butter or fresh citrus; trust me, your tastebuds will thank you later. I’ve broken down exactly what you need for the two main acts of this show: the filling and the cloud on top.
For the Tangy lemon meringue Filling
For that unbeatable zing, you need everything measured out just so. I always line up my jars and bowls ahead of time so the mixing process goes smoothly:
- 1 recipe for your favorite 9-inch pie crust (make sure it’s baked!)
- 1 1/2 cups granulated sugar
- 1/4 cup cornstarch (this is the thickener, don’t skip it!)
- 1/4 teaspoon salt
- 1 1/2 cups cold water
- 4 large egg yolks, lightly beaten—save the whites!
- 1/2 cup fresh lemon juice (strain out any pulp)
- 1 tablespoon lemon zest (get that fragrant yellow part only!)
- 2 tablespoons unsalted butter
For the Fluffy meringue topping
This topping requires focus once you start beating, so have these ingredients ready to go:
- 6 large egg whites, brought to room temperature
- 1/2 teaspoon cream of tartar (this is our magic stabilizer!)
- 1/2 cup granulated sugar (this is separate from the filling sugar)
Pie Crust Requirements
This recipe is designed for a standard 9-inch pie pan. The most important thing to know about your crust is that it absolutely MUST be fully baked and completely cooled before you pour the hot filling in. If your crust is warm, the delicate bottom of the filling will turn soupy, and we can’t have a soggy bottom on our perfect lemon meringue pie!
Step-by-Step: how to make lemon meringue
Okay, time to get serious! This process moves fairly quickly once you start cooking because we want that filling hot when it meets the meringue. Always have your cooled crust ready, and make sure you have a clean, grease-free bowl waiting for those egg whites. If you mess up the tempering, don’t sweat it—you can always read my thoughts on troubleshooting various kitchen disasters over at this handy disclaimer page, though I really think you’ll nail this!
Creating the Perfect lemon meringue Filling
First things first: we need a silky, thick base. Whisk your 1 1/2 cups of sugar, cornstarch, and salt together in a saucepan. Now, slowly trickle in the cold water, whisking constantly until it looks smooth—no lumps allowed!
Put that on medium heat and stir, stir, stir until it gets thick and starts boiling. You must let it boil for one full minute while you stir; this cooks out the starchy flavor. Remove it! Now for the trickiest part: tempering those yolks. Take a ladle of that hot sugar mixture and slowly drizzle it into your lightly beaten egg yolks while whisking the yolks like crazy. This gently warms them up. Once tempered, pour that yolk mixture back into the saucepan with the rest of the hot base and return it to the heat. Bring it back to a boil for that last minute. Finally, stir in the lemon juice, zest, and butter until everything melts smooth. Pour this gorgeous, bright yellow filling right into your cooled crust!
Achieving a tall, fluffy meringue topping
While the filling is still piping hot, move straight to your egg whites. Make sure your bowl is spotless! Beat those room-temperature egg whites with the cream of tartar until you see soft peaks—they should look like soft, droopy snowcaps. Now, slowly add the remaining 1/2 cup of sugar, a tablespoon at a time. Keep beating until you hit those stiff, glossy peaks. You should be able to hold the bowl upside down (maybe just test this over the sink first!), and the meringue should look like a perfect, stable cloud. This is the key to a fluffy meringue topping.
Assembly and Baking the final lemon meringue
Take that gorgeous meringue and drop it right onto the hot filling. This is crucial: use a spatula to push the meringue all the way out so it touches the pastry edge everywhere. If you leave a gap, the meringue will shrink down the sides, which nobody wants! Create some dramatic swirls on top. Pop it into a 350°F oven for about 12 to 15 minutes. We’re just trying to lightly toast that glorious topping until it’s kissed with golden brown spots. Let the whole thing cool completely on a rack—at least 4 hours—so your lemon meringue sets perfectly before slicing.
Tips for Success with Your lemon meringue Pie
I’ve learned a few things over the years about making a truly bomb-proof lemon meringue pie. Usually, when people run into trouble, it’s the meringue throwing a tantrum! For that best meringue recipe structure, remember the two golden rules I mentioned: Room temperature whites are non-negotiable for volume, and your bowl for whipping must be surgically clean—any hint of grease fights those egg whites.
To stop the dreaded shrinking, make sure you seal the meringue right to the edge of that warm filling; it creates a tight seal. And if you see little beads of moisture forming (weeping!), that often means the baking time was too short, or the pie cooled down too fast. My experience tells me that if you just let it bake until those peaks are beautifully set and slightly golden, you’ll avoid 99% of the drama. Patience while cooling is the final hurdle!
Storage and Reheating Instructions for lemon meringue
So, you made it! You have this gorgeous, towering slice of heaven. Now, how do you keep it looking great? The short answer is: you need a cold place fast. This lemon meringue really doesn’t like hanging out on the counter.
You must cover and refrigerate the pie immediately after it has fully cooled down—that’s at least four hours hanging out on the counter. Remember, that meringue is made of egg whites and sugar, and it starts degrading pretty quickly once it’s out of that oven temperature zone. It’s science, but it’s annoying science!
When you wrap it, don’t press plastic wrap directly onto the meringue. Trust me, it’ll stick, and you’ll yank half the topping off when you try to serve it later. I usually use a large cake dome or just loosely tent some plastic wrap over the top without touching the peaks.
In the fridge, it’s best eaten within two days maximum for peak meringue texture. After that, the meringue starts to ‘weep’ (get watery) and shrink back from the crust. The filling underneath will stay delicious for maybe four days, but the showstopping fluffiness fades after 48 hours. Nobody wants sad, sunken meringue, so slice and enjoy it quickly!
Reheating isn’t really a thing for this pie. You don’t want to reheat lemon meringue pie because it totally ruins the structure of the topping. Just pull it out of the fridge about 20 minutes before serving to take the chill off. That slight warmth just enhances the citrus flavor without melting your beautiful construction.
Variations on the classic lemon meringue
Now that you’ve mastered the ultimate classic lemon meringue pie, you might be wondering how else you can use that incredible filling and top-notch meringue, right? I totally get it! Sometimes you want something handheld, or maybe you just don’t want to deal with slicing a huge pie. Good news: you absolutely can adapt this bright, sweet and tart dessert flavor profile into so many other amazing things!
The filling we made is so vibrant, it’s practically begging to be transformed into other wonderful treats. Think about scaling back the complexity but keeping all that mouth-watering flavor! It’s all about capturing that true tangy lemon essence in different formats.
Lemon meringue bars
If you’re looking for something incredibly easy to transport or serve at a party, you have to try lemon meringue bars. You bake the filling—often on top of a shortbread crust instead of a traditional pastry shell—and then you top it with the meringue.
The method changes slightly because you’ll usually bake the whole thing until the filling sets firmly in a square or rectangular pan. When cut into squares, they are perfect finger food! They hold up so well and give you a huge payoff for much less effort than rolling out a full crust.
Mini lemon meringue tarts
Oh my gosh, these are adorable! For special occasions, making mini lemon meringue tarts is such a fun project. You use those little individual tart shells—either shortcrust or sometimes even puff pastry if you want to be really decadent.
The best part? You can perfectly portion the filling. You pipe the filling into the shells, then pipe little individual kisses of meringue on top. Since they are smaller, they bake much faster, and they look like actual jewels sitting on a platter. They’re just stunning little citrus meringue desserts.
Lemon meringue cheesecake
Now this one is a serious showstopper! If you want to take things in a richer direction, consider making a lemon meringue cheesecake. You bake your standard cheesecake base, let it cool completely, and then top the whole thing with the tangy lemon curd layer we made.
Finally, you finish it with that incredible fluffy meringue topping and briefly broil or bake it just enough to color the meringue. It’s super creamy, intensely flavorful, and definitely earns the title of a serious showstopper dessert. The combination of creamy cheese, sharp lemon, and sweet meringue is just heavenly.
Other simple lemon dessert ideas
Don’t stop there! If you want an even more simple lemon dessert, you can use the filling as a base for homemade pudding, or even layer it with ladyfingers for a sort of deconstructed lemon meringue trifle. And for something truly unique, some bakers even manage to pipe the filling and meringue onto little sugar cookie bases for tiny lemon meringue cookies or lemon meringue bites. The possibilities are endless when you master the core filling!
Quick Answers to Common lemon meringue Questions (FAQ)
I know when you’re in the middle of baking, you always have little questions that pop up. I certainly do! That’s why I pulled together some of the most common concerns I hear about making a beautiful lemon meringue pie. Don’t worry if you run into a tiny glitch; most of them are simple fixes!
Why is my lemon meringue weeping?
Oh, weeping! That’s when tiny, watery beads form on top of your beautiful meringue, and look, it’s frustrating, but it’s usually easy to fix next time. Weeping happens when the meringue hasn’t cooked long enough to set up properly, or if you cool the pie down too fast after it comes out of the oven.
For this best meringue recipe, you need to make sure you bake it until those peaks are definitely set and the meringue is starting to get a little color. If it’s weeping, it means the sugar in the meringue hasn’t fully incorporated with the egg whites. Just try giving it that extra minute or two in the oven next time. A slow cool-down period, as I mentioned in the tips, also helps stabilize everything!
Can I use pre-made lemon filling for an easy lemon meringue recipe?
Okay, this is a totally fair question when you’re craving a simple lemon dessert and you’re short on time! Yes, technically you can use a high-quality, store-bought lemon meringue filling base if you need an easy lemon meringue recipe. But listen, if you want that genuine, bright, punchy flavor that makes people ask for the recipe, you really need to make the filling from scratch.
The packaged ones often rely heavily on artificial flavoring or too much sugar to mask deficiencies. Our filling, made with fresh lemon juice and zest, is vibrant! Going from scratch isn’t much harder—it really just adds about twenty minutes of active cooking time—and the resulting depth of flavor is just so much better. It’s worth the small extra effort!
How long does it take for the pie to set?
This is where patience comes in, and it’s the hardest part when your kitchen smells like glorious citrus! You absolutely cannot rush this part if you plan on getting those beautiful, clean slices everyone is hoping for. The pie needs to cool completely on a wire rack at room temperature for a minimum of four hours.
I know, waiting four hours feels like an eternity, but this gives the starch in the lemon base time to fully gel and firm up around the egg whites and zest. If you cut into it early, it will just ooze out sadly. If you want those amazing slices for your showstopper desserts presentation, just trust the cooling time. After that, it goes into the fridge to stay stable!
Estimated Nutritional Data for lemon meringue
Alright, let’s talk turkey—or, well, sugar and butter! I always feel a little awkward posting nutrition facts because, let’s be honest, when you’re making a classic lemon meringue pie, you aren’t exactly thinking about macro counting! This is a celebration dessert, meant to be enjoyed!
However, I understand that some of you are curious, so I did a quick calculation based on the standard recipe for 8 generous slices. Because we are making this completely from scratch, the numbers are going to look different than a store-bought version loaded with artificial stabilizers and fillers.
Keep in mind that these figures below are just quick estimates based on general ingredient averages. If you use a fancy butter substitute or a different crust recipe, your numbers will shift. Please treat this section as a general guideline, not a precise nutritional breakdown. You can find out more about how I handle data transparency over at my Privacy Policy page if you’re interested!
- Serving Size: 1 slice (1/8th of pie)
- Calories: Approximately 380
- Sugar: Right around 45 grams (That tart filling needs its sugar, folks!)
- Fat: About 18 grams
- Saturated Fat: Roughly 8 grams
- Carbohydrates: Around 54 grams
- Protein: About 6 grams
- Cholesterol: Near 120 mg
See? It’s a treat! But goodness, is it worth every single bite of that tangy lemon filling and sweet meringue. Don’t let numbers keep you from making this incredible showstopper dessert!
Share Your Showstopper lemon meringue Creations
And that’s it! You’ve conquered the crust, tamed the tart filling, and built a mountain of glorious, fluffy perfection on top. Truly, making a spectacular lemon meringue from scratch is something to be proud of. It’s an impressive dessert, and I bet yours looks absolutely stunning!
Now, I would be thrilled if you could stop by the comments section down below and tell me how it went. Did your meringue reach those stiff peaks I promised? Was the filling sharp enough to make you pucker just a little?
Your feedback is gold to me. It helps me know that this classic lemon meringue pie recipe is making kitchens happier everywhere. If you found this recipe helpful, please leave a rating! It really helps other bakers find their way to the best lemon pie recipe.
If you shared pictures of your towering dessert on social media—and honestly, why wouldn’t you?—please tag me! I love seeing how you styled your pies. Showing off your beautiful, handcrafted results is the best part of sharing these recipes. If you have any questions or need further assistance with your homemade lemon meringue pie, don’t hesitate to reach out through my contact page. Happy baking, friends!
PrintClassic Homemade Lemon Meringue Pie

A recipe for a classic lemon meringue pie featuring a tangy lemon filling and a tall, fluffy meringue topping, made completely from scratch.
- Prep Time: 30 min
- Cook Time: 45 min
- Total Time: 5 hours 15 min
- Yield: 8 servings
- Category: Dessert
- Method: Baking
- Cuisine: American
- Diet: Vegetarian
Ingredients
- 1 recipe for 9-inch pie crust (baked)
- 1 1/2 cups granulated sugar
- 1/4 cup cornstarch
- 1/4 teaspoon salt
- 1 1/2 cups cold water
- 4 large egg yolks, lightly beaten
- 1/2 cup fresh lemon juice
- 1 tablespoon lemon zest
- 2 tablespoons unsalted butter
- 6 large egg whites, room temperature
- 1/2 teaspoon cream of tartar
- 1/2 cup granulated sugar (for meringue)
Instructions
- Prepare and fully bake your 9-inch pie crust shell. Let it cool.
- For the filling, whisk together 1 1/2 cups sugar, cornstarch, and salt in a medium saucepan.
- Gradually whisk in the cold water until smooth.
- Cook over medium heat, stirring constantly, until the mixture thickens and boils. Boil for 1 minute, stirring constantly. Remove from heat.
- In a separate bowl, whisk the egg yolks lightly. Slowly temper the hot sugar mixture into the yolks, whisking constantly.
- Return the entire mixture to the saucepan. Cook over medium heat, stirring, until it returns to a boil. Boil for 1 minute. Remove from heat.
- Stir in the lemon juice, lemon zest, and butter until the butter melts.
- Pour the hot lemon filling immediately into the cooled, baked pie crust.
- For the meringue, beat the egg whites and cream of tartar in a clean, grease-free bowl until soft peaks form.
- Gradually add the 1/2 cup sugar, beating until stiff, glossy peaks form.
- Spread the meringue over the hot lemon filling, making sure the meringue touches the crust edge all around to prevent shrinking.
- Bake at 350°F (175°C) for 12 to 15 minutes, or until the meringue is lightly golden brown.
- Cool the pie completely on a wire rack at room temperature for at least 4 hours before slicing.
Notes
- Use room temperature egg whites for the fluffiest meringue.
- Ensure your mixing bowl for the meringue is completely free of grease or water.
- To prevent the meringue from weeping, bake it immediately after preparing the filling.
- For a showstopper look, create decorative swirls in the meringue before baking.
Nutrition
- Serving Size: 1 slice
- Calories: 380
- Sugar: 45
- Sodium: 150
- Fat: 18
- Saturated Fat: 8
- Unsaturated Fat: 10
- Trans Fat: 0
- Carbohydrates: 54
- Fiber: 1
- Protein: 6
- Cholesterol: 120