

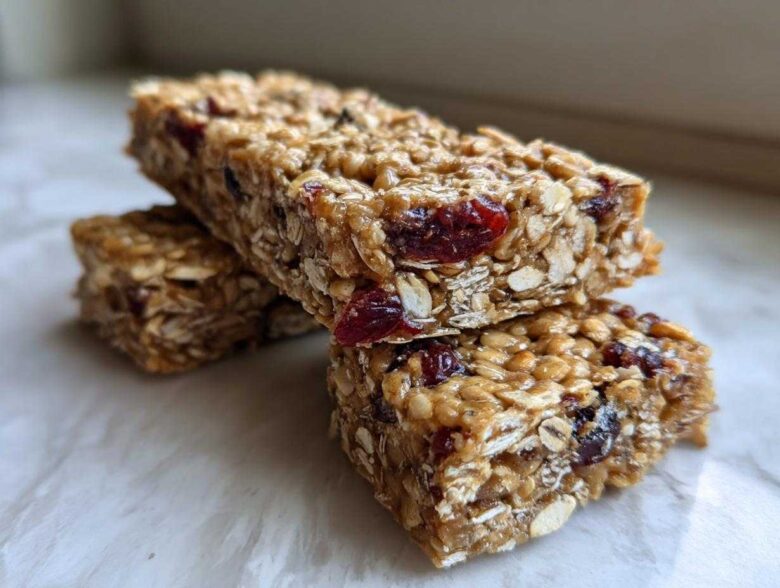
You know those days? When the lunch rush hits, or you just need a solid grab-and-go breakfast, and you look in the pantry and panic? I’ve been there a million times, and that’s exactly how I ended up perfecting these Chewy No-Bake homemade granola bars. Forget those crumbly, sugary bars you find wrapped in shiny plastic at the store. I swear, after trying nearly every variation—baked, pressed, baked again—I landed here. This no-bake method is the fastest way to get wholesome, chewy goodness into a pan. I actually timed myself last week making a huge batch for the school week; it’s genuinely 15 minutes of active work. Trust me, these are the bars that actually stick together and keep everyone going! If you want to know more about where I get my inspiration, you can always check out our story here.
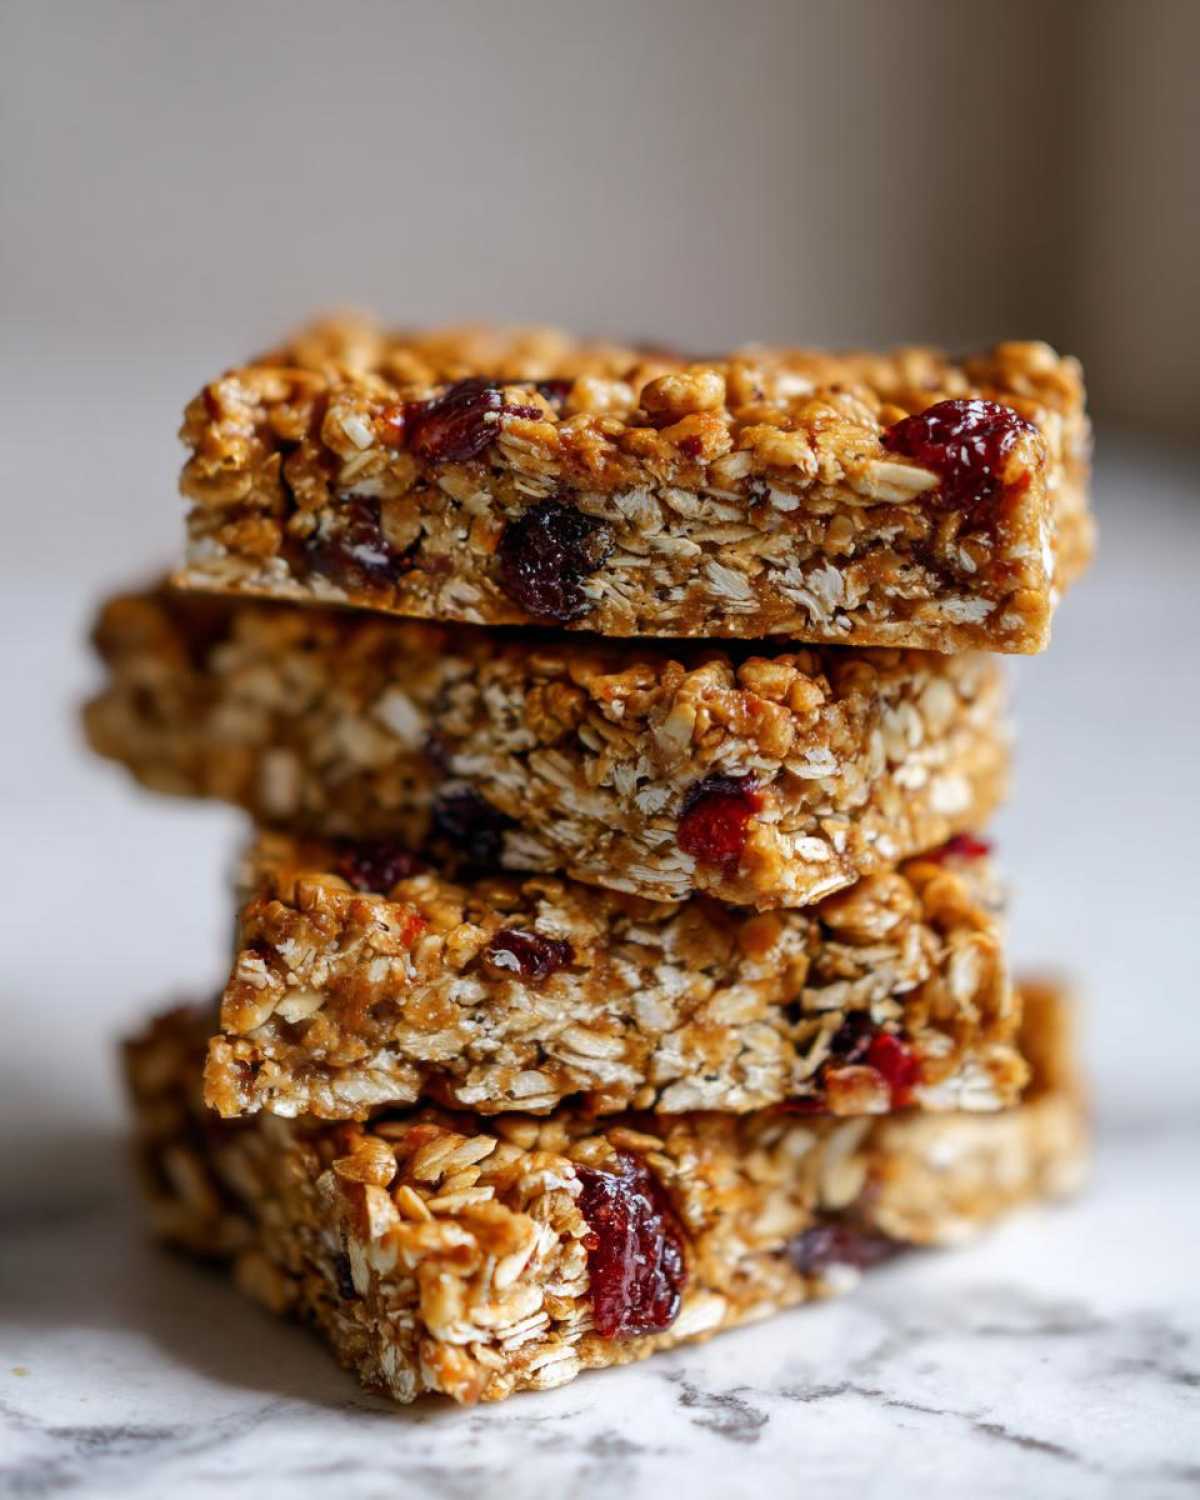
Why This Chewy No-Bake Recipe Makes the Best Homemade Granola Bars
When I first started making these for my kids, my main goal was survival—I needed something fast and something that wouldn’t instantly fall into a million crumbs the second they touched it. These homemade granola bars nail that instantly. They are truly the best because they tick every box without needing the oven!
- They are genuinely chewy, not hard or cakey. That’s the magic binder mix!
- We control every single ingredient, so we skip the junk you find in the store-bought versions.
- There’s almost zero cleanup since we aren’t dealing with pans in the oven.
Achieving the Perfect Chewy Homemade Snack Bars
The chewiness comes almost entirely from how we treat our sweeteners. Honey or maple syrup, when gently warmed with the nut butter, creates this sticky, pliable glue. It coats every oat perfectly so they compress beautifully. That compression is the secret sauce to a bar that doesn’t shatter when you bite into it.
Quick Homemade Snack Preparation Time
Talk about fast! You are only looking at about 15 minutes of actual work. Since this is a no-bake recipe, that means zero preheating and zero waiting for the oven to cool down later. It’s the perfect recipe for a quick homemade snack when you realize at 7 AM that you forgot to pack anything for lunch boxes!
Gathering Ingredients for Your Homemade Granola Bars
Okay, let’s talk materials! The best part about these is that they are completely naturally sweetened granola bars. We aren’t using refined sugar here at all, just the beautiful sweetness from honey or maple syrup to get that perfect binding quality. I always lay everything out on the counter first—it’s my ‘mise en place’ moment, even though it’s super simple! You’ll need 2 cups of rolled oats, a bit of crispy rice cereal if you want that extra crunch, your nut butter, vanilla, and of course, your mix-ins. Getting these proportions right is key to making sure they aren’t sticky messes.
Ingredient Notes and Substitutions for Customizable Granola Bars at Home
This is where you get to play chef with your customizable granola bars at home. If you’ve got allergies, don’t worry for a second! We’ve got solutions. For starters, if anyone in your house can’t handle gluten, just make sure you grab certified gluten-free rolled oats—the rest of the recipe is naturally GF. Also, if you’re dealing with a nut-free classroom requirement, swapping the peanut butter for sunflower seed butter works like a charm! Seriously, the binder remains perfect, you just get a different flavor profile.
Step-by-Step Guide to Making No Bake Oat Bars
Alright, let’s get down to the fun part! Now that we have all our dry and wet bits ready, it’s time to bring them together. This process is so easy, which is why these are my go-to no bake oat bars. We’re moving fast here, so make sure that 8×8 pan is lined with parchment paper first—you want those long sides hanging over the edge so you can lift the whole thing out later. No struggling with stuck bars here!
First, put your dry stuff (oats, cereal if you’re using it) into the big mixing bowl. Then, get ready for the magic binder. This is the most important part of the process for structure.
Preparing the Wet Binder for Your Homemade Granola Bars
Grab a small saucepan and put your nut butter and your honey or maple syrup in there. Keep the heat turned down low—I mean really low, like ‘warm milk’ level. We just want them to get cozy enough to mix well. You need them smooth enough to pour, but listen to me: DO NOT BOIL IT. Boiled syrup changes its properties, and you’ll end up with hard, brittle bars instead of the soft ones we want. Once it’s liquid smooth, take it off the heat immediately and stir in the vanilla extract. That’s it for the wet side!
Setting and Cutting the Chewy Homemade Snack Bars
Now, pour that warm, gooey mixture right over your oats and mix it like your life depends on it! Make sure every single oat flake is coated; don’t leave any dry patches hiding in the corners of the bowl. Then, dump it all into your prepared pan. Here’s the secret handshake for success: you have to press this mixture down as hard as humanly possible. Use the bottom of a glass or a sturdy spatula and compact it down tightly. If you think it’s firm enough, press it again! That tightness is what gives you those beautiful, chewy homemade snack bars that hold their shape.
Once it’s unbelievably packed down, pop that pan into the fridge. You need patience here! Give it a minimum of two hours, but honestly, overnight is even better. Once it’s rock solid, you just grab those parchment handles and lift the whole slab out. Then, slice it up into your 12 or 16 bars. Easy peasy!
Tips for Success When Making Homemade Granola Bars
I’ve messed these up enough times for all of us, so let me save you some heartache when making these homemade granola bars! The biggest enemy here is stickiness, usually caused by skipping the chilling step. Don’t try to cut them warm, or you’ll end up with goo all over your knife! They need that time in the fridge to let the binder fully solidify.
Also, if you notice your bars seem a little crumbly after you cut them, it usually means you didn’t press hard enough in the pan. Seriously, use muscle! Another little trick I learned? If my oats have been sitting in the pantry a while and feel super dry, I sometimes add just a tablespoon of extra nut butter. It sounds counterintuitive, but that extra fat helps those older oats really grab onto the binder and stay put. This keeps them from turning into those sad, falling-apart snacks later in the week.
Making Healthy Granola Bars for Kids and Lunchboxes
One of the main reasons I developed this recipe was honestly to stop buying those grocery store snack packs. It felt like every time I packed one in a lunchbox, half of it was missing by recess anyway! These are the ultimate healthy granola bars for kids because we use honey or maple syrup instead of high-fructose corn syrup. You just feel so much better about handing these over for snack time.
The best part for the kids is the customization, which means they are way more likely to actually eat them! If you have picky eaters, keep the mix-ins simple: mini chocolate chips, dried cranberries, or maybe some puffed rice cereal if you want to bulk them up without nuts. Honestly, my little one always asks for the sunflower seeds because he likes the crunch, but you use whatever floats your family’s boat. Since we make them fresh, they are always soft and delicious, which is a huge win for me!
Storage and Make Ahead Breakfast Bars for Busy Weeks
Since these are no-bake, the shelf life is a little different than baked goods, but that’s actually great! You absolutely need to keep these bars chilled. Once you’ve cut them, pop them into an airtight container right away. I usually layer them with a piece of parchment paper in between so they don’t stick together, especially if you loaded them up with sticky chocolate chips.
Stored properly in the fridge, they stay perfectly chewy and fresh for at least a week, maybe even ten days if you don’t sneak a few every time you open the door! Because they last so well, this is my total go-to for make ahead breakfast bars. I can make a batch on Sunday, and we are completely set for grab-and-go mornings all the way through the following weekend. Easy convenience, massive win!
Frequently Asked Questions About Homemade Granola Bars
Whenever I share pictures of these on social media, people always have the same few pressing questions! It’s all about getting these homemade granola bars exactly right, and I get it. Here are some of the things I hear most often that might help you tackle your first batch!
Can I bake these homemade granola bars instead of making them no-bake?
Oh, I wouldn’t really recommend it, honestly. Keeping them no-bake is how we guarantee that wonderfully soft, chewy texture everyone loves! If you absolutely must bake them—maybe your fridge is too full—I’d try baking at a super low temperature, like 300°F (150°C), for maybe 15 minutes, just until they start to feel set. But be warned, they will dry out much faster and lose that signature chewiness we worked so hard for. The charm here is skipping the oven entirely!
What is the best binder if I cannot use honey or maple syrup for my easy granola bar recipe?
That’s a great question, especially if you’re avoiding high-sugar options or just ran out of the usual suspects! For an easy granola bar recipe like this, you need a viscous liquid binder. Brown rice syrup is a fantastic replacement; it binds really well, though sometimes you need just a tiny bit less of it. Date paste works wonders too, though it will make the final bars darker and give them a distinct fruitier flavor. Just make sure whatever you use is warm and smooth before mixing it with the oats!
If you have other questions about substitutions or need to check something specific, I’ve got a link to our general policy notes if you want to review ingredients further!
Nutritional Estimate for Wholesome Snack Bars Recipe
I always get asked about the health factor when people taste how good these wholesome snack bars recipe bars are, especially since we keep the sugar light! Now, here’s a big caveat—since you can customize these so much with different nuts and dried fruits, these numbers are just an estimate based on the base recipe using smooth peanut butter and honey. Think of this as a ballpark figure, okay? But it gives you a really good idea of what you’re getting in a satisfying, energy-packed bar.
This calculation is based on yielding 12 bars:
- Serving Size: 1 bar
- Calories: 200
- Sugar: 12g
- Sodium: 50mg
- Fat: 10g
- Saturated Fat: 2g
- Unsaturated Fat: 8g
- Trans Fat: 0g
- Carbohydrates: 25g
- Fiber: 2g
- Protein: 6g
- Cholesterol: 0mg
See? Pretty solid stuff for something that tastes like a treat! That protein and fiber count helps keep everyone feeling full until the next meal, which is exactly what I aim for in a great homemade granola bar.
Share Your Favorite Variations of This Recipe
Now that you know the basics for these incredible homemade granola bars, I want to know what you’re putting in them! The fun part is changing up the mix-ins. If you want to bulk up the nutrition, try adding chia seeds or ground flaxseed when you mix in the oats—they disappear right into the binder. For flavor bursts, swap the dried fruit for chopped dates or even dried cherries!
Some folks add just a teaspoon of cinnamon or even a pinch of nutmeg to the dry ingredients to make them smell incredible while mixing. If you’ve tried using almond butter instead of peanut butter, let me know how that worked for you! Please drop your favorite custom combos below in the comments section so we can all share ideas for our next batch!
PrintChewy No-Bake Homemade Granola Bars
Make simple, chewy granola bars at home without baking. These bars use natural sweeteners and allow you to add your favorite mix-ins for a quick, healthy snack.
- Prep Time: 15 min
- Cook Time: 0 min
- Total Time: 2 hr 15 min
- Yield: 12 bars
- Category: Snack
- Method: No-Bake
- Cuisine: American
- Diet: Vegetarian
Ingredients
- 2 cups rolled oats
- 1 cup crispy rice cereal (optional, for texture)
- 1/2 cup smooth peanut butter or almond butter
- 1/2 cup honey or maple syrup
- 1 teaspoon vanilla extract
- 1/2 cup mix-ins (e.g., chopped nuts, seeds, dried fruit, mini chocolate chips)
Instructions
- Line an 8×8 inch baking pan with parchment paper, leaving an overhang for easy removal.
- In a large bowl, combine the rolled oats and crispy rice cereal, if using.
- In a small saucepan over low heat, warm the peanut butter and honey (or maple syrup) until smooth and easily stirrable. Do not boil.
- Remove the saucepan from the heat and stir in the vanilla extract.
- Pour the wet mixture over the dry ingredients. Mix thoroughly until everything is evenly coated.
- Stir in your chosen mix-ins.
- Press the mixture firmly and evenly into the prepared pan. Use the back of a spatula or another piece of parchment paper to compact the mixture tightly.
- Refrigerate for at least 2 hours, or until completely firm.
- Lift the bars out of the pan using the parchment paper overhang. Cut into 12 or 16 even bars.
- Store the bars in an airtight container in the refrigerator.
Notes
- For a gluten-free option, use certified gluten-free rolled oats.
- If you prefer a firmer bar, slightly reduce the amount of liquid sweetener.
- You can substitute sunflower seed butter for nut butter to make these school safe for nut-free environments.
Nutrition
- Serving Size: 1 bar
- Calories: 200
- Sugar: 12
- Sodium: 50
- Fat: 10
- Saturated Fat: 2
- Unsaturated Fat: 8
- Trans Fat: 0
- Carbohydrates: 25
- Fiber: 2
- Protein: 6
- Cholesterol: 0