

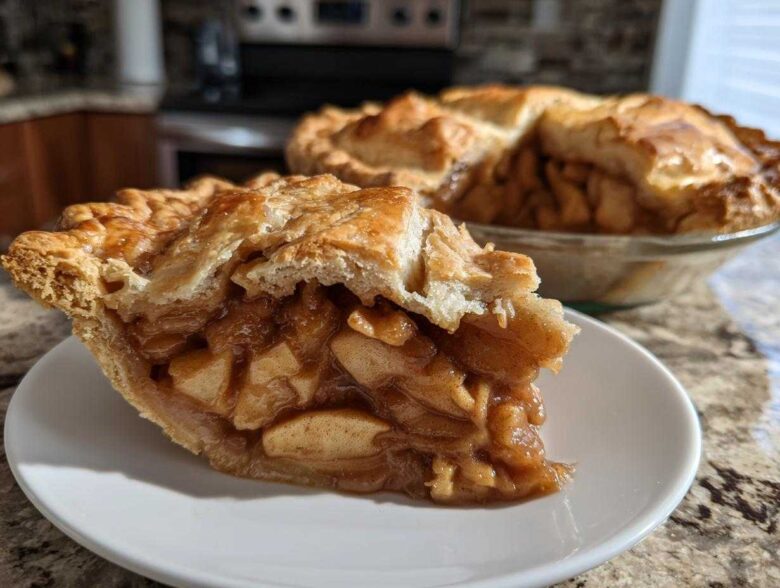
There is nothing, absolutely nothing, like walking into a kitchen scented with hot cinnamon, butter, and sweet-tart apples. Forget those sad, store-bought things in aluminum tins! When you make a **homemade apple pie** entirely from scratch, you’re not just baking dessert; you’re making memories. I spent years chasing that perfect, shatteringly flaky crust, and trust me, I finally cracked the code. This recipe nails the balance: the apples are tender but hold their shape, and that crust melts right in your mouth. It’s my family’s standard for everything from Thanksgiving to a random Tuesday when we just need a little comfort. You need to try this version!
I learned the secrets to this pie thanks to years of trial and error, which is really just fancy talk for ‘I wasted a lot of butter.’ But seriously, knowing why the butter has to be fridge-cold and how much spice is too much makes all the difference. If you’re ready to master this classic, you’ll find all my hard-won knowledge right here. I share all my best baking wisdom to make sure your pie is legendary.
Why This Homemade Apple Pie Recipe Delivers Comfort and Flavor
Making a truly great **homemade apple pie** doesn’t have to be stressful! I designed this recipe to give you bakery-quality results with manageable steps. It’s pure, classic **Comfort Food Baking** that tastes far more complicated than it actually is. It’s definitely an **Easy Homemade Dessert** winner!
- The crust is unbelievably flaky—we’re talking layers you can see!
- The filling has the perfect sweet-tart ratio, never mushy.
- It provides that signature, cozy slice you dream about all year.
Key Details for Your Homemade Apple Pie
Here’s a quick rundown so you know what you’re getting into:
Prep Time: 45 min
Cook Time: 65 min
Requires Chilling Time: Yes, but worth it!
Yield: 8 satisfying servings
Gathering Ingredients for Your Flaky Pie Crust From Scratch
Okay, listen up, because the crust is where most people get nervous. But I’m telling you, it’s all about keeping things icy cold! For this **Buttery Pie Dough**, you cannot skip chilling your butter and water. If your hands are warm, run them under cold water first! This crucial step ensures we get those distinct flakes of butter that steam up in the oven.
Ingredients for the Buttery Pie Dough
We are only focusing on the dough here. Once you have these items, the magic can begin. Remember, this makes enough for the bottom and the top—a true double crust!
- 2 1/2 cups all-purpose flour
- 1 teaspoon salt
- 1 cup (2 sticks) unsalted butter, very cold and cubed
- 1/2 cup ice water, plus more if needed
Assembling the Best Apple Pie Filling for Your Homemade Apple Pie
Now that the dough is chilling out, we get to the fun part: the glorious, aromatic guts of the pie! You want your apples to be flavorful, not just sugary mush, right? That’s why the mix of sugars and spices we use here results in the **Best Apple Pie Filling** imaginable.
We need six medium apples, and they absolutely must be Granny Smith. Seriously, don’t try to cheat this step if you want that signature tart profile for your **Sweet Tart Apple Pie**. A little cinnamon, a pinch of nutmeg, and just a whisper of cloves gives it that deep, warm glow.
Selecting Apples for a Spiced Apple Dessert
Granny Smiths are sturdy; they won’t just dissolve when they hit the heat. They keep their shape and provide that necessary tang to cut through the butter in the crust. I toss them with both white and brown sugar for depth, and then a splash of lemon juice. That lemon isn’t just for brightness; it stops the apples from looking muddy brown before they even hit the oven. Don’t skip it!
Step-by-Step Instructions for Your Homemade Apple Pie
Alright, we have our cold dough chilling and our spiced apples waiting patiently. Now we put the puzzle pieces together! This is where you really get to see that beautiful, **Old Fashioned Apple Pie** come to life. Pay attention here, especially to how we handle the dough, because that’s what makes this a true **Double Crust Pie Tutorial** success story. Remember, for exact details, you should always review our site’s full baking disclaimer regarding substitutions and results!
Making the Flaky Pie Crust From Scratch
First things first: we need to get that amazing **Flaky Pie Crust From Scratch** built. Remember how we whisked the flour and salt? Now, toss in those cubed, super-cold butter pieces. You need to ‘cut in the butter.’ I prefer using my fingertips because you can feel when the butter pieces are the perfect size—think small peas or flattened lentils. If you use a pastry blender, go quickly! Once the butter is incorporated, start drizzling in that ice water, tablespoon by tablespoon. Mix just until the dough clumps together. Seriously, stop mixing the second it holds. It should look shaggy, not smooth! That shagginess is flavor later. Then, divide it, wrap them up, and they have to chill for at least one full hour. Don’t peek!
Assembling and Baking Your Classic Apple Pie Recipe
Once the dough is rested, preheat your oven to 425°F. Take the first disk and roll it out to about 12 inches wide. Gently fit it into your 9-inch pie plate—don’t stretch it, or it shrinks later! Now load up that sweet filling. Take your second disk and roll that out too for the top crust. Lay it carefully over your apples. Now, seal the deal! Crimp those edges together beautifully, and then cut those steam vents—we need about five good slits so the inside doesn’t explode. Brush the top evenly with that beaten egg wash and sprinkle on the coarse sugar for crunch. Bake it hot for 15 minutes at 425°F. Then, and this is important, drop that heat down to 375°F for another 40 to 50 minutes. If you see the edges getting too dark around minute 35, cover them with a little strip of foil. You want golden brown perfection, not burnt edges!
Tips for Success When Making Your Homemade Apple Pie
Even when you follow the instructions perfectly, a few extra bits of wisdom can turn a great pie into an *absolute showstopper*. Temperature management is everything here, both when you’re mixing and, more importantly, when you let it rest afterward. Don’t try to rush that final cooling step, or you’ll end up with a soupy mess on the plate!
We want that beautiful, sturdy slice that shows off all our hard work. It’s about patience! You’ll see why these little expert checks make all the difference when you go for that first slice.
Achieving the Perfect Texture in Your Homemade Apple Pie
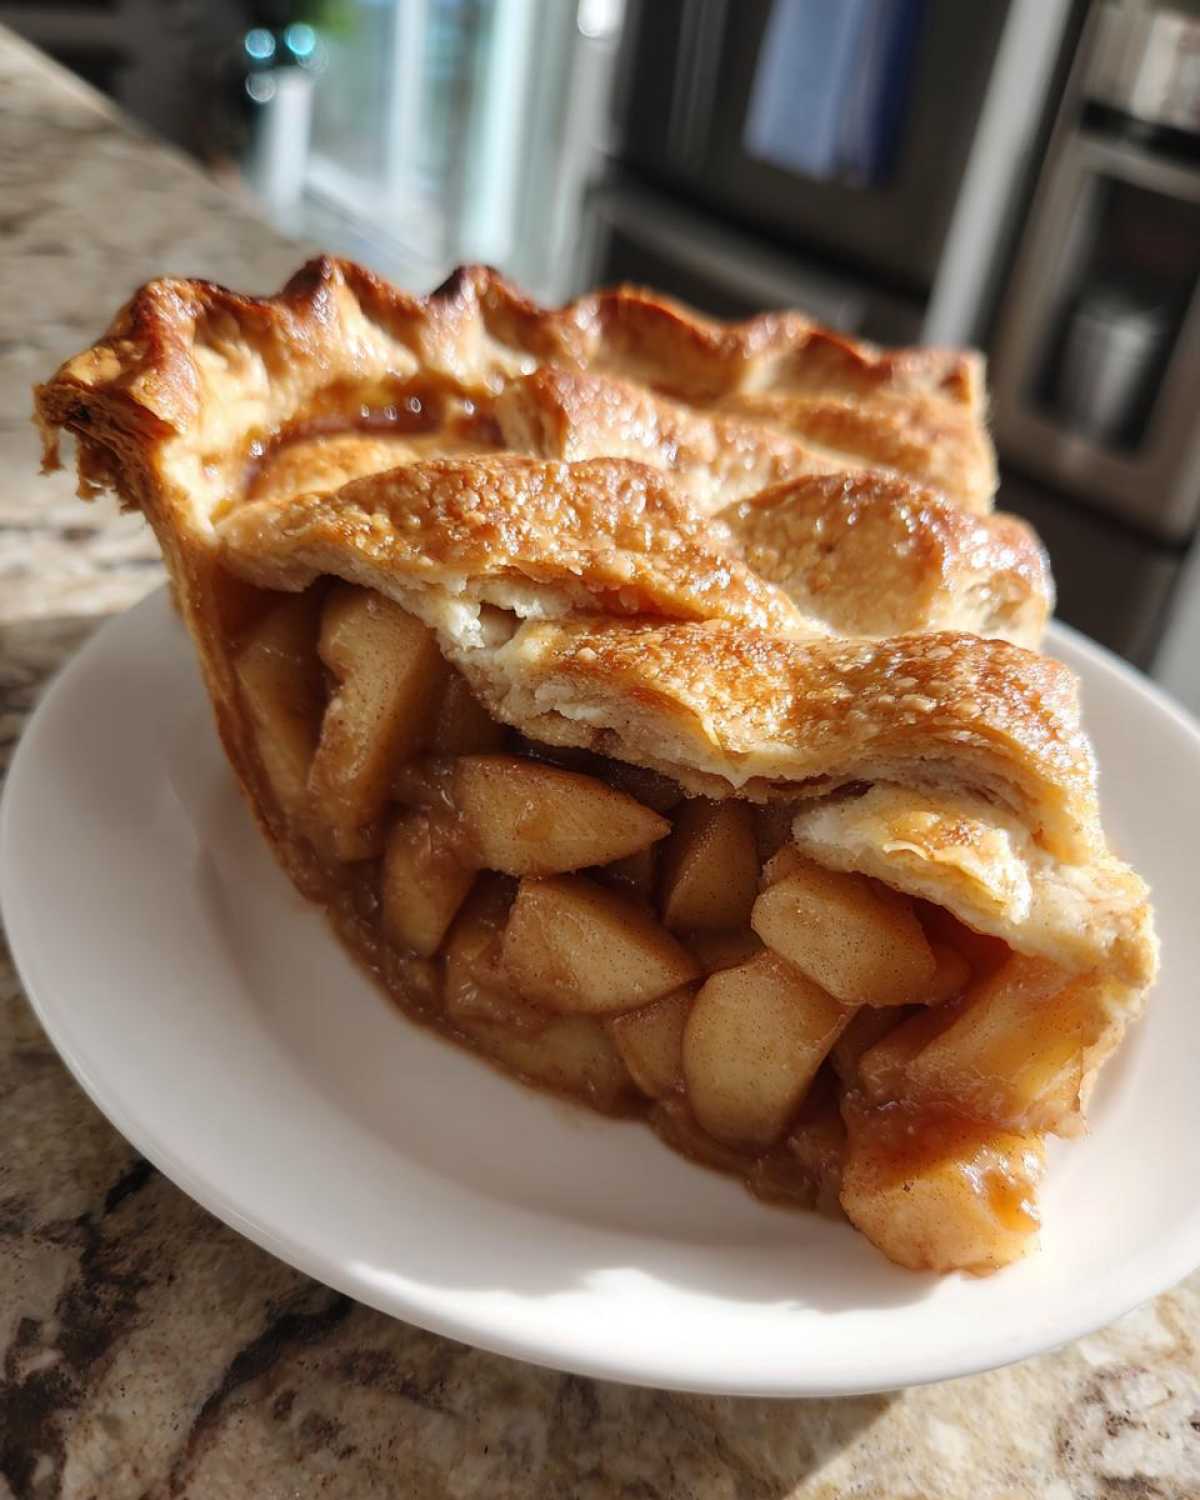
If you’re tempted to slice into this pie as soon as it comes out of the oven, I’m going to stop you right there! The filling is still violently hot and totally liquid. It needs to cool for a solid three hours on a wire rack. Trust me, this resting time allows the starches and sugars to set up properly, binding all the glorious spiced filling together. That’s how you get a clean slice!
Also, if you decided to get fancy and make that lattice top instead of the full cover? Make sure your strips are about one inch wide. If they are too thin, they’ll dry out before the apples are ready. If you opted for the lattice, you might want to give it a quick egg wash every 15 minutes during the last half of the bake, just to keep the woven strips evenly golden.
Storing Your Old Fashioned Apple Pie
Once you’ve managed to wait the required three hours for your masterpiece to set—and I know it’s hard—you’ll need to know how to keep that beautiful **Old Fashioned Apple Pie** tasting just as good the next day. The rules change depending on how long you need to keep it.
If you’re planning on eating the pie within 24 hours, leaving it on the counter is perfectly fine! Just make sure it’s covered loosely, maybe with a cake dome or foil tented slightly so it doesn’t stick to the top crust. The reason we leave it out is that the cold dulls the flavor and makes the crust seriously tough. Room temperature is best for preserving that buttery texture.
If you know you have leftovers lasting longer than a day, then you need to put it in the fridge. Wrap the cut edges tightly with plastic wrap, or transfer slices to an airtight container. This stops that gorgeous crust from absorbing fridge odors.
Now, for reheating, this is critical for bringing that crust back to life! Never use the microwave—it turns the crust leathery. Instead, pop a slice (or the remainder of the pie) back into a moderate oven—say, about 325°F—for about 10 to 15 minutes. That gentle heat warms the filling back up while crisping the crust beautifully. It tastes almost freshly baked again, I promise!
Frequently Asked Questions About Your Homemade Apple Pie
I know when you’re tackling a big **homemade apple pie**, questions pop up. It’s normal! Hopefully, my instructions covered everything, but here are a few things people ask me all the time about this **Classic Apple Pie Recipe**.
Can I use pre-made pie dough for this homemade apple pie recipe?
You absolutely can, and I won’t tell anyone! If you are short on time, go for it. But I have to warn you: the whole point of making a **homemade apple pie** is that incredible, shatteringly crisp texture you get from the butter in a **Flaky Pie Crust From Scratch**. Pre-made dough is fine, but you’ll be missing out on that truly buttery, airy texture that makes this recipe special.
What apples are best if I don’t have Granny Smith for my Spiced Apple Dessert?
That’s a great question! If you can’t find Granny Smith, or maybe you just want a slight variation in flavor for your **Spiced Apple Dessert**, you need apples that hold up to time in the oven and offer some tartness. I often mix them half-and-half with Honeycrisp or Braeburn—they bake up beautifully and still keep that nice structural integrity we talked about. Just make sure you still use lemon juice to balance out the sweetness!
If you’re still stumped or want to share your baking triumphs (or disasters, we all have them!), don’t hesitate to reach out through our contact page!
Estimated Nutritional Breakdown for This Homemade Apple Pie
Now, because this is a genuine, rich, homemade creation featuring lots of butter and sugar, we need to talk about the numbers for a second. I always feel a little funny posting these because every single batch tastes different depending on the exact size of apple I use or how much sugar clings to the edges, but here is the general estimate for one generous slice of this **homemade apple pie**.
Please keep in mind that these numbers are just based on the recipe ingredients listed above, and they don’t account for any substitutions you might make or how thin/thick you roll your crust. Always refer to the site’s full disclaimer regarding our nutritional estimates!
- Serving Size: 1 slice
- Calories: 420
- Sugar: 35g (Yes, it’s sweet, but it’s fruit and sugar doing the work!)
- Fat: 24g
- Saturated Fat: 15g
- Carbohydrates: 52g
- Protein: 4g
See? It looks like a treat, and it totally is! But when you make it yourself, you know exactly what went into it, which is so much better than buying some mystery pie mass-produced somewhere. Enjoy every calorie!
Share Your Classic Apple Pie Recipe Experience
Well, that’s it—we’ve reached the end of the road, and hopefully, your kitchen smells amazing right now! You’ve tackled the **Flaky Pie Crust From Scratch** and put together a fantastic **Classic Apple Pie Recipe**.
Now comes my favorite part: hearing from you! Did the butter stay cold? How did your crimping turn out? Did you stick to the Granny Smiths or sneak in a Honeycrisp?
I genuinely want to know how your **homemade apple pie** turned out! Head down to the comments section right now. Please leave a star rating if you loved this recipe, and let me know if you tried any little tweaks or modifications. We all learn from each other, right? I love seeing pictures of everyone’s beautiful, bubbling pies!
If you have any questions about the baking process itself, or if you need to check our legal stuff before posting, you can always review the Terms and Conditions page. Happy baking, and I can’t wait to read all about your success!
PrintClassic Homemade Apple Pie with Flaky Double Crust
A detailed recipe for making a classic apple pie entirely from scratch, featuring a buttery, flaky crust and a perfectly spiced apple filling.
- Prep Time: 45 min
- Cook Time: 65 min
- Total Time: 110 min
- Yield: 8 servings
- Category: Dessert
- Method: Baking
- Cuisine: American
- Diet: Vegetarian
Ingredients
- 2 1/2 cups all-purpose flour
- 1 teaspoon salt
- 1 cup (2 sticks) unsalted butter, very cold and cubed
- 1/2 cup ice water, plus more if needed
- 6 medium Granny Smith apples, peeled, cored, and sliced 1/4 inch thick
- 1/2 cup granulated sugar
- 1/4 cup packed light brown sugar
- 1 teaspoon ground cinnamon
- 1/4 teaspoon ground nutmeg
- 1/8 teaspoon ground cloves
- 2 tablespoons all-purpose flour
- 1 tablespoon lemon juice
- 1 large egg, beaten (for egg wash)
- 1 tablespoon coarse sugar (for topping)
Instructions
- Make the crust: In a large bowl, whisk together the flour and salt. Cut in the cold butter using a pastry blender or your fingers until the mixture resembles coarse crumbs with some pea-sized pieces of butter remaining.
- Gradually add ice water, one tablespoon at a time, mixing until the dough just comes together. Do not overmix. Divide the dough in half, flatten each half into a disk, wrap in plastic, and chill for at least 1 hour.
- Prepare the filling: In a separate bowl, gently toss the sliced apples with the granulated sugar, brown sugar, cinnamon, nutmeg, cloves, 2 tablespoons of flour, and lemon juice until evenly coated. Set aside.
- Preheat your oven to 425 degrees Fahrenheit (220 degrees Celsius).
- Roll out one dough disk on a lightly floured surface into a 12-inch circle. Carefully transfer it to a 9-inch pie plate. Trim the edges, leaving a 1-inch overhang.
- Pour the apple filling into the crust. Dot the top of the filling with small pieces of any remaining cold butter if desired.
- Roll out the second dough disk for the top crust. Place it over the filling. Trim the edges, leaving a 1-inch overhang. Crimp the top and bottom edges together to seal. Cut several slits in the top crust to allow steam to escape.
- Brush the top crust evenly with the beaten egg wash and sprinkle with coarse sugar.
- Bake for 15 minutes at 425 degrees Fahrenheit. Reduce the oven temperature to 375 degrees Fahrenheit (190 degrees Celsius) and continue baking for 40 to 50 minutes, or until the crust is golden brown and the filling is bubbling. If the edges brown too quickly, cover them loosely with foil.
- Cool the pie on a wire rack for at least 3 hours before slicing and serving.
Notes
- Use Granny Smith apples for a tart flavor that balances the sugar.
- Keep all crust ingredients very cold for the flakiest results.
- If you prefer a lattice top, cut the top dough into strips and weave them over the filling.
Nutrition
- Serving Size: 1 slice
- Calories: 420
- Sugar: 35g
- Sodium: 250mg
- Fat: 24g
- Saturated Fat: 15g
- Unsaturated Fat: 9g
- Trans Fat: 0g
- Carbohydrates: 52g
- Fiber: 3g
- Protein: 4g
- Cholesterol: 60mg