

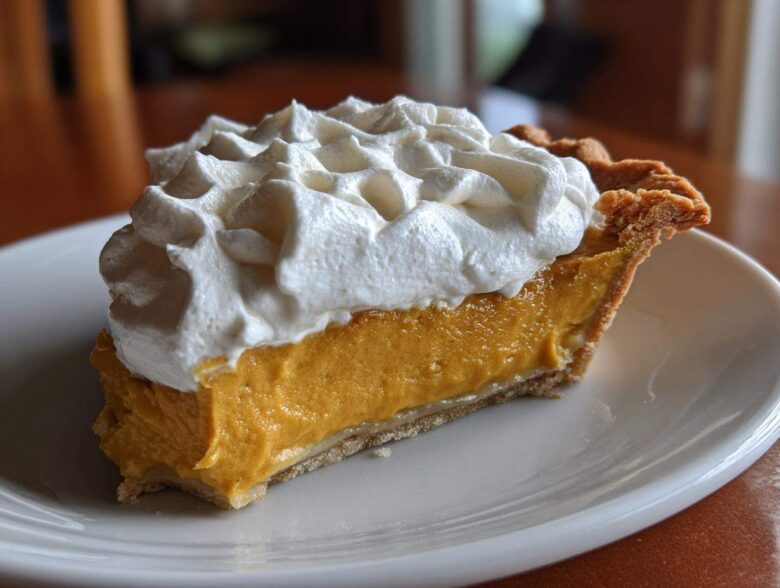
If you ask me, there’s nothing quite as comforting as a genuine, old-school dessert, and the butterscotch pie holds the absolute top spot in my heart. Forget those weird, overly sweet imposters you find sometimes! I’m talking about the real deal: a rich, deep, caramel-y dream capped with pillowy topping. Believe me, I spent many kitchen afternoons wrestling with custard bases until one day, it just clicked! The secret to making a truly spectacular, stop-everyone-at-the-party butterscotch pie is mastering that velvety smooth filling from scratch. Are you ready to try the best? You can learn a lot about who I am and what drives my cooking over at my About Us page, but right now, let’s get baking!
Why This is the Best Butterscotch Pie Recipe
If you’ve ever relied on a box mix, you’re missing out! This recipe is pure, unadulterated joy in a crust. It looks fancy, but honestly, it’s so straightforward once you know the trick. This isn’t just any dessert; this is one of those classic dessert recipes that makes people jealous.
- Velvety smooth filling guaranteed! No lumps allowed here.
- Absolutely perfect for any big gathering or as a show-stopping holiday pie idea.
- It tastes deeply, wonderfully like real butterscotch, not just brown sugar water.
Achieving That Velvety Smooth Pie Filling
The reason our filling is miles better than those instant packets comes down to one thing: tempering the egg yolks just right. When you introduce them slowly to the hot milk mixture, they thicken everything beautifully without curdling or scrambling. That careful dance results in a gorgeous, creamy butterscotch pie that feels decadent and totally old fashioned pie recipes authentic. Don’t skip that slow pour!
Gathering Ingredients for Your Butterscotch Pie
Okay, let’s talk about what you’ll need. Because this is an old fashioned pie recipes classic, we have to treat the ingredients with respect. You can’t shortcut real butterscotch flavor! Everything listed below needs to be ready to go before you turn on the stove, trust me on this one. Having your butter cut up and your eggs already beaten changes the game when the heat is on.
For the filling, you’re going to need:
- 1 pre-made 9-inch pie crust (If you want to make your own, go for it, but please let it cool completely before filling!)
- 1 cup packed light brown sugar—make sure it’s packed in there!
- 1/2 cup granulated sugar
- 1/4 cup cornstarch—this is our stabilizer.
- 1/4 teaspoon salt to make those sweet notes sing.
- 2 cups whole milk—and I really mean whole milk for richness.
- 4 large egg yolks, lightly beaten—save the whites for incredible meringue later, or maybe French toast!
- 1/2 cup (1 stick) unsalted butter, cut into little pieces
- 1 teaspoon pure vanilla extract
- 1 cup heavy whipping cream, nice and chilled for later
- 2 tablespoons powdered sugar for whipping the topping
- Extra butterscotch chips or toasted pecans if you want to get fancy on top.
Ingredient Notes and Substitutions
I get asked all the time about making this simpler, especially since we already have a simple crust option listed. If you’re short on time and want a quick base, you can absolutely go ahead and use a store-bought crust or even whip up a quick graham cracker one. That’s how you turn this into a super quick no bake butterscotch pie situation, provided you chill the filling long enough to set!
Also, if you want this pie to be so rich it practically weeps, swap out half of the whole milk for heavy cream in the custard mix. It adds this incredible mouthfeel. Don’t worry about getting a fancy regional recipe; this classic version has all the depth you need for a show-stopping classic dessert recipe.
Step-by-Step Guide to Making Old Fashioned Pie Recipes Filling
Alright, listen up, because this is where the magic—and maybe a little bit of tension—happens! Making a true scratch made pie filling requires your full attention, but it’s totally worth it. Before you even think about turning on the burner, get everything measured out, especially those delicate egg yolks. If you’re looking for a foolproof guide, you can check out the official site disclaimer if you ever have questions about following directions!
Preparing the Sugar Base and Thickening the Custard
First things first: grab your medium saucepan. We start dry! Whisk together your brown sugar, granulated sugar, cornstarch, and salt until everything looks totally uniform. This is so important; we don’t want any pockets of dry cornstarch hiding! Now, slowly whisk in your milk until it’s beautifully smooth. Set that over medium heat and get ready to stir constantly, folks. I mean it! You have to keep things moving until it gets thick and starts bubbling gently—that usually takes about eight or nine minutes. Don’t walk away unless you want scorched sugar!
Tempering Eggs for a Silky Smooth Butterscotch Pie Filling
Once that base is thick and hot, take the pan *off* the heat—this is key! Now for the critical technique: tempering. You have to coax those egg yolks into accepting the heat without turning them into scrambled bits sitting in your glorious butterscotch pie filling. Take about one cup of the hot sugar milk and slowly drizzle it into your beaten yolks while whisking them like crazy. Once they look happier and warmer, slowly pour that yolk mixture back into the main saucepan. Then, you gently return it to low heat for just a minute or two until it thickens *one last time*. That’s how you get a true homemade custard pie consistency.
Finishing the Filling and Chilling the Butterscotch Pie
Right after that final thickening (don’t let it boil after the eggs go in!), pull it off the heat for good. Stir in your butter pieces until they melt completely into that gorgeous mixture, and then add the vanilla. Work fast! Pour that hot, luscious butterscotch pie filling straight into your cooled pie shell. The absolute best trick for a perfect top layer is pressing a piece of plastic wrap directly onto the surface of the filling. This stops a rubbery skin from forming while it chills. Pop it in the fridge for a minimum of four hours so it can set up solid!
Topping Your Creamy Butterscotch Pie
The filling has been chilling, setting up into that perfect custard dream we worked so hard for! Now comes the fun part: the crowning glory. Since the filling is so rich, we keep the topping light and airy. You need the heavy whipping cream, chilled right down, and just a couple of tablespoons of powdered sugar.
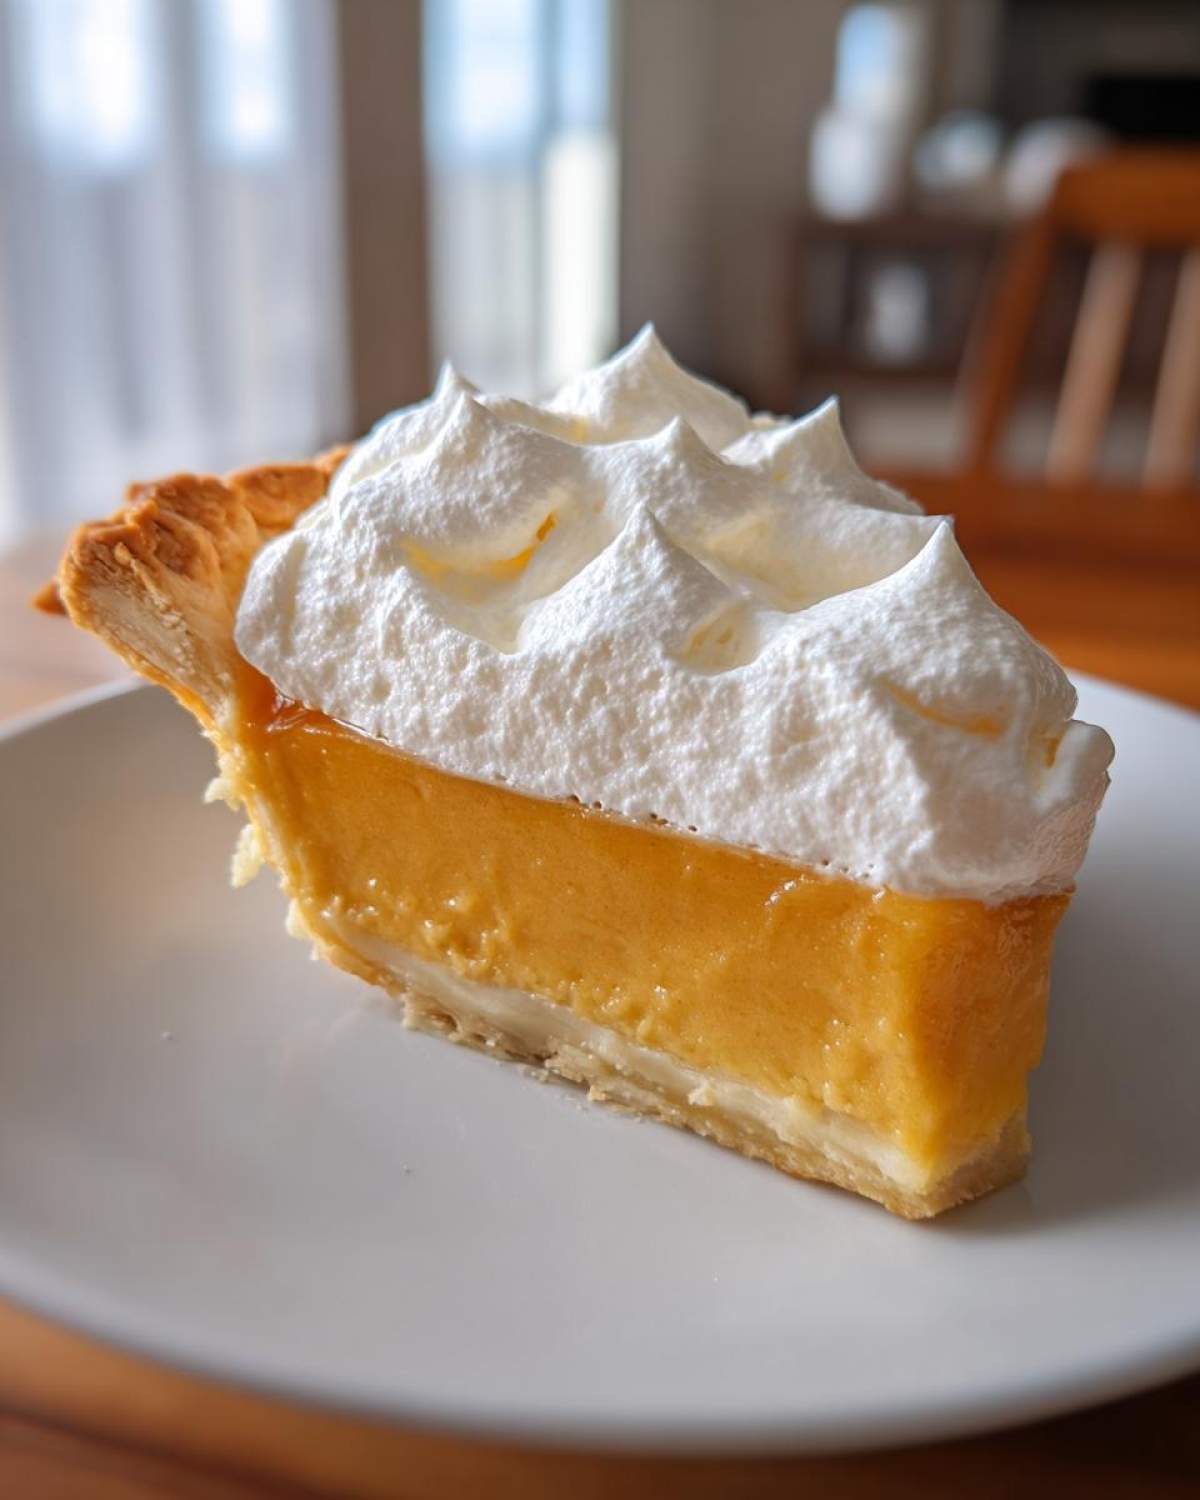
Use your mixer until you get stiff peaks—you know, when you pull the whisk out and the cream stays standing up proudly. It’s so much better than anything you get out of a can! Spread that cloud gently over the fully set and cold creamy butterscotch pie. If you want something extra special, maybe sprinkle on some toasted pecans or a few melted butterscotch chips? It just enhances that wonderful flavor profile we built in the scratch filling. Once topped, it’s time to shine!
Tips for Success with Homemade Custard Pie
If you’re aiming for that flawless, homemade custard pie experience, a couple of extra steps make all the difference. First, and I cannot stress this enough, your pie crust *must* be fully cooled. Putting hot custard into a warm crust means the bottom sets softly, and we want a sturdy base, not a floppy one! Also, when you see the filling start to look grainy on the stovetop, back off the heat immediately; that’s scorching, and it ruins the whole batch.
My personal little tip—and this goes back to my own early kitchen fails—is to use the whisk attachment on my hand mixer when I stir the initial sugar mixture, just for about thirty seconds before switching to the wooden spoon. It whisks clumps right out of the dry ingredients before the liquid goes in. It’s a tiny cheat that saves future headaches!
Making This an Easy Weeknight Dessert
I totally get it; sometimes you don’t have two hours to devote to a dessert, even if it’s the best butterscotch pie ever. That’s where the crust comes in handy! If you skip making a crust from scratch and use a good quality pre-baked shell, you eliminate almost 45 minutes of work right there. The filling itself takes about 15 minutes of active cooking, and then it’s just chill time. That makes this recipe feel much more like an easy butterscotch pie you can pull out for unexpected guests!
Storage and Reheating Instructions
Once you’ve gone through all that trouble to make the absolute best butterscotch pie, you want to make sure it lasts, right? Since this filling has dairy, egg yolks, and that beautiful whipped topping, we have to treat it gently.
The finished pie—topped with the cream—needs to go straight into the refrigerator. Cover it loosely with plastic wrap or foil, being careful not to press it onto the cream. Honestly, this pie is at its absolute peak the day you make it, but it holds up beautifully for about three to four days in the fridge. After that, the crust starts getting a little sad, and the whipped cream texture changes.
Now, about reheating… don’t do it! I know sometimes you want a warm slice of heaven, but reheating a custard pie with whipped cream on top is a guaranteed way to ruin the texture. The custard can get soupy, and the cream just melts into a puddle. Stick to eating this one chilled, straight from the fridge. It’s the best way to enjoy that silky smooth filling! Just grab a slice whenever you need a sweet treat.
Serving Suggestions for This Classic Dessert Recipe
This butterscotch pie is intensely rich, sweet, and buttery. Because it’s such a heavy hitter, you need things alongside it that can cut through that richness, especially if you’re serving it after a big holiday meal or as one of your best pie recipes for gatherings. I always think about creating balance on the plate!
For coffee lovers, nothing beats a slice of this creamy butterscotch pie next to a strong, dark cup of coffee—the bitterness plays so perfectly against the caramel notes. If you prefer tea, go for something robust, like an Earl Grey, not a weak little herbal blend!
If you decide to serve it a la mode (which is always a good idea, frankly), skip the vanilla ice cream unless it’s really high quality. Instead, try using slightly tart flavors. A small scoop of raspberry sorbet on the side is incredible because the slight acidity wakes up your palate. Seriously, try it!
For a simple garnish that adds texture and helps cut the sweetness, I love to shave a bit of good quality dark chocolate right over the whipped cream topping before serving. It gives you that nice bitter contrast. Or, if you’re feeling extra fancy, a few very thinly sliced pear wedges placed alongside the slice offer a fresh, earthy element that makes this feel elegant enough for any dinner party.
Frequently Asked Questions About Butterscotch Pie
I always get so many questions when I post this recipe because everyone wants that perfect end result! Since my version focuses on that deep, rich flavor, people often wonder how it stacks up against other creamy desserts. Let’s clear up some common confusion so you feel totally confident making this butterscotch pie!
Can I make a Dolly Parton pie recipe version instead?
That’s a fun question! Many people love the regional recipes out there, and the famous Dolly Parton pie recipe often involves a few different ingredients, sometimes using instant pudding mixes or even instant chocolate pudding along with butterscotch. My recipe here is strictly scratch made pie filling, focusing only on that deep brown sugar flavor without the chocolate or instant mixes. If you want that nostalgic, velvety smooth texture, sticking to the eggs and cornstarch, like we do here, is the way to go for a true old fashioned pie!
What is the difference between this and a Caramel Custard Pie?
This is an excellent distinction to make! Both pies are divine, but the flavor base is totally different. A true caramel custard pie usually starts by caramelizing white granulated sugar—cooking down that white sugar until it turns amber brown, then adding the dairy. It gives a cleaner, sharper burnt-sugar taste.
Our butterscotch pie recipe, however, relies almost entirely on dark brown sugar. That brown sugar brings in molasses right from the start, which is richer, deeper, and has those wonderful caramel undertones without the extra step of caramelizing white sugar. It’s a warmer flavor overall, which is why I think it’s the star among classic dessert recipes. If you hit any snags while testing this out, feel free to reach out to us via the contact page!
If you want a simple way to make this an easy weeknight dessert, remember that using a pre-made crust saves major time. But no matter what, always make the custard fresh; that’s the non-negotiable part for the best results!
Estimated Nutritional Data for Your Dessert
Now, I have to give a little disclaimer here before we dive into the numbers. I’m baking with love, not keeping spreadsheets, so these figures are estimates based on the ingredients I listed and the way I broke down the final pie into eight servings. You know things change if you add extra nuts or decide to use a different type of crust! This is just a guideline for those watching their intake while still enjoying fantastic classic dessert recipes.
Based on my calculations for one slice of this glorious butterscotch pie, here’s what we’re looking at:
- Serving Size: 1 slice
- Calories: 450
- Sugar: 45g (Yep, it’s a treat!)
- Sodium: 250mg
- Total Fat: 25g
- Saturated Fat: 15g
- Carbohydrates: 55g
- Protein: 6g
- Cholesterol: 150mg
Bottom line: This creamy butterscotch pie is rich, and that’s why it tastes so amazing! It’s definitely worthy of a special occasion or a little weeknight splurge. Because we are using real butter and real sugar to make that stunning scratch made pie filling, the numbers reflect pure comfort food heaven. As always, for all the official fine print regarding how we handle data here on the site, you can check our Privacy Policy. Enjoy every bite of this homemade custard pie!
Share Your Experience Making This Dessert
Okay, you’ve made it! You conquered the tempering, you chilled it perfectly, and now you have this beautiful, shimmering butterscotch pie sitting in your fridge. I honestly can’t wait for you to try that first slice! That smooth, rich, old fashioned pie flavor is just unbeatable.
When you slice into it—please, please come back here and tell me how it went! I need to know if you stuck to the full homemade version or if you opted for that easy weeknight dessert shortcut with the pre-made crust. Drop a star rating right down below the recipe card. Did you use toasted pecans? Did you try adding a pinch of extra sea salt on top of the whipped cream?
Sharing your results helps everyone else who is nervous about making their first homemade custard pie! Seeing that people successfully created that perfect, creamy butterscotch pie filling from scratch gives me so much joy. We support each other here, so don’t be shy about shouting out your success!
And if you’re snapping pictures—and I bet you are, because this classic dessert recipe is gorgeous—tag me on social media! I love seeing the beautiful ways you bring these recipes into your own kitchens. We truly consider this community our family, and hearing from you makes all the recipe testing worthwhile. Remember to always check the Terms and Conditions before uploading any photos, but otherwise, I’m looking forward to seeing your amazing pies!
PrintClassic Creamy Butterscotch Pie

A recipe for a rich, old-fashioned butterscotch pie featuring a smooth, velvety custard filling made from scratch.
- Prep Time: 20 min
- Cook Time: 15 min
- Total Time: 5 hours 35 min
- Yield: 8 servings
- Category: Dessert
- Method: Stovetop Cooking
- Cuisine: American
- Diet: Vegetarian
Ingredients
- 1 pre-made 9-inch pie crust (or homemade)
- 1 cup packed light brown sugar
- 1/2 cup granulated sugar
- 1/4 cup cornstarch
- 1/4 teaspoon salt
- 2 cups whole milk
- 4 large egg yolks, lightly beaten
- 1/2 cup (1 stick) unsalted butter, cut into pieces
- 1 teaspoon vanilla extract
- 1 cup heavy whipping cream, chilled
- 2 tablespoons powdered sugar (for topping)
- Extra butterscotch chips or toasted pecans for garnish (optional)
Instructions
- Prepare your 9-inch pie crust and let it cool completely if you baked it beforehand.
- In a medium saucepan, whisk together the brown sugar, granulated sugar, cornstarch, and salt.
- Gradually whisk in the whole milk until the mixture is smooth.
- Cook the mixture over medium heat, stirring constantly, until it thickens significantly and begins to bubble. This takes about 8 to 10 minutes. Do not stop stirring.
- Remove the saucepan from the heat. In a separate bowl, lightly whisk the egg yolks.
- Temper the egg yolks by slowly pouring about 1 cup of the hot sugar mixture into the yolks while whisking the yolks continuously.
- Pour the tempered yolk mixture back into the saucepan with the remaining sugar mixture.
- Return the saucepan to medium-low heat. Cook, stirring constantly, for 1 to 2 minutes until the custard thickens further. Do not let it boil after adding the yolks.
- Remove from heat. Stir in the butter pieces until they melt completely. Stir in the vanilla extract.
- Pour the hot filling immediately into the cooled pie crust. Press plastic wrap directly onto the surface of the filling to prevent a skin from forming.
- Chill the pie in the refrigerator for at least 4 hours, or until the filling is completely set.
- Before serving, whip the heavy cream with the powdered sugar until stiff peaks form.
- Spread or pipe the whipped cream over the chilled pie. Garnish with extra butterscotch chips or pecans if desired.
Notes
- For a richer flavor, you can substitute half of the milk with heavy cream.
- If you prefer a graham cracker crust, mix 1 1/2 cups graham cracker crumbs with 1/4 cup sugar and 6 tablespoons melted butter, then press into the pan and chill for 30 minutes before filling.
- To achieve a truly velvety texture, make sure to temper the egg yolks slowly.
Nutrition
- Serving Size: 1 slice
- Calories: 450
- Sugar: 45
- Sodium: 250
- Fat: 25
- Saturated Fat: 15
- Unsaturated Fat: 10
- Trans Fat: 0.5
- Carbohydrates: 55
- Fiber: 1
- Protein: 6
- Cholesterol: 150