

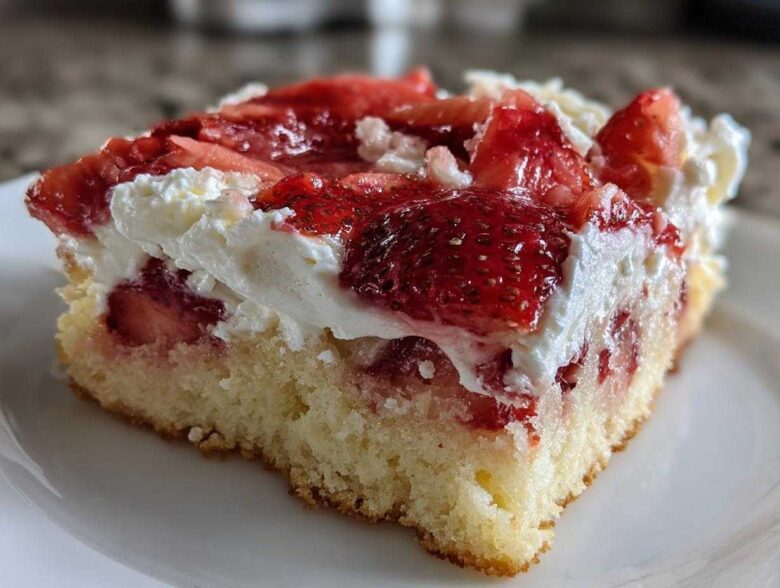
When the summer heat hits and you crave that classic combination of fresh berries, sweet cake, and cool cream, you don’t always want the fuss of a full shortcake assembly line, do you? Well, I totally get it! That’s why I spent a whole summer tweaking my go-to layered dessert methods to create these absolutely perfect Strawberry Shortcake Bars. Forget the crumbling biscuits and the messy platters—these bars are sturdy, portable, and they taste exactly like summer in every single bite.
Seriously, I developed this specific Strawberry Shortcake Bars recipe because my family started going to every single neighborhood potluck, and trying to carry a towering shortcake was a disaster waiting to happen. I needed something that held up in a cooler and didn’t demand silverware. After perfecting my technique for sturdy layered desserts—you can see my notes on my classic homemade strawberry shortcake recipe for background!—these bars became my secret weapon. They have that crumbly, buttery shortcake flavor down pat, but they’re built for picnics and ease. Trust me, once you try this layered design, you might forget about the traditional version entirely!
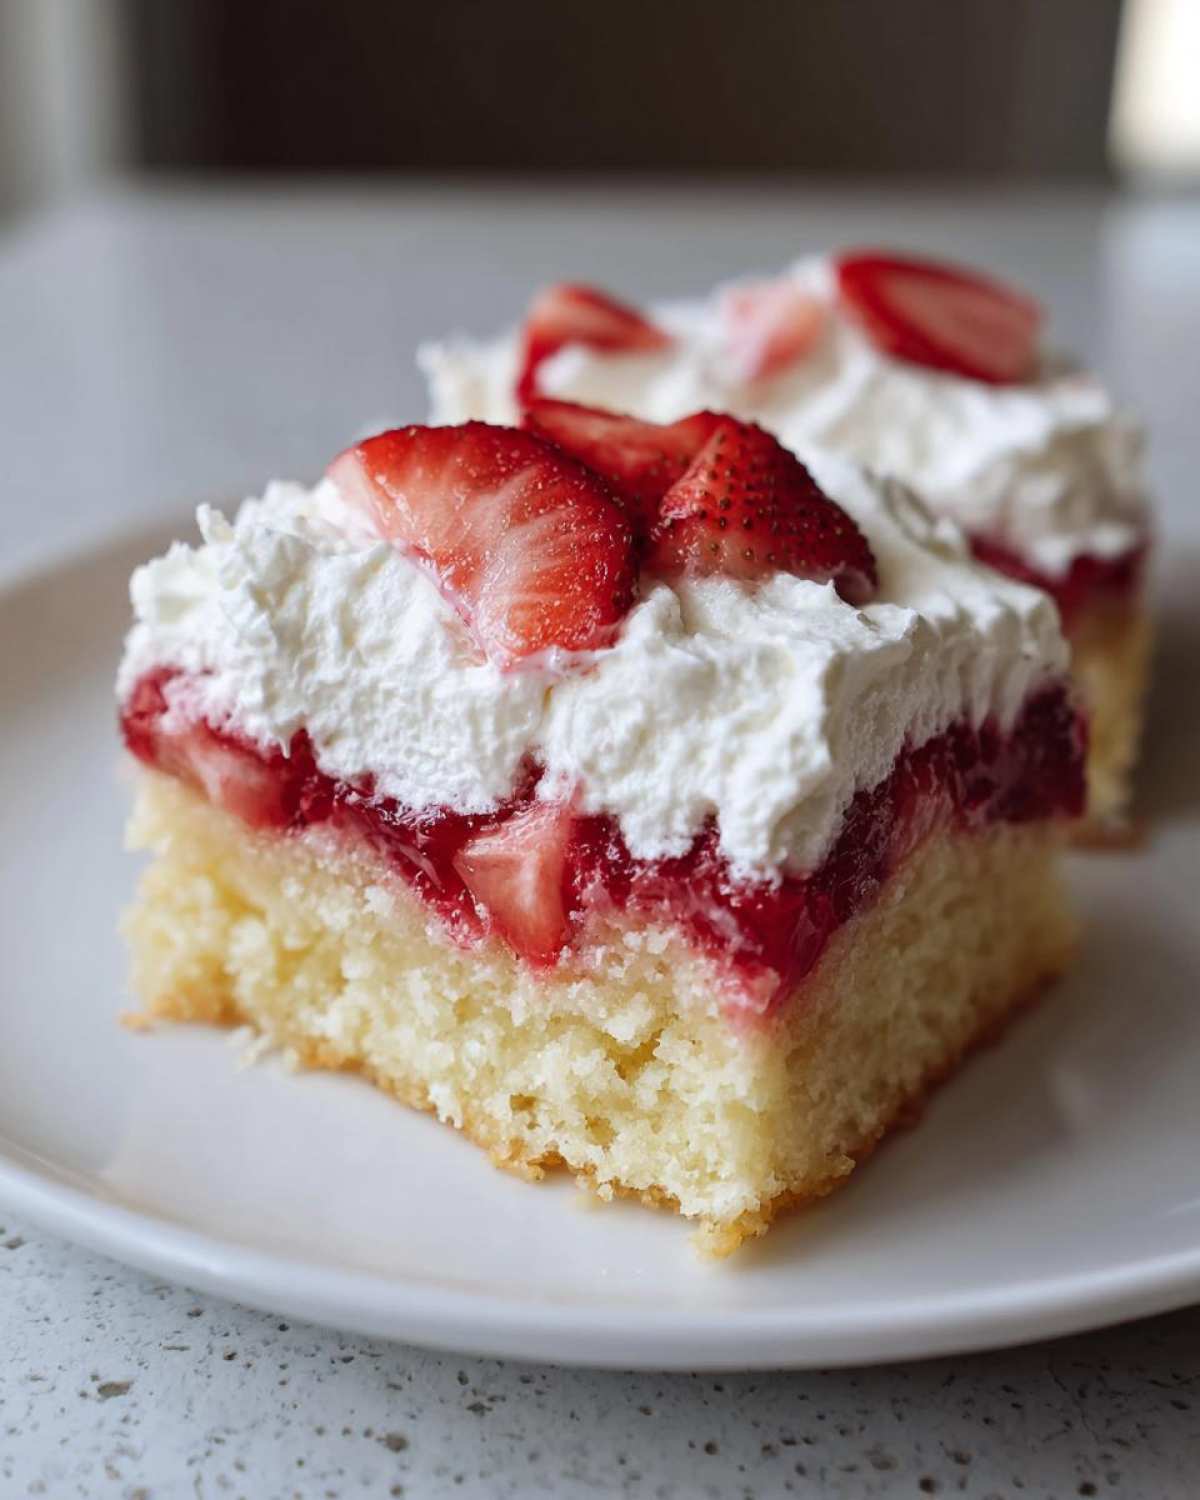
Why You Should Make These Strawberry Shortcake Bars Today
Listen, I know you have a million dessert recipes bookmarked. But if you need proof that a simple bake can deliver maximum flavor with minimum stress, these are the ones. I promise, they tick every single box you have for a summer bake.
- These are the definition of an Easy Strawberry Shortcake Bars Recipe. We’re talking about a press-in base and a crumble top—no fancy rolling or cutting required!
- They are the ultimate Picnic Friendly Strawberry Desserts. Slice them up, stack them neatly in a container, and they travel like champs. No sliding berries or collapsing cream structures here.
- The flavor balance is just spot-on. You get that beautiful, rich, buttery shortcake flavor against the sweet-tart burst of the strawberry filling. It’s perfect.
- We’re cutting down on steps, not quality. The preparation flies by, and you get a stunning layered look without hours in the kitchen.
- They handle toppings beautifully! You can load them up with cream right before serving or just dust them with sugar—easy customization is always a win.
If you are looking for more easy summer fruit bakes, you absolutely have to check out my post on Summer Strawberry Treat Recipes for more inspiration!
Essential Ingredients for Perfect Strawberry Shortcake Bars
Okay, let’s talk turkey. The secret to making these Strawberry Shortcake Bars taste like they came straight from a fancy bakery, even though they are so simple, is paying attention to the details in the ingredient list. Since we are aiming for that classic shortcake texture—a little crunchy on top, tender on the bottom—the butter preparation is non-negotiable. Keep everything cold!
This recipe relies on three distinct components: that rich, buttery shortcake layer that acts as both the base and the crumble topping, the bright, slightly thickened berry layer, and, of course, the glorious cloud of cream on top. Get these ingredients ready, and you’re halfway to flavor heaven. You can find my guide to the perfect Buttery Shortcake Bar Recipe techniques if you want to dive deep into that base!
For the Buttery Shortcake Base and Crumble
Remember, we need cold butter here. Don’t get lazy and try to melt it! Cold butter creates those perfect pockets of steam that give you the crumbly texture we love.
- 1 1/2 cups all-purpose flour
- 1/2 cup granulated sugar (for the dough structure)
- 1 teaspoon baking powder (just enough lift!)
- 1/4 teaspoon salt
- 1/2 cup cold unsalted butter, cut into cubes
- 1 large egg
- 1 teaspoon vanilla extract
For the Sweet Strawberry Filling
This is where the magic happens. We’re using fresh strawberries, and we *have* to use cornstarch. It thickens the juices released by the berries so you don’t end up with a runny mess when you try to cut your Strawberry Shortcake Bars cleanly.
- 4 cups fresh strawberries, hulled and sliced (don’t dice them too fine!)
- 1/2 cup granulated sugar (for sweetening the berries)
- 2 tablespoons cornstarch (our secret weapon for set!)
- 1 tablespoon lemon juice (just a touch of brightness)
For the Light Whipped Cream Topping
I always make this topping last, right before serving. Fresh whipped cream just doesn’t compare to the canned stuff, and it only takes about two minutes to whip up!
- 1 cup heavy whipping cream
- 2 tablespoons powdered sugar (confectioners’ sugar works best)
Step-by-Step Guide to Making Easy Strawberry Shortcake Bars Recipe
This is where the real fun begins! Following the steps in order is key to making sure your layers set up just right in these Easy Strawberry Shortcake Bars Recipe. It moves surprisingly fast—you’ll be surprised how quickly this comes together. Remember, we are building a sturdy but tender dessert perfect for summer eating.
Preparing the Pan and Shortcake Dough
First things first: get that oven warming up to 350 degrees Fahrenheit. You absolutely must line your 9×9 inch pan with parchment paper. I always leave a good overhang on two sides—this acts as handles later, making removal a breeze! Trust me, trying to wrestle a baked bar out of a pan is no joke.
In a separate bowl, quickly whisk together your flour, the first portion of sugar, baking powder, and salt. Now comes the satisfying part: cutting in that cold butter. Use your pastry blender or your fingertips to work the butter in until it looks like coarse crumbs. Don’t overwork it; we want those little butter chunks intact! Then, mix in the egg and vanilla until it just barely comes together into a soft dough. Take that dough and divide it mentally: press two-thirds smoothly into the bottom of your prepared pan. Keep the remaining one-third aside—that’s for the topping!
Assembling the Layered Strawberry Shortcake Squares
While you were working the dough, your strawberries got a little time to hang out with the sugar, cornstarch, and lemon juice. This little rest lets them start releasing their juices, which the cornstarch immediately starts grabbing onto. This is crucial for amazing Layered Strawberry Shortcake Squares that aren’t soupy!
Gently spread out that juicy strawberry mixture right over the pressed dough base. Don’t mash it down; we want the topping to sit nicely on top. Now, take that reserved one-third of the dough and crumble it evenly over the strawberries. I like to make sure there are little gaps so you can see that red peeking through the golden topping.
Baking and Cooling the Strawberry Shortcake Bars
Pop your pan into the preheated oven for about 35 to 40 minutes. You’re looking for two things: the topping should be slightly golden brown, and if you peek closely between the crumble bits, the strawberry filling should be bubbling happily. That means the cornstarch has done its job!
Here’s the hardest step, but you HAVE to do it: let the bars cool *completely* in the pan. If you try to cut these warm, they will just smear into a delicious, but decidedly messy, pile. Patience here guarantees perfect squares, which you can learn more about in my Make Ahead Strawberry Shortcake Bake tips for timing!
Finishing with Fresh Whipped Cream
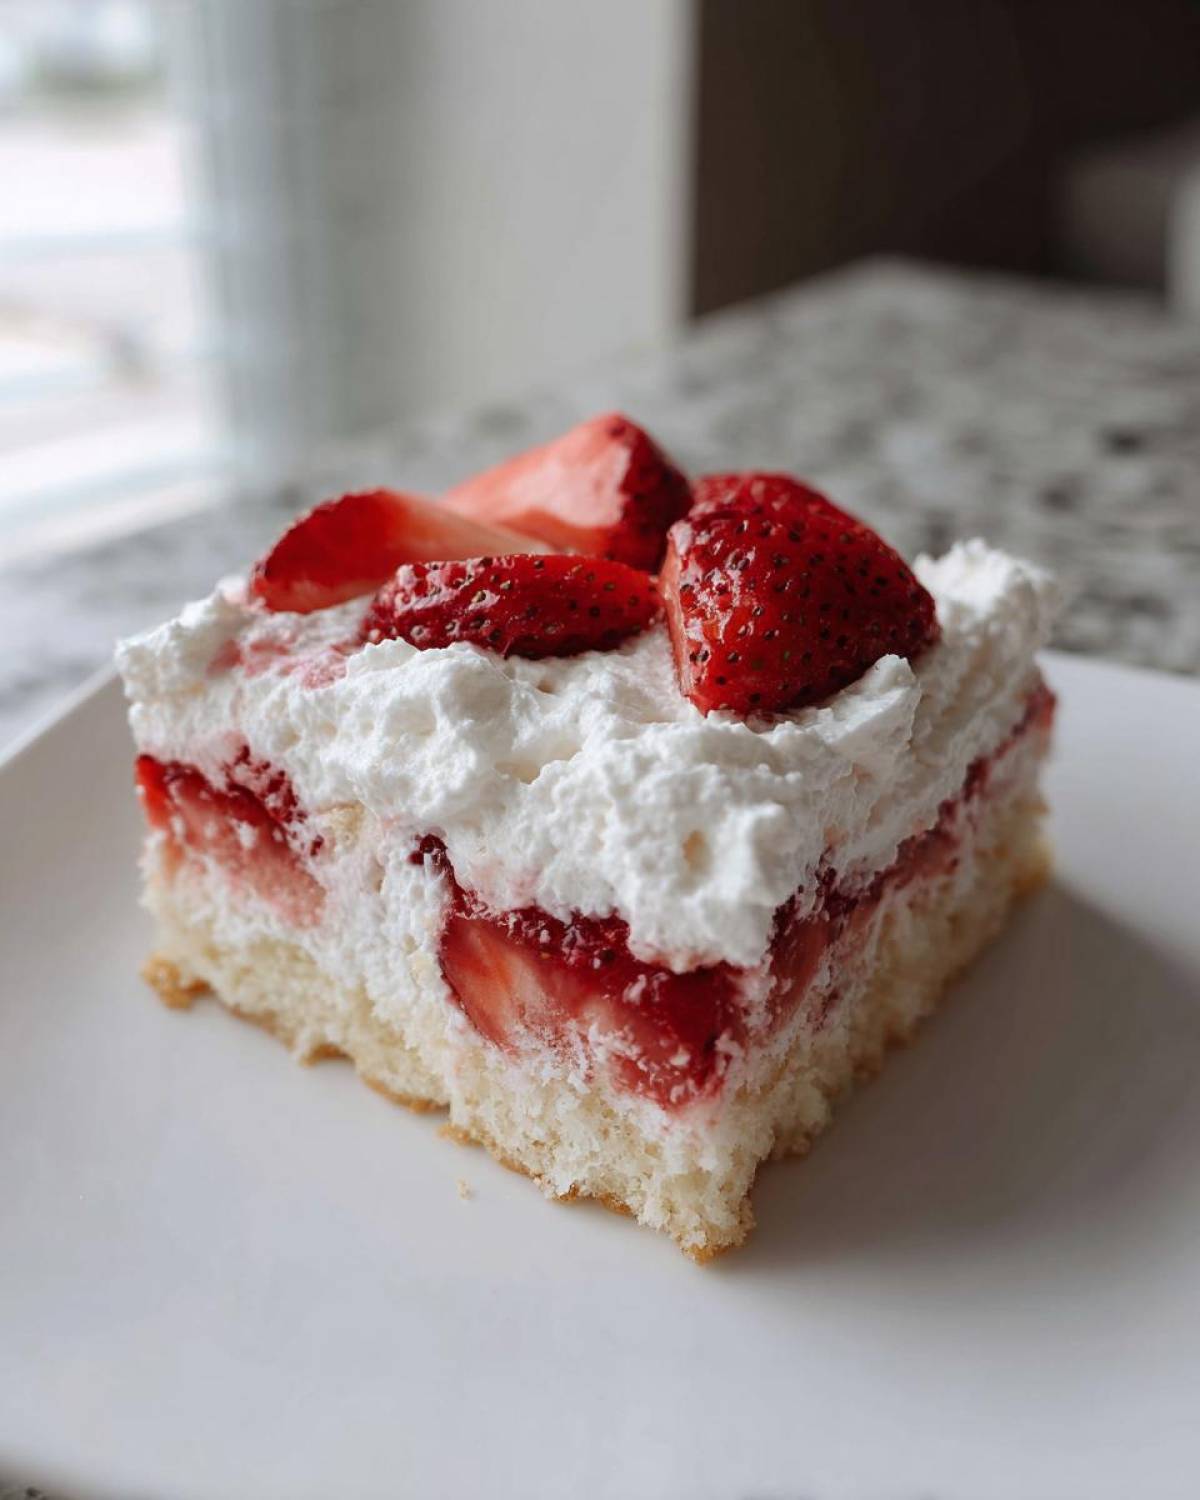
Right before you serve them, it’s time for the topping! Whip that heavy cream with the powdered sugar until you reach stiff, glorious peaks. You should be able to hold the bowl upside down (carefully, of course!). Dollop a generous spoonful of that whipped cream onto each perfectly cooled square. This keeps the cream fresh and fluffy right up until you take that first bite!
Tips for Success with Your Buttery Shortcake Bar Recipe
Look, I’ve made this recipe probably twenty times now—for family picnics, bake sales, and just because it was Tuesday. I’ve learned a couple of tricks, mostly the hard way, that help guarantee these Buttery Shortcake Bar Recipe turns out perfectly every single time you make it. We want that beautiful texture contrast, right? The crisp crumble and the soft center.
Handling the Dough and Preventing Soggy Layers
If you’re worried about the base being too soft, especially since we’re dealing with juicy strawberries, try this little cheat! Right after you mix the dough, cover your bowl and pop it into the fridge for about 15 minutes before you press it into the pan. That chilling time firms up the butter just enough so when you press it down, you get a really sturdy foundation. That firmness stops the strawberry moisture from just soaking right up into the bottom layer!
And I can’t stress this enough for clean slicing: cooling completely is the law of the land for these Strawberry Shortcake Bars. If you rush it, the filling hasn’t fully set, and everything smears. Let them sit on the rack until they’re just room temperature, then honestly, I usually chill mine in the fridge for another 30 minutes before cutting. That makes cutting them into perfect squares ridiculously easy.
Strawberry Filling Adjustments
What if you run out of fresh berries mid-winter, or your fresh haul looks a little sad? You can totally use frozen strawberries! Here’s the necessary pivot: do *not* thaw them first. Toss the frozen berries straight into the filling mixture.
Because frozen berries release more liquid when they bake, you’ll want to bump up that cornstarch just a tiny bit—maybe add an extra half-teaspoon. That little bit of extra thickening power keeps our layers distinct. You can look at my recipe for cookie icing recipes for more thoughts on firm fruit fillings, but for these bars, the cornstarch is your absolute best friend to manage that berry moisture!
Variations for Simple Strawberry Dessert Squares
While I think this classic combination of buttery shortcake and fresh berries is unbeatable, sometimes you just need to switch things up a little bit, right? Baking is about making the recipe your own, and this one is super flexible. You can tweak the components easily while keeping that great bar shape. These tweaks help you make customized Simple Strawberry Dessert Squares for different tastes!
I’ve experimented a bunch with different mix-ins, especially for the shortcake part, because I love trying to add a little extra texture. If you want something heartier that travels even better for a long day out, try boosting the base!
- Oatmeal Crunch Base: For a chewier, nuttier experience, swap out 1/2 cup of the all-purpose flour in the base and crumble mixture for 1/2 cup of rolled oats. It gives the crust a lovely, rustic texture that holds everything together beautifully. It leans a little closer to a crumble bar, which I also love!
- Zest it Up: The lemon juice brightens the strawberries, but you can absolutely substitute that with lime juice for a sharper tang, or even use orange juice for a warmer, sweeter citrus note that pairs surprisingly well with the berries. This is a super easy change for a completely different vibe.
- Almond Extract Swap: If you have almond extract on hand, try replacing the vanilla extract (1 teaspoon) with about 1/2 teaspoon of almond extract in the dough. It gives the shortcake layer an almost Italian pastry flavor, which is amazing with strawberries.
If you are looking for even more bar inspiration that involves oats and hearty textures, you might want to check out my guide on chewy homemade granola bars—the principle of keeping the dough structured is similar!
Storage and Make Ahead Strawberry Shortcake Bake
One of the huge perks of making Strawberry Shortcake Bars instead of the traditional towering biscuit shortcake is durability! These are perfect for planning ahead, which is why they are such a hit for summer parties or packing lunches. You can definitely pull this off as a Make Ahead Strawberry Shortcake Bake.
The rules for storage change a little bit depending on whether you’ve added the whipped cream topping yet. Remember, fresh cream doesn’t love long trips in the fridge!
- Keeping Them Fresh Before Topping: Once the bars have cooled 100%—and I mean completely cool—slice them up. Store the squares in a single layer, or separated by wax paper if you stack them, inside an airtight container. They stay wonderful at room temperature for about 12 hours if your kitchen isn’t too hot.
- Refrigeration Notes: If you’re making these ahead of time, definitely store the cooled, uncut, or cut bars in the fridge. The strawberry filling keeps them perfectly moist. The instructions note says they are good for up to three days in an airtight container in the refrigerator. They taste fantastic cold, too, which is great when it’s sweltering outside!
- Freezing for Later: Yes, you can freeze these! If you want to keep them longer, wrap the cooled, unsliced shortcake block tightly in plastic wrap, then foil. They freeze beautifully for about two months. When you want them, just thaw them overnight in the fridge before slicing and adding cream. For more tips on storing other baked goods, check out my notes on pumpkin cream cheese bread storage because the principles are similar!
Just remember to wait until the very last second to dollop on that homemade whipped topping. If you add the cream too early, it tends to weep a little and make the crumble topping soggy too quickly. Store the cream separately until serving time!
Serving Suggestions for Your Summer Strawberry Treat Recipes
So, you’ve got these gorgeous, portable Strawberry Shortcake Bars sitting on the counter, perfectly sliced, waiting for their moment in the sun. How should you serve them up to make them extra special? Since this is such a classic, simple flavor profile—buttery, tart, sweet—you don’t need to go overboard with complicated garnishes. Practicality is key for these kinds of Summer Strawberry Treat Recipes!
If you decided not to whip up that homemade cream—maybe you’re packing these up for a long day trip and you need maximum stability—you still have options. A simple dusting of powdered sugar right before you pack them up gives them that beautiful, finished bakery look. It’s elegant, it’s easy, and it definitely doesn’t melt!
If you bake these for a backyard BBQ, serving them slightly warmed up right out of the oven (after cooling slightly, of course!) is divine, especially if you use fresh, room-temperature strawberries rather than chilled ones. That warmth makes the buttery base taste even richer.
For an extra layer of decadent flavor that still fits the rustic shortcake vibe, try a tiny sprinkle of finely chopped pistachios over the whipped cream. They add a lovely green color pop and a little bit of crunch that works wonderfully with berries. If you’re looking for warm fruit desserts that contrast nicely with the cold cream, check out my favorite apple cobbler recipe—it has a totally different texture, but the warm fruit/cold cream dynamic is the same!
Honestly, though? These bars are perfect just as they are. A square of shortcake, fresh berries, and a cloud of sweetness—that’s summer done right.
Frequently Asked Questions About Strawberry Shortcake Bars
I know when you get into a new recipe, especially one as layered as these Strawberry Shortcake Bars, you end up with a few burning questions floating around. That’s totally normal! I’ve gathered up the things people always ask me about making sure these turn out perfect every single time. Getting these details right makes all the difference between a good bar and the *best* bar.
Can I use a different fruit instead of strawberries in these bars?
Absolutely, you can play around with the fruit! The structure works really well with heartier summer fruits. If you try blueberries or raspberries, they are generally fantastic replacements. Just treat them like the fresh strawberries: toss them with a little sugar and the cornstarch we measure out for the filling. You might need to add a touch more thickening power—maybe an extra teaspoon of cornstarch—if the fruit you are using is super juicy. But generally, yes, feel free to swap them out for your favorite berry!
What is the best way to get clean cuts when slicing?
This is probably the number one question I get about any *Simple Strawberry Dessert Squares*! The secret is patience, honey. You bake them, they cool on the counter until they’re not burning hot anymore, and then you chill them. I find that chilling the entire baked block in the fridge for at least an hour after the initial cooling makes the shortcake base firm up nicely. Then, use a very long, sharp knife, and wipe the blade clean between every single cut. That combination—cold and a clean, sharp blade—gives you those perfect, professional-looking squares.
Can I skip the whipped cream topping?
Yes, 100%! If you are making these for a bake sale, or maybe you just don’t want the hassle of whipping cream right before serving, the bars are still incredible on their own. They are sturdy enough without the cream. If you skip the topping, I personally like to lightly dust the cooled bars with powdered sugar just before slicing. That little bit of extra sweetness melts slightly into the crumble topping and gives them a lovely finish. They transport even better that way, too!
For more background on my baking philosophy and why precision matters in layered desserts, you can read a bit about me on the About Us page!
Estimated Nutritional Data for Classic Strawberry Shortcake in Bar Form
Listen, I’m a cook, not a nutritionist, and I bake with butter and sugar because that’s what makes treats taste amazing! These numbers are just my best estimate based on the ingredients listed in the recipe and general brand averages. Don’t treat this as gospel truth for tracking your diet down to the last gram, but it gives you a general idea of what you’re working with when you enjoy one of these delicious Layered Strawberry Shortcake Squares.
We calculate this based on the 9 generous servings we yield from one 9×9 pan. If you cut them smaller, these figures per bar will obviously drop!
| Nutrient | Amount Per Bar |
|---|---|
| Serving Size | 1 bar |
| Calories | 310 |
| Fat | 16g |
| Saturated Fat | 10g |
| Cholesterol | 65mg |
| Sodium | 110mg |
| Carbohydrates | 39g |
| Sugar | 25g |
| Fiber | 2g |
| Protein | 4g |
I always feel better knowing the general rundown, even if I’m not counting calories during summer berry season! It just confirms we’re eating a rich, buttery treat, which is exactly what we want from a Buttery Shortcake Bar Recipe!
Share Your Experience Making These Strawberry Shortcake Bars
Well, that’s it! You’ve made the most portable, delicious summer dessert I know—the amazing Strawberry Shortcake Bars. I truly hope this recipe brings a little bit of easy sunshine to your gatherings, whether it’s a big Fourth of July bash or just a quiet Tuesday evening.
I put so much love into getting that ratio of buttery crush to juicy strawberry filling just right, and I really want to know how they turn out for you! Please, hop down to the comments section below and give these bars a star rating. Since this recipe yields 9 generous squares, let me know if you cut them smaller for sampling!
Did you try adding the oats, or did you stick to the classic butter base? Did you find a way to make the whipped cream last longer? Every little piece of feedback that comes through helps me, and it helps other bakers who are looking for the Best Homemade Strawberry Bars!
Don’t forget to bookmark this page or save your favorite version of this recipe to your Pinterest boards so you can easily find it next summer. And hey, if you have any other questions or just want to say hi, feel free to reach out anytime via my contact page. Happy baking, friends!
PrintEasy Strawberry Shortcake Bars Recipe
Make this simple, layered dessert featuring a buttery shortcake base, sweet strawberry filling, and a light topping. These bars are perfect for picnics or make-ahead summer treats.
- Prep Time: 20 min
- Cook Time: 40 min
- Total Time: 60 min
- Yield: 9 servings
- Category: Dessert
- Method: Baking
- Cuisine: American
- Diet: Vegetarian
Ingredients
- 1 1/2 cups all-purpose flour
- 1/2 cup granulated sugar
- 1 teaspoon baking powder
- 1/4 teaspoon salt
- 1/2 cup cold unsalted butter, cut into cubes
- 1 large egg
- 1 teaspoon vanilla extract
- 4 cups fresh strawberries, hulled and sliced
- 1/2 cup granulated sugar (for filling)
- 2 tablespoons cornstarch
- 1 tablespoon lemon juice
- 1 cup heavy whipping cream
- 2 tablespoons powdered sugar
Instructions
- Preheat your oven to 350 degrees Fahrenheit (175 degrees Celsius). Line a 9×9 inch baking pan with parchment paper, leaving an overhang on two sides for easy removal.
- Prepare the base: In a medium bowl, whisk together the flour, 1/2 cup sugar, baking powder, and salt. Cut in the cold butter using a pastry blender or your fingers until the mixture resembles coarse crumbs.
- Add the egg and vanilla extract to the flour mixture. Mix until a soft dough forms. Press two-thirds of this dough evenly into the bottom of the prepared pan.
- Prepare the filling: In a separate bowl, gently toss the sliced strawberries with 1/2 cup sugar, cornstarch, and lemon juice. Let this sit for 5 minutes.
- Spread the strawberry mixture evenly over the pressed dough base in the pan.
- Crumble the remaining one-third of the dough mixture over the top of the strawberries to create a streusel topping.
- Bake for 35 to 40 minutes, or until the topping is lightly golden brown and the filling is bubbly.
- Let the bars cool completely in the pan on a wire rack. This is important for clean cutting.
- Prepare the topping: In a chilled bowl, whip the heavy cream and powdered sugar until stiff peaks form.
- Once cooled, cut the shortcake into squares. Top each square with a dollop of whipped cream before serving.
Notes
- For a firmer base, chill the dough for 15 minutes before pressing it into the pan.
- You can use frozen strawberries, but do not thaw them first; increase the cornstarch slightly if the mixture seems too wet.
- Store leftovers in an airtight container in the refrigerator for up to three days.
Nutrition
- Serving Size: 1 bar
- Calories: 310
- Sugar: 25g
- Sodium: 110mg
- Fat: 16g
- Saturated Fat: 10g
- Unsaturated Fat: 6g
- Trans Fat: 0g
- Carbohydrates: 39g
- Fiber: 2g
- Protein: 4g
- Cholesterol: 65mg