

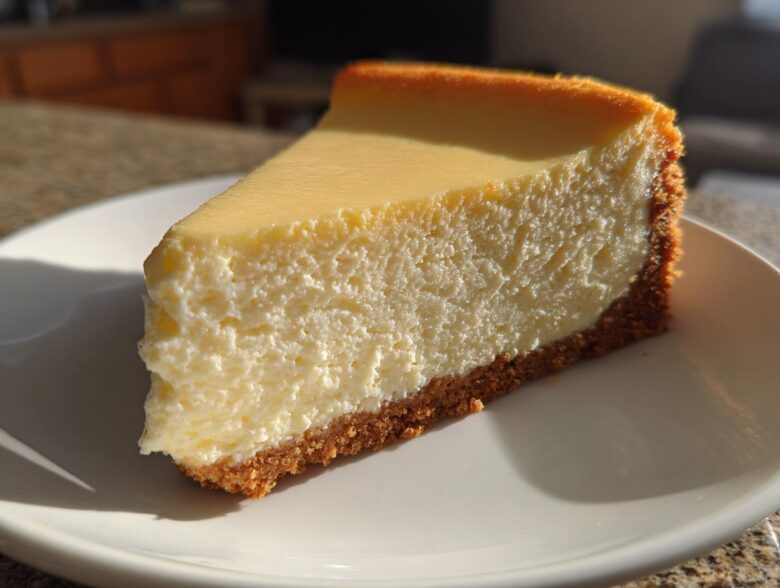
Oh, friend, if you’ve ever wrestled with a beautiful cheesecake only to have it emerge from the oven looking like cracked earth, I feel you! I’ve wasted so many expensive tubs of cream cheese trying to get that perfect, polished top. But I’m telling you now, my search is over. This is it—the definitive, easy-to-follow cheesecake recipe that absolutely guarantees you a dreamy, creamy, New York Style finish without a single crack. Seriously, I was skeptical too, but the slow cooling trick in the oven changed everything for me. Get ready for the best homemade cheesecake you’ve ever made! Check out our story for why we obsess over perfect desserts.
Why This is the Best Cheesecake Recipe for Beginners
When you’re looking for the best cheesecake recipe, you probably worry most about texture and cracks. Trust me when I say this whole process is set up to make you look like a baking genius! We rely on two major techniques that experienced bakers swear by: the water bath and the slow, gentle cooling process. These steps stabilize the bake, stopping that awful rapid temperature shift that causes cracking. If you’ve been desperate for an easy cheesecake recipe that delivers on its promise of being a stunning no crack cheesecake, this is your blueprint. It takes a little patience at the end, but the payoff is worth every second.
Achieving a Velvety Cheesecake Filling
Texture is everything when it comes to that truly creamy cheesecake recipe experience. The secret to that perfectly velvety cheesecake filling starts long before you ever turn the mixer on! You absolutely must use room-temperature cream cheese and eggs. If they are cold, the mixture clumps, and you end up beating it too hard to smooth it out. Gentle mixing stops incorporating air, and less air means a denser, smoother texture that sets beautifully. It’s simple science, really, but it makes all the difference between good and divine!
Gathering Ingredients for Your Classic Cheesecake Recipe
Okay, now that you understand why this is the best cheesecake recipe—it’s all about technique!—let’s talk about what you need to pull it off. Since we are aiming for that amazing creamy cheesecake recipe result, this is non-negotiable: your cream cheese and eggs must be sitting out on the counter until they are totally room temperature. If you try to rush this part, you’re going to end up with lumps, and we just don’t have room for lumps in our perfect cake. This entire classic cheesecake recipe yields 10 generous slices of pure indulgence.
It takes about 20 minutes of prep, 75 minutes to bake, but honestly, the total time is closer to eight hours because of the chilling time—but don’t let that scare you! Most of that is just waiting for it to chill perfectly. Before you start, take a peek at our recipe disclaimer, just so you know what you’re getting into!
Ingredients for the Cheesecake with Graham Cracker Crust
Here is what you need to gather up. Make sure everything is ready to go before you start beating things together!
- For the Crust: You’ll need 1 1/2 cups of graham cracker crumbs, 1/4 cup of granulated sugar, and 6 tablespoons of unsalted butter, melted.
- For the Filling: We need 3 (8 ounce) packages of cream cheese, and remember, they must be softened! You’ll also need 1 1/2 cups of granulated sugar (that’s the main sugar component), 1 teaspoon of vanilla extract, 1/4 cup of heavy cream, and 4 large eggs.
That’s it! Simple ingredients creating magic, I tell you. If you forget to soften the cheese, just zap the blocks for about 10 seconds in the microwave, but check them often!
Step-by-Step Instructions for the No Crack Cheesecake Recipe
This is where the magic happens, and honestly, following these steps exactly is the difference between a great cheesecake recipe and the absolute best dessert ever. Don’t freestyle on the cooling part—that’s the foolproof secret to avoiding cracks! Read through all these steps before you even touch the mixer, because timing is everything here.
Preparing the Crust and Setting Up the Water Bath
First thing: get organized! Preheat the oven to 325°F (160°C). Take your 9-inch springform pan and wrap the entire outside with heavy-duty aluminum foil. I mean serious wrapping—you want to stop any water from creeping in during the bath. Mix up your crust ingredients—the crumbs, the 1/4 cup sugar, and melted butter—and press that mixture down firmly on the bottom of the pan. Pop it into the oven for 10 minutes to set; let it cool a little bit when it comes out.
Now for the water bath, or bain-marie. Place your foil-wrapped cheesecake pan *inside* a larger roasting pan. Careful now! Pour hot water into that outer pan until it’s about halfway up the sides of the springform pan. This steaming environment is essential for keeping that delicate center from firming up too fast.
Mixing the Velvety Cheesecake Filling
Go back to those room-temperature ingredients we talked about! In a big bowl, beat that softened cream cheese until it is genuinely, 100% smooth. Scrape down those bowl sides. Next, add the 1 1/2 cups of sugar gradually, then mix in your vanilla and heavy cream. The real caution zone is the eggs. You need to add them one at a time, and I mean one at a time, mixing only on the very lowest speed until you just see the yolk disappear.
If you beat the batter too hard once those eggs are in, you’ll whip air into it, and that air expands during baking, causing the cake to rise rapidly and then suddenly fall and crack. We want that velvety cheesecake filling, not meringue! Once the last egg is incorporated, stop mixing immediately. Pour that lovely filling over your slightly cooled crust and ease it into the water bath.
Baking and Slow Cooling for the Perfect Cheesecake Recipe
Bake this beauty for anywhere from 60 to 75 minutes. You’ll know it’s close when the edges look totally set, but if you gently nudge the whole pan, the center two inches should still have a little wobble, like thick pudding. Don’t overbake it! That leads right back to cracking.
Here’s the part everyone skips: When the time is up, turn the oven OFF. Don’t pull it out! Prop the oven door open about two inches—I usually use a wooden spoon handle for this. Let the cheesecake sit in that slowly cooling oven for a full hour. This gradual temperature drop is the ultimate no crack cheesecake technique. After the hour, carefully remove it from the water bath and foil, let it cool on a rack, and then—this is the hardest part—chill it for at least 6 hours, but overnight is always better!
Tips for Success with Your Homemade Cheesecake Recipe
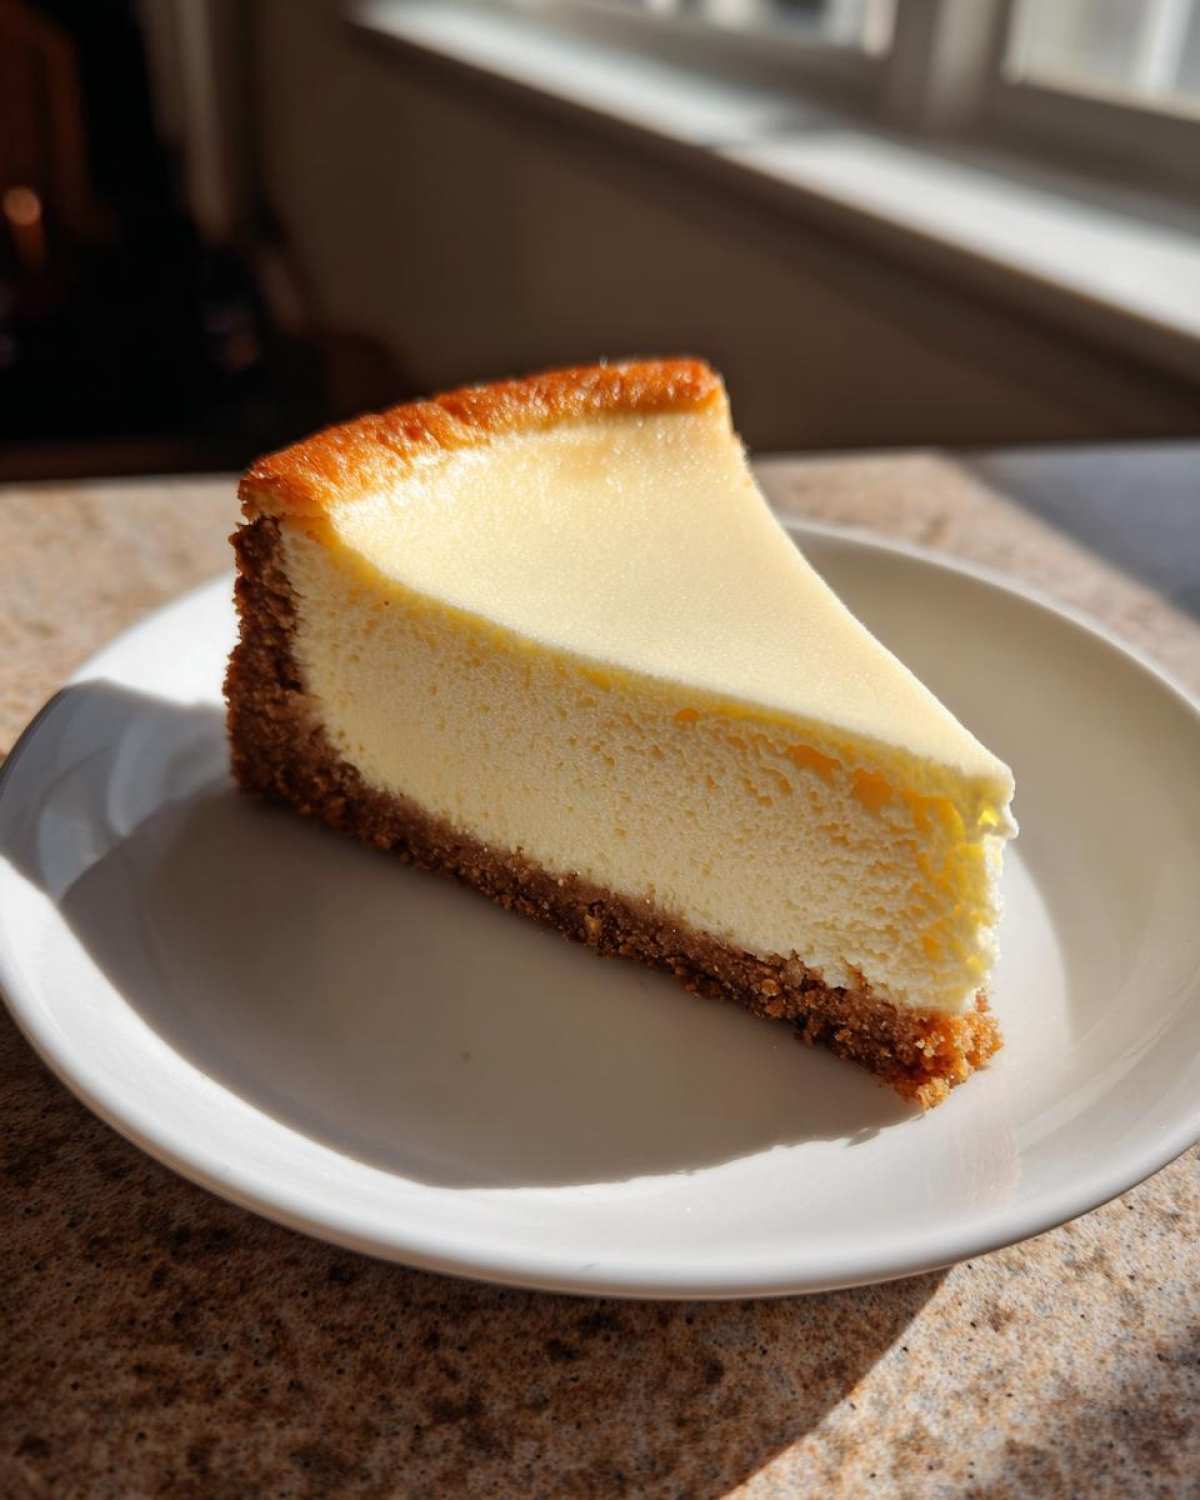
I know I keep harping on technique, but successfully making a homemade cheesecake really hinges on a few small details that feel like cheating, but they aren’t! Remember the notes I found scribbled on my old recipe card? They were all about temperature and timing. Seriously, when I first tried making a classic cheesecake recipe, I used cold cream cheese straight from the fridge, and it curdled, creating grainy lumps. Total disaster!
Now, I always take my cream cheese and eggs out the morning before I plan to bake. It ensures that beautiful, silky texture we are after. Also, and this is crucial: never, ever open that oven door while the cake is actually baking in the water bath. You’re messing with the steam environment, and that’s what causes the top to sink or, worse, crack right in the middle. If you need me, I’ll be over here enjoying the finished product while you contact us if you need help!
Ingredient Notes and Substitutions for This Cheesecake Recipe
So you’ve mastered the mixing, but maybe you’re looking at the ingredient list and wondering, “Do I *have* to use heavy cream?” That’s a fair question! For this particular cheesecake recipe, I stick to heavy cream instead of sour cream because we are aiming for that super dense, pure New York Style experience. The heavy cream gives us incredible richness and the exact fat content we need to keep the texture stable and luxurious without adding the tang that sour cream brings.
If you want tang, that’s great for a different variation, but for this classic, it’s heavy cream all the way to that perfect density. Don’t skip it unless you absolutely have to!
Now, let’s talk crust—the foundation of our delicious cheesecake recipe. While the standard graham cracker crust is traditional, what if you ran out? You can totally swap those graham crackers for about 1 3/4 cups of finely crushed chocolate sandwich cookies, like Oreos (minus the filling, if you want to keep the sugar down slightly). If you swap to Oreos, you might need to slightly reduce the melted butter by a tablespoon or so, because the cookie crumbs themselves tend to hold a bit more moisture. It’s a small adjustment, but it makes a huge difference in the final crust texture!
Serving Suggestions for Your Indulgent Cheesecake Flavors
That big, creamy slice of New York Style cheesecake is frankly perfect just as it is, but if you want to dress it up for a party, I have a few ideas for toppings! For a simple, elegant look, a dusting of powdered sugar or a drizzle of dark chocolate ganache is just divine against that pale canvas. It lets the pure flavor of this amazing cheesecake recipe shine through.
If you’re feeling ambitious next time, use this base recipe and swirl in some fruit reduction just before that final bake—that’s how you get a beautiful strawberry swirl cheesecake! Or, if you’re looking for something truly over-the-top for a holiday, imagine topping this with caramel, pecans, and dark chocolate chunks; that’s heading straight into turtle cheesecake recipe territory! This simple beauty is your launching pad for all those indulgent cheesecake flavors.
Storage and Make Ahead Dessert Tips for This Cheesecake Recipe
One of the greatest things about mastering this cheesecake recipe? It’s the ultimate make ahead dessert! Seriously, planning ahead for holiday gatherings or big dinners is so much easier when you know your star dessert is done days in advance. This rich, creamy beauty actually tastes better after a long, cold chill, so don’t feel bad about making it a day or two early. It develops that fantastic density then!
When it comes to refrigeration, you need to protect that lovely top from absorbing any funky fridge smells. Once the cheesecake is fully chilled—and I mean rock solid from being in the pan—carefully run a thin, sharp knife around the edge before releasing the springform side. Then, cover the whole thing tightly with plastic wrap. I usually do one layer of wrap, then another layer of foil over that, just to be certain. It stays absolutely perfect in the fridge for up to five days! Make sure you check out our privacy policy while you wait for it to set!
But what if you need it for next month? Yes, you can freeze this magnificent cheesecake! After the initial chilling, wrap it really well, just like I described for the fridge, but use a high-quality freezer bag or double layer of foil. If you freeze it whole, it lasts beautifully for about one month. When you want to serve it, just transfer the wrapped cake right into the refrigerator. It takes a full 24 hours to thaw, but keeping it wrapped while it thaws keeps any moisture loss locked away. When it’s ready, unwrap it, let it sit at room temperature for about 30 minutes, and slice away!
Frequently Asked Questions About Making Cheesecake
Why is my cheesecake still liquid in the middle even after baking?
Oh, this is completely normal right out of the oven, don’t panic! Remember when we talked about the jiggle? If your creamy cheesecake recipe looks liquidy in the center after the full bake time, it means you timed it perfectly! The center 2 inches need to wiggle slightly. If it’s totally firm, you’ve overbaked it, and that’s what can cause shrinkage later. The real setting happens during that slow cool-down inside the turned-off oven. If it’s still liquidy after that hour in the oven, it just needs more time in the fridge—it needs that full 6 to 8 hours, or better yet, overnight, to fully firm up into that perfect slice of heaven.
Can I skip the water bath when making this New York Cheesecake?
I know, I know, wrapping that pan in foil feels like such a chore for a classic cheesecake recipe, but please, please don’t skip it if you want that no crack cheesecake result! The water bath creates a humid, gentle oven environment. Without it, the outside edges cook way faster than the middle. This results in the edges setting firmly while the center rushes to catch up, causing it to rise unevenly and *crack* as it cools down. It’s the main protective measure for achieving that smooth top!
How do I get unbelievably clean, perfect slices every time?
This is the key to serving up a beautiful slice of your homemade cheesecake! Forget the knife you use for everything else. For the cleanest cuts, you need a large, thin, sharp knife—a carving knife works best. Here’s the trick that saves the day for every rich dessert idea: Dip the knife blade into a glass of hot water, wipe it dry with a clean cloth, and then slice. You only clean the knife between every single cut! This melts the fats slightly just as you cut, so you get a super smooth separation instead of dragging the filling. Make sure your cheesecake is ice-cold before you even attempt this. You can find more great tips on our terms and conditions page, too!
Is this recipe suitable for making mini cheesecakes?
Absolutely! I love making mini cheesecakes when company comes over. It cuts down on the baking time significantly, usually to about 20 to 25 minutes at 325°F, depending on how deep your muffin tin liners are. You still need to use the water bath method, though! Line a muffin tin with liners, press the crust in, chill the filling briefly to help it stay put, and then place that whole muffin tin inside a larger baking dish filled halfway with hot water before you bake. The slow bake keeps them creamy, even in those smaller portions!
Estimated Nutritional Information for This Rich Dessert Idea
Now, full disclosure time! I bake for love and flavor, not for tracking macros, but I know some of you lovely readers are curious about what you’re diving into when you make this magnificent, rich dessert idea. Since this is a proper New York Style cheesecake, it is certainly an indulgence, so keep that in mind!
The figures I’ve calculated below are just an estimation based on the recipe provided, assuming you divide the entire cake into 10 equal slices. If you cut it into smaller pieces (which, let’s be honest, is tempting!), the numbers change. You can find more details on how we calculate these estimates over on our GDPR compliance statement page.
It’s a decadent treat, but totally worth it when it’s made this perfectly!
- Serving Size: 1 slice
- Calories: 450
- Sugar: 35g
- Fat: 30g
- Carbohydrates: 40g
- Protein: 8g
Classic No-Crack New York Style Cheesecake Recipe
Follow this simple guide to make a rich, creamy New York Style cheesecake with a graham cracker crust that resists cracking.
- Prep Time: 20 min
- Cook Time: 75 min
- Total Time: 8 hours 35 min
- Yield: 10 servings
- Category: Dessert
- Method: Baking
- Cuisine: American
- Diet: Vegetarian
Ingredients
- 1 1/2 cups graham cracker crumbs
- 1/4 cup granulated sugar (for crust)
- 6 tablespoons unsalted butter, melted
- 3 (8 ounce) packages cream cheese, softened
- 1 1/2 cups granulated sugar (for filling)
- 1 teaspoon vanilla extract
- 1/4 cup heavy cream
- 4 large eggs
Instructions
- Preheat your oven to 325°F (160°C). Wrap the outside of a 9-inch springform pan tightly with heavy-duty aluminum foil to prevent water seepage.
- Prepare the crust: Mix graham cracker crumbs, 1/4 cup sugar, and melted butter until combined. Press the mixture firmly into the bottom of the prepared springform pan. Bake for 10 minutes. Let cool slightly.
- Prepare the filling: In a large bowl, beat the softened cream cheese with an electric mixer until completely smooth. Scrape down the sides.
- Gradually beat in 1 1/2 cups sugar until just combined. Mix in vanilla extract and heavy cream.
- Add the eggs one at a time, mixing on low speed only until each egg is incorporated. Do not overmix the batter once eggs are added.
- Pour the filling over the cooled crust. Place the springform pan inside a larger roasting pan. Carefully pour hot water into the roasting pan until the water reaches halfway up the sides of the springform pan (this creates a water bath).
- Bake for 60 to 75 minutes. The edges should look set, but the center 2 inches should still jiggle slightly when gently nudged.
- Turn off the oven, prop the door open slightly (about 2 inches), and let the cheesecake cool inside the oven for 1 hour. This slow cooling prevents cracking.
- Remove the cheesecake from the water bath and foil. Cool completely on a wire rack, then chill in the refrigerator for at least 6 hours, or preferably overnight, before serving.
Notes
- Use room temperature ingredients for the cream cheese and eggs for the smoothest filling.
- Do not open the oven door during the initial baking time.
- For the best texture, chill the cheesecake completely before slicing.
Nutrition
- Serving Size: 1 slice
- Calories: 450
- Sugar: 35g
- Sodium: 300mg
- Fat: 30g
- Saturated Fat: 18g
- Unsaturated Fat: 12g
- Trans Fat: 0.5g
- Carbohydrates: 40g
- Fiber: 1g
- Protein: 8g
- Cholesterol: 120mg