

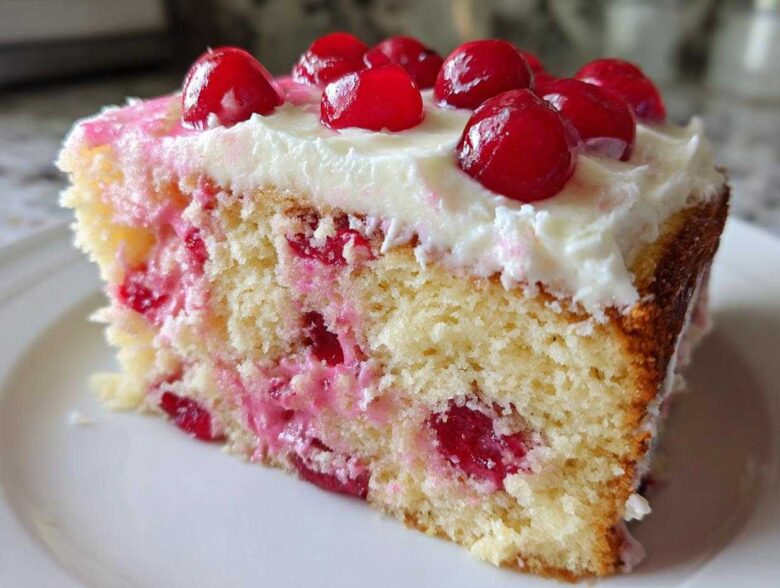
Some desserts just scream ‘celebration,’ right? They carry that perfect, sweet nostalgia that takes you right back to the best family parties when you were a kid. Forget trying to chase the latest complicated trends—we’re going back to basics with what I confidently call the absolute best cherry cake recipe you’ll ever need. This isn’t just any cake; this is my go-to, rock-solid recipe for the Vintage Maraschino Cherry Cake. Trust me when I say this cake is special; the color is stunning, but the moist crumb we get from using the actual cherry juice? That’s the secret handshake that sets it apart from everything else. I’ve tried every fresh cherry dessert out there, but nothing beats the vibrant look and soft texture of this classic beauty.
Why This Vintage Maraschino Cherry Cake Recipe Stands Out
I know there are a million ways to bake a cherry cake these days, but this vintage style is my absolute favorite, and once you try it, you’ll understand why it’s been around for so long. It really hits that sweet spot between being totally simple and completely show-stopping. It’s the kind of homemade cherry cake that gets requested for every single birthday and holiday gathering we have!
Here are the main reasons this recipe belongs in your rotation:
- It creates an unbelievably moist cherry cake because we skip the water and use the juice directly!
- The color is just stunning—that deep, jewel-toned pink is all natural (well, mostly natural, haha!).
- It comes together faster than most fussy layer cakes, making it perfect for when you need something impressive in a hurry.
- We keep the frosting simple, letting the flavor of the cherry and almond shine through. Learn more about our commitment to classic baking over at our story page.
Achieving the Perfect Moist Cherry Cake Texture
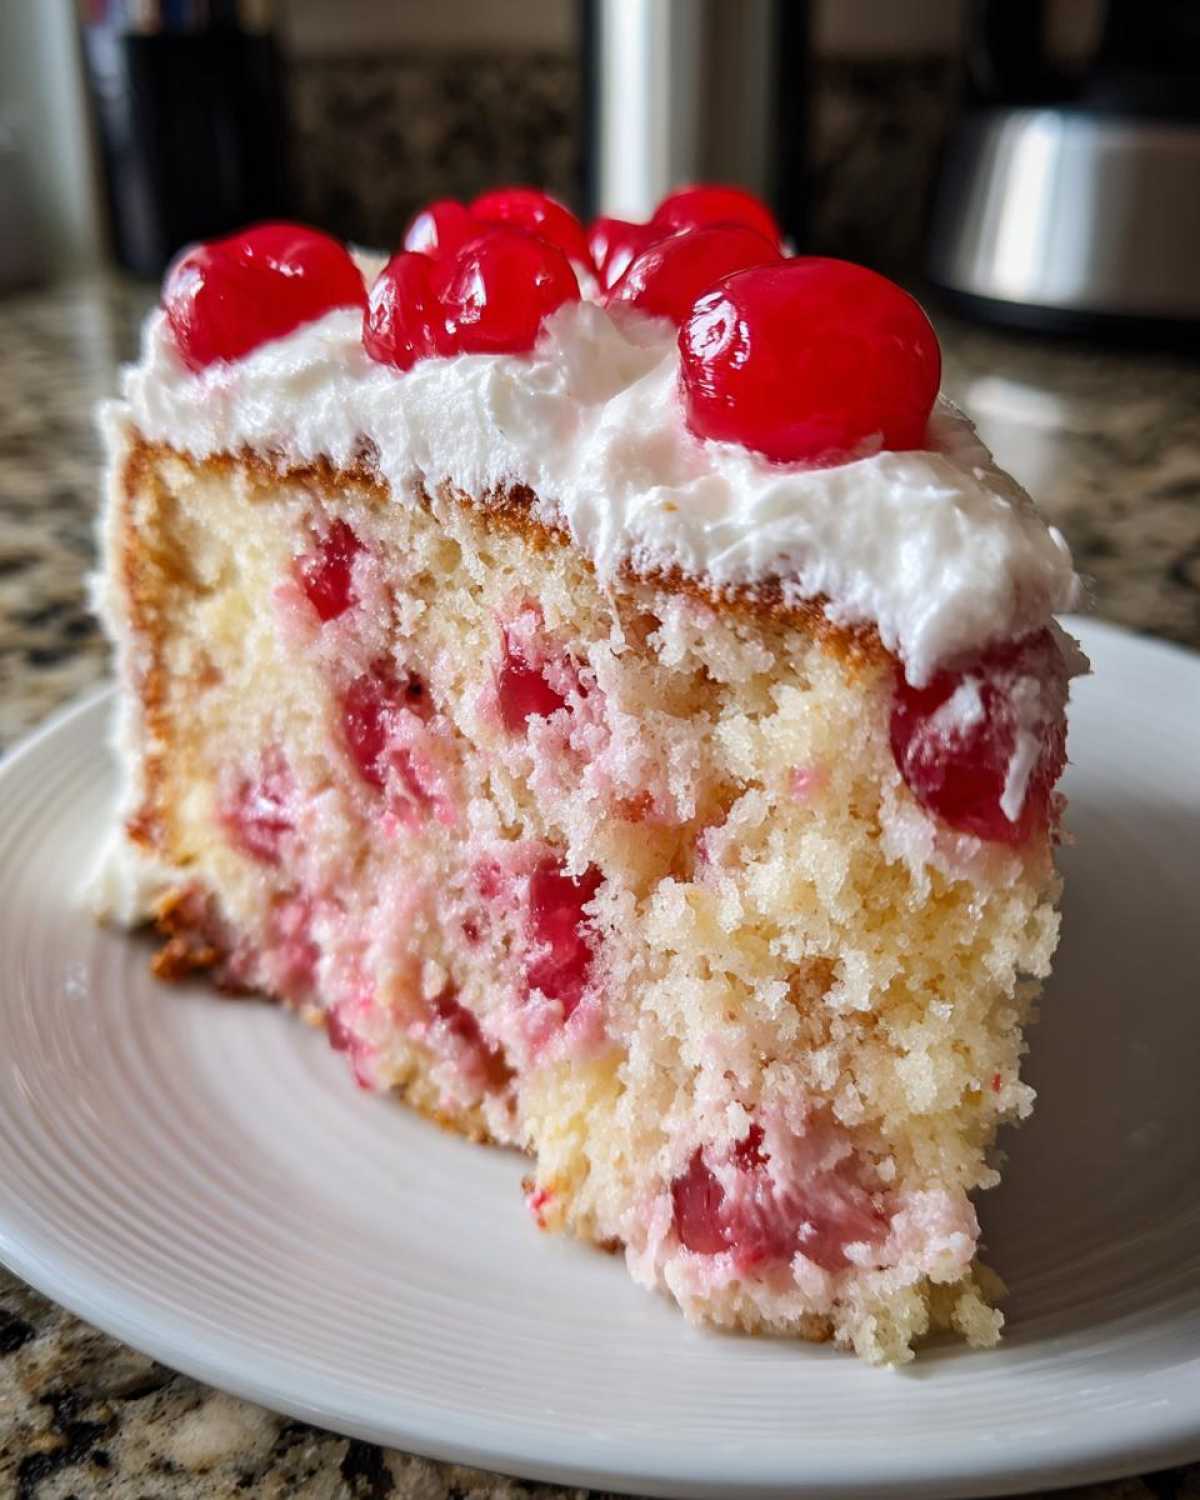
Seriously, the juice is everything here. When you use the liquid from the maraschino jar instead of milk or water, you introduce just the right amount of sugar and syrup into the flour mixture. This keeps the crumb incredibly tender and stops it from drying out halfway through the day. That’s the secret to a truly moist cherry cake that stays soft for days!
The Nostalgia of This Cherry Cake
This isn’t just about flavor; it’s about history. This vintage cherry cake reminds me of the old cookbooks my aunt used to bake from back in the day. People love the bright, happy look of maraschino cherries—it takes us back to simpler times, maybe potlucks or church socials. It’s classic American baking at its absolute best, and it just feels comforting to make.
Gathering Ingredients for Your Cherry Cake
Okay, let’s get down to business! Before we start mixing anything, we need our supplies lined up. Making a fantastic homemade cherry cake starts with accurate measurements. Don’t skimp here; precision in baking really pays off, especially when you are relying on liquid measurements like that beautiful cherry juice!
This list is what creates that signature pink hue and perfect texture. Double-check your pantry—especially if you have a jar of maraschino cherries hiding somewhere!
Ingredient List for the Vintage Cherry Cake
- 1 1/2 cups all-purpose flour
- 1 1/2 teaspoons baking powder
- 1/2 teaspoon salt
- 1/2 cup unsalted butter, softened
- 1 cup granulated sugar
- 2 large eggs
- 1 teaspoon vanilla extract
- 1/2 cup milk
- 1/2 cup maraschino cherry juice
- 1/2 cup chopped maraschino cherries, drained
- 1/4 cup chopped pecans or walnuts (optional)
Essential Ingredient Notes and Substitutions for Your Cherry Cake
Even though this is a classic recipe, I always get questions about swaps, especially since not everyone keeps maraschino cherry juice chilled next to the milk! Don’t worry if you’re running low on one specific item; we can totally work around it. Being flexible is key to getting this cherry cake baked whenever the craving hits, and these little notes really help build that confidence in the kitchen.
You want every component singing in harmony to ensure you nail that perfect texture. Trust me, a little adjustment here or there makes a huge difference in the final bake!
Tips for Using Fresh Cherry Cake Ingredients
If you happen to have gorgeous fresh or frozen cherries lying around instead of the canned ones, you absolutely must use them! Fresh cherries give a wonderful burst of tartness that cuts through the sweetness beautifully. But here’s the absolute non-negotiable trick if you go that route: you have to toss them in about a tablespoon of flour before folding them into the batter.
Why the flour toss? Because fruit sinks! Especially when it’s heavy or moist, it just wants to settle right at the bottom of your pan while everything else bakes up light around it. Coating them lightly in flour helps the little bits—whether they’re fresh, frozen, or even canned—stay suspended beautifully throughout your entire homemade cherry cake slice. It’s a small step that saves you from a sad, cherry-less bottom layer!
Now, about that juice—if you don’t have the jar liquid, you can substitute it with regular milk, but make sure you add just a tiny drop or two of red food coloring. You need that signature vintage look, right? It won’t taste exactly the same without the natural syrup mixed in, but it’s a great fast fix!
Step-by-Step Instructions for the Best Cherry Cake Recipe
Alright, time to roll up our sleeves! This whole process for the best cherry cake recipe is so straightforward, but you need to pay attention to the order of mixing—that’s where we get that amazing height and texture. I usually preheat the oven first, just so it’s nice and ready to go by the time we’re done mixing the batter. You’ll need one 9-inch round pan, and make sure you grease and flour it really well. These cakes can sometimes stick if you aren’t generous with the prep!
First things first, we tackle the dry team. Whisk your flour, baking powder, and salt together in a medium bowl. Just a quick whisk to combine them thoroughly. Then you set that bowl aside and move onto the heavy lifting in your big mixing bowl. This is where the magic really starts to happen!
Preparing the Batter for a Light Cherry Cake
We need that butter softened—not melted, mind you, just soft enough to mash easily. Cream your softened butter and the sugar together until it gets light and fluffy. I mean pale yellow, almost white. This step is crucial because you’re building air into the cake! Beat in those two eggs one at a time, making sure each one is fully incorporated before adding the next, followed by that lovely vanilla.
Now, you have your wet ingredients (milk mixed with the cherry juice) and your dry ingredients. We’re going to alternate adding them into the butter mixture. Always start and end with the dry stuff! Add about a third of the flour mix, mix gently, then half of your liquid, mix gently. Repeat until everything is used up. Be super careful not to overmix here! Once the flour streaks disappear, stop mixing. I’m serious—stop! Overmixing develops gluten and turns this beautiful cake into a chewy brick.
Finally, gently fold in those chopped cherries and nuts, if you’re using them. Pour all that gorgeous pink batter into your prepared pan. Check out our official disclaimer if you have questions about ingredient sourcing!
Baking and Cooling Your Homemade Cherry Cake
Pop that pan into your preheated 350-degree oven. It usually takes about 30 to 35 minutes. How do you know when it’s done? Don’t just stare at the clock! You absolutely must insert a wooden pick right into the center. If it comes out clean, you’re golden. If it has wet batter clinging to it, give it five more minutes.
Once it’s baked, don’t rush it out! Let the cake cool in the pan for just 10 minutes. This is important because it lets the structure firm up a bit before we try to handle it. After those 10 minutes, carefully invert the cake onto a wire rack. You need that rack so air can circulate underneath, letting it cool completely before you even *think* about frosting it. A warm cake melts frosting instantly, and nobody wants a cherry cake landslide!
Tips for Success When Making a Flawless Cherry Cake
We’ve covered the main steps for this cherry cake, but I want to share a couple of little insider tricks I’ve picked up over the years. Baking is science, but when you’re making something this delicate, a couple of extra steps really guarantee success, so you end up with the most beautiful slice every single time.
First, please, please make sure your butter and eggs are truly at room temperature before you start creaming. If they are cold, they won’t emulsify properly with the sugar, and you’ll end up with a curdled batter. Curdled batter means a denser, less tender cake. It’s worth setting those things out 45 minutes before you plan to bake!
Second, when you fold in those chopped cherries, use a rubber spatula, not your whisk or electric mixer. You need a gentle hand at that stage. We want to keep all the air we beat into the batter for the first 20 minutes, so handle those cherries like they’re spun glass!
Finally, I always line the bottom of my 9-inch pan with a parchment circle, even after greasing and flouring. It’s my insurance policy against sticking. Since this is such a moist cake, sometimes the edges hold on for dear life, but that parchment guarantees an easy release. A little extra prep means a perfectly intact cake!
Serving Suggestions for Your Cherry Cake
Now that you have this incredible, vibrant cake, the fun part is deciding how to present it! This cake is fantastic as is, especially covered in a light dusting of powdered sugar, but it really sings when paired with a good frosting. You absolutely can’t go wrong with a classic, slightly tangy cream cheese frosting—it balances the sweetness perfectly. A simple, fluffy vanilla buttercream also works wonders if you want something lighter.
If you’re serving this at a casual afternoon coffee get-together, just a dollop of fresh whipped cream and maybe a few extra chopped nuts sprinkled on top is all it needs. Honestly, a warm slice with a good, strong cup of coffee makes for a wonderful afternoon snack. These are some of my favorite cherry dessert ideas because they don’t require a lot of extra fuss!
Storage and Reheating Instructions for Cherry Cake
Since this cherry cake is so wonderfully moist, we need to treat it right so it stays that way! If you have leftovers (which I highly doubt, but we can hope!), keep it covered loosely at room temperature. It should be perfectly fine for about two days like that. If your kitchen is really warm or humid, I’d move it into the fridge, but cover it tightly with plastic wrap first so it doesn’t dry out.
When you want to bring a slice back to life, don’t microwave the whole thing—that ruins the texture! Just take a slice and warm it for about 10 to 15 seconds in the microwave. That little blast of heat softens the cake up beautifully and makes it taste like it just came out of the oven. It’s the best way to enjoy those last few pieces of your homemade cherry cake!
Frequently Asked Questions About This Cherry Cake
Can I easily turn this into a Cherry Layer Cake?
Oh, you totally can! While this recipe is traditionally baked as a single, gorgeous round cake, it’s perfect for doubling up if you want a proper cherry layer cake. Just double every ingredient quantity and divide the batter evenly between two 8-inch or 9-inch round pans. You’ll need to keep an eye on the baking time, though; two layers might bake just slightly faster than one thick cake, so start checking around the 25-minute mark. A sweet cream cheese frosting between the layers is just heavenly!
Is this recipe simple enough to be called an Easy Cherry Cake?
I would absolutely call this an easy cherry cake! The total prep time is only about 20 minutes, and the steps are really simple: cream butter/sugar, add eggs, mix dry/wet alternately, fold in cherries. Honestly, the trickiest part is resisting the urge to overmix, but once you remember that rule, the rest is foolproof. It delivers way more visual impact than the effort it actually takes!
What if I only have fresh cherries and no maraschino juice?
That’s a great question, and you can definitely use fresh cherries—see my notes above about tossing them in flour! If you don’t have the juice, you can use an equal amount of regular milk, but you’ll need to add 1 to 2 drops of red food coloring to get that classic vintage pink color we expect from this style of cake. If you skip the color completely, you’ll end up with a lovely, pale vanilla cake with cherries, which is delicious too, just not the exact vintage look we were aiming for!
Can I bake this as a Cherry Loaf Cake instead of a round cake?
Yes, loaf pans are fantastic for this because they make for great slicing and easier gifting. If you use two standard 9×5 inch loaf pans, you’ll want to bake them a little longer, usually around 40 to 45 minutes, because the batter is deeper. Make sure you grease those loaf pans really, really well, or use parchment paper slings so you can lift the cakes right out when they’re done. Let me know if you need help figuring out the geometry on different pan sizes; we keep all the info updated on our contact page!
Nutritional Estimate for One Slice of Cherry Cake
I always get asked about the numbers, and while I’m absolutely more concerned with flavor than calorie counts when I’m whipping up a cherry cake, I know some of you like to plan ahead! Please remember that this is just a general guide. The final nutrition can change wildly depending on the brand of butter you use, whether you add those optional nuts, or what kind of frosting you decide to slather on top.
This estimate is based solely on the cake recipe itself, not including any frosting or glaze you might add later. You can find our full terms on ingredient analysis here: our published terms.
Here is the approximate breakdown per slice, based on 8 servings:
- Serving Size: 1 slice
- Calories: 320
- Sugar: 35g
- Sodium: 210mg
- Fat: 15g
- Saturated Fat: 9g
- Unsaturated Fat: 6g
- Trans Fat: 0g
- Carbohydrates: 45g
- Fiber: 1g
- Protein: 4g
- Cholesterol: 75mg
So, enjoy that slice of delicious, moist cake! If you skip the optional nuts, you save a tiny bit of fat, but honestly, these numbers look pretty good for such a flavorful, classic dessert!
PrintVintage Maraschino Cherry Cake
A moist, classic cake recipe using maraschino cherries for color and flavor, perfect for celebrations.
- Prep Time: 20 min
- Cook Time: 35 min
- Total Time: 55 min
- Yield: 8 servings
- Category: Dessert
- Method: Baking
- Cuisine: American
- Diet: Vegetarian
Ingredients
- 1 1/2 cups all-purpose flour
- 1 1/2 teaspoons baking powder
- 1/2 teaspoon salt
- 1/2 cup unsalted butter, softened
- 1 cup granulated sugar
- 2 large eggs
- 1 teaspoon vanilla extract
- 1/2 cup milk
- 1/2 cup maraschino cherry juice
- 1/2 cup chopped maraschino cherries, drained
- 1/4 cup chopped pecans or walnuts (optional)
Instructions
- Preheat your oven to 350 degrees F (175 degrees C). Grease and flour one 9-inch round cake pan.
- In a medium bowl, whisk together the flour, baking powder, and salt. Set aside.
- In a large bowl, cream the softened butter and sugar together until light and fluffy.
- Beat in the eggs one at a time, mixing well after each addition. Stir in the vanilla extract.
- In a separate small bowl, mix the milk and maraschino cherry juice together.
- Gradually add the dry ingredients to the wet ingredients, alternating with the milk mixture, beginning and ending with the dry ingredients. Mix until just combined. Do not overmix.
- Gently fold in the chopped maraschino cherries and nuts, if using.
- Pour the batter into the prepared cake pan.
- Bake for 30 to 35 minutes, or until a wooden pick inserted into the center comes out clean.
- Let the cake cool in the pan for 10 minutes before inverting it onto a wire rack to cool completely.
- Frost as desired (a simple vanilla or cream cheese frosting works well).
Notes
- For extra moisture, substitute 1/4 cup of the milk with sour cream.
- If you do not have maraschino cherry juice, use milk and add 1-2 drops of red food coloring.
- You can use fresh or frozen cherries, but you must chop them and toss them lightly in flour before adding to the batter to prevent sinking.
Nutrition
- Serving Size: 1 slice
- Calories: 320
- Sugar: 35
- Sodium: 210
- Fat: 15
- Saturated Fat: 9
- Unsaturated Fat: 6
- Trans Fat: 0
- Carbohydrates: 45
- Fiber: 1
- Protein: 4
- Cholesterol: 75