

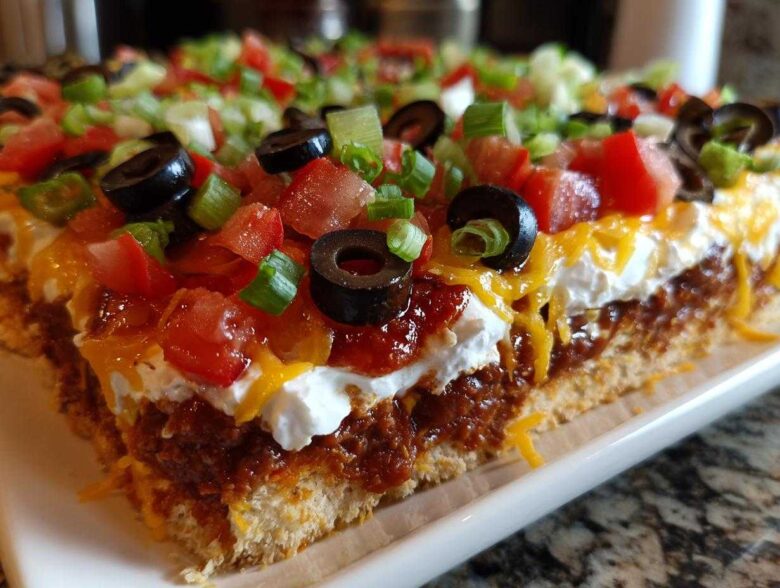
Oh my gosh, if hosting a gathering—be it a chaotic Super Bowl party, a chill Sunday hangout, or even just a Tuesday when you need something amazing—I always, always bring a dip! Out of all the appetizers I’ve tried over the years, nothing beats the sheer satisfaction of a perfect **layer dip**. And I’m not talking about some fancy, overly complicated thing. I’m talking about the real deal: the Classic Seven Layer Taco Dip!
This recipe is my absolute go-to for game day. It’s reliable, it’s gorgeous when you slice into it, and honestly, people lose their minds for it. I’ve made this exact Tex-Mex spread so many times I could probably do the layers blindfolded. It’s the ultimate, crowd-pleasing victory because it requires zero oven time. Seriously, trust me on this one; it never lasts long on the snack table!
If you want to see more of my trusty party snack arsenal, you can always check out our philosophy on easy entertaining.
Why This Classic Seven Layer Dip is the Best Party Dip
When you’re putting out a spread, you need food that performs! And this Classic Seven Layer Dip? It’s a superstar. It brings all the vibrant flavors of your favorite Tex-Mex nachos into one incredible, scoopable package. Why do I keep coming back to this recipe? Because I know it’s a guaranteed hit—it’s the definition of the Best Party Dip.
- It’s fast! You won’t spend hours hovering over the stove.
- It sets up beautifully in the fridge.
- Everyone loves layering! It’s fun just to look at before you eat it.
Quick Party Dip Assembly
Seriously, the hands-on prep time is only about 20 minutes. You’re basically just mixing a couple of things and carefully spreading them out. Since this is a completely no-bake dip, you don’t have to worry about oven space, which is a huge win when you’re balancing casseroles and warming up appetizers. It’s the definition of a Quick Party Dip!
Make Ahead Party Appetizer Strategy
This is my favorite part for real: you need to chill it! After assembling, you cover it and let it rest for an hour or more. This chilling time is crucial—it lets the layers firm up so they don’t all slide together when someone digs in with a chip. That makes it the ultimate Make Ahead Party Appetizer; I can finish it the morning of the party and forget about it until guests arrive!
Ingredients for Your Ultimate Layer Dip
Okay, you absolutely need to treat these layers with respect! If you’re aiming for that perfect structure, measurements matter, and the preparation of each ingredient is key to getting a clean slice. Don’t try to rush the draining part, or you’ll end up with a soupy mess instead of an **Ultimate Layer Dip**.
Here is exactly what you need to make those seven beautiful layers happen:
- One 16-ounce can of refried beans. And I mean it—they have to be at room temperature so they spread like butter!
- One cup of sour cream.
- One standard 1-ounce packet of taco seasoning mix.
- One cup of Mexican cheese blend, shredded nicely.
- One cup of salsa—but you must drain this super well!
- One cup of glorious guacamole.
- Half a cup of chopped black olives.
- And finally, a quarter cup of chopped green onions for that fresh bite on top.
Ingredient Notes and Substitutions for This Layer Dip
My number one tip for this whole **layer dip** venture is the beans. If they are cold, they will tear into the sour cream layer underneath, and that is just sad. Let them sit out for half an hour! Also, please, please drain your salsa. I use a fine-mesh sieve and let it sit while I mix the sour cream. If you don’t drain it, water runs everywhere.
If you want a slightly tangier, brighter flavor in your **Creamy Layered Dip**, you can swap out half the sour cream for plain Greek yogurt. It holds up great and adds a little zip behind all that savory flavor!
How to Make Layer Dip: Step-by-Step Instructions
Laying this dip is like creating a delicious, edible masterpiece, but you have to use the right order, or it all just becomes a mushy mess! Trust me, I learned the hard way a few times early on. The whole trick to a beautiful, impressive **layer dip** is applying each layer smoothly and gently, respecting the layer below it. No aggressive plopping allowed!
We are keeping this simple and active, just dumping and smoothing!
Mixing the Seasoned Sour Cream Layer
First things first, let’s make the creamy heart of this dip. Grab a bowl and mix your full cup of sour cream right together with that taco seasoning packet. I like to use a small whisk or a fork and keep going until everything is totally uniform—no white streaks left! This seasoned sour cream is the flavor glue for our Easy Layer Dip.
Building the Tex Mex Layer Dip Foundation
Time for the base! Take your room-temperature refried beans and spread them evenly across the bottom of your serving dish. Don’t press too hard here; you just want coverage. Next, you’re going to gently spread that seasoned sour cream right on top of the beans. Use the back of a spoon and glide across it softly. If you push too hard, you’ll see bean streaks in your sour cream, and we don’t want that in our **Tex Mex Layer Dip**!
Setting Your Layered Guacamole Dip
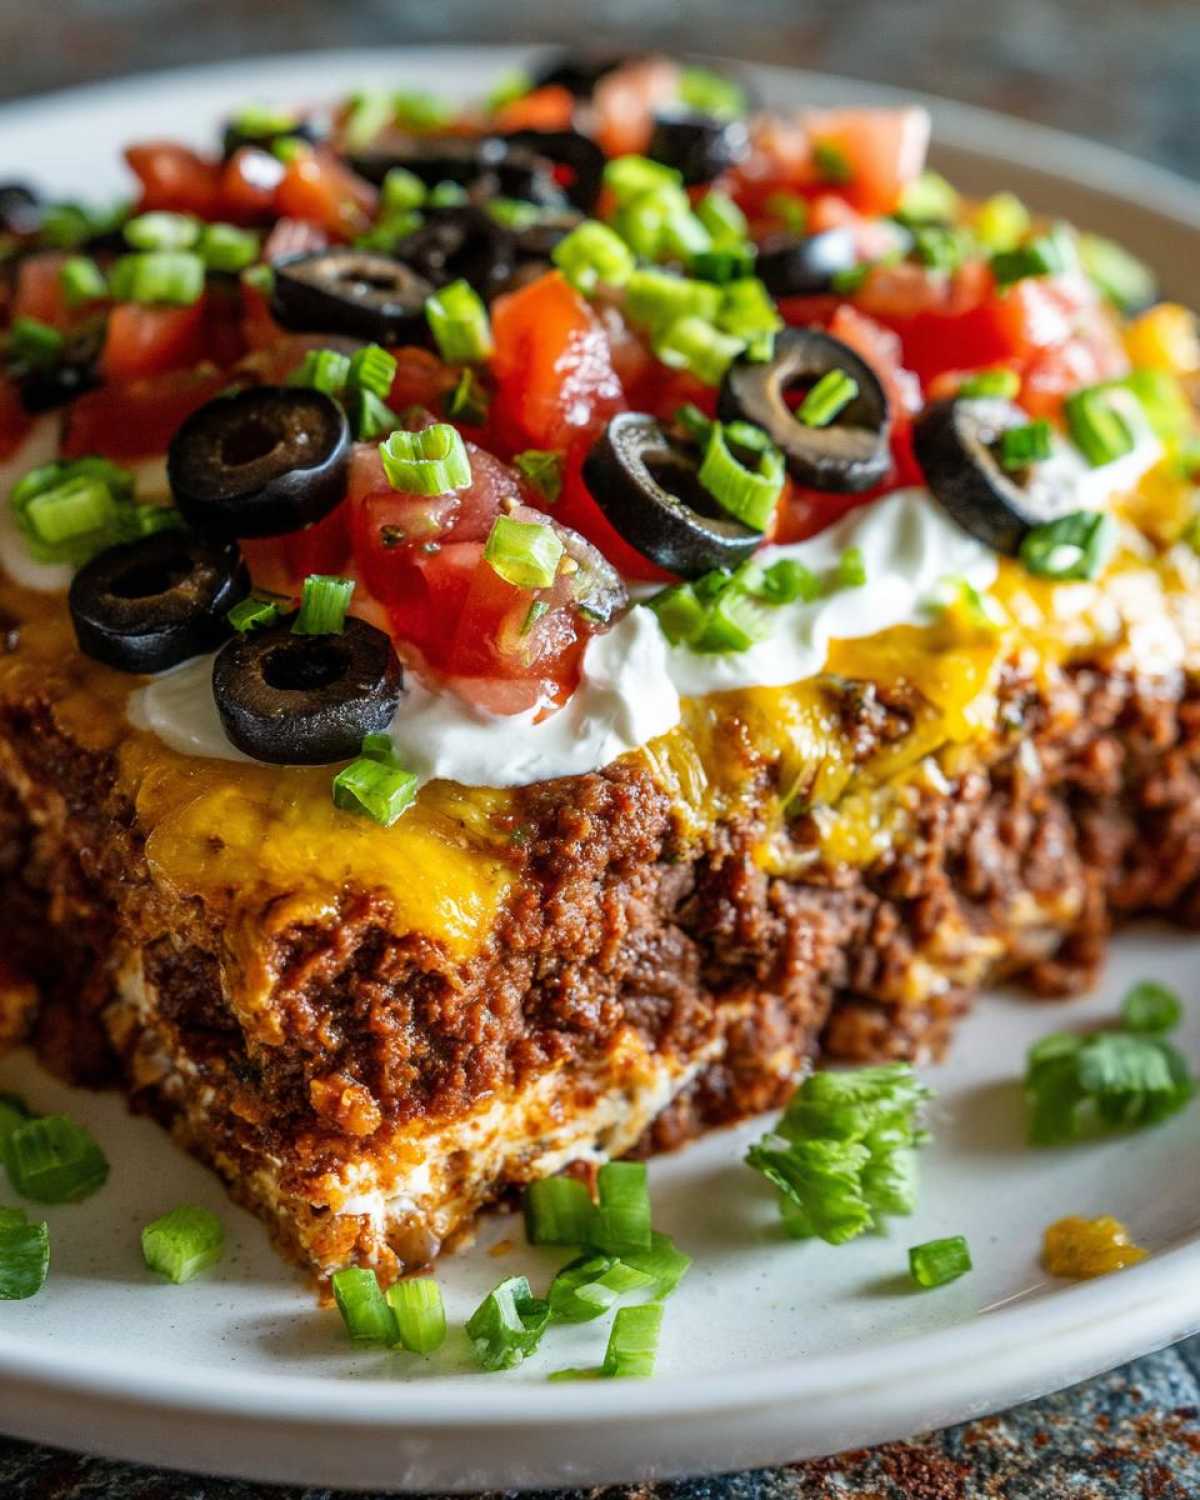
Now we go bright and cheesy! Sprinkle all your shredded Mexican cheese right over the sour cream. Then, spoon on that well-drained salsa, making sure it stays where you put it. The star is next: spread that gorgeous guacamole evenly over the salsa. Finally, sprinkle those olives and green onions right on top. Once it’s all assembled, cover the whole thing tightly and stick it in the fridge for at least one hour. This chilling time is essential for setting up your perfect **Layered Guacamole Dip**!
If you need the terms of service for understanding how I share these recipes online, you can check them right here.
Tips for Success with Your Classic Taco Dip
I’ve mastered this **layer dip** over years of trial and error, so let me save you some tears and frustration! The biggest failure point here is moisture control. If your salsa is swimming, your whole dip turns soupy fast. That’s why draining it so thoroughly in the ingredient prep is non-negotiable, I promise.
My top secret for keeping things looking fresh, especially if you’re making this ahead of time, is tackling the guacamole. Guacamole turns brown faster than I can eat it sometimes, so here’s my trick: once you spread that layer, take a piece of plastic wrap and press it *directly* onto the surface of the green layer. No air touching it means no browning! It feels a little weird, but it works like a charm and keeps your **Classic Taco Dip** looking vibrant until serving time.
Storage and Serving Suggestions for This Layer Dip
Once you’ve nailed those layers, how do you keep this beauty safe until everyone devours it? Since this **layer dip** is full of dairy and fresh avocado, it needs proper refrigeration. Cover your dish tightly with plastic wrap or, even better, transfer it to an airtight container if you made it in a non-sealing dish. It stays fantastic for about 2 to 3 days in the fridge—though honestly, for my parties, it never lasts past the first hour!
When it comes time to pull it out as one of your **Potluck Dip Ideas**, let it sit on the counter for about 15 minutes to take the hard chill off, but don’t leave it out indefinitely! I serve mine in a big, shallow glass dish so everyone can see those beautiful layers. Tortilla chips are the classic choice, of course, but don’t forget crisp celery sticks or carrot rounds for scooping too!
Frequently Asked Questions About Layer Dip
Whenever I put out a big platter of this layer dip, I always get a ton of questions! People are curious about substitutions or how long it needs to chill. I’ve rounded up the ones I hear most often so you can get your dip ready without any guesswork. It’s all about keeping things easy for you!
Can I make this a Seven Layer Bean Dip without meat?
Great question! Yes, you absolutely can, and you already are! This specific recipe is naturally vegetarian because we skip the ground beef layer. So, this is a perfect, hearty **Seven Layer Bean Dip** right out of the gate. You get all the flavor from the beans and toppings without needing any meat at all!
How long can this No Bake Layer Dip sit out?
Because we rely so heavily on that sour cream and the guacamole, food safety is important here. Since this is a **No Bake Layer Dip**, it shouldn’t sit out at room temperature (party time!) for longer than two hours total. After that, the dairy starts taking risks, and nobody wants to risk feeling crummy the day after a great party. Keep any leftovers tightly covered!
For all the legal stuff related to using this site, you can read our official disclaimer here.
Estimated Nutritional Data for This Layered Nacho Dip
Now, I always say, when you’re eating something this delicious, you probably don’t want to look too closely at the numbers! But for those of you who like to keep track, here are the general estimates for one serving of this fantastic **Layered Nacho Dip**.
Keep in mind, these numbers can absolutely change based on the type of cheese or low-fat sour cream you use. I calculated this based on standard name-brand ingredients. Consider this your baseline guide!
- Calories: 210
- Total Fat: 15g
- Carbohydrates: 14g
- Protein: 8g
- Sodium: 450mg
If you want to review how we handle site data and cookies, please check out our privacy policy.
Share Your Experience Making This Layer Dip
I sincerely hope this **layer dip** becomes your new party staple! Have you made it yet? Tell me how it went in the comments below. Which layer disappeared first? Don’t forget to rate the recipe so others can see how amazing this **Easy Layer Dip** is! If you snap a picture of your beautiful spread, I’d love to see it when you reach out on our contact page!
PrintClassic Seven Layer Taco Dip
A traditional, no-bake layered dip featuring seven distinct Tex-Mex components, perfect for parties and gatherings.
- Prep Time: 20 min
- Cook Time: 0 min
- Total Time: 20 min
- Yield: 8 servings
- Category: Appetizer
- Method: No Bake
- Cuisine: Tex-Mex
- Diet: Vegetarian
Ingredients
- 1 (16 ounce) can refried beans, room temperature
- 1 cup sour cream
- 1 packet (1 ounce) taco seasoning mix
- 1 cup shredded Mexican cheese blend
- 1 cup salsa, drained well
- 1 cup guacamole
- 1/2 cup chopped black olives
- 1/4 cup chopped green onions
Instructions
- In a small bowl, mix the sour cream and taco seasoning until fully combined. This is your seasoned sour cream layer.
- Spread the refried beans evenly over the bottom of a 9-inch pie plate or shallow serving dish.
- Spread the seasoned sour cream mixture over the bean layer.
- Sprinkle the shredded cheese evenly over the sour cream layer.
- Carefully spoon the drained salsa over the cheese layer.
- Spread the guacamole evenly over the salsa layer.
- Top the dip with the chopped black olives and chopped green onions.
- Cover the dip and refrigerate for at least 1 hour before serving to allow the layers to set.
Notes
- For the best results, use room temperature refried beans so they spread smoothly without tearing the layer beneath.
- Drain your salsa thoroughly; excess liquid will make the dip watery.
- You can prepare the seasoned sour cream up to one day ahead.
Nutrition
- Serving Size: 1/8 of dip
- Calories: 210
- Sugar: 4
- Sodium: 450
- Fat: 15
- Saturated Fat: 7
- Unsaturated Fat: 8
- Trans Fat: 0
- Carbohydrates: 14
- Fiber: 3
- Protein: 8
- Cholesterol: 30