

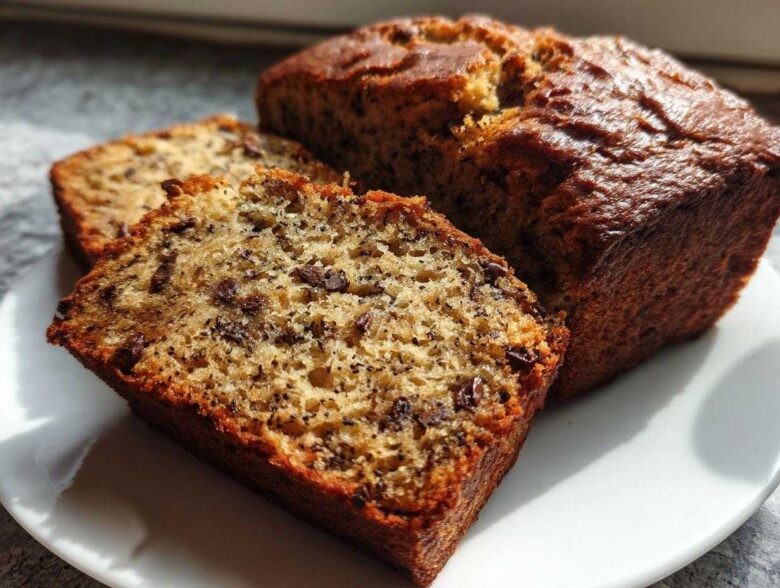
There is genuinely nothing better than grabbing a perfectly portioned snack that tastes homemade, right? Forget those dry, sad little bread slices you find at the store. We are talking about truly decadent, ridiculously moist mini banana bread loaves fresh from the oven. I’ve tried every fancy mixing bowl and stand mixer combo out there, but I always come back to the simplest method because it just works! I spent way too many afternoons tweaking proportions until I nailed this foolproof, one-bowl recipe that guarantees moisture every single time. Seriously, knowing I can whip up six perfectly sized loaves in under 35 minutes means I’m always ready for impromptu snacking or last-minute gifting. You’re going to love how easy this feels, trust me!
If you want to read a little more about why we stand by all our recipes here on the blog, you can check out our About Us page!
Why You Will Master These Easy One-Bowl Mini Banana Bread Loaves
Honestly, the best recipes are the ones that don’t require you to haul out every single gadget you own. These mini banana bread loaves are designed for real life—busy mornings, unexpected guests, or when that banana craving hits hard and fast. Here’s why this recipe is about to become your new absolute favorite:
- One Bowl Magic: We are talking minimal cleanup here! Seriously, just one large bowl for mixing everything. No creaming butter separately, no fuss!
- Unbelievably Moist Texture: We use sour cream (or Greek yogurt!) as a secret weapon, which locks in moisture way better than milk ever could. They stay soft for days.
- Perfect Portion Control: These are the ultimate snack size banana bread. You grab one—or two, I won’t judge—and you’re done! Great for quick breakfasts too.
- Fast Track to Flavor: Because they are small, they bake up super quickly, meaning you go from ripe bananas to delicious smell in the kitchen in about 35 minutes total!
- Instant Giftable Goodies: Wrap two or three up with some twine, and you have an adorable, thoughtful, homemade gift for neighbors or teachers. They look so cute packaged up!
Gathering Ingredients for Moist Mini Banana Bread Loaves
Okay, let’s talk ingredients! Because this is a one-bowl situation, the quality of what you put in really matters. What makes these mini banana bread loaves so incredibly moist is actually the combination you see here—especially swapping butter for some sour cream goodness. When you go shopping, make the search for the bananas your main mission. I mean it—they need to look sad and almost black on the counter. Yellow bananas just won’t give you that deep, sweet flavor or the necessary moisture foundation. Don’t buy them looking perfect; wait until they look truly past their prime!
Here’s what you’ll need to pull this off:
- 1 3/4 cups all-purpose flour
- 1 teaspoon baking soda
- 1/2 teaspoon salt
- 1/2 teaspoon ground cinnamon (Don’t skip this spice!)
- 1/2 cup (1 stick) unsalted butter, melted (Melting is key for the one-bowl method!)
- 3/4 cup packed light brown sugar (Pack it in tight for that caramel note!)
- 2 large eggs, lightly beaten
- 1 teaspoon vanilla extract
- 1 1/2 cups very ripe mashed bananas (Approximately 3 to 4 medium bananas)
- 1/2 cup sour cream or plain Greek yogurt
- 1/2 cup chocolate chips (These are for maximum happiness, totally optional though!)
Ingredient Notes and Substitution Tips
If you’re out of sour cream, don’t panic! Plain Greek yogurt works beautifully, often adding a little extra protein without changing the amazing texture we are aiming for in these mini banana bread loaves. If you want to cut back just slightly on the refined flour, you can swap out half of the white flour for whole wheat flour. That said, for the absolute softest crumb, stick to all-purpose flour. Everything here is important, but the banana ripeness dictates the success of the final texture, so choose wisely!
Essential Equipment for Mini Loaf Pan Baking
You don’t need a chef’s entire arsenal to make fantastic mini banana bread loaves, but there are a few key players in this production. First things first: you absolutely need the right pan. If you don’t have one, go get one! They are fantastic for portion control and they bake up so much faster than the big guys.
For this recipe, since we are keeping things super simple with that one-bowl mixing method, make sure you have:
- A large mixing bowl big enough to handle all the batter without making a huge mess—I learned that lesson the hard way!
- A whisk for combining the dry ingredients, no matter how tempting it is to use that big spoon right away.
- A quality silicone spatula. This is your best friend for scraping down the sides of the bowl to make sure every bit of banana goodness gets incorporated.
- Your 6-cup mini loaf pan. Don’t try to fudge this with something else; these small pans require specific baking times.
- A small cooling rack. Letting them cool properly prevents sogginess on the bottom, which is the death of any good quick bread.
Having these straightforward items ready makes the whole process feel like a breeze, and honestly, setting up your station ensures you don’t overmix the batter once the wet ingredients hit the dry ones!
Step-by-Step Instructions for Quick Banana Bread Recipe
Now we get to the fun part! Because this is a true one-bowl recipe, the process moves really fast once you have your bananas mashed. Don’t dawdle once the wet ingredients meet the dry ingredients, or you risk making tough loaves. Before you even think about grabbing the bowl, make sure your oven is heating up. We need that consistent 350°F (175°C) heat ready to go right when you are! Also, grab your 6-cup mini loaf pan and grease it well, then dust it lightly with flour. That small extra step ensures these beautiful mini banana bread loaves slide right out when they are ready.
First, grab your big bowl and whisk together all the dry stuff. That means the flour, baking soda, salt, and cinnamon. Whisking them up front makes sure the leavening agents are evenly spread out, which is important when you aren’t mixing for very long later on.
Next, here’s where the one-bowl magic starts: dump the melted butter and the packed brown sugar right into that dry mix. Stir it with your spatula until it looks crumbly—it won’t look like much, but just combine it briefly. Then, toss in your lightly beaten eggs and that vanilla extract. Mix this until it just barely comes together. Remember that rule about not overmixing? This is where it counts!
Now for the heavy hitters: add your 1 1/2 cups of mashed bananas and that dollop of sour cream or yogurt. Fold this into the batter gently. You are looking for *mostly* smooth—if you see a few tiny streaks of flour or a small lump of banana, stop mixing! That’s how you keep them tender. If you’re adding chocolate chips, fold those in right at the very end. Pour the batter evenly into your prepared mini cups, making sure to fill them only about two-thirds full so they have room to rise up nicely without spilling over.
If you want to check out the legal guidelines for recipes posted here, you can always reference the disclaimer.
Achieving Perfect Bake Time for Quick Bake Loaves
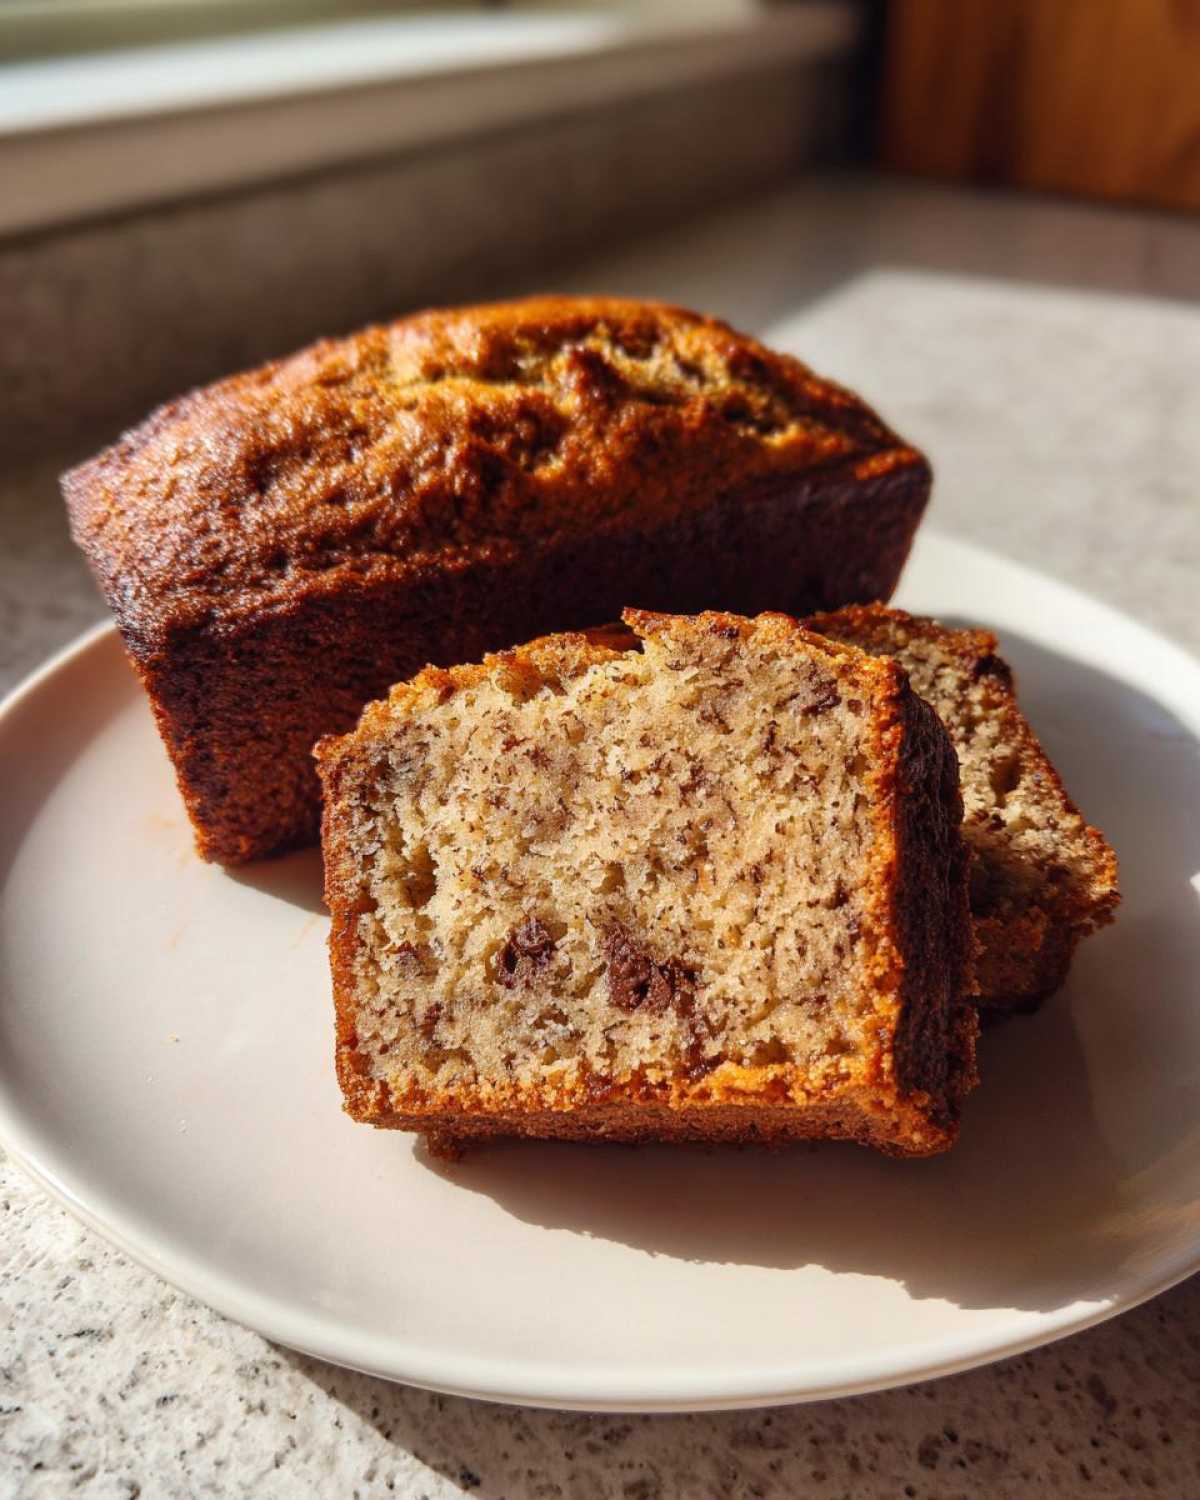
Because these are small, they cook fast—usually just 20 to 25 minutes at 350°F. However, you must start checking them around the 20-minute mark. Slide a wooden toothpick into the very center of one loaf. If it comes out clean, they are done! If you see wet batter, give them five more minutes. Don’t wait until the toothpick is bone dry though; that means you’ve gone too far and you’ll lose that moist banana bread mini feeling we worked so hard for!
Tips for Success with Homemade Mini Loaves
Making perfect mini banana bread loaves isn’t just about measuring correctly; it’s about treating those ingredients right, especially when you’re dealing with a small pan size. I’ve learned a few tricks over the years that stop these little beauties from sticking or drying out, which are the two biggest pitfalls when baking snack size banana bread.
First up is moisture management. You *must* use those blackened, spotty bananas. If your bananas still look mostly yellow, they won’t yield the moisture content needed to keep these loaves soft. Don’t try to rush them in the microwave either—it just doesn’t work the same way! The natural sugars need to be fully developed, and that only happens when they’ve sat on the counter a little too long.
Next, let’s talk extraction. Mini loaf pans can be tricky because they have lots of corners. While I mentioned greasing and flouring above, sometimes that’s not quite enough, especially with high-sugar recipes. Try this: after you grease the pan, line the bottom of each cup with a tiny, cut-out square of parchment paper. Seriously, it takes thirty seconds, but it ensures a 100% clean release every single time you make these homemade mini loaves, saving you from having to scoop out baked chunks!
Another thing I always stress is cooling time. Resist the urge to pop them out immediately when they come out of the oven. They are very delicate at that stage. Let them sit in that warm pan for a solid 10 minutes. This resting period allows the structure to firm up just enough so the insides set properly, but they aren’t sitting long enough to steam and get soggy bottoms. After 10 minutes, turn them out gently onto a wire rack to cool completely.
Finally, when dividing the batter, a simple kitchen scale can actually be a huge help if you want all six of your mini banana bread loaves to be exactly the same size. Weighing the batter before portioning ensures they all bake evenly, which prevents some from burning while others are still raw in the center. It’s a small step that elevates your whole batch game!
Banana Bread Variations: Chocolate Chip Mini Loaves and More
So you’ve mastered the base recipe for our fantastic mini banana bread loaves, but maybe you want to mix things up a bit next time? That is the beauty of a great simple recipe like this—it begs for customization! The great news is that these loaves handle mix-ins like champions, provided you don’t get too greedy.
The recipe already calls for chocolate chips, and honestly, those chocolate chip mini loaves are usually the first to disappear in my house. When I add them, I toss them in at the very last second after the wet and dry are combined, just like the directions say. I usually use semi-sweet chips, but sometimes I drop in a handful of white chocolate or even dark chocolate chunks if I’m feeling fancy. Just make sure you only add about a half cup total, or else you risk weighing down the batter too much and slowing down the quick bake loaves.
If chocolate isn’t your thing, here are a couple of other easy ways I like to change up these mini banana bread loaves:
- Nuts for Crunch: Walnuts or pecans are classic additions here. If you use nuts, I highly recommend lightly toasting them first in a dry pan for about five minutes. That little bit of extra heat brings out their essential oils and gives you a much better flavor when baked inside the bread. Fold in about 1/3 cup of chopped nuts along with your chips.
- Spice it Up: Want a warmer flavor profile? Add just another 1/4 teaspoon of ground nutmeg and a tiny pinch of ground cloves along with the cinnamon in the dry ingredients. That makes these perfect for a colder morning breakfast mini loaf!
- Zesty Surprise: If you love a bright flavor, add the zest of one whole orange when you mix in the mashed bananas. It cuts through that richness just perfectly without feeling overpowering.
The key to all variations of these mini banana bread loaves is balance. Since the batter is relatively small, adding too much heavy stuff upsets the delicate balance needed for success. Stick to less than a full cup of additions combined, and you’ll get perfect results every time!
Storage and Reheating Instructions for Snack Size Banana Bread
These snack size banana bread portions disappear quickly in my house, but if you manage to have leftovers—which is impressive!—you need to know how to keep them fresh. For the first couple of days, keep them right on the counter stored in an airtight container. They stay incredibly moist thanks to that sour cream, so refrigerating them too soon can actually dry them out! If you anticipate keeping them longer than three days, then transition them to the fridge. To bring back that perfectly soft texture, just pop a loaf in the microwave for about 10 to 15 seconds. Wow, they taste freshly baked again!
Frequently Asked Questions About Miniature Banana Bread Recipe
I get so many questions when people make my miniature banana bread recipe for the first time, especially if they are trying to scale things up or down! It’s all about understanding how the smaller size affects the bake time. I tried to cover the most pressing concerns right here so you can bake with confidence.
If you ever have a question that isn’t covered here, feel free to reach out via my contact page. I love hearing how your baking turns out!
Can I use a regular loaf pan instead of a mini loaf pan?
Oh, absolutely, you can! If you don’t have the mini pan, you can totally use a standard 8×4 or 9×5 inch loaf pan for a small batch banana bread. The big difference is the baking time. Since the heat has a much longer way to travel to the center of a huge loaf compared to our cute mini banana bread loaves, you’ll need to increase that bake time significantly. If these little guys take 20 to 25 minutes, the standard loaf will likely take anywhere from 50 to 65 minutes.
My advice? Start checking around the 45-minute mark. Use that toothpick test just like we talked about previously. Also, because the top browns a bit faster than the middle, if you notice the top getting too dark before the center is done, you can loosely tent a piece of aluminum foil over the top for the last 15 minutes of baking. Better to bake slower and longer than to rush it and end up with crispy edges!
Why do my mini loaves bake so fast?
That’s the magic of the *mini* size! Since the batter is shallow and spread out across six smaller cups instead of being stacked high in one big mold, the heat penetrates much more evenly and quickly. This is fantastic because it means we use less electricity and you get to eat your snack size banana bread sooner! Just be hyper-aware of the oven temperature and use your toothpick test religiously. If you forget them for even five minutes too long, they can go from perfectly moist to slightly crumbly really fast.
Can I freeze these homemade mini loaves?
Yes, and this is one of the best things about making a small batch! These freeze wonderfully because the portion size is already perfect for a single serving. Once they are completely cool—and I mean 100% cool—wrap each individual loaf tightly in plastic wrap first. Then, place the wrapped loaves together into a large freezer-safe zip-top bag. They keep great for up to three months this way. To reheat, just unwrap one and microwave it for about 15-20 seconds, and it tastes just like you pulled it from the oven this morning!
What makes this recipe better than other small batch banana bread recipes?
It all comes down to managing moisture without adding unnecessary steps! Most small batch banana bread recipes rely just on bananas, which sometimes isn’t enough when you are keeping the fat lower. My secret sauce, so to speak, is the combination of the melted butter (which coats the flour differently than creamed butter) plus that half cup of sour cream. That sour cream is the ticket to that ultra-soft, never-drying texture you want in a portion controlled dessert. Plus, the one-bowl method just can’t be beaten for speed on a busy morning!
Estimated Nutritional Data for Portion Controlled Dessert
I know some of you are counting macros or watching sugar intake, and I totally get that! While these mini banana bread loaves are definitely a treat, knowing what you’re eating is important for a good portion controlled dessert. Remember, since we are using real ingredients like butter and bananas, and you might swap out sour cream for yogurt, these numbers are always just estimates. I always double-check the labels on my own ingredients, but this should give you a great baseline!
This data is based on one standard mini loaf, assuming you made the optional chocolate chips addition:
- Serving Size: 1 mini loaf
- Calories: 280
- Sugar: 18g
- Sodium: 190mg
- Fat: 14g
- Saturated Fat: 8g
- Carbohydrates: 35g
- Protein: 4g
The good news is that the fat content leans toward the better fats depending on what you use, and that 1g of fiber is a nice little boost! Just keep in mind that if you skip the chocolate chips, the sugar and fat counts will drop a tiny bit. Enjoying one of these delicious homemade mini loaves as a planned snack is much better than grabbing something processed, in my opinion!
For reference on how we approach data privacy for all our readers, please feel free to look over our Privacy Policy.
PrintExtra Moist & Easy One-Bowl Mini Banana Bread Loaves
Make moist and delicious mini banana bread loaves using a simple one-bowl method, perfect for snacks or gifting.
- Prep Time: 10 min
- Cook Time: 25 min
- Total Time: 35 min
- Yield: 6 mini loaves
- Category: Breakfast
- Method: Baking
- Cuisine: American
- Diet: Vegetarian
Ingredients
- 1 3/4 cups all-purpose flour
- 1 teaspoon baking soda
- 1/2 teaspoon salt
- 1/2 teaspoon ground cinnamon
- 1/2 cup (1 stick) unsalted butter, melted
- 3/4 cup packed light brown sugar
- 2 large eggs, lightly beaten
- 1 teaspoon vanilla extract
- 1 1/2 cups very ripe mashed bananas (about 3-4 medium bananas)
- 1/2 cup sour cream or plain Greek yogurt
- 1/2 cup chocolate chips (optional)
Instructions
- Preheat your oven to 350°F (175°C). Grease and flour a standard 6-cup mini loaf pan.
- In a large bowl, whisk together the flour, baking soda, salt, and cinnamon.
- Add the melted butter and brown sugar to the dry ingredients. Mix briefly with a spatula until just combined.
- Add the eggs and vanilla extract. Mix until just incorporated. Do not overmix.
- Stir in the mashed bananas and sour cream (or yogurt) until the batter is mostly smooth. A few small lumps are fine.
- Fold in the chocolate chips, if using.
- Divide the batter evenly among the prepared mini loaf cups, filling each about two-thirds full.
- Bake for 20 to 25 minutes, or until a toothpick inserted into the center comes out clean.
- Let the loaves cool in the pan for 10 minutes before carefully removing them to a wire rack to cool completely.
Notes
- Use very ripe bananas for the best flavor and moisture. The skins should be heavily spotted or black.
- For extra moistness, do not overbake. Check for doneness early.
- You can substitute half the all-purpose flour with whole wheat flour for a slightly healthier version.
- This recipe yields approximately 6 standard mini loaves.
Nutrition
- Serving Size: 1 mini loaf
- Calories: 280
- Sugar: 18
- Sodium: 190
- Fat: 14
- Saturated Fat: 8
- Unsaturated Fat: 6
- Trans Fat: 0
- Carbohydrates: 35
- Fiber: 1
- Protein: 4
- Cholesterol: 60