

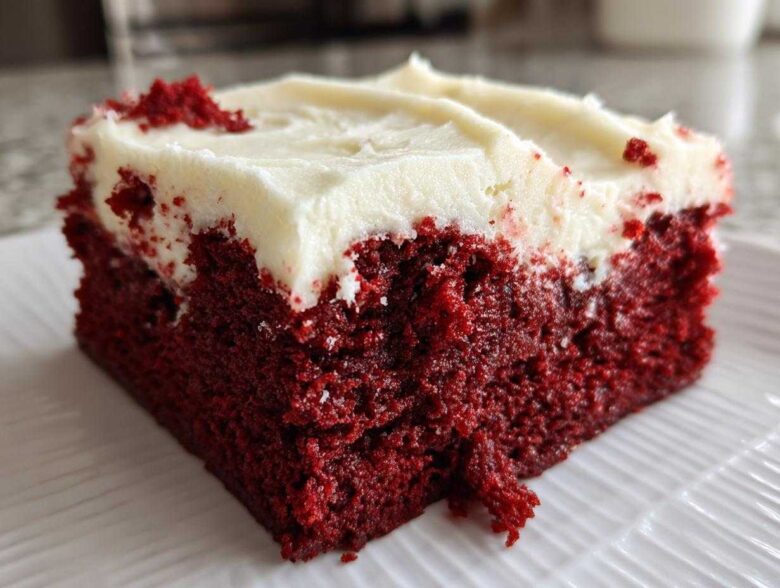
I swear, the absolute best thing in the world is biting into a brownie that is pure, unadulterated fudgy indulgence, right? Well, I’ve finally cracked the code on achieving that dense, chewy texture while also getting that spectacular, vibrant red color everyone drools over. Forget dry, cakey disappointments when you’re craving something decadent. These Ultimate Fudgy Red Velvet Brownies with Tangy Cream Cheese Frosting are rich, they’re simple to make from scratch, and I personally spent way too many afternoons getting the red dye just right!
Why You Will Love These Fudgy Red Velvet Brownies
Honestly, what’s not to love about these treats? They hit every single flavor note you want when a craving strikes. They bring that deep cocoa punch but keep it totally festive and bright. These aren’t just any baked goods; they are the perfect simple dessert idea for a gathering or just a Tuesday afternoon.
- They nail the fudgy texture—no cake-like crumbs here!
- The vibrant red pops beautifully, especially when paired with the tangy topping.
- They are surprisingly simple to pull together, even for a baking beginner.
- We get that rich chocolate flavor from high-quality cocoa powder.
Essential Ingredients for Perfect Red Velvet Brownies
Okay, let’s talk about what makes these red velvet brownies sing. You can’t fake this kind of decadence, so we need quality stuff! Don’t skimp on the cocoa powder, because that’s where the deep, rich chocolate brownies flavor comes from. And trust me on the food coloring—gel coloring is your best friend. It gives you that deep, non-streaky red that liquid coloring just can’t achieve without making your batter too thin.
Ingredients for the Rich Chocolate Brownies Base
Grab these items for the main event. We are going for maximum fudginess right from the start, so notice the butter is melted! That’s key for that dense texture we love.
- 1 cup (2 sticks) unsalted butter, melted
- 2 cups granulated sugar
- 4 large eggs
- 1 tablespoon vanilla extract
- 1 teaspoon white vinegar
- 1 teaspoon red food coloring (gel preferred)
- 1 1/4 cups all-purpose flour
- 1/2 cup unsweetened cocoa powder—don’t forget this!
- 1/2 teaspoon salt
- 1/2 cup white chocolate chips (optional, highly recommended!)
Ingredients for the Tangy Cream Cheese Frosting Brownies Topping
This topping is what pulls everything together. You need to make sure your cream cheese and butter have been sitting out and are genuinely soft before you start mixing, or you’ll end up with lumps in your cream cheese frosting brownies, and nobody wants that!
- 4 ounces cream cheese, softened
- 1/2 cup (1 stick) unsalted butter, softened
- 2 cups powdered sugar
- 1/2 teaspoon vanilla extract
Step-by-Step Guide to Making Easy Red Velvet Brownies
This is where the magic happens! Even though these turn into such decadent dessert squares, these are such an easy brownie recipe. I always follow these steps exactly because tiny changes here make the difference between a chewy delight and a slightly drier one. Remember, we are aiming for chewy brownies, so patience during the mixing stage is vital!
Preparing the Batter for Vibrant Red Velvet Brownies
First things first, make sure that oven is preheated to 350°F (175°C) and you’ve got that parchment paper cradle ready in your 9×13 pan. This makes cleanup a breeze! In your big bowl, whisk that melted butter and sugar until they are totally happy together. Then, drop in those eggs one by one. Now comes the fun part: the color! Add the vanilla, vinegar, and that gorgeous red food coloring. If you use gel coloring like I recommend, stir until the batter is a uniform, vibrant red—no streaks allowed!
In a separate bowl, just quickly whisk your flour, cocoa powder, and salt together. Then, here’s crucial advice for the best red velvet brownies: gradually add the dry stuff to that bright wet mix, but only stir until you can’t see any more white flour streaks. Seriously, stop there! Overmixing develops gluten, and we do not want cake where we should have a fudgy brownie base.
Baking Tips for Chewy Brownies
Pour that beautiful red batter into the pan and smooth it out evenly. Bake this showstopper for about 25 to 30 minutes. I know it’s tempting to wait until it looks totally done, but for that perfect fudgy texture, it shouldn’t be dry when you check it. You want a toothpick inserted near the center to come out with *moist crumbs* clinging to it. If the toothpick is clean, you’ve gone too far and you’re making cakey bars!
The absolute final step before frosting is cooling. You HAVE to let these cool completely. I mean it! If you try to frost them warm, the cream cheese melts into a puddle and you lose all that gorgeous definition. Patience pays off here! Once they are cool, you can hop over to our general baking tips if you need a refresher on how to manage chocolate temperature.
Mixing the Cream Cheese Frosting
While the bars cool down—which is the hardest part of this whole process, I know—let’s whip up that tangy topping. Get your softened cream cheese and softened butter into your mixer. Beat those two together until they look super smooth; you don’t want any lumps hiding in there creating texture bombs! Then, slowly add in your powdered sugar, beating until it gets light and fluffy. Finish it off with that splash of vanilla extract. It should be easily spreadable right on top of your cooled red velvet brownies.
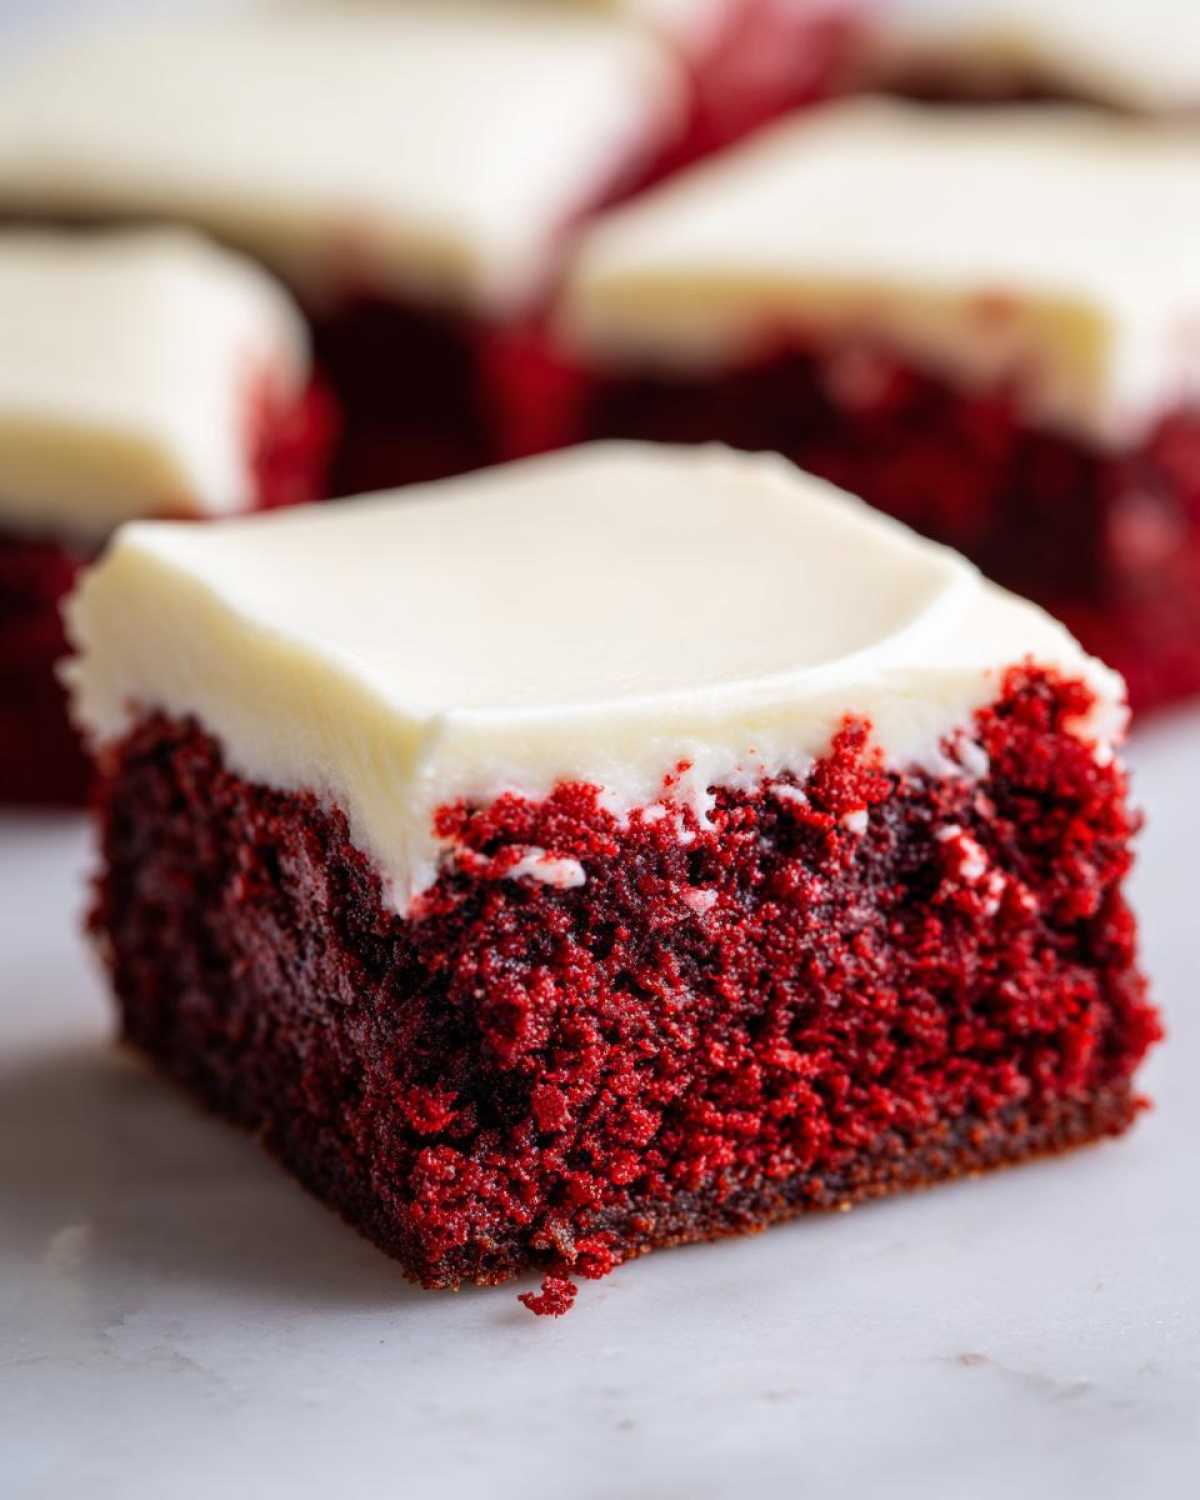
Expert Tips for Perfect Homemade Brownies
Listen, baking these homemade brownies feels like art, but it really comes down to a few non-negotiable quirks. I learned these the hard way, trust me! My biggest rookie mistake years ago—before I understood the fudgy requirements—was trying to rush the ingredients. I threw in cold eggs because I was impatient, and the butter instantly seized up. You end up with denser pockets where the butter didn’t emulsify properly. So Tip Number One: make sure your eggs are room temperature!
Also, folding is your friend! When you introduce those dry ingredients, don’t switch to the electric mixer. You want to fold gently with a spatula. I remember one batch where I got distracted by a phone call and mixed the flour in too vigorously for maybe thirty seconds too long. The result? Perfectly colored, but they came out with a slight chewiness that leaned way too close to cake territory. We want chewiness, yes, but we want *fudgy* chewiness, not just tough chewiness!
And seriously, I cannot stress this enough: complete cooling before frosting. If you think they’re cool enough, let them sit for another thirty minutes. The cream cheese frosting needs a completely cold surface to set up properly. Otherwise, that beautiful tangy topping just slides right down the sides, and you end up with a sloppy, albeit delicious, mess. These little details are what take your red velvet brownies from good to absolutely legendary!
Variations for Your Red Velvet Brownies
While this recipe for red velvet brownies is pretty stellar as is, I absolutely love how easy it is to customize depending on what chocolate mood I’m in! Sometimes you just need a little extra texture or a different kind of chip hiding in the fudgy depths. You really can make this recipe your own signature treat.
If you love nuts, go ahead and fold in about half a cup of chopped pecans or walnuts. I love pecans because they toast up nicely against the deep cocoa flavor. If you want double the chocolate goodness, swapping out the white chocolate chips for semi-sweet or even dark chocolate chunks works fantastically well. Every little addition changes the experience, turning it into a unique batch of homemade brownies.
Creating the Brownie with Cream Cheese Swirl Effect
Now, if you want that show-stopping look that screams ‘Bakery Style Brownies,’ you have to try the swirl! This is super simple and looks incredibly professional. Remember how we mixed up that cream cheese frosting? Well, we aren’t using all of it yet. Take about four ounces of softened cream cheese, mix it with just a quarter cup of sugar and one egg yolk—that’s the secret ingredient to make it hold its shape, not just melt into the batter.
Pour your main red batter into the prepared pan. Then, drop spoonfuls of that cream cheese mixture randomly over the top of the batter. Grab a butter knife—or even a chopstick if you want precision—and gently drag it through the dollops a few times to create beautiful, messy swirls. Don’t overdo it! You just want ribbons of cream cheese peeking through the batter. When baked, this gives you that gorgeous contrast of tangy cream cheese against the rich red base in every square.
Adding Seasonal Touches to Your Red Velvet Baking
These are perfect Valentine Day Brownies, of course, but they shine during the holidays, too! For Christmas, I sometimes add a teaspoon of espresso powder to the dry ingredients—it just deepens the chocolate flavor without making it taste like coffee. If you’re feeling extra fancy for a holiday party, try the white chocolate brownies route by using white chocolate chips throughout and skipping the red food color entirely, though technically that turns it into a white velvet brownie!
For Valentine’s Day, after the cream cheese frosting has set, you can drizzle melted dark chocolate right over the top in thin lines. A few sprinkles in pink or red just makes them irresistible. See? These red velvet desserts are so versatile, you’ll never get tired of making them!
Storing and Serving Your Decadent Dessert
Once you’ve waited (impatiently, I know!) for these red velvet brownies to cool completely and the frosting is set, the final challenge is keeping them perfect until you eat them all. Since we have that glorious cream cheese frosting on top, storage needs a little more thought than your average batch of fudgy bars.
For short-term storage, say, eating them over the next three days, keeping them airtight at room temperature is totally fine. I usually put them in a single layer in an airtight container, maybe with a little piece of parchment paper between layers if I have a lot, just to be safe. The high sugar content in the frosting helps keep things stabilized! But if you’re worried about it getting too warm or if you made them way ahead of time, the fridge is your friend.
If you store them in the refrigerator, just remember they firm up a bit in the cold, which can make them seem less fudgy. Always pull them out about 30 minutes before you want to serve them. Letting them come back up to room temp really softens that amazing texture we worked so hard to achieve.
Making the Most of These Holiday Treats
These truly are the perfect decadent dessert for sharing! Because of that bright red color, they scream Valentine Day Brownies, but they are equally stunning on a Christmas cookie platter—they look so striking next to dark chocolate cookies. For a really festive look, I sometimes dust the tops lightly with edible gold shimmer powder right before serving.
If you happen to have any leftovers (which I doubt, but one can dream!), reheating isn’t really necessary since we want them fudgy and slightly cool, but I have tried gently warming a square for about 10 seconds in the microwave just to get that chocolate slightly gooey again. Just be careful not to microwave too long, or the cream cheese topping gets weird!
When serving, I always cut them into substantial squares. They are rich enough that you don’t need a tiny sliver; you want a proper bite of that tangy frosting, the vibrant cake, and the deep cocoa flavor all at once. They bake up beautifully, and they taste just as rich on day two, provided they’ve been stored correctly!
Frequently Asked Questions About Red Velvet Baking
I get so many wonderful questions about these red velvet brownies! Honestly, I think the texture is what messes people up the most, but once you know these little secrets, you’ll be churning out batches of perfect homemade brownies every single time. Let’s clear up the most common things I hear people ask about when they’re attempting this vibrant red dessert.
How do I get the most vibrant red color in my red velvet brownies?
This is the fun part! If you want that bright, unapologetic, perfect red, you absolutely must use good quality gel food coloring instead of the liquid drops. Liquid coloring actually thins out your batter a bit, which throws off the fudgy ratio we’ve worked so hard to achieve. Gel coloring gives you intense color payoff with tiny volume. Also, remember that the vinegar we add actually helps activate and deepen that gorgeous red hue when it interacts with the cocoa powder. Don’t be shy with it!
Can I make these brownies ahead of time for a party?
Yes, you totally can! These are fantastic for making ahead, which definitely reduces stress before a big party or for Christmas baking. If you wait to frost them, the unfrosted brownie base keeps really well in an airtight container for about three days at room temperature. If you frost them, they should be refrigerated due to the cream cheese, but pull them out about half an hour before serving so they soften back up a bit. They really are an easy grab-and-go option for any celebration!
What is the secret to achieving fudgy brownies instead of cakey ones?
It all comes down to fat and flour proportions, honestly. Our recipe leans heavily on the butter and eggs—meaning more fat than flour—which is the hallmark of fudgy brownies. The other huge secret is underbaking *just* slightly. When you test it, you are looking for moist crumbs attaching to the toothpick, not a clean stick. If the toothpick comes out clean, it’s already baking past fudgy and shifting into cake territory. Don’t be afraid of those moist crumbs; that moisture cooks out a little bit more as the brownies cool down completely on the counter.
If you want to check out more of our general baking tips to nail textures, take a look over at our recipe disclaimer notes for more background info on our testing methods!
Estimated Nutrition for These Red Velvet Brownies
Now, I always feel a little guilty looking at the numbers after making a batch of these rich treats, but hey, if we are going to indulge in something this delicious, we might as well know what’s in that glorious square! Remember, these are solid estimates based on the ingredients list and serving style we used. Since we are making these from scratch brownies with real butter and cream cheese, they are definitely meant for special occasions!
I calculated this data based on dividing the whole batch into 16 squares, so if you cut them bigger or smaller, those numbers will shift! This recipe definitely falls into the realm of a decadent dessert, but they are worth every single bite.
- Calories: Approximately 350 per square
- Fat: Roughly 20g total
- Carbohydrates: About 40g
- Sugar: Coming in around 35g (Hello, powdered sugar!)
We get about 4 grams of protein, which is nice, and only 1 gram of fiber, so these are definitely flavor-forward rather than health-food focused—and that’s okay with me! We are aiming for chocolate perfection here.
A quick little note for transparency, which is super important to me as I share these family treasures: these numbers are standard estimates. If you use a different brand of butter or decide to skip the cream cheese frosting and just dust them with powdered sugar like my Aunt Carol does, your numbers will change. If you want to read more about how we handle our recipe testing and nutritional estimates here at the blog, you can always check out our privacy policy page for more background on our methods!
Share Your Experience Making These Red Velvet Brownies
Okay, so now it’s your turn! Once you’ve gone through the whole process—from getting that beautiful, bright red batter mixed up to swirling that tangy cream cheese frosting on top—I absolutely need to hear about it. Baking is so much more fun when you share the results, right?
Did you manage to nail that perfect fudgy texture? Or did yours lean a little more toward the chewy brownies side? Both are delicious outcomes, but I want to know where you landed! Please, please leave a rating below and tell me your thoughts in the comments section. Were these the best red velvet brownies you’ve ever whipped up?
And if you took pictures—and you absolutely should have, because that color is stunning—I would love to see them! You can tag me on social media using the appropriate hashtags. Seeing your beautiful creations seriously makes my day and proves that these simple dessert ideas work for everyone, no matter where they are baking!
If you have any last-minute questions after reading everything, or if you tried one of the variations, like the swirl, pop over to the contact page and let me know. Happy baking, friends!
PrintUltimate Fudgy Red Velvet Brownies with Tangy Cream Cheese Frosting
Make rich, fudgy red velvet brownies from scratch with a vibrant red color and top them with a simple cream cheese frosting for a decadent treat.
- Prep Time: 20 min
- Cook Time: 30 min
- Total Time: 50 min
- Yield: 16 servings
- Category: Dessert
- Method: Baking
- Cuisine: American
- Diet: Vegetarian
Ingredients
- 1 cup (2 sticks) unsalted butter, melted
- 2 cups granulated sugar
- 4 large eggs
- 1 tablespoon vanilla extract
- 1 teaspoon white vinegar
- 1 teaspoon red food coloring (gel preferred)
- 1 1/4 cups all-purpose flour
- 1/2 cup unsweetened cocoa powder
- 1/2 teaspoon salt
- 1/2 cup white chocolate chips (optional)
- For the Frosting: 4 ounces cream cheese, softened
- 1/2 cup (1 stick) unsalted butter, softened
- 2 cups powdered sugar
- 1/2 teaspoon vanilla extract
Instructions
- Preheat your oven to 350°F (175°C). Line a 9×13 inch baking pan with parchment paper, leaving an overhang on the sides for easy removal. Lightly grease the paper.
- In a large bowl, whisk together the melted butter and granulated sugar until combined.
- Whisk in the eggs one at a time until fully incorporated. Mix in the vanilla extract, white vinegar, and red food coloring until you achieve a uniform, vibrant red batter.
- In a separate medium bowl, whisk together the flour, cocoa powder, and salt.
- Gradually add the dry ingredients to the wet ingredients, mixing only until just combined. Do not overmix. Fold in the white chocolate chips if using.
- Spread the batter evenly into the prepared baking pan.
- Bake for 25 to 30 minutes. A toothpick inserted near the center should come out with moist crumbs attached, not wet batter, for a fudgy texture.
- While the brownies cool, prepare the frosting. Beat the softened cream cheese and butter together in a bowl until smooth.
- Gradually beat in the powdered sugar until the frosting is light and fluffy. Mix in the vanilla extract.
- Once the brownies are completely cool, spread the cream cheese frosting evenly over the top. Cut into squares before serving.
Notes
- For a cream cheese swirl effect, reserve half the batter, mix 4 ounces of softened cream cheese with 1/4 cup sugar and 1 egg yolk, then dollop onto the batter and swirl with a knife before baking.
- Use gel food coloring for the most intense red color without thinning the batter.
- Cool the brownies completely before frosting to prevent the frosting from melting.
Nutrition
- Serving Size: 1 square
- Calories: 350
- Sugar: 35
- Sodium: 150
- Fat: 20
- Saturated Fat: 12
- Unsaturated Fat: 8
- Trans Fat: 0
- Carbohydrates: 40
- Fiber: 1
- Protein: 4
- Cholesterol: 80