

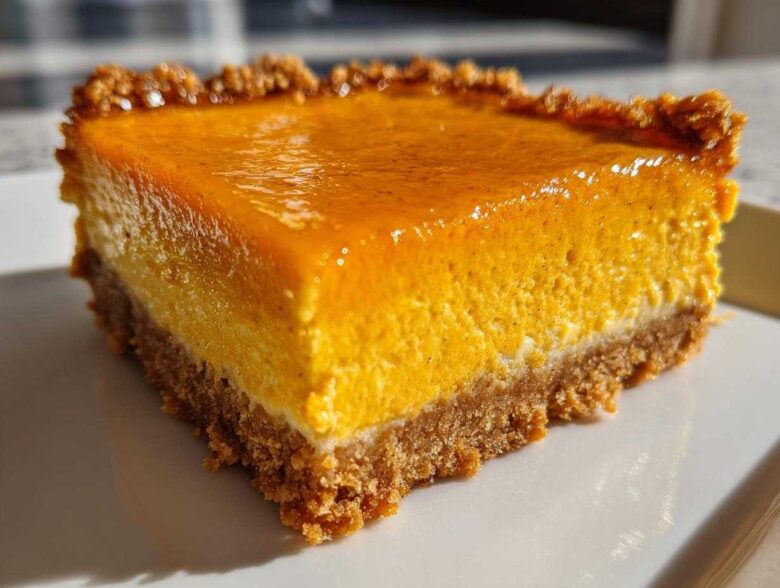
Oh my gosh, when those first crisp autumn days hit, my kitchen *demands* pumpkin. But let’s be honest, sometimes a full pie is too fussy, and I want something I can cut into neat little squares for everyone to grab! That’s exactly why I landed on these incredible, can’t-stop-eating pumpkin cheesecake bars. They taste like Thanksgiving condensed into a perfect, handheld bite. Seriously, after ruining one batch by slicing it too soon, I finally figured out the secret to that perfect, non-crumbly edge. Trust me, chilling time is non-negotiable for these gems!
We’re talking about the creaminess factor here, people. If you’re heading over to see more about our kitchen philosophy, you’ll know that texture is everything to me, and these deliver that luxurious, velvety filling every single time. Forget those dry, crumbly bars you might have tried before. These are my go-to Thanksgiving dessert bars!
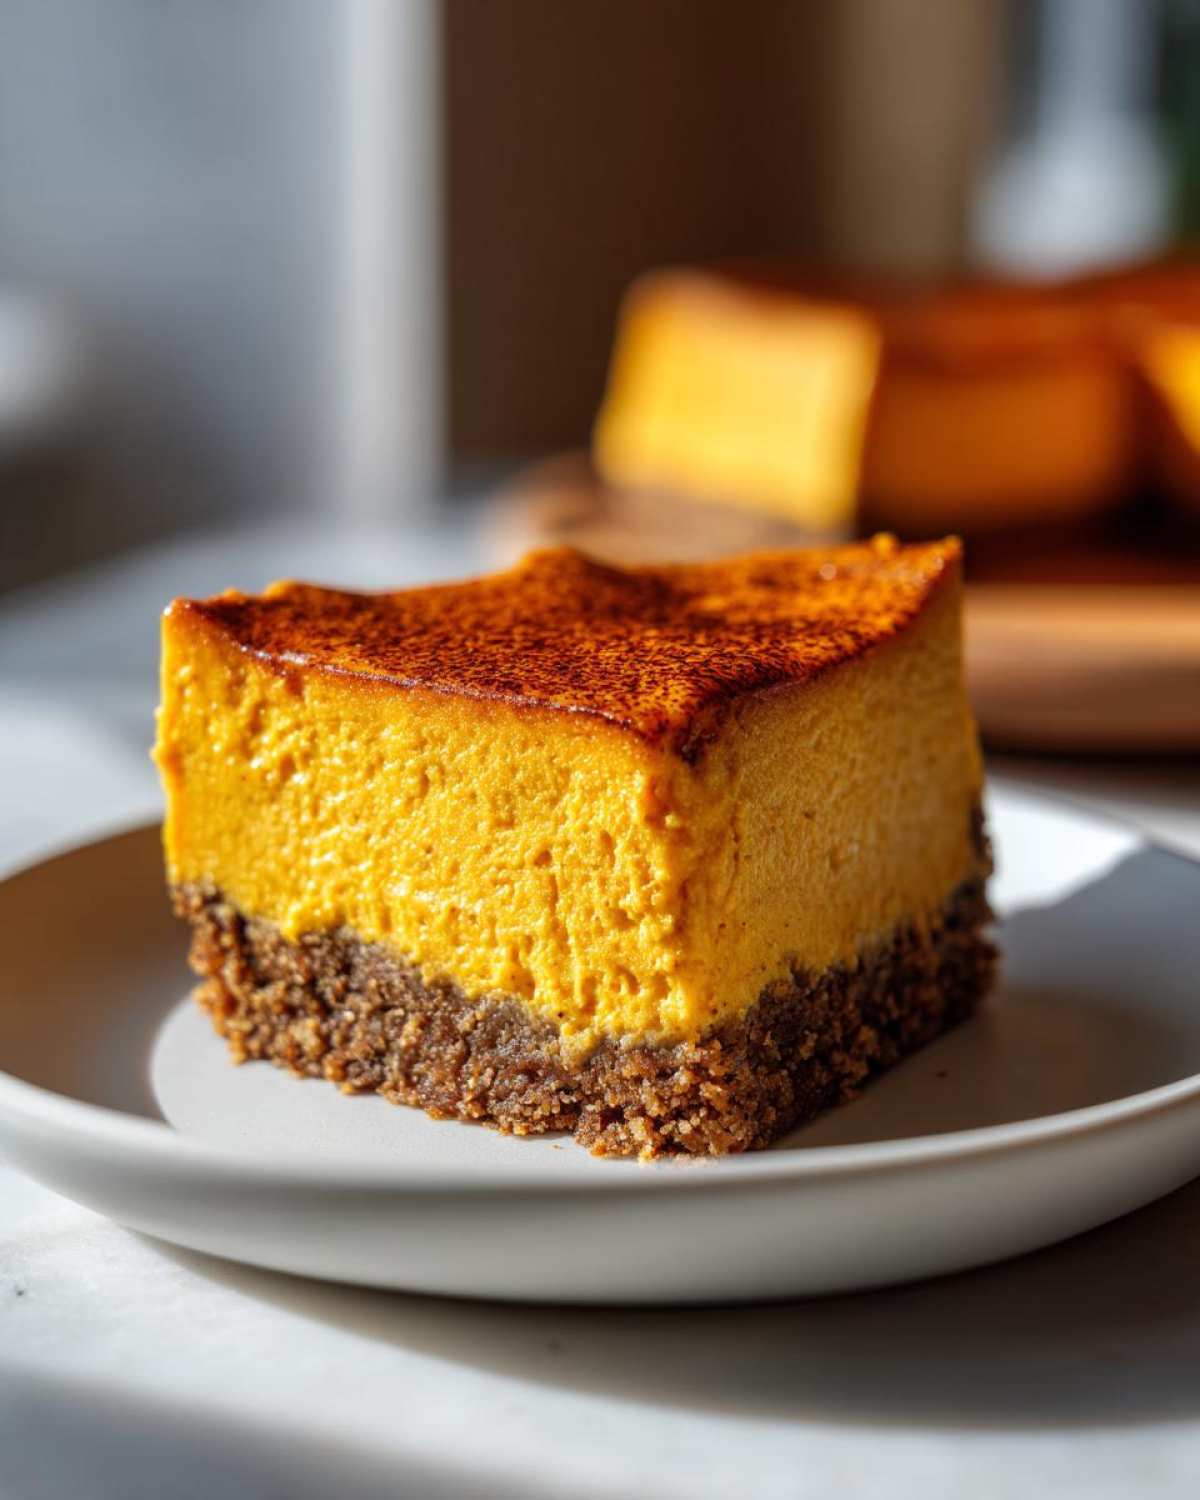
Why This Is the Best Pumpkin Cheesecake Bars Recipe
I’ve tested so many fall baking recipes over the years, but this one always wins. Why? Because it truly is the best pumpkin bars experience without all the fuss of rolling out pie dough. It’s fast to whip up, and it looks gorgeous on a holiday spread—a real showstopper that’s secretly an easy pumpkin dessert. Everyone asks how I get that filling so perfectly smooth!
Honestly, these are the reasons I keep coming back to this exact formula:
Key Benefits of Our Creamy Cheesecake Bars
- The filling is unbelievably thick and smooth, not runny or grainy at all.
- The graham cracker crust just melts in your mouth and needs no fussing with rolling.
- They are fantastic because you can absolutely make them the day before Thanksgiving!
Gathering Ingredients for Your Pumpkin Cheesecake Bars
Okay, let’s talk about what you need to pull off these amazing pumpkin cheesecake bars. Since this recipe is layered, I keep my ingredients separated into two main camps: the crust and the star, the creamy filling. You’ll need all-purpose graham cracker crumbs; about a box and a half should do it, plus a little sugar for the base and some melted butter to bind it all together.
For the filling, the absolute most important thing is your cream cheese—it has to be completely softened to room temperature. I mean melt-it-on-the-counter soft, not microwave-it-for-ten-seconds soft! You’ll also need granulated sugar, one large egg, vanilla, and, of course, pumpkin. And listen closely: make sure you grab pure pumpkin puree, not that pumpkin pie *filling* that already has all the sugar and spices mixed in. We’re building our own perfect spice blend here!
Finally, we need those warm spices that scream autumn: cinnamon, a little punch of ginger, and a tiny whisper of nutmeg. Measure them out precisely; these are strong flavors!
Ingredient Notes and Substitutions for Spiced Pumpkin Treats
I know sometimes the pantry doesn’t cooperate! If you find yourself out of graham crackers, don’t panic. You can use gingersnap crumbs instead for your crust. Seriously, it changes the flavor just enough—it gives these spiced pumpkin treats an extra little zing that is absolutely divine, especially when paired with that cool cheesecake layer underneath.
Also, about that pumpkin? If you happen to have leftover baked fresh pumpkin puree from another project, that would work wonderfully, but canned is totally reliable. Just measure exactly one half-cup. Too much pumpkin and your bars won’t set right, and we need these to be solid for slicing!
If you want to amp up the vanilla flavor, go ahead and use a teaspoon and a half instead of one teaspoon. I’m a firm believer that vanilla rescues nearly every baked good!
Step-by-Step Instructions for Baked Pumpkin Cheesecake Bars
Putting these pumpkin cheesecake bars together is really shockingly simple, even though the result tastes like you slaved away all day! The key is breaking it down into manageable stages. Don’t rush the crust, and for the love of all that is good, don’t over-beat the filling! Before we even touch a crumb, make sure your oven is set to 350 degrees Fahrenheit. I use an 8×8 inch metal pan, and I always line it with parchment paper first, making sure those ends hang way over the edges. That’s your secret handle for lifting these babies out later—trust me on the parchment overhang!
Creating the Perfect Graham Cracker Crust Dessert Base
First up is that buttery base. In a regular bowl—no fancy stand mixer needed here—we mix our graham cracker crumbs, that little bit of sugar we saved for the crust, and the melted butter. Mix it up until it looks uniformly damp, like wet sand ready for building a castle.
Now, take that mixture and press it right into the bottom of your prepared pan. You need to press it firmly! I usually use the bottom of a flat drinking glass or just the heel of my hand. Get those edges nice and tight so they bake up sturdy. Pop that crust into the oven for about 8 minutes. We’re just setting it, giving it a little head start. Once they come out, pull them onto a cooling rack and let them relax for about five minutes while you start the good part.
Mixing and Pouring the Creamy Cheesecake Bars Filling
Time for the magic! Grab your electric mixer for this part, or a really strong arm. You have to beat that softened cream cheese until it’s perfectly smooth—absolutely no lumps allowed. Then slowly add your half cup of sugar and beat until it looks light and creamy.
Now gently mix in the pumpkin puree, the egg, vanilla, and all those lovely spices we gathered. Here’s the critical warning: as soon as everything is *just* combined, you stop. I mean it! Stop mixing the second you don’t see streaks of raw egg or unincorporated pumpkin. Overmixing adds scary air bubbles, and air bubbles equal cracks on the surface of your beautiful creamy cheesecake bars. Pour that rich filling right over your slightly cooled crust and smooth the top out with a spatula.
Baking and Cooling Techniques for Flawless Pumpkin Cheesecake Bars
Back into the 350-degree oven they go for about 30 to 35 minutes. You know they are done when the edges look set and the very center jiggles just a tiny bit if you nudge the pan—like Jell-O, not like soup! The temptation here is to yank them out, but please resist!
To keep them from cracking, we do the slow cool-down method. Turn the oven completely off, prop the door open just a crack with a wooden spoon or oven mitt, and let them sit in that slight warmth for a full 30 minutes. This slow transition prevents that sudden temperature shock. Then, you have to take them out completely and let them cool on the counter. And this is step ten, the most important one for clean cuts: chill these babies in the fridge for at least four hours, but seriously, my professional disclaimer is that overnight is always better for those perfect squares!
Expert Tips for Perfect Pumpkin Pie Cheesecake Bars Slicing
I swear, there’s a special kind of heartbreak when you pull rock-solid, perfectly chilled pumpkin pie cheesecake bars out of the fridge, ready to slice them for the crowd, and they just crumble everywhere! It’s disheartening when you’ve done all that chilling work. But don’t worry, I’ve cracked the code on getting those super clean, professional-looking squares that look amazing on a platter.
First thing, and I already mentioned this because it’s so vital—use that parchment paper overhang! Lift the entire block of chilled bars out of the 8×8 pan and place it onto a sturdy cutting board. Having that entire slab sitting flat makes all the difference in the world.
Now for the knife technique. Don’t just use any old butter knife! You need a long, sharp chef’s knife. The real secret, the one that makes me feel like a professional baker, is to heat that knife up. I keep a tall glass of very hot water nearby.
Here’s the rhythm: dip the knife blade entirely into the hot water, let it sit for just a second, quickly wipe it completely dry with a clean towel—you don’t want drips on your filling! Then, press down firmly and slowly through the bar in one smooth motion. Don’t saw back and forth; just use your weight to guide the knife through the chilled cheesecake layer. See how clean that cut is?
Once you’ve made that first clean cut, rinse the knife in the hot water again, dry it off, and go in for the next slice. Wiping the knife between every single cut is absolutely essential when you are making these pumpkin cheesecake bars. If you skip that step, the delicious filling will smear onto your knife, and your next slice will look messy! This process works like magic for clean layers every time, making them perfect cheesecake dessert squares for any gathering.
Making Make Ahead Thanksgiving Dessert Variations
I know we just went through the whole baked process, and that recipe is glorious, but sometimes you need a break on Thanksgiving Day, right? The oven space is at an absolute premium, and frankly, cleanup for a baked item can be a pain if you’re already juggling a turkey and pies. That’s why I always keep the instructions for the no bake pumpkin bars tucked right alongside the main recipe.
Making these pumpkin cheesecake bars completely no-bake is ridiculously easy, and the texture ends up being a little softer, almost like a mousse on top of that lovely crust. It really transforms them into a super quick, ultra-refreshing make ahead thanksgiving dessert that everyone loves.
The main thing you are swapping out is the egg. Since the egg acts as a binder when we bake, when we skip the oven, we need to compensate by simplifying the filling and making sure it chills hard. You’ll need slightly less cream cheese—about 6 ounces instead of the full 8 ounces—and you definitely, absolutely omit the egg.
For the crust, you can honestly use the exact same ingredients, but since you aren’t baking it for 8 minutes to set it, you need to make sure that butter is really mixed in well, and you must press it down super firmly. It won’t get that light crunch a baked crust has, but it will hold together beautifully.
Once you pour that simplified filling over the crust, the only difference is the resting time. Instead of the 35 minutes in the oven plus the cooling process, you’re looking at a minimum of 6 hours chilling in the refrigerator. I always say aim for overnight! These fall baking recipes variations are perfect for those of us who like to get desserts done on Wednesday so we can actually enjoy Thursday!
Serving Suggestions for Your Holiday Dessert Bars
You have these gorgeous, creamy pumpkin cheesecake bars sitting perfectly cut on your counter. Now, how do you present them so they look like they deserve their spot next to the turkey? It’s all about the finishing touches! These rich, spiced bars are robust, so they pair wonderfully with something light and airy on top, or a sharp contrasting sauce.
My absolute favorite way to serve these, especially when I’m feeling fancy for company, is a dollop of freshly whipped cream. Keep that cream slightly unsweetened so it balances the sweetness of the cheesecake layer nicely. You can even dust the whole serving plate lightly with some extra cinnamon for that lovely aroma!
If you’re looking for something a little more decadent—and who isn’t during the holidays?—a simple drizzle of salted caramel sauce across the top of the square makes these taste instantly gourmet. The salt cuts through that rich pumpkin spice perfectly. Don’t go too heavy with the caramel or it will soak into the crust too much, though!
Beyond toppings, think about what you are serving them *with*. These rich, warm flavors really sing when paired with a hot drink. You can’t go wrong serving these holiday dessert bars alongside a strong, hot cup of coffee. If you’re having guests over earlier in the day, a mug of hot spiced apple cider makes the whole dessert experience feel incredibly autumnal. They just melt together! These simple ideas take your pumpkin cheesecake bars from great to absolutely unforgettable.
Storage and Reheating Instructions for Pumpkin Cheesecake Bars
One of the biggest advantages of making these pumpkin cheesecake bars is that they are total rockstars when it comes to storing well. This is why they make such amazing make ahead thanksgiving dessert options! You don’t have to stress about baking right before the guests arrive or worrying about leftovers; these keep beautifully.
First things first: refrigeration is your best friend here. Because they have that wonderful cream cheese filling, these bars need to stay chilled until you are truly ready to serve them. Once they are completely cool and sliced—remember that crucial chilling step we talked about earlier?—you can store them in an airtight container in the refrigerator. I’ve found they stay absolutely perfect for five full days. That’s nearly a week of spontaneous dessert grabbing! When kept cold, they maintain that dense, creamy texture without getting sweaty or tacky.
Now, what if you need to stash some away for even longer? They freeze like a dream! This is my big secret for surviving the holiday rush: freeze the leftovers immediately after slicing. Don’t put them in the container whole; slice them first, then freeze them!
Here’s how I do it for my favorite autumn dessert ideas. I line my 8×8 container with a fresh piece of parchment paper once they are sliced, place all the squares inside, and top it with another layer of parchment before putting the lid on tight. This keeps them from sticking to each other once they freeze solid. You can wrap the whole thing again in plastic wrap just to be extra safe against freezer burn.
When you want to enjoy them, take the container out of the freezer and let them thaw slowly in the refrigerator overnight. Seriously effortless! You’ll get that same perfect texture you had right after they first chilled. Honestly, if you’re tight on fridge space, freezing them solid and thawing them as needed is the way to go with these rich pumpkin cheesecake bars!
Frequently Asked Questions About Pumpkin Cheesecake Bars
I always get a ton of questions when I post about these bars because everyone wants theirs to be absolutely perfect, just like mine! These are the things I hear all the time when people are trying to figure out the best way to make amazing pumpkin cheesecake bars.
Can I use fresh pumpkin puree instead of canned?
That’s a great question! If you’ve just roasted and pureed your own fresh pumpkin, it will taste fantastic, absolutely! The only thing you have to watch out for is the moisture content. Fresh pumpkin is often much wetter than the canned stuff we use here. If you use homemade, you might need to strain it vigorously in a cheesecloth or coffee filter for a good hour to wick away some of that extra liquid. If you skip that step, your creamy cheesecake bars filling might come out just a little too soft.
How do I stop my pumpkin cheesecake bars from cracking?
Cracking is the bane of every cheesecake baker’s existence! We already talked about the slow cooling process in the oven, which honestly solves about 90% of the problem. But if you still get a little crack—don’t panic! A tiny crack just means it’s homemade goodness. For maximum insurance, make absolutely certain your cream cheese is room temperature, and *never* over-beat the filling. We want smooth, not airy!
Can I use a different crust like Snickerdoodle or Shortbread?
Yes, you certainly can play around with the crust! The reason I love the graham cracker or gingersnap crust so much is that it offers a sturdy, slightly spiced contrast to the smooth filling, and it holds up really well during chilling. Shortbread might bake up too thick and buttery, and it could soak up too much moisture from the filling over time.
If you try a different cookie base, maybe bake it just a minute or two longer than recommended to make sure it’s nice and set before you add the wet filling on top. A shortbread crust works best if you reduce the melted butter slightly, just to keep everything cohesive.
What is the difference between baked and no-bake pumpkin bars?
Oh, this comes down to texture preference, really. Our main recipe here is baked, which gives you that firm, slightly dense slice that holds its shape perfectly—think classic cheesecake texture but in bar form. It relies on that one egg to set up properly.
The no bake pumpkin bars variation, which I mentioned is great for ultra-busy days, skips the oven entirely. These rely purely on the chilling time to firm up. The result is lighter, creamier, and closer to a rich, spiced mousse layered on the crust. Both are delicious, but the baked one has that signature, satisfying cheesecake density that I adore!
If you need to get in touch with me about specific measurements or if you have more burning questions about any of my Thanksgiving dessert bars, you can always reach out via my contact page right here!
Nutritional Estimates for Cheesecake Dessert Squares
Now, I know many of us are watching what we eat, even when pie in bar form is staring us down! I always like to give a quick overview of what’s in these wonderful pumpkin cheesecake bars. Remember, these numbers are just estimates based on the ingredients I used when I developed this recipe. If you swap out butter for a different fat, or use a different brand of cream cheese, your totals will shift a little. My goal is always flavor first, but being transparent about the macros builds better trust, right?
These estimates are for one single, delicious square of the finished, chilled, and cut bars:
- Serving Size: 1 bar
- Calories: 220
- Sugar: 18g
- Fat: 14g (8g Saturated Fat)
- Carbohydrates: 21g
- Protein: 3g
See? Not too bad for such a rich-tasting treat! They’re slightly lower in sugar than a traditional glazed pastry, which helps me feel a little better about grabbing a second one. If you are looking for more details on how this site handles user data and privacy, you can check out our official privacy policy details here.
Enjoy these cheesecake dessert squares knowing exactly what you are getting—a perfect blend of cream cheese tang and warm pumpkin spice!
Share Your Thoughts on These Pumpkin Cheesecake Bars
Whew! We made it through the whole process, from smashing the graham crackers for the crust all the way to getting those perfect, sliceable squares out of the fridge. Now, it’s your turn to make some magic happen in your kitchen!
I’m so thrilled that I got to share my top tips for making these the creamiest, most perfect pumpkin cheesecake bars you’ve ever tasted. But here’s the thing about recipes—they only get better when people try them and give feedback. So please, I’m begging you, don’t be shy!
When you make these for your next gathering, come straight back here and leave me a rating. How many stars are you giving these creamy treats? Be honest! If you managed to get those slices cut perfectly cleanly, shout it out! If you tried substituting pecans in the crust or added some crunchy brown sugar topping, tell me how that substitution worked out!
Your feedback helps guide me and shows other bakers who might be nervous about tackling a cheesecake bar that this recipe is reliable and delicious. I truly appreciate you hanging out with me in the kitchen today! Happy baking, and I hope these bars are the absolute hit of your next celebration.
PrintCreamy Baked Pumpkin Cheesecake Bars with Graham Cracker Crust
Make these easy, creamy pumpkin cheesecake bars with a simple graham cracker base. They are perfect for fall gatherings and holidays.
- Prep Time: 15 min
- Cook Time: 35 min
- Total Time: 50 min
- Yield: 16 bars
- Category: Dessert
- Method: Baking
- Cuisine: American
- Diet: Vegetarian
Ingredients
- 1 1/2 cups graham cracker crumbs
- 1/4 cup granulated sugar (for crust)
- 6 tablespoons unsalted butter, melted
- 1 (8 ounce) package cream cheese, softened
- 1/2 cup granulated sugar (for filling)
- 1/2 cup pumpkin puree (not pumpkin pie filling)
- 1 large egg
- 1 teaspoon vanilla extract
- 1/2 teaspoon ground cinnamon
- 1/4 teaspoon ground ginger
- Pinch of ground nutmeg
Instructions
- Preheat your oven to 350 degrees Fahrenheit. Line an 8×8 inch baking pan with parchment paper, leaving an overhang on two sides for easy removal.
- Prepare the crust: In a medium bowl, combine the graham cracker crumbs, 1/4 cup sugar, and melted butter. Press the mixture firmly and evenly into the bottom of the prepared pan.
- Bake the crust for 8 minutes. Remove from the oven and let it cool slightly while you prepare the filling.
- Prepare the filling: In a large bowl, beat the softened cream cheese and 1/2 cup sugar with an electric mixer until smooth.
- Beat in the pumpkin puree, egg, vanilla extract, cinnamon, ginger, and nutmeg until just combined. Do not overmix.
- Pour the pumpkin cheesecake filling evenly over the slightly cooled crust.
- Bake for 30 to 35 minutes, or until the edges are set and the center has only a slight jiggle.
- Turn off the oven, prop the door open slightly, and let the bars cool in the oven for 30 minutes. This helps prevent cracking.
- Remove the pan from the oven and cool completely on a wire rack.
- Chill the bars in the refrigerator for at least 4 hours, or preferably overnight, before slicing into squares.
Notes
- For easy slicing, use the parchment paper overhang to lift the entire block of bars out of the pan before cutting. Wipe your knife clean between cuts.
- If you prefer a gingersnap crust, substitute gingersnap crumbs for the graham cracker crumbs.
- For a no-bake option, omit the egg and reduce the cream cheese to 6 ounces. Chill for 6 hours instead of baking.
Nutrition
- Serving Size: 1 bar
- Calories: 220
- Sugar: 18
- Sodium: 150
- Fat: 14
- Saturated Fat: 8
- Unsaturated Fat: 6
- Trans Fat: 0
- Carbohydrates: 21
- Fiber: 1
- Protein: 3
- Cholesterol: 45