

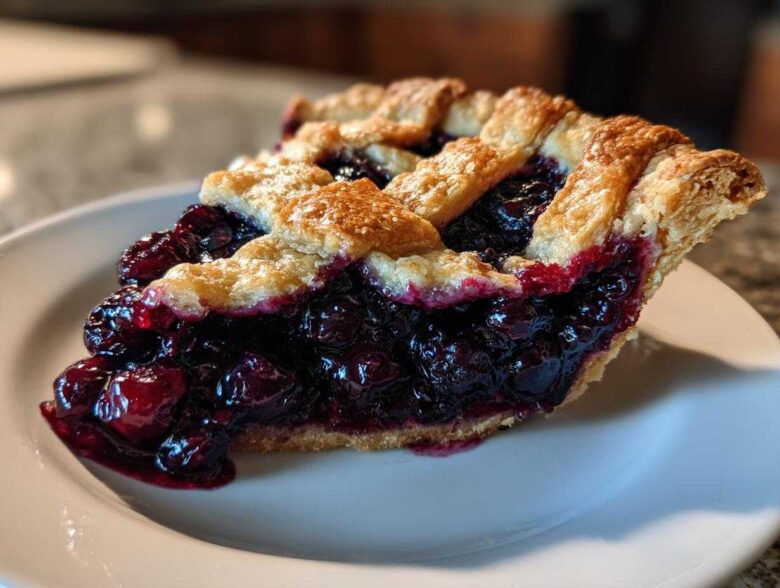
Oh my gosh, you want the perfect summer dessert? Forget everything else—this is it. When the heat hits and the farmers markets are overflowing, nothing beats cutting into a slice of homemade blueberry pie. I’ve been chasing the ultimate blueberry pie recipe for what feels like a decade! Seriously, I once nearly ruined a Fourth of July cookout because my filling was soup! Not anymore, though. This version is the one that finally clicked: it has that impossibly flaky, all-butter crust you dream about, and the filling actually holds its shape when you slice it. Trust me, after years of trial and error, this is my tried-and-true, foolproof way to make a family favorite that never fails to impress everyone at the table.
We use a little bit of lemon zest in ours, which brightens everything up, turning that familiar sweet pie into something truly special. If you’re ready to bake the best fruit pie of your life, pull out your rolling pin because we are getting started. You can check out a little bit about my baking journey right over here at our kitchen philosophy if you’re curious!
Why This Classic Blueberry Pie Recipe Works Every Time
Okay, let’s talk about why this isn’t just another run-of-the-mill pie. This blueberry pie recipe guarantees success, which is why it’s become my personal Family Favorite Pie for every summer picnic. We’re hitting those key points everyone wants: a crust that shatters when you cut into it, and a filling that’s perfectly sweet and tart, never gooey or runny.
It takes the best parts of an Old Fashioned Blueberry Pie and simplifies the tricky bits. I promise, once you follow these steps, you’ll never sweat a fruit pie again!
Achieving the Perfect Flaky Pie Crust Tutorial
The magic of a truly flaky crust starts and ends with temperature and movement. Seriously, keep everything cold! I mean ice water, rock-hard butter—the colder, the better. You want the butter pieces to stay intact so they can create steam pockets in the oven. Don’t overwork that dough either. Just mix it until it barely holds hands, wrap it tight, and let it chill. That chilling time is non-negotiable for maximum flakiness.
The Secret to a Set Blueberry Pie Filling
This is where I used to go wrong every single time because I thought more berries meant more flavor, but it meant more soup! The key to the Best Blueberry Pie Filling is the cornstarch. It thickens beautifully as it heats up. We also rely on that fresh lemon juice and zest; the acid helps keep the color vibrant and balances the sweetness so you get that wonderful sweet and tart flavor profile.
Ingredients for Your Homemade Blueberry Pie Recipe
Alright, now we get down to business! Baking is just chemistry you can eat, and for a perfect homemade blueberry pie, you need precision, but don’t let that scare you. We are using simple items here. I’ve listed exactly what you need below. Remember, the crust is absolutely all-butter; no funny substitutes are allowed if you want that flakiness!
- 2 1/2 cups all-purpose flour
- 1 teaspoon salt
- 1 cup (2 sticks) unsalted butter, cold and cubed
- 1/2 cup ice water
- 6 cups fresh or frozen blueberries (do not thaw if frozen)
- 3/4 cup granulated sugar (adjust based on berry sweetness)
- 1/4 cup cornstarch
- 1 tablespoon lemon zest
- 1 tablespoon fresh lemon juice
- 1 large egg, beaten (for that beautiful egg wash)
- 1 tablespoon coarse sugar (for a little crunch on top)
Ingredient Notes and Substitutions for This Blueberry Pie Recipe
I want to make sure you nail the parts that make or break this pie! For the butter in the crust, please—please—use real, high-quality unsalted butter. It’s what creates those incredible layers. If you cut in those cold cubes correctly, you’ll see pea-sized chunks even after mixing; those are pockets of pure steam waiting to happen!
When it comes to the berries, I usually grab fresh ones in the summer because they are the best of the bunch. But if you are making this in January, frozen works perfectly! The main thing for frozen blueberries is that you toss them in the sugar mixture while they are still hard. Don’t thaw them first, or you end up with berry juice flooding your kitchen counter! Also, taste your sugar. If your blueberries are already super sweet, maybe pull back that 3/4 cup of sugar just a touch. That’s the beauty of baking from scratch!
Step-by-Step Instructions for the Best Blueberry Pie Filling
Now that your dough is chilling nicely and getting frosty, we can tackle the delicious part: getting that Best Blueberry Pie Filling ready. This step needs a gentle hand. You want the berries to stay mostly whole, not turn into jam before they even hit the oven!
Grab a large bowl—bigger than you think you need—and dump your blueberries right in there. Sprinkle over the sugar, sprinkle in that cornstarch to keep things thick, and add the lemon zest and juice. Just toss it super gently with a big rubber spatula. You’re aiming to coat everything evenly. Keep swirling carefully until that sugar mixture looks fully incorporated with the berries. Set this bowl aside while you get your crust ready.
Assembling and Baking Your Blueberry Pie Recipe
Okay, the dough is rested, and the filling is waiting patiently. This is where your hard work really shines! First things first, grab that bottom crust that’s been chilling—it should be firm. Roll it out on a lightly floured counter until it’s a big circle, about 12 inches across. Gently ease that into your 9-inch pie plate. Don’t stretch it, just let it settle in there! Trim the overhang to about an inch. Pop the whole plate back into the fridge while you work on the top layer.
Next, roll out the top crust. You can cut strips for a classic lattice (which lets out steam beautifully!) or cut a solid top, but make sure you punch a few vents if you go solid. Pour that fantastic blueberry mixture into the chilled bottom crust. Then seal it up! Crimp those edges tight—this keeps all those glorious juices locked inside the pie. Brush the top lightly with your beaten egg, and then scatter that coarse sugar over everything for a professional sparkle.
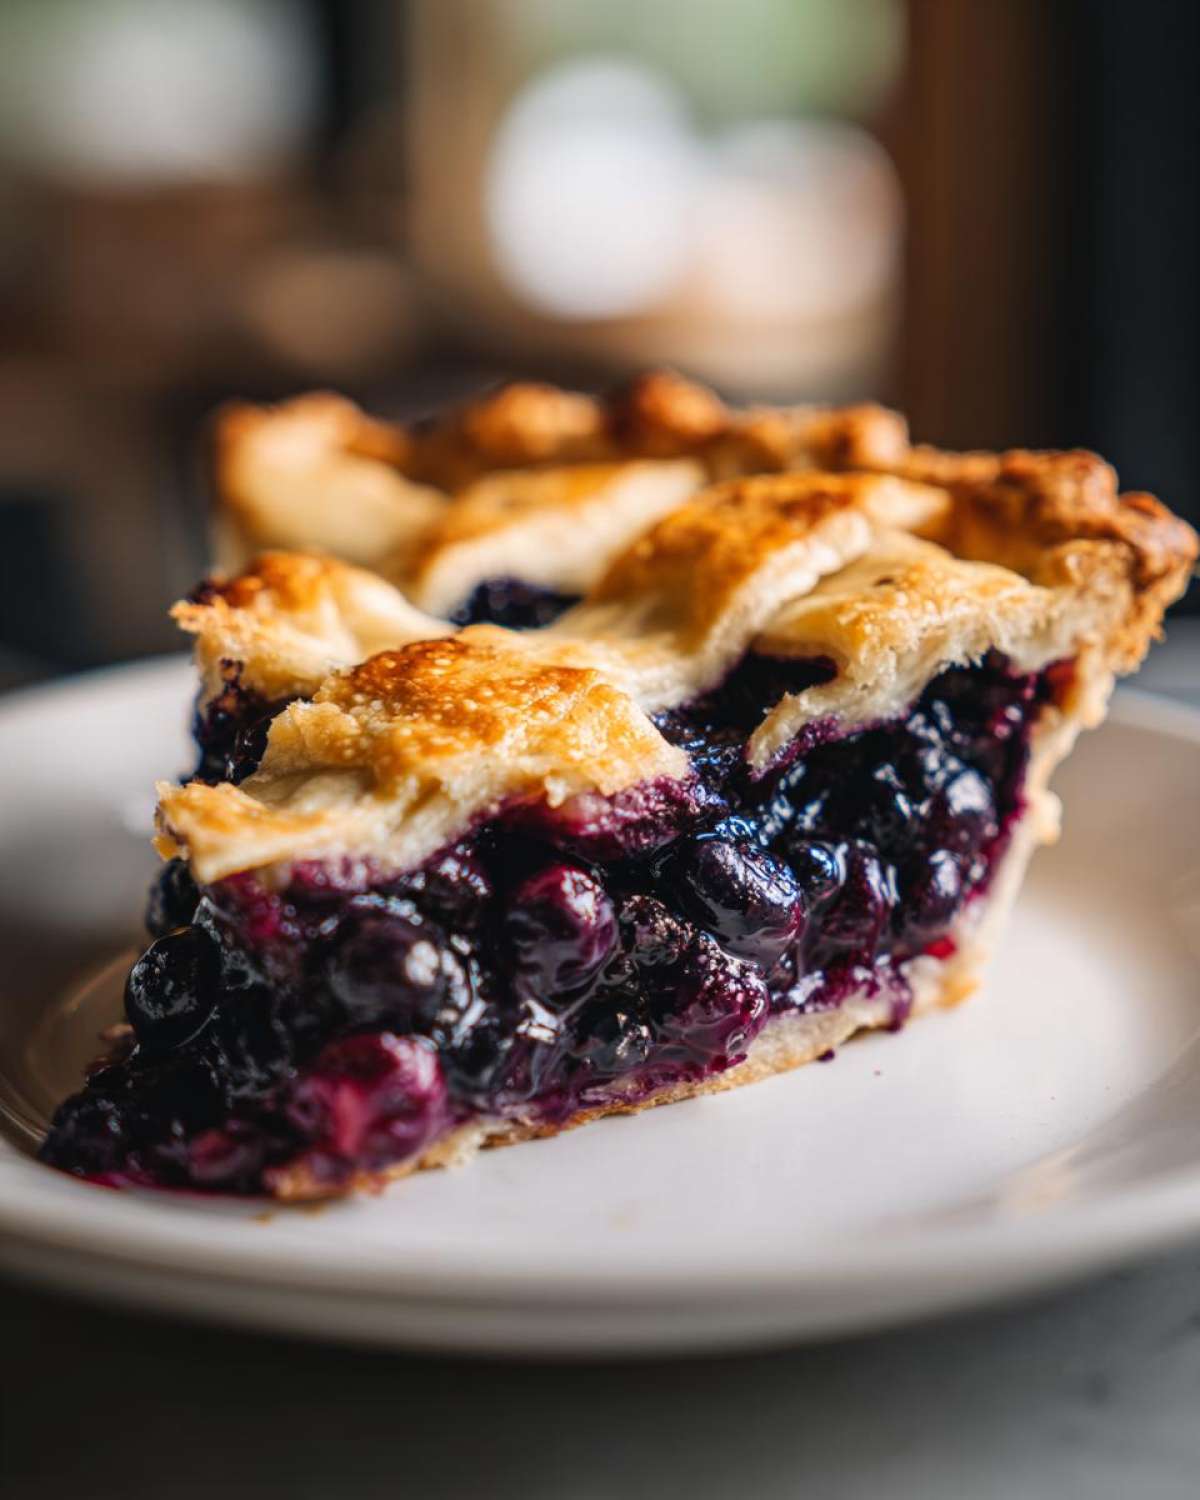
Now for the two-stage baking heat, which is the secret for this blueberry pie recipe. Preheat your oven to a roaring 425 degrees F. I always put my pie on a preheated baking sheet underneath—this helps cook the bottom crust quick so it doesn’t get soggy. Bake it hot for 15 minutes! Then, drop the heat way down to 375 degrees F, and let it bake for another 40 to 50 minutes. If the edges start looking too dark, just sneak some foil around them. You’re looking for a deep golden brown and thick, heavy bubbling.
Make sure you check out our site terms before you share photos of this masterpiece!
Tips for a Flaky Pie Crust Tutorial During Assembly
When you’re sealing the edges, a firm pinch works wonders. You want a tight seal so the steam doesn’t escape that way, forcing it out the top vents instead. Another little trick I learned is that egg wash is your friend! It gives that top crust a deep, shiny mahogany color you just can’t get otherwise.
If you’re aiming for that truly incredible flake we talked about earlier, remember what I said about keeping everything cold. If the dough feels soft or sticky while you’re crimping, just slide the whole thing into the freezer for five minutes. Five minutes! It firms right back up, and you keep that gorgeous structure the butter worked so hard to create.
The Most Important Step: Cooling Your Blueberry Pie Recipe
I know, I know! The pie is golden brown, it smells like heaven, and you want to cut into it right now! But stop! If I could shake you gently through the screen, I would. Cooling is honestly the most critical, non-negotiable step in any fruit pie, especially one packed with berries. If you rush this part, you get that watery, soupy mess that runs all over the plate—and we worked so hard to avoid that!
When that pie comes out of the oven, the filling is basically lava. It looks thick, but trust me, it’s not set. It needs time for that cornstarch slurry to relax and fully develop its structure. I tell everyone, give it a bare minimum of four hours on a wire cooling rack. Four hours! I usually make my pie the day before I need it.
If you can wait that time, you will be rewarded with slices that hold their shape beautifully, where the fruit is suspended perfectly in that sweet, slightly tart glaze. You can even cover it loosely with foil after about an hour if dust or pets are a concern. This patience pays off tenfold when you serve that perfect slice!
Serving Suggestions for This Simple Homemade Dessert
Now that you’ve successfully navigated the baking and cooling marathon—congratulations!—it’s time for the best part: eating! A fantastic pie like this really doesn’t need much help, which is why it’s such a star in my collection of Simple Summer Baking recipes.
Honestly, the simplest way to serve it is just slightly warm, though I usually try to fight the urge and wait until it’s fully cooled so I can get those perfect slices. When serving, a scoop of good quality vanilla bean ice cream is mandatory. The cold cream melting against the slightly warm, sweet-tart berries? It’s pure magic, folks! If you’re not a huge ice cream fan, you can’t go wrong with freshly whipped cream. Just whip heavy cream with a tiny bit of powdered sugar and maybe half a teaspoon of vanilla. It keeps the focus right on the fruit.
This pie is a staple for any gathering, especially as one of our go-to Summer Berry Desserts. It tastes fantastic on its own, but pairing it like this just elevates it from a great pie to a memorable dessert experience. Imagine this sitting next to a big bowl of fruit salad—total crowd-pleaser!
Storage and Reheating Instructions for Your Blueberry Pie Recipe
So, you have leftovers—which means you did something right! Storing a classic fruit pie like this blueberry pie recipe is straightforward, but timing is everything, especially when you want that crust to stay crisp.
Here’s the simple rundown: Since this pie has a cooked filling, you don’t need to worry about it spoiling right away. For the first day, you can leave the leftovers right on the counter, covered loosely with aluminum foil or a cake dome. Keep it away from any direct sunlight or heat, as that warm environment will cause the bottom crust to get soggy fast. Room temperature is fine for about 24 hours.
If you aren’t going to demolish it by tomorrow, you absolutely must move it to the fridge. Tightly wrapping the whole pie or individual slices in plastic wrap, followed by a layer of foil, keeps it fresh for up to four days. The cold air helps solidify that filling even more, which is great for clean slicing.
Warming Up a Slice Without Ruining the Crust
Reheating is delicate work! The microwave is your enemy here because it turns crusts into sad, chewy sponges. If you want that perfect texture back, you need dry heat.
The best way to reheat a slice of my blueberry pie recipe is in the oven or even an air fryer if you have one! Place a slice directly on a small piece of foil or skip the foil if you’re using an air fryer basket. Heat it at about 300 degrees F for maybe 10 to 15 minutes. That low, slow heat warms the filling back up gently without attacking the crust.
If you’re feeling lazy, you can eat it cold straight from the fridge (it’s actually amazing that way, too!). But if you crave that just-baked warmth, the low oven method is your ticket to keeping that homemade flakiness alive.
Frequently Asked Questions About Making a Blueberry Pie Recipe
I always get so many questions after people try this recipe for the first time—and that’s awesome! It means you’re diving in and trying new things or just need a quick reminder on a tricky spot. Don’t worry, I’ve cleared up the three biggest things people ask me about when they tackle this **blueberry pie recipe**.
Can I make this blueberry pie recipe with frozen blueberries?
Absolutely, yes! Isn’t that handy for those times you crave a Summer Berry Dessert but fresh blueberries are nowhere to be found? The trick, as I mentioned when we went over the ingredients, is simply not to thaw them first. Toss those frozen berries straight from the bag into the sugar mixture. Because they start colder, they release their internal liquid more slowly during the initial bake. You might need to add five to ten extra minutes to the total baking time, but the result is still fantastic!
How do I prevent the bottom crust from getting soggy in my blueberry pie recipe?
Oh, the curse of the soggy bottom! We fought that battle for years, but we won! There are two main tricks this **blueberry pie recipe** uses. First, make sure that bottom crust has had a good, solid chill in the fridge before you even put the filling in. Cold crust hits the hot plate and sizzles that bottom layer, setting the fats quickly. Second, remember how I told you to preheat your oven with a baking sheet inside? Place the pie on that hot baking sheet when it goes in the oven!
That initial blast of heat right on the bottom of the tin essentially par-bakes the dough before the moisture from the filling can soak in too deeply. It works like a charm for keeping that flaky texture intact! If you want to get super fancy, you can even brush the inside of the raw bottom crust with a thin layer of something sealant, like a lightly beaten egg white, before filling it, but honestly, chilling and the hot tray usually solve everything.
If you have any more questions after your bake, please read through our baking disclaimer! Happy baking!
Nutritional Estimates for One Slice of Blueberry Pie Recipe
I wanted to include this little table just so you know what you’re diving into when you cut that first gorgeous slice! Please remember, this is just a ballpark figure. My baking style is a little rustic, so your specific sugar, butter brand, and even the exact size of those blueberries will change the final count a tiny bit. But this gives you a great idea of what’s in this wonderful blueberry pie recipe!
- Serving Size: 1 slice
- Calories: 380
- Sugar: 30g
- Sodium: 180mg
- Fat: 20g
- Saturated Fat: 12g
- Unsaturated Fat: 8g
- Trans Fat: 0g
- Carbohydrates: 50g
- Fiber: 3g
- Protein: 5g
- Cholesterol: 55mg
See? That’s not bad at all for an all-butter crust and a full cup of fruit! It’s a real treat. Remember that this data is based on my standard measurements and brands used for this specific blueberry pie recipe. If you wanted to make it lighter, you could always use half the sugar, but honestly, I wouldn’t recommend skipping the eggs or butter—that’s how you lose the flaky crust!
If you want to read the nitty-gritty details about how we handle data and recipes here on the site, you can check out our privacy policy. Happy baking, and enjoy every single bite!
PrintClassic Homemade Blueberry Pie with Flaky Crust

A recipe for a traditional blueberry pie featuring a flaky, all-butter crust and a set filling enhanced with lemon zest.
- Prep Time: 45 min
- Cook Time: 60 min
- Total Time: 105 min
- Yield: 8 servings
- Category: Dessert
- Method: Baking
- Cuisine: American
- Diet: Vegetarian
Ingredients
- 2 1/2 cups all-purpose flour
- 1 teaspoon salt
- 1 cup (2 sticks) unsalted butter, cold and cubed
- 1/2 cup ice water
- 6 cups fresh or frozen blueberries (do not thaw if frozen)
- 3/4 cup granulated sugar (adjust based on berry sweetness)
- 1/4 cup cornstarch
- 1 tablespoon lemon zest
- 1 tablespoon fresh lemon juice
- 1 large egg, beaten (for egg wash)
- 1 tablespoon coarse sugar (for topping)
Instructions
- Prepare the Pie Crust: In a large bowl, whisk together the flour and salt. Cut in the cold butter using a pastry blender or your fingers until the mixture resembles coarse crumbs with some pea-sized pieces of butter remaining. Gradually add the ice water, one tablespoon at a time, mixing until the dough just comes together. Divide the dough in half, flatten each half into a disk, wrap in plastic, and chill for at least 1 hour.
- Prepare the Filling: In a separate bowl, gently combine the blueberries, granulated sugar, cornstarch, lemon zest, and lemon juice. Mix until the berries are evenly coated. Set aside while you roll out the dough.
- Assemble the Bottom Crust: On a lightly floured surface, roll out one disk of dough into a 12-inch circle. Carefully transfer the dough to a 9-inch pie plate. Trim the edges, leaving a 1-inch overhang. Place the pie plate in the refrigerator.
- Assemble the Top Crust: Roll out the second disk of dough. Cut strips for a lattice top or cut out a solid top, making several vents if solid.
- Fill the Pie: Pour the blueberry mixture into the chilled bottom crust. Place the lattice or solid top crust over the filling. Crimp the edges to seal the top and bottom crusts together. Brush the top crust lightly with the beaten egg and sprinkle with coarse sugar.
- Bake the Pie: Preheat your oven to 425 degrees Fahrenheit (220 degrees Celsius). Place the pie on a baking sheet to catch any drips. Bake for 15 minutes at 425°F. Then, reduce the oven temperature to 375 degrees Fahrenheit (190 degrees Celsius) and continue baking for 40 to 50 minutes, or until the crust is golden brown and the filling is bubbling thickly. If the edges brown too quickly, cover them loosely with foil.
- Cool Completely: Remove the pie from the oven and let it cool on a wire rack for at least 4 hours before slicing. This cooling time allows the filling to set properly.
Notes
- If you use frozen blueberries, do not thaw them first. You may need to add 5 to 10 minutes to the total baking time.
- For an extra flaky crust, keep all ingredients very cold during preparation.
- If you prefer a richer color, substitute 1/4 cup of the sugar with light brown sugar.
Nutrition
- Serving Size: 1 slice
- Calories: 380
- Sugar: 30g
- Sodium: 180mg
- Fat: 20g
- Saturated Fat: 12g
- Unsaturated Fat: 8g
- Trans Fat: 0g
- Carbohydrates: 50g
- Fiber: 3g
- Protein: 5g
- Cholesterol: 55mg