

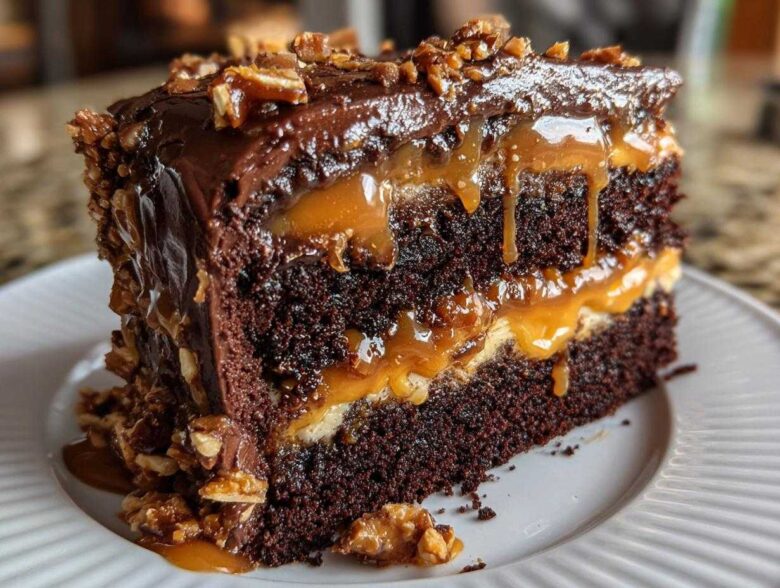
Okay, listen up because I’m about to share the recipe I only bring out for truly major accomplishments—like when the kids finish their finals or when I just need a serious moment of chocolate-fueled peace. Forget everything you thought you knew about layered cakes; this chocolate caramel toffee crunch cake is the real deal. It’s dark, it’s dangerously gooey underneath that crunchy shell, and honestly, it’s almost too much joy to handle in one slice. I first perfected this monster for my best friend’s 40th birthday, and I swear, the entire room went silent. This isn’t just cake; it’s an event. If you’re ready for the ultimate chocolate indulgence, then grab your apron!
I’m so glad you’re here to make this beast with me. If you need to know a little bit more about where this whole crazy cooking journey started, take a peek at my little About Me page, but don’t let it distract you for long—that caramel isn’t going to drizzle itself!
Why This Chocolate Caramel Toffee Crunch Cake Is Your Next Showstopper
I know you’ve seen fancy cakes, but this one is different. It’s got all the bells and whistles you look for in a bakery-style dessert, but I promise, you can pull this off right in your kitchen. It’s all about those layers working together! We nailed the texture balance here.
- The cake itself is ridiculously brown and moist—no dry crumbs allowed!
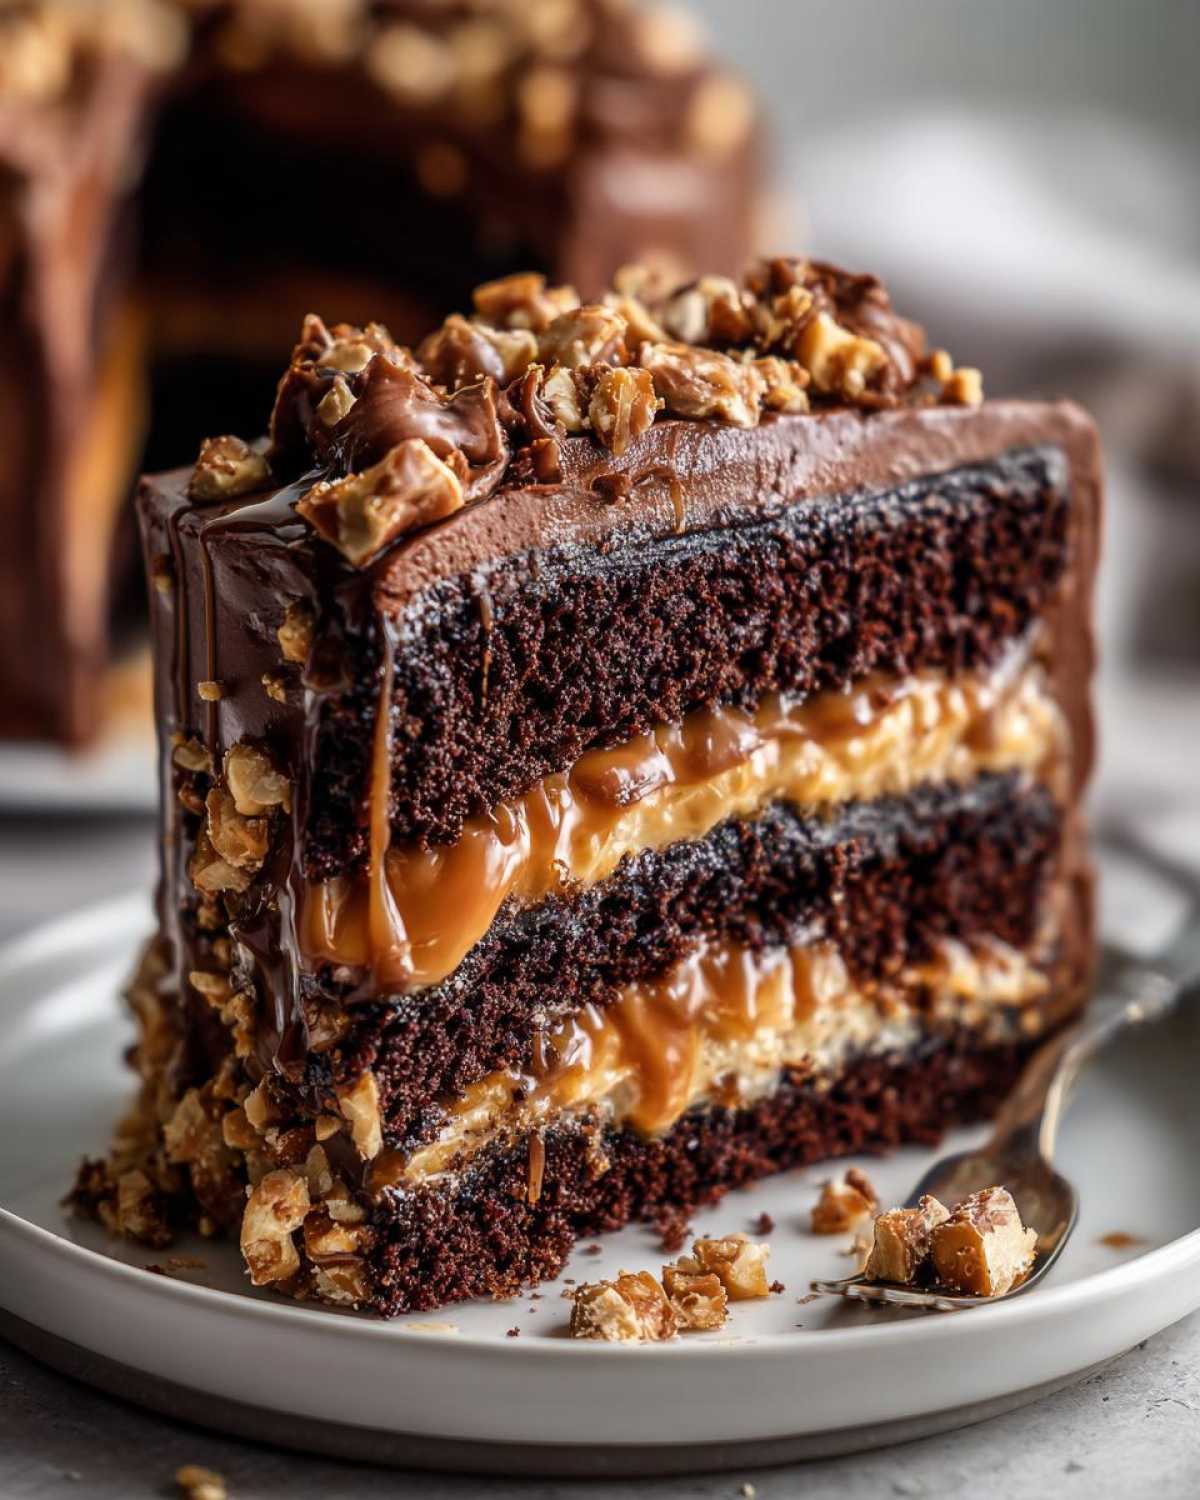
- It features three distinct layers of taste: deep chocolate, salty caramel, and sharp toffee crunch.
- It stacks tall, making it the perfect centerpiece for any celebration. Trust me, it absolutely screams ‘ultimate indulgence.’
- This **chocolate caramel toffee crunch cake** isn’t just sweet; it’s balanced, which is why everyone begs for the recipe.
Achieving the Ultimate Chocolate Indulgence Texture
The secret weapon in the cake layers isn’t just cocoa powder; it’s the hot coffee! Don’t panic if you’re not a coffee drinker. It doesn’t taste like a latte, I swear. That hot liquid helps bloom the cocoa powder instantly, making the chocolate flavor so much richer and darker. It’s what takes this from a regular chocolate cake to a truly **decadent chocolate cake recipe** without adding any extra fat.
Ingredients for the Perfect Chocolate Caramel Toffee Crunch Cake
When you’re making something this over-the-top, you absolutely cannot skimp on ingredient quality—that’s my number one rule! If you use cheap cocoa, you get a flat cake, and we are aiming for rich, deep chocolate flavor here. Make sure your butter for the frosting is truly softened, not melted, and your eggs are at room temperature before you start the cake batter process; it really helps everything emulsify nicely.
We are making a lot of cake, so be sure your pantry is stocked! I broke the list down just to make it feel a little less intimidating, but it’s all going into one amazing final creation.
For the Moist Chocolate Cake Layers
- 1 3/4 cups all-purpose flour
- 1 3/4 cups granulated sugar
- 3/4 cup unsweetened cocoa powder (the good stuff!)
- 1 1/2 teaspoons baking soda
- 1 1/2 teaspoons baking powder
- 1 teaspoon salt
- 2 large eggs (room temperature, please!)
- 1 cup buttermilk (room temperature)
- 1/2 cup vegetable oil
- 2 teaspoons vanilla extract
- 1 cup hot strong brewed coffee
For the Rich Chocolate Frosting and Assembly Components
This is where all the magic happens—the glue, the goo, and the crunch! If you’re feeling lazy, grab a really excellent *dulce de leche* for the filling, but I think making the sauce fresh is always worth the extra bit of effort—I’ll show you how later.
- 1 cup (2 sticks) unsalted butter, softened
- 3 1/2 cups powdered sugar
- 1/2 cup cocoa powder
- 1/2 cup heavy cream
- 1 teaspoon vanilla extract
- 1 cup prepared thick caramel sauce (or store-bought dulce de leche)
- 1 cup crushed toffee candy bars (like Skor or Heath)
- 1/2 cup extra caramel sauce for drizzling
Step-by-Step Instructions for Your Chocolate Caramel Toffee Crunch Cake
Okay, this is the fun part! Don’t let the long ingredient list intimidate you; we’re just building flavors in stages, kind of like assembling a gorgeous puzzle. The most important thing I want you to remember here is patience during the cooling phase. If you rush that step, you’ll end up with a caramel disaster, and nobody wants that melty mess. We are building trust here, so follow these steps exactly, and you’ll have a cake that looks like it came straight from a magazine. Trust me on this one—it’s worth the extra ten minutes of waiting between steps!
Baking the Chocolate Layers
First things first: get that oven warmed up to 350°F (175°C). Prep your three 8-inch pans by greasing, flouring, and definitely adding parchment circles on the bottom. Seriously, don’t skip the paper!
In your biggest bowl, whisk all the dry stuff together: the flour, sugar, the first amount of cocoa, baking soda, baking powder, and salt. You want this evenly mixed before we introduce the wet ingredients. Now, dump in the eggs, buttermilk, oil, and vanilla. Mix that on medium speed for a solid two minutes until it looks combined. It’s going to look thick.
Here comes the shocker: Carefully stir in that hot coffee until the batter looks smooth. Yes, it will be very thin, almost soupy. That’s exactly right! Don’t worry about it being runny; that thin batter is the key to a moist cake. Divide it evenly between your three pans and pop them in for about 30 to 35 minutes. They’re done when a pick comes out clean. Let them sit in the pans for 10 minutes, then flip them onto a wire rack to cool completely. I mean *completely*—caramel and warm cake are not friends.
Making the Creamy Chocolate Frosting
While those layers are chilling out, let’s get that beautiful frosting ready. Grab your stand mixer—or a hand mixer if you’re feeling ambitious!—and beat that softened butter until it’s really creamy and pale yellow. Start adding the powdered sugar and the extra 1/2 cup of cocoa powder gradually. You need to alternate that with the heavy cream and vanilla.
Keep mixing, scraping down the sides constantly. You want to beat this for a good long time until it’s super light and fluffy. Seriously, beat it until your arm works up a sweat! That aeration locks in all that rich chocolate flavor.
Assembling the Chocolate Caramel Toffee Crunch Layer Cake
This layering technique is what makes it a true **Layer Cake Inspiration** and gives it height. Place your first cooled layer on your serving platter or cake stand—a little smear of frosting underneath helps anchor it down so it doesn’t slide around.
Spread about one-third of your chocolate frosting evenly over that first layer. Now, drizzle about a third of your thick caramel sauce right over the frosting. Don’t be shy! Then, toss a generous sprinkle of crushed toffee over the caramel. That crunch is what we are here for!
Carefully place the second layer on top and repeat that trilogy: frosting, then caramel, then toffee crunch. Top it with your final cake layer.
Use the rest of the chocolate frosting to cover the top and sides of the entire cake. This is where you seal in all that goodness. Once it’s frosted smooth, take your reserved 1/2 cup of caramel and drizzle it artistically over the top edge so it drips down the sides dramatically. Finish it off by sprinkling the very last of your crushed toffee pieces across the top surface. Pop the whole **chocolate caramel toffee crunch layer** creation into the fridge for at least 30 minutes so everything firms up before you slice into this beauty!
Remember you can review my strict guidelines for clean assembly in my disclaimer post, but honestly, a little messy drip makes it look even more homemade and wonderful!
Expert Tips for a Bakery Style Chocolate Caramel Toffee Crunch Cake
You’ve baked the layers, you’ve made the frosting—yay! But if you want this cake to look like you commissioned it from a high-end bakery, you need a couple of extra little tricks up your sleeve. Making a **bakery style chocolate cake** is all about paying attention to the details that others skip over. I’ve gathered the things that always make the difference between a good cake and a *wow* cake.
First up: temperature management. This applies to everything!
- Chill Your Layers Before Frosting: Once your cake layers are totally cool, wrap them tightly in plastic wrap and stick them in the fridge for at least an hour, or even overnight. Cold cakes are stiff cakes, and stiff cakes don’t crumble when you try to frost them horizontally. This is crucial for getting those sharp edges we love.
- The Secret of Crumb Coating: If you want that super smooth finish, you need a crumb coat. It’s just a thin layer of frosting—thin enough that you can see some cake showing through! Spread it lightly over the entire cake and then chill it again for 20 minutes until that thin layer hardens. This traps all those pesky loose crumbs so your final, beautiful coat of frosting goes on totally pristine.
- Crushing Toffee Perfectly: Don’t just hack at your toffee bars with a knife; they fly everywhere! Put your toffee bars into a heavy-duty zip-top bag, seal it tightly, and then use a rolling pin or even a meat mallet to gently smash them. You want varied sizes—some powder and some decent-sized chunks—to give you the best textural contrast in every bite.
Follow those three things, and honestly, people will ask where you bought this incredible **chocolate caramel toffee crunch cake**!
Ingredient Notes and Substitutions for Your Gooey Caramel Cake
I always get emails asking if they can swap things out, and that’s fair! Baking is personal, after all. But for this specific **gooey caramel cake**, substitutions can sometimes change the entire balance created by the chocolate and coffee. However, there are a couple of places where we can play around without ruining the whole masterpiece.
The most common question I get is about buttermilk since not everyone keeps it stocked. That’s an easy fix! You can absolutely make your own substitute easily. Just take a regular cup of milk—whatever kind you have—and stir in one tablespoon of white vinegar or fresh lemon juice. Let that sit on the counter for about five or ten minutes until it slightly curdles and thickens up. That’s your perfectly soured milk, ready to act just like buttermilk in the recipe!
Now, let’s chat about the crunch factor. If you can’t find your favorite toffee bars (like Skor or Heath), don’t stress. You can actually make your own easy toffee bits! You just need butter, brown sugar, and a little bit of water cooked until it hits the hard crack stage, then poured thin and smashed up. It adds another fun little step if you want to conquer the whole thing from scratch, but honestly, store-bought works great too if you’re short on time.
Also, if someone in your house isn’t a big fan of the dark chocolate depth the coffee brings, you can definitely replace the hot coffee with hot water, but I really encourage you at least to try the coffee once. It deepens the chocolate flavor in a way that just hot water can’t quite replicate. It’s the secret to that intense, rich flavor we’re going for!
Storing and Serving Your Chocolate Caramel Toffee Crunch Cake
Okay, we’ve made this towering masterpiece, and now you have to decide: eat it all today, or save some for later? Good news: this cake actually travels really well because that rich chocolate frosting acts like its own little protective shield. However, because we have all that amazing, gooey homemade caramel in there, storage strategy is pretty important!
I always try to keep this cake covered loosely at room temperature for the first day—if your kitchen isn’t too warm, that is. The cake layers stay softer that way, and the caramel stays beautifully gooey. If you’re keeping it longer than 24 hours, or if your house is summer-hot, you absolutely need to move it into the fridge. Just cover it tightly with a cake dome or plastic wrap to stop it from drying out or absorbing other weird fridge smells.
When you take it out of the fridge, though, here is the non-negotiable step for serving this **Ultimate Chocolate Indulgence**. You must, must, *must* let it sit on the counter for at least 45 minutes to an hour before slicing. If you cut it cold, that chocolate frosting will shatter, and the caramel will turn hard! We want that luxurious, slightly soft texture that oozes just a tiny bit when you press down with your fork. That wait time is the hardest part, but it makes all the difference in presentation.
If you happen to have leftovers (which I doubt!), they’ll last easily three days refrigerated, or even up to two months frozen! Just wrap those slices tightly in a double layer of plastic wrap before freezing. When you’re ready, thaw them slowly in the fridge overnight. If you need to brush up on my general baking promises and rules, make sure to check out my terms and conditions, just so you know I’m standing by this recipe!
Frequently Asked Questions About This Ultimate Chocolate Indulgence
It seems like every time I bake this cake, someone has a question about storing it or tweaking the toffee, so I thought I’d put a quick Q&A section right here at the end. I want you to feel totally confident trying this recipe!
Can I make the components of the chocolate caramel toffee crunch cake ahead of time?
Absolutely! That’s one of the best parts about making something this big—you can spread out the work. The cake layers are fantastic made a day ahead. Once they are completely cool, wrap each one tightly in plastic wrap and keep them on the counter or fridge. The chocolate frosting does wonderfully sitting in the fridge for up to three days in an airtight container; just remember to let it soften up a bit on the counter and give it a quick whip with your mixer before you use it!
I usually only leave the caramel sauce out for about 24 hours before I assemble, just to be safe, but the crushed toffee pieces can be made days ahead and stored in a dry container at room temperature. Don’t forget to check my contact page if you have a question I missed!
What is the best way to make this cake look like a ‘Birthday Showstopper Cake’?
To get those beautiful, clean sides that look so professional, you need to master the chill time I mentioned before! After you’ve done your crumb coat (that thin layer of frosting that locks in the crumbs), stick the cake in the freezer for about 15 minutes just until the frosting sets hard. Then, apply your final, thick layer of frosting.
When applying the final layer, use an offset spatula or a bench scraper held perfectly straight against the side of the cake while you slowly spin the turntable. That will shave off any uneven bits, leaving you with impossibly sharp edges. It truly transforms this into a **Birthday Showstopper Cake**! It takes practice, but it’s so worth seeing that clean line.
Is this really an ‘Easy Decadent Cake’ if I have to make three different things?
I totally get why you ask! It looks complex, but I promise it’s an **Easy Decadent Cake** because the work is mostly hands-off waiting time, not complicated technique. The cake batter mixes up super fast—seriously, under 15 minutes to get it into the oven. The frosting is a dream to whip up quickly. The only part that requires a bit of patience is the assembly layering with the caramel and toffee. If you focus on nailing the cake and the frosting, the assembly is just layering what you already made. If you follow the steps, you will feel so accomplished!
Where does the signature ‘crunch’ in the chocolate caramel toffee crunch cake come from?
That amazing, necessary crunch comes entirely from the crushed toffee bars—whether you buy them or make your own. We layer them *between* the cake layers, right on top of the gooey caramel. The cake itself is moist, the frosting is soft, and the caramel is slow and drippy, so that hard, buttery crunch of the toffee hits your palate perfectly! It’s the crunch that stops this from just being a dense, sweet mush!
Sharing Your Chocolate Caramel Toffee Crunch Cake Creations
I really hope you loved making this massive, over-the-the-top beauty! I feel like we just spent the afternoon in the kitchen together, and I’m already excited to see what you ended up with. Seriously, don’t be shy!
Once you’ve sliced into your **chocolate caramel toffee crunch cake** and taken that first incredible bite, I need to hear all about it. Did the crunch hold up? Did the caramel drip just right? Head down to the comments below and leave me a rating! Five stars if it nearly made you cry happy tears, and tell me your favorite part of the process.
If you shared a picture of your masterpiece on Instagram, please tag me! I absolutely adore seeing your creations. It makes all this recipe testing and writing worth it when I see your beautiful desserts on my feed. Knowing that my favorite family indulgence is making its way onto your celebration tables is the best feeling in the world.
And hey, before you click away, just a quick friendly reminder about keeping things above board—you can always check out my privacy policy if you want to know how I handle all the wonderful comments and data folks share here on the site. Happy baking, and enjoy every single, decadent bite!
PrintUltimate Decadent Chocolate Caramel Toffee Crunch Layer Cake
A rich, multi-layered cake featuring moist chocolate cake, thick homemade caramel, and crunchy toffee pieces for a truly indulgent dessert.
- Prep Time: 45 min
- Cook Time: 35 min
- Total Time: 80 min
- Yield: 12 servings
- Category: Dessert
- Method: Baking
- Cuisine: American
- Diet: Vegetarian
Ingredients
- 1 3/4 cups all-purpose flour
- 1 3/4 cups granulated sugar
- 3/4 cup unsweetened cocoa powder
- 1 1/2 teaspoons baking soda
- 1 1/2 teaspoons baking powder
- 1 teaspoon salt
- 2 large eggs
- 1 cup buttermilk
- 1/2 cup vegetable oil
- 2 teaspoons vanilla extract
- 1 cup hot strong brewed coffee
- 1 cup (2 sticks) unsalted butter, softened
- 3 1/2 cups powdered sugar
- 1/2 cup cocoa powder
- 1/2 cup heavy cream
- 1 teaspoon vanilla extract
- 1 cup prepared thick caramel sauce (or store-bought dulce de leche)
- 1 cup crushed toffee candy bars (like Skor or Heath)
- 1/2 cup extra caramel sauce for drizzling
Instructions
- Preheat your oven to 350°F (175°C). Grease and flour three 8-inch round cake pans. Line the bottoms with parchment paper.
- In a large bowl, whisk together the flour, sugar, 3/4 cup cocoa powder, baking soda, baking powder, and salt for the cake layers.
- Add the eggs, buttermilk, oil, and 2 teaspoons vanilla extract to the dry ingredients. Beat with an electric mixer on medium speed for two minutes.
- Carefully stir in the hot coffee until the batter is smooth. The batter will be thin.
- Divide the batter evenly among the prepared pans. Bake for 30 to 35 minutes, or until a wooden pick inserted into the center comes out clean. Let the cakes cool in the pans for 10 minutes before inverting them onto a wire rack to cool completely.
- Prepare the chocolate frosting: Beat the softened butter until creamy. Gradually add the powdered sugar and 1/2 cup cocoa powder, alternating with the heavy cream and 1 teaspoon vanilla extract. Beat until light and fluffy.
- Once cakes are fully cool, place the first layer on a serving plate. Spread about 1/3 of the frosting evenly over the top. Drizzle generously with 1/3 cup of the thick caramel sauce. Sprinkle with 1/3 cup of the crushed toffee.
- Carefully place the second cake layer on top. Repeat the frosting, caramel, and toffee layers.
- Top with the final cake layer. Frost the top and sides of the entire cake with the remaining chocolate frosting.
- Drizzle the remaining caramel sauce over the top edge of the cake, allowing it to drip down the sides. Sprinkle the remaining crushed toffee pieces over the top.
- Chill the cake for at least 30 minutes before slicing and serving.
Notes
- For the best texture, use room temperature ingredients for the cake batter.
- If you prefer a less intense coffee flavor, substitute the hot coffee with hot water.
- You can make homemade caramel sauce by cooking sugar, butter, and cream, but using a high-quality store-bought sauce saves time.
- Crush the toffee bars inside a sealed plastic bag using a rolling pin for even pieces.
Nutrition
- Serving Size: 1 slice
- Calories: 650
- Sugar: 85
- Sodium: 350
- Fat: 35
- Saturated Fat: 18
- Unsaturated Fat: 12
- Trans Fat: 1
- Carbohydrates: 85
- Fiber: 3
- Protein: 7
- Cholesterol: 95