

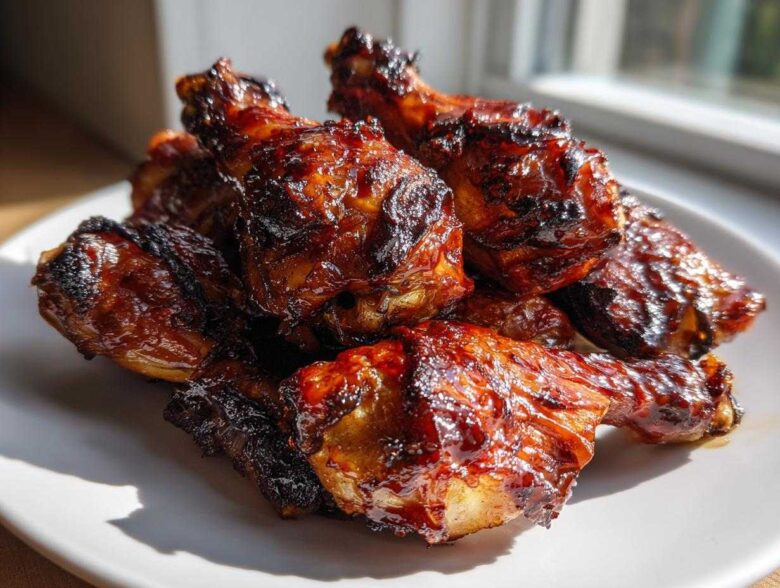
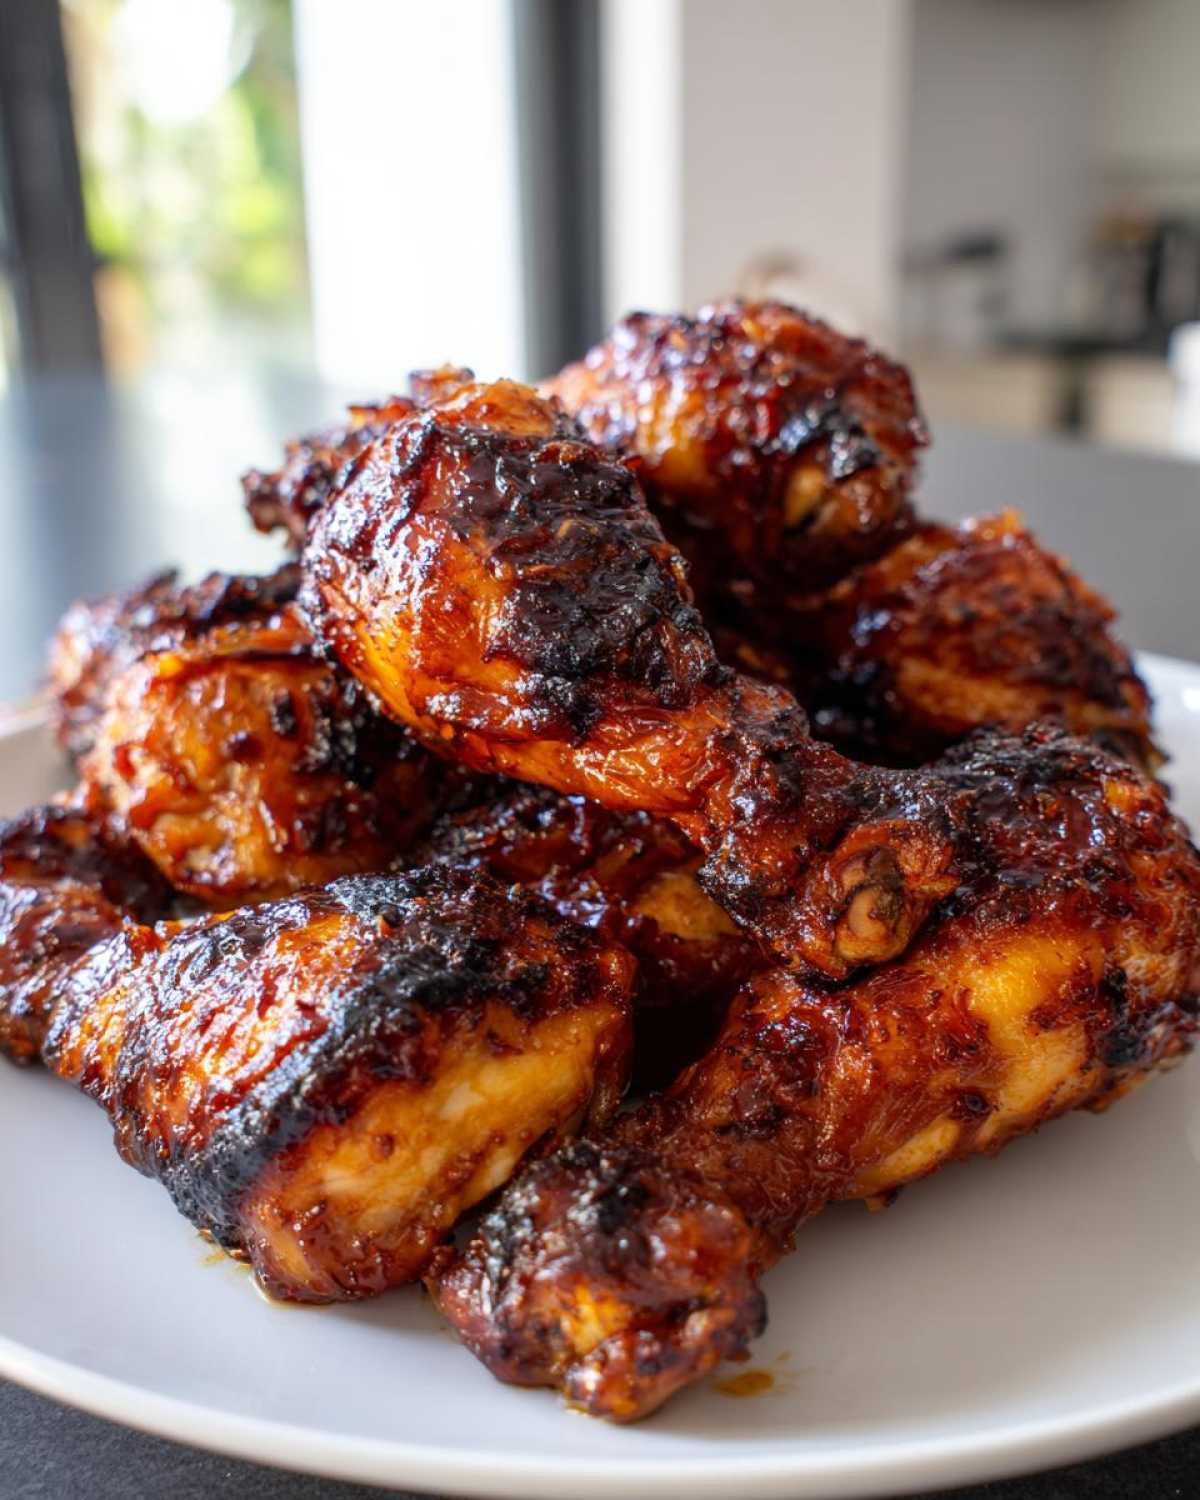
Oh my gosh, if you have been chasing that perfect bite—you know, where the sticky, sweet honey garlic glaze is caramelized just right, but underneath, that skin is shatteringly crisp? I spent *years* trying to figure out how to get that glorious texture without deep-frying everything. It felt like a culinary magic trick reserved only for restaurants!
But I cracked the code, friends, I really did. This is officially my foolproof guide for **Crispy Honey Garlic Chicken Drumsticks Oven Baked**. This recipe takes what should be a tricky weeknight meal and makes it ridiculously simple. If you’ve ever wanted to know how to get that chicken totally juicy inside while keeping the outside perfect, you might even want to check out my secrets for a quick chicken marinade, too! I swear, the first time I pulled these out of the oven, my whole family cheered. They’re quick, they use basic pantry stuff, and they deliver restaurant-quality crunch every single time. You are going to love how these turn out!
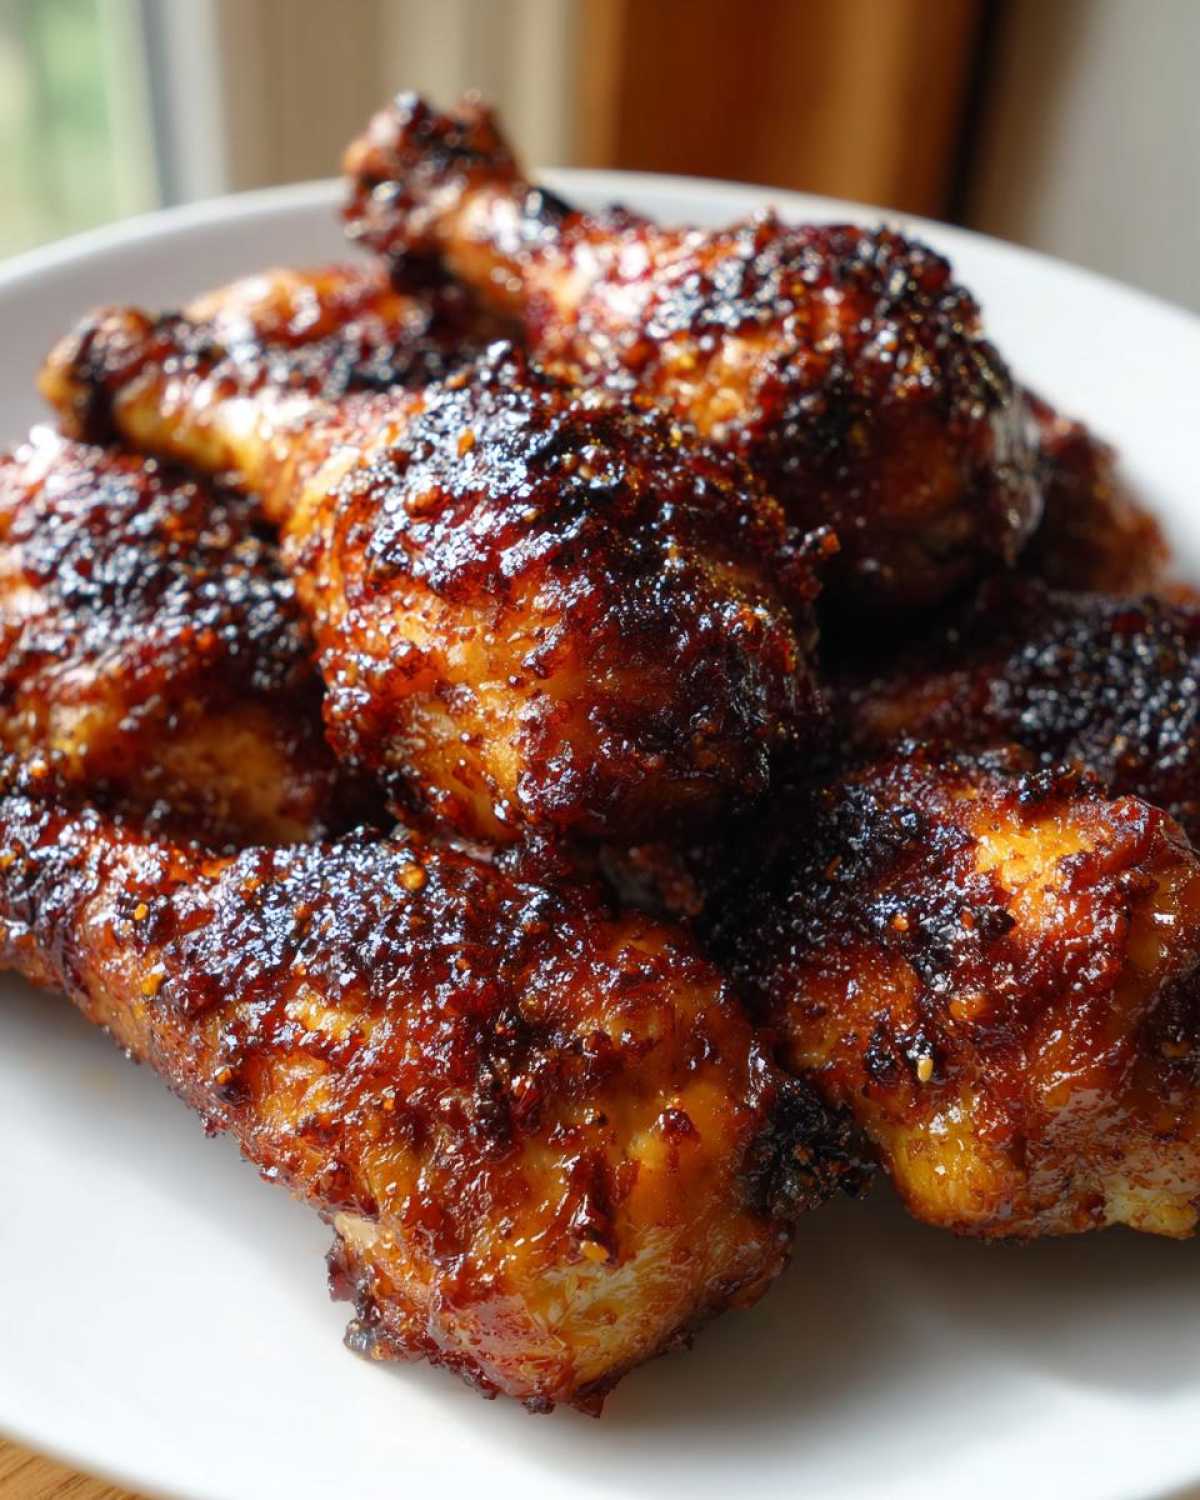
Why This Recipe Delivers the Best Crispy Honey Garlic Chicken Drumsticks Oven Baked
You might wonder why standard drumming chicken recipes just don’t cut it. Honestly, they often turn out rubbery or the sauce just slides right off into a sad, sticky puddle! My method is designed specifically to lock in the juiciness while guaranteeing that crunch you crave. It’s all about layering preparation and timing.
- We ditch high heat for most of the cook time to let the skin render slowly.
- The baking powder step acts like a little miracle worker to draw out moisture from the skin’s surface.
- We apply the thick, sweet glaze in stages so it caramelizes instead of steaming the chicken!
If you want even more general advice on locking in that perfect texture, I have a whole deep dive on how to get crispy skin baking chicken that you’ll want to check out!
Key Elements for Crispy Chicken Skin Oven Success
Okay, remember that aluminum-free baking powder I listed in the ingredients? Don’t skip it! Baking powder is mildly alkaline. When it hits the chicken skin, it raises the pH level just enough. This slight shift helps the proteins break down differently, allowing the skin to dry out beautifully and puff up while baking. It’s pure science making your drumsticks amazing. You want that skin to feel dry to the touch before it even hits the oven—that’s your ticket to success!
Essential Ingredients for Crispy Honey Garlic Chicken Drumsticks Oven Baked
Alright, let’s talk about what you need. I’ve tried to keep this list short and sweet, because who has time for twenty different marinade ingredients on a Tuesday night? But these items are non-negotiable if you want that perfect sweet, savory, crispy combo!
First and most importantly: your chicken! You absolutely need about two pounds of drumsticks, and you must pat them until they feel like sandpaper. Seriously—bone dry! If they look even a little damp, the crisping trick won’t work, and we’ll end up with steaming hot chicken armor instead of crispy skin. Don’t forget the aluminum-free baking powder; it’s our little secret weapon for that incredible texture. I always keep my favorite easy garlic butter recipe bookmarked in case I need extra flavor boosters later, but for this core recipe, we stick to the basics.
- 2 lbs chicken drumsticks, patted extremely dry
- 1 tablespoon baking powder (make sure it’s aluminum-free for the best result here!)
- 1 teaspoon salt
- 1/2 teaspoon black pepper
- 1/4 cup honey (use that thick, golden stuff!)
- 1/4 cup soy sauce (I use low sodium just because the glaze gets intense)
- 2 tablespoons water
- 4 cloves garlic, minced super fine—I mean, really weep over that chopping board!
- 1 tablespoon apple cider vinegar (this cuts the sweetness perfectly)
- 1 teaspoon grated fresh ginger (fresh is key for that bright flavor!)
That’s everything! Simple, right? But trust me, when those ingredients combine with the high heat of the oven, it’s practically magic. Make sure your garlic is minced well so you don’t end up biting into huge chunks later—we want the flavor infused everywhere.
Preparation Steps for Oven Baked Chicken Drumsticks Recipe
Okay, we’re moving into the action phase! Before that honey garlic sauce even hits the pan, we need to set up our drumsticks for absolute crispiness success. This part is fast, but it’s where you earn your crispy skin badge right here in the oven. First thing, punch that oven temperature up to 425 degrees Fahrenheit. You need that heat ready to scorch the outside!
Next, grab a baking sheet and line it with foil—this saves your life later, trust me on the cleanup front. Then, place a wire rack over that foil. Having the chicken elevated is key so the hot air can circulate all the way around the bottom, preventing sogginess. If you want to get really fancy, I sometimes chill the seasoned chicken uncovered in the fridge for an hour after I season them—that helps draw out even more surface moisture. For a great resource on different ways to marinate before getting to this step, check out my thoughts on a simple drumstick marinade!
The Critical Step: Drying the Drumsticks
If you take away only one thing from this whole recipe, let it be this: dry chicken equals crispy skin. Period. Grab about a pound of paper towels and basically give every single drumstick a firm massage. I mean, press down until you feel like you’ve wrung all the surface moisture out of them. You are aiming for skin so dry it almost feels dusty. If you skip this, the baking powder won’t activate properly, and you end up with lackluster skin, even with all the high heat in the world. Don’t rush this part—it’s the foundation for our perfectly crunchy finish!
Cooking Instructions for Sticky Chicken Drumsticks Recipe
Okay, moment of truth! We have dried, seasoned chicken sitting on our rack, and the oven is roaring hot at 425°F. This process moves quickly once you get started, so have your sauce ingredients ready to roll. Everything is timed perfectly so the chicken skin is ready to absorb that beautiful glaze without burning to a crisp.
Toss those seasoned drumsticks onto the rack in one even layer—no crowding! We need space for the hot air to do its job. Pop them in for the first round: 25 minutes exactly. Resist the urge to check on them! We are rendering fat and building texture right now.
Making the Honey Garlic Glaze
While the chicken is rendering its fat happily in the oven, let’s whip up the flavor bomb! Grab a small saucepan. We’re combining the honey, soy sauce, water, all that minced garlic, the apple cider vinegar, and fresh ginger. Get this on medium heat and stir it until that honey completely melts into a liquid—it happens fast! Once it’s simmering nicely, drop the heat down to low and let it bubble gently for about 3 minutes. We want it *slightly* thickened, but remember, it’s going to get much stickier later in the oven. The apple cider vinegar is my little secret here; it keeps the glaze from tasting overwhelmingly sweet, giving it that beautiful savory edge.
Oh, and if you’re curious about other sticky sauces, I have my best homemade teriyaki sauce recipe bookmarked right next to this one for rotation nights!
Saucing and Final Caramelization
Twenty-five minutes are up! Pull that pan out—the chicken skin should already look tighter and a little browner. Now, using a pastry brush, paint about half of that beautiful honey garlic glaze all over every visible part of the drumsticks. Don’t be shy, but don’t drown them either! Stick them back in the oven for 10 more minutes. This sets the first layer.
When they come out that second time, brush on the remaining sauce. This double-dipping technique is what prevents burning! Now, back in they go for the final push: 5 to 10 minutes. You are looking for that internal temperature to hit 165°F for safety, but visually, you want that glaze to look deep amber, sticky, and just starting to bubble aggressively around the edges. That’s the sign they are ready for their 5-minute rest before you devour this batch of **Crispy Honey Garlic Chicken Drumsticks Oven Baked**!
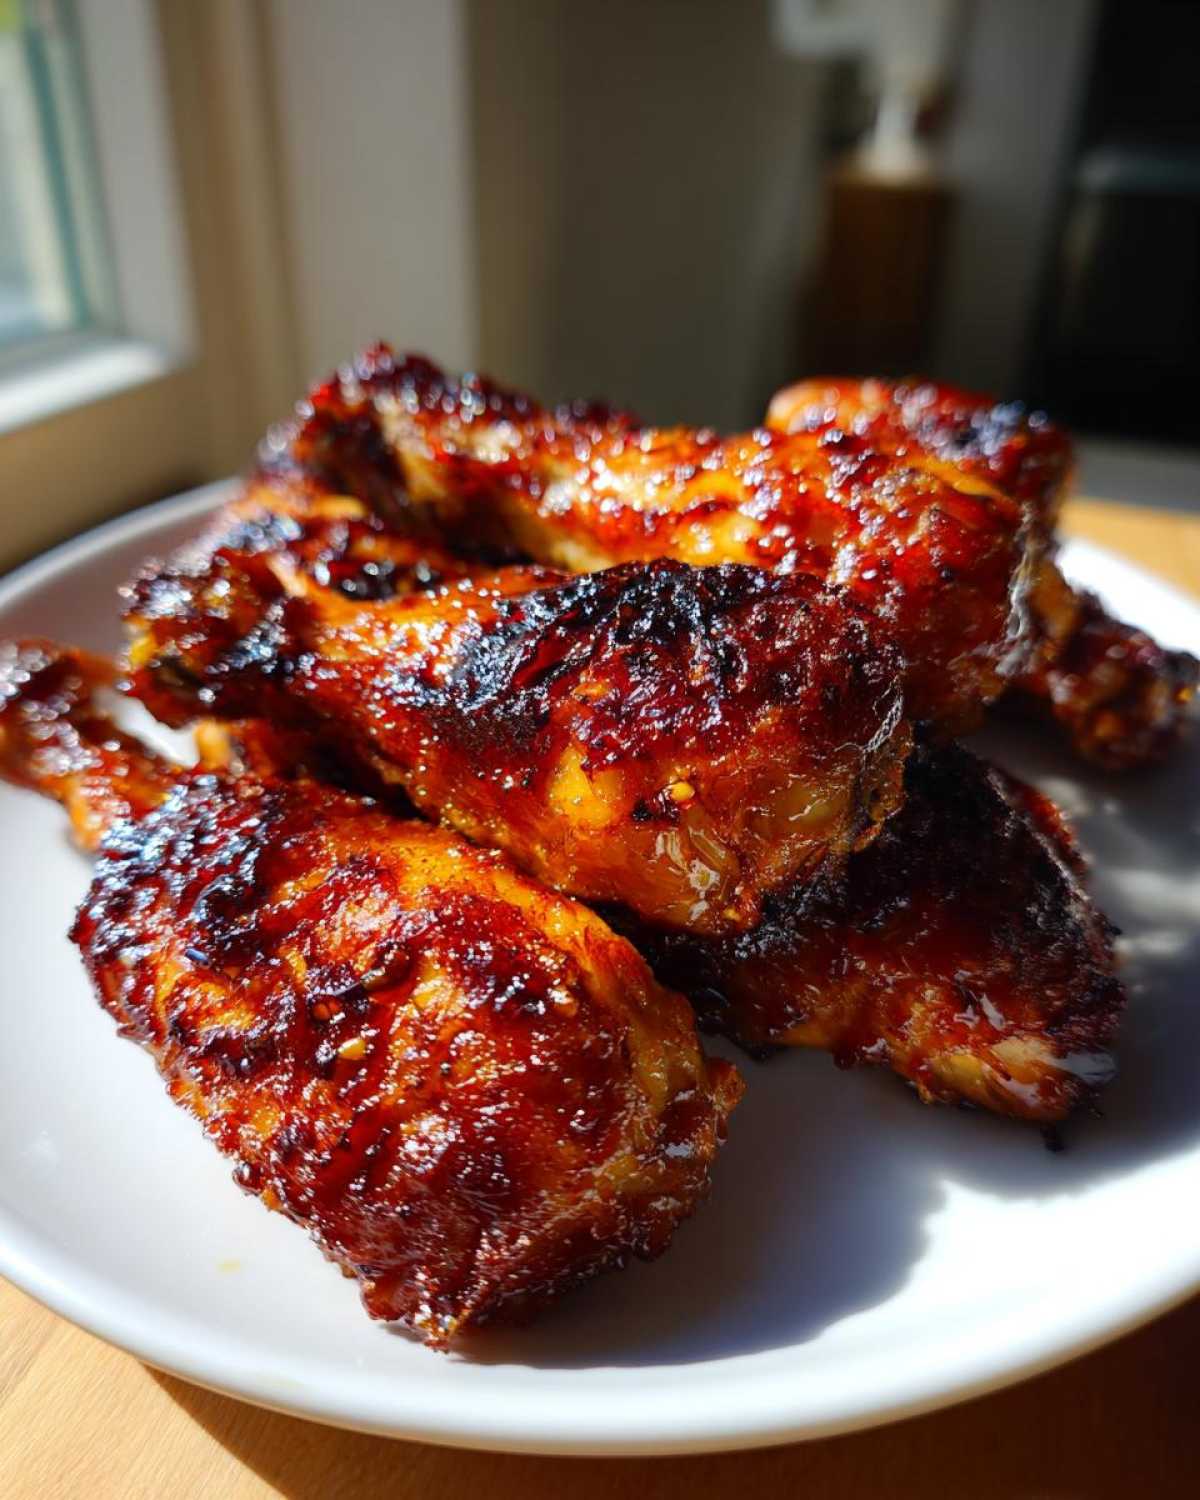
Tips for Success with Oven Roasted Drumsticks Tips
Even with the best recipe, sometimes things go sideways, right? Don’t panic if your chicken isn’t quite hitting that pristine, crispy mark. Usually, it comes down to one of two things: moisture retention or heat management. Remember, we want roasted, not steamed!
If your skin seems a little soft after that first bake, turn the heat up for the last 5 minutes to 450°F, but watch it like a hawk! That high blast can crisp up the skin quickly. If your glaze is looking dark brown way too early, take the pan out, quickly brush off any excess burning sauce, and finish baking with just the remaining sauce applied right at the end.
For anyone who struggles with racks sticking, I always recommend giving the rack a super light spray with non-stick cooking spray *before* you put the seasoned pieces on. It helps release them without tearing up that hard-earned crispy skin when you go to serve dinner. If you want to explore other ways to maximize flavor in your sides, check out this amazing guide on caramelized onions—they go great alongside this chicken!
Variations for Your Easy Honey Garlic Chicken
I absolutely love drumsticks—they are the perfect size and seem to crisp up easier than anything else—but hey, we are cooks, not robots! Sometimes you have thighs on hand, or maybe you just crave a little heat with your sweetness. Totally understandable!
This recipe is super flexible, which is what makes it such a fantastic go-to for my weekly rotation. If you swap out the drumsticks, the general steps stay the same, but you have to play around with heat absorption time. If you’re switching to chicken thighs, just know they are thicker and have more fat, so you’ll need to increase that initial baking time by about 5 to 10 minutes before you start brushing on the sauce. It gives the thigh skin time to render properly before we get sticky!
You can find loads of amazing ideas on handling thighs over at my post about braised chicken thighs, though remember this recipe is focused on the oven crisping method.
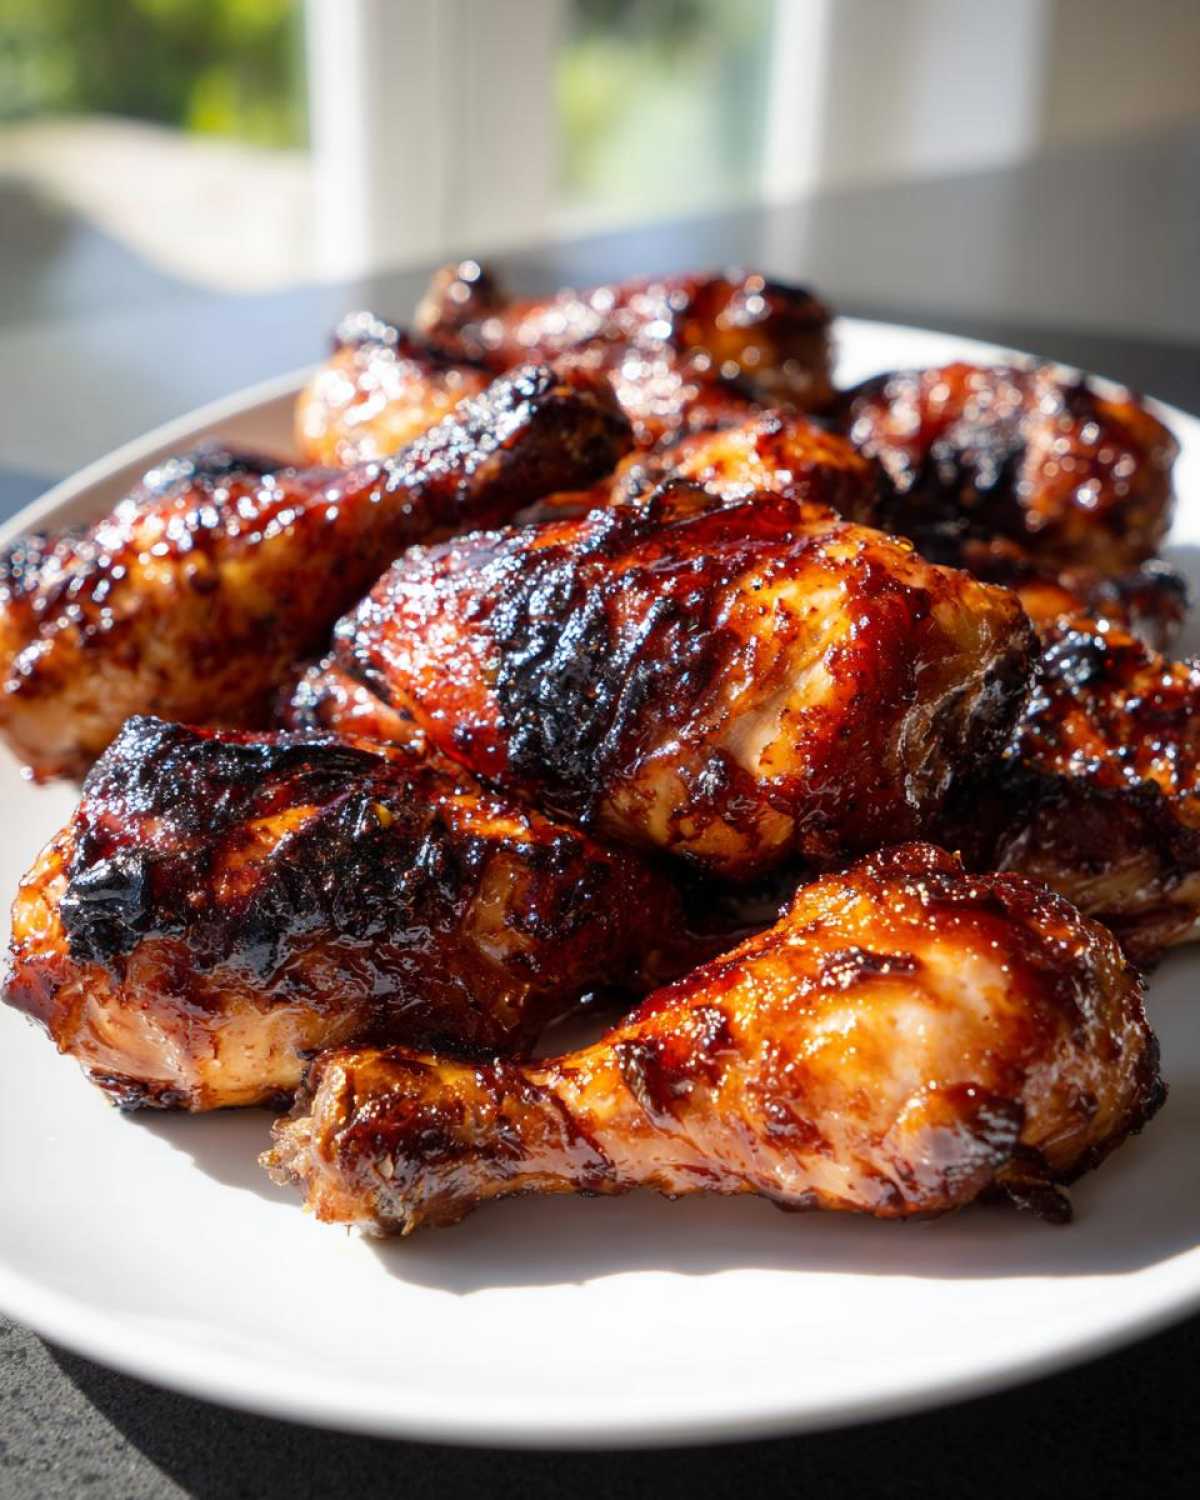
Now, let’s talk spice! If you find that classic honey garlic just a touch too easygoing for your palate, jazz it up! My favorite boost is adding about half a teaspoon of red pepper flakes right into the sauce mixture when you are simmering it on the stovetop. It gives you a lovely little warmth at the back of your throat that plays beautifully against the sweetness of the honey. You could even mince up a tiny bit of fresh chili for a brighter heat!
Another fun little twist I do sometimes, especially if I’m serving picky eaters who don’t like ginger, is swapping the teaspoon of fresh ginger for about a teaspoon of rice vinegar instead when making the sauce. It provides a slightly different acidic kick that brightens everything up. The beauty of a good **Crispy Honey Garlic Chicken Drumsticks Oven Baked** recipe is that you can test these small tweaks every time you make it until you find your absolute favorite version!
Serving Suggestions for Glazed Chicken Drumsticks for Dinner
Okay, so you’ve got this magnificent, sticky, crispy chicken coming out of the oven, and now you need something quick on the side to soak up all those glorious caramelized honey garlic juices. Since the drumsticks themselves are pretty rich and intense in flavor, I always look for sides that are simple, fresh, or absorb flavor well. We’re keeping it weeknight-friendly here—no need to complicate things!
My absolute first choice when I’m serving these glazed drumsticks is usually some perfectly steamed broccoli or green beans. Toss them quickly with a little salt, pepper, and maybe a tiny squeeze of lemon right before serving. The freshness of the green veggie just cuts through the sweetness of the glaze beautifully. It’s an easy win.
If I’m feeling like doing carbs for an extra satisfying dinner, I almost always default to rice. But plain white rice just feels boring next to this flavor bomb! I love making a batch of easy Spanish rice on the side. The slight tang and tomato base of that rice give you just the right contrast to the sweet-and-savory chicken. Plus, leftover Spanish rice next to the leftover chicken is an amazing lunch situation the next day.
For something super quick, just grab a bag of frozen edamame and steam it up! A little sprinkle of sea salt on the edamame ties it all together. Honestly, with chicken this flavorful, the side dish just needs to be dependable and not fight for attention. Three easy dishes, and dinner is served!
Storage and Reheating Instructions for Crispy Honey Garlic Chicken Drumsticks Oven Baked
Nobody likes throwing away perfectly good chicken, even if the glaze has gotten a little softer overnight! If you have leftovers from your amazing batch of **Crispy Honey Garlic Chicken Drumsticks Oven Baked**, just pop them into an airtight container. They keep beautifully in the fridge for about three to four days. Now, about reheating—please, please, *please* skip the microwave if you want any crunch left!
The microwave turns all that beautiful texture back into steam city. Instead, toss the drumsticks onto a baking sheet (you don’t even need the rack this time) and bake them at 350°F for about 10 to 12 minutes. That little bit of dry heat crisps the skin right back up and warms the honey garlic glaze just perfectly. If you have a toaster oven, that works, too, for just a couple of pieces!
Frequently Asked Questions About Oven Baked Chicken Drumsticks
I know you’ve probably got your pan ready to go, but just in case you have one last tiny question floating around about your **Oven Baked Chicken Drumsticks**, I collected the ones I hear most often! We want you to feel super confident when you start baking these beauties.
Can I use chicken thighs instead of drumsticks in this recipe?
Oh yes, you totally can! If you’re looking for a great chicken thighs alternative, the process works exactly the same way—pat them dry, use the baking powder seasoning, and set them on the rack. Remember, thighs have more fat and are thicker bones, so they generally take longer to cook through. I usually add an extra 5 to 10 minutes to that initial bake time to let the skin render before I start brushing on the glaze. Keep checking that internal temperature (165°F) before you decide they’re done!
How do I stop the honey glaze from burning?
This is the most important question when making any **Sticky Chicken Drumsticks Recipe**! The sugar in that honey is beautiful, but it burns fast under high heat. The secret is absolutely the staggered application. You bake the chicken naked (seasoned only) for the first 25 minutes. That builds the foundation of crispiness. Then, you brush on half the glaze and bake for 10 minutes. The final brush of sauce goes on for only the very last 5 to 10 minutes. If you put all that sticky glaze on at once, you end up with black, bitter chicken instead of a perfect **Glazed Chicken Drumsticks for Dinner**! It’s all about timing that caramelization.
What is the best way to ensure maximum crispy skin oven results?
If you want that ultimate **Crispy Chicken Skin Oven** finish, there are two golden rules you cannot skip when making your **Best Crispy Drumstick Recipe**. First: you must pat the skin bone-dry with paper towels until they feel papery. Second: you must toss them thoroughly with the baking powder right before they go into that hot oven. The combination of dryness and the rising agent in the baking powder is what guarantees you are roasting them beautifully instead of steaming them in their own juices. Trust me, follow those two steps, and you won’t be disappointed!
If you want more general cooking confidence, feel free to browse all my favorite ways to make dinner time easier over at my main dinner category page!
PrintCrispy Honey Garlic Chicken Drumsticks Oven Baked
Follow this simple recipe to bake chicken drumsticks in the oven until the skin is crispy and coated in a sweet and savory honey garlic glaze.
- Prep Time: 10 min
- Cook Time: 45 min
- Total Time: 55 min
- Yield: 4 servings
- Category: Dinner
- Method: Baking
- Cuisine: American
- Diet: Low Fat
Ingredients
- 2 lbs chicken drumsticks, patted very dry
- 1 tablespoon baking powder (aluminum-free for best results)
- 1 teaspoon salt
- 1/2 teaspoon black pepper
- 1/4 cup honey
- 1/4 cup soy sauce
- 2 tablespoons water
- 4 cloves garlic, minced
- 1 tablespoon apple cider vinegar
- 1 teaspoon grated fresh ginger
Instructions
- Preheat your oven to 425 degrees Fahrenheit (220 degrees Celsius). Line a baking sheet with foil and place a wire rack on top of the foil.
- In a medium bowl, toss the very dry drumsticks with baking powder, salt, and pepper until evenly coated. This step helps dry the skin for crispiness.
- Arrange the seasoned drumsticks on the wire rack in a single layer, ensuring space between each piece.
- Bake for 25 minutes.
- While the chicken bakes, prepare the sauce: In a small saucepan, combine honey, soy sauce, water, minced garlic, apple cider vinegar, and ginger. Bring the mixture to a simmer over medium heat, stirring until the honey dissolves. Reduce heat to low and cook for 3 minutes until slightly thickened. Remove from heat.
- After the initial 25 minutes of baking, brush half of the honey garlic sauce over the drumsticks.
- Return the chicken to the oven and bake for another 10 minutes.
- Remove the chicken, brush with the remaining sauce, and bake for a final 5 to 10 minutes, or until the internal temperature reaches 165 degrees Fahrenheit (74 degrees Celsius) and the glaze is sticky and caramelized.
- Let the chicken rest for 5 minutes before serving.
Notes
- Patting the chicken skin completely dry before seasoning is the most important step for achieving crispy skin in the oven.
- If you prefer a thicker glaze, simmer the sauce longer in step 5 until it coats the back of a spoon.
- You can substitute chicken thighs for drumsticks; increase the initial baking time by 5 to 10 minutes.
Nutrition
- Serving Size: 2 drumsticks
- Calories: 350
- Sugar: 18
- Sodium: 650
- Fat: 15
- Saturated Fat: 4
- Unsaturated Fat: 11
- Trans Fat: 0
- Carbohydrates: 20
- Fiber: 0
- Protein: 32
- Cholesterol: 110