

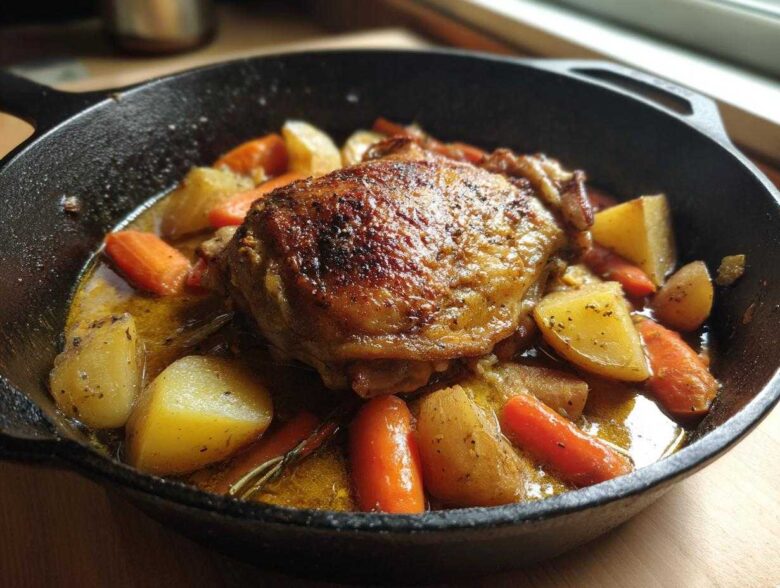
Okay, listen up! If you’ve ever given up on making truly amazing braised chicken thighs because you thought you had to choose between tender meat and crispy skin—that ends today. Seriously, I used to think it was witchcraft. But I finally cracked the code, and it’s unbelievably simple!
This recipe for One-Pot Crispy Skin Braised Chicken Thighs with Root Vegetables is the answer to all our weeknight prayers. It’s hearty, it’s packed with flavor, and guess what? Clean up is a breeze because everything cooks together in one spot. You need to try this, trust me. I’ll show you exactly how to get that fall-off-the-bone tenderness while keeping that beautiful, crackly skin intact. This is the one you’re going to save!
If you want to know more about what goes on behind the scenes here at the kitchen counter, you can always poke around the About Us page!
Why This One-Pot Crispy Skin Braised Chicken Thighs Recipe Works (E-E-A-T)
So, why does this recipe feel a little more special than your average chicken dish? It all comes down to respecting the thigh. Bone-in, skin-on thighs are just better for braising, hands down. The bone adds flavor right into the meat while it cooks, and the skin holds onto all that fat you render out—which is pure liquid gold for flavor later!
This method ensures you get that perfect comfort food chicken dinner vibe. It’s rustic, it smells incredible, and it’s way easier than it tastes.
Achieving Tender Chicken Thighs Every Time
Braising is a slow, gentle cooking method. We’re using just enough liquid to protect the meat, but not so much that it boils into mush. The moist heat in the oven breaks down all those tough fibers around the bone. That’s how you get that beautiful, almost fall off the bone chicken texture without drying out the meat at all. It’s magic, but it’s really just science!
Keeping the Skin Crispy During Braised Chicken Thighs Cooking
This is the part everyone worries about, right? Soggy braised chicken skin is a sadness we don’t need in our lives. The secret is the initial sear! We crank the heat up high in the Dutch oven to render out most of that fat and make the skin super golden brown and crisp before the moisture comes in.
Then, when we put the vegetables and liquid in, we nestle the chicken right on top, skin-side up. As long as that skin stays above the liquid line while it braises, it steams less and stays crunchy. It’s a simple trick, but it completely changes the game for braised chicken thighs.
Gathering Ingredients for Your One-Pot Braised Chicken Thighs
Okay, let’s talk about piling everything into one pot! The beauty of this recipe is that it’s a complete meal right out of the oven. We’ve got the deeply flavored chicken sitting on a bed of veggies that soak up all those wonderful savory juices. This totally nails the ‘weeknight chicken dinner idea‘ request because you’re not hunting down side dishes!
You really just need the staples for this to sing, but precision on a few key items makes all the difference for those perfectly juicy chicken thighs with sauce.
Essential Components for Juicy Chicken Thighs with Sauce
- 6 bone-in, skin-on chicken thighs (Don’t skimp here, the bone matters!)
- 1 tablespoon olive oil
- 1 teaspoon salt and 1/2 teaspoon black pepper (You need to season them heavily!)
- 1 large chopped onion
- 3 carrots, peeled and cut into 1-inch pieces (Keep them chunky!)
- 1 pound small small potatoes, halved or quartered (New potatoes work great if you have them.)
- 3 cloves minced garlic (Don’t even think about using the jarred stuff if you can chop these fresh—it makes the sauce aroma pop!)
- 1 cup chicken broth
- 1/2 cup dry white wine (or just use extra broth if you’re keeping it simple)
- 1 tablespoon Dijon mustard
- 1 teaspoon dried thyme
Step-by-Step Instructions for Perfect Braised Chicken Thighs
Alright, let’s get cooking! This is where the real payoff happens, and I promise you, it flows so easily. If you follow these steps, you’ll end up with the most amazing one pot chicken thighs that practically melt in your mouth. We start with a hot pan for flavor, then we build that beautiful sauce layer by layer.
Searing the Chicken for Flavor and Crispy Skin
Step one is non-negotiable: grab some paper towels and pat those chicken thighs bone-dry. I mean it—bone-dry! Moisture is the enemy of crispiness. Once they look thirsty, season them generously with that salt and pepper.
Heat your olive oil in that big Dutch oven over medium-high heat until it shimmers. Lay the thighs in skin-side down. You want to hear a good sizzle! Let them sear undisturbed for about six to eight minutes until that skin is deep golden brown. Don’t touch them! Once they’re golden, pull them out and set them on a plate. Leave all that glorious rendered fat right in the pot—that’s our flavor base!
Building the Savory Braising Liquid for Braised Chicken Thighs
Now drop that chopped onion into the hot fat and let it soften up for four minutes. Toss in your carrots and potatoes and stir them around for another five minutes. You want them cooking a little bit in that fat to start releasing their flavor.
Next, quickly stir in that minced garlic—it only takes about a minute until you can smell it—then whisk together your broth, wine, Dijon, and thyme in a measuring cup. Pour this straight into the pot. This is my favorite part: grab a wooden spoon and scrape up all those browned, caramelized bits stuck to the bottom. That’s the fond, and it’s jam-packed with flavor for your final sauce. That’s what makes these savory chicken recipes taste like they simmered all day!
The Braising Process in the Dutch Oven
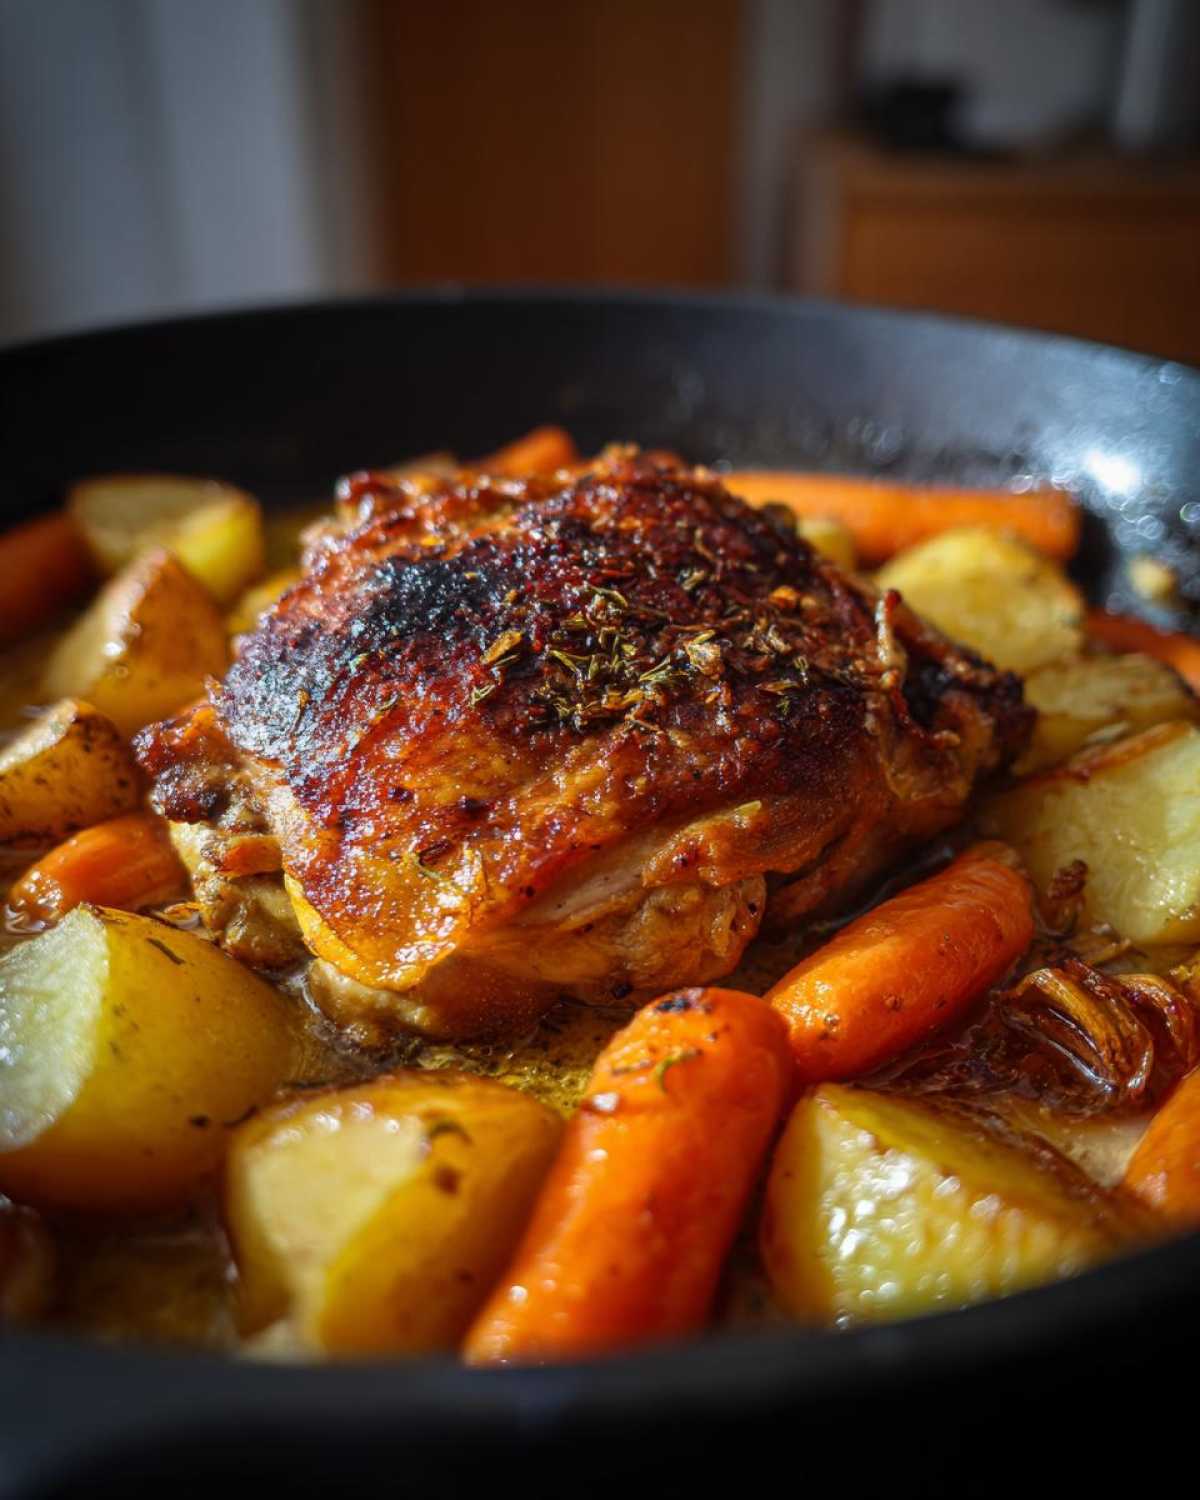
Now, gently nestle those seared chicken thighs back into the pot, making sure they are skin-side up. We want that skin *above* the liquid as much as possible so it stays crispy! Bring everything up to a gentle simmer right on the stovetop first. Once it’s bubbling gently, slap that tight lid on and move the whole thing into a preheated oven set to 350°F (175°C).
Let them braise happily for 40 to 50 minutes. After that time, if the skin still looks a little pale, pop the lid off for the last 10 minutes to let it crisp up a bit more. Just watch closely so it doesn’t burn!
If you have any questions about the timing or need help with a substitution, feel free to reach out through the Contact page!
Expert Tips for Making the Best Braised Chicken Thighs
You’ve seen the steps, but let me give you the little insider secrets that take these braised chicken thighs from great to absolutely unforgettable. Honestly, technique matters way more than fancy ingredients when you’re aiming for juicy meat and crispy edges. You can do this with basic spices, but if you skip these tricks, you’re missing out on the full experience!
Using that tough, heavy Dutch oven is honestly ideal because it heats so evenly, which is key for consistent searing and slow cooking. But don’t stress if you don’t own one! Any oven-safe skillet that has a tight-fitting lid will work perfectly for these Dutch oven chicken recipes. Just make sure that lid fits snugly so none of that precious steam escapes!
Ingredient Notes and Substitutions
I can’t say this enough: Dry the skin! Grab another layer of paper towels and press down firmly one last time right before they hit the hot oil. If the skin is damp, you get a sad, pale sizzle instead of that gorgeous, loud sear we want.
If you are aiming for a truly deep, moody sauce—something that tastes like it cooked for two days instead of one—give this a try: Add one big tablespoon of tomato paste right after the garlic starts smelling fragrant, and cook it for about a minute until it darkens up. It adds incredible richness!
This recipe is built for low-fuss cooking, making it fantastic for chicken recipes for beginners. The main thing is getting the sear nailed down. Stick to bone-in, skin-on, and you’re already winning the tender chicken thighs game!
Serving Suggestions for Your Braised Chicken Thighs Dinner
This is officially a whole meal in a pot, thanks to those yummy potatoes and carrots soaking up all that Dijon-thyme broth. But you know what? I always need something extra to sop up every last delicious drop of that sauce. It’s a rule!
My absolute favorite thing to serve alongside these braised chicken thighs is a big loaf of crusty, rustic bread. You want something sturdy enough to stand up to the sauce without immediately turning to mush. Think sourdough or a great French baguette—perfect for dipping!
If you feel like you need a little bit of green to cut through the richness, don’t get fancy. A simple side salad dressed with just lemon juice, olive oil, salt, and pepper is perfect. It keeps the focus right where it belongs: on that incredible, comfort food chicken dinner right out of the pot!
Storage and Reheating Instructions for Leftover Braised Chicken Thighs
Oh, leftovers! Sometimes I think these braised chicken thighs taste even better the next day. When you’re lucky enough to have some left over from this amazing one pot chicken dinner, you want to handle them right so they don’t lose that tender, juicy texture.
First things first: let them cool down a bit, but don’t leave them sitting on the counter for more than an hour or two. Transfer the chicken and the vegetables into an airtight container. That extra broth and sauce are great because they help keep everything moist! They’ll keep happily in the fridge for about three to four days. Make sure that container is sealed tight so they don’t pick up any funky smells from the fridge.
Reheating is where you need a little strategy if you want to respect that lovely skin we worked so hard to crisp up! Pouring the sauce over the chicken and reheating everything together in a covered pot on the stove—low and slow—will keep the meat moist. That works great for the vegetables too.
Now, if you absolutely must have crispy skin back, don’t crank the microwave! That’s a recipe for rubbery poultry, and nobody wants that. Instead, reheat the chicken and veggies in a little bit of that sauce in an oven-safe dish at about 325°F (160°C) until warmed through. Then, for the last five minutes before serving, pull them out, brush off most of that wet sauce from the skin, and pop them under the broiler for sixty seconds. Watch them like a hawk—broilers are fast! This gives you a quick blast of heat to bring the crispiness back just in time for your second helping of these fantastic, easy chicken thigh recipes.
Frequently Asked Questions About Tender Chicken Thighs
It’s totally normal to have questions when trying a new technique, especially when you’re trying to balance crispy skin with tender meat! Here are the things folks ask me most often when they’re whipping up these braised chicken thighs. These are usually the final little hurdles before everyone becomes a chicken thigh master!
Can I make this recipe with skinless chicken thighs?
You absolutely can, but be warned: the result will be different! If you use skinless, you lose that fantastic layer of fat that renders out to start your whole sauce, and you definitely won’t get any skin crispiness, obviously. If you have to use skinless, make sure you add an extra tablespoon of olive oil or even a pat of butter when you heat the pot for searing. Skip the initial searing step, since there’s no crispy skin to form, and just start by cooking your onions in the added fat. You’ll still end up with tender chicken thighs, just not as rich or deeply flavorful as the skin-on version.
How long do I cook braised chicken thighs if I use a slow cooker?
The slow cooker is a superstar for making chicken truly ‘fall off the bone,’ so yes, you can totally adapt this for those lazy days! For the very best flavor, I highly recommend you still take the time to sear the skin on the stovetop first, just like in the main recipe—it makes a huge difference!
Once you’ve developed the fond and maybe cooked your veggies a bit, just pour everything into your slow cooker. Cook on Low for five to six hours, or if you’re rushed, High for about three hours. You won’t get the crispy skin, but you will get spectacularly juicy chicken thighs!
How do I know when my chicken thighs are done and safe to eat?
The visual and touch tests work great here, just like with any poultry. The biggest sign is that the meat separates easily from the bone when you wiggle it a bit with tongs. That means the connective tissue has broken down perfectly, giving you that lovely texture associated with easy chicken thigh recipes.
But honestly, the only guaranteed way is with a thermometer. You’re looking for an internal temperature of 175°F to 180°F (around 80°C to 82°C) in the thickest part of the thigh (away from the bone). Since thighs have a higher fat content and more connective tissue than breasts, cooking them slightly higher than the standard 165°F just makes them more tender and juicy!
Please remember that all times and temperatures listed here are estimates, and you can always check out our full disclaimer for more details on cooking safety.
Nutritional Estimates for These Braised Chicken Thighs
Now, I have to give you the official numbers, although you know I bake more by smell and feel than by counting grams! Anytime you’re working with a rich sauce like the one we made for these braised chicken thighs, the exact nutritional breakdown is going to shift based on how much sauce you spoon over your vegetables versus leaving it in the pot.
What I can tell you is that because we are using bone-in, skin-on thighs and including the potatoes and carrots, this is a balanced, whole-food meal. These estimates are based on serving one thigh and a good portion of veggies, but remember these are just guidelines!
Here’s what my charts usually churn out for this savory chicken recipe:
- Serving Size: 1 thigh and vegetables
- Calories: 450
- Sugar: 5g (mostly from the carrots and Dijon, not refined sugar!)
- Protein: 35g (That bone-in meat really packs a punch!)
- Fat: 25g (This includes all the healthy rendered fat from the skin.)
- Carbohydrates: 25g
We’re getting a great balance here for a fantastic comfort food chicken dinner. If you are trying to keep the fat lower, you can always skim some of the fat off the top of the sauce after it cools down in the fridge before reheating. Every cook has their own way of handling leftovers!
As always, for the really intense breakdown, you can check out our full privacy policy details, but feel good knowing this meal fuels you up right!
Share Your Experience Making These Braised Chicken Thighs
Now that you’ve mastered searing and braising, I absolutely need to know how your braised chicken thighs turned out! Seriously, don’t leave me hanging!
Did that skin crisp up like shattered glass? Were the vegetables swimming happily in that savory broth? Drop a comment below and give me all the details, whether you’re a seasoned cook or this was your first big one pot chicken thighs adventure. I love seeing your kitchen successes! Don’t forget to leave a quick star rating for the recipe right near the top so others can see how much you loved this easy, comforting meal.
And if you snapped a photo while you were enjoying your gorgeous dinner, tag me over on social media! Seeing those plates piled high with tender meat always brightens my day. Happy cooking, and I hope this becomes a staple in your rotation just like it is in mine!
By the way, if you want to know about how we use cookies on this site, you can read all about it on our official cookie policy page!
PrintOne-Pot Crispy Skin Braised Chicken Thighs with Root Vegetables

Make tender, juicy chicken thighs with crispy skin in one pot. This recipe uses root vegetables for a complete, comforting weeknight dinner.
- Prep Time: 15 min
- Cook Time: 60 min
- Total Time: 75 min
- Yield: 6 servings
- Category: Dinner
- Method: Braising
- Cuisine: American
- Diet: Low Fat
Ingredients
- 6 bone-in, skin-on chicken thighs
- 1 tablespoon olive oil
- 1 teaspoon salt
- 1/2 teaspoon black pepper
- 1 large onion, chopped
- 3 carrots, peeled and cut into 1-inch pieces
- 1 pound small potatoes, halved or quartered
- 3 cloves garlic, minced
- 1 cup chicken broth
- 1/2 cup dry white wine or extra broth
- 1 tablespoon Dijon mustard
- 1 teaspoon dried thyme
Instructions
- Pat the chicken thighs completely dry with paper towels. Season both sides with salt and pepper.
- Heat the olive oil in a large Dutch oven over medium-high heat. Place the chicken thighs skin-side down in the hot oil. Sear for 6 to 8 minutes until the skin is deep golden brown and crispy. Remove the chicken and set aside, leaving the rendered fat in the pot.
- Reduce the heat to medium. Add the chopped onion and cook for 4 minutes until softened. Add the carrots and potatoes and cook for 5 minutes, stirring occasionally.
- Stir in the minced garlic and cook for 1 minute until fragrant.
- Whisk together the chicken broth, white wine (or extra broth), Dijon mustard, and thyme. Pour this liquid into the pot, scraping up any browned bits from the bottom.
- Return the seared chicken thighs to the pot, nestling them skin-side up among the vegetables. The skin should remain above the liquid level as much as possible.
- Bring the liquid to a simmer on the stovetop. Cover the Dutch oven tightly with a lid.
- Transfer the Dutch oven to a preheated oven at 350°F (175°C). Braise for 40 to 50 minutes, or until the chicken is cooked through and tender.
- Remove the lid for the last 10 minutes of cooking if you want to crisp the skin slightly more, being careful not to burn it.
- Serve the chicken immediately over the vegetables with the pan sauce spooned over top.
Notes
- Drying the skin thoroughly before searing is key to achieving crispiness.
- If you do not have a Dutch oven, use an oven-safe skillet with a tight-fitting lid.
- For a richer sauce, add 1 tablespoon of tomato paste when cooking the onions.
Nutrition
- Serving Size: 1 thigh and vegetables
- Calories: 450
- Sugar: 5
- Sodium: 450
- Fat: 25
- Saturated Fat: 7
- Unsaturated Fat: 18
- Trans Fat: 0
- Carbohydrates: 25
- Fiber: 5
- Protein: 35
- Cholesterol: 120