

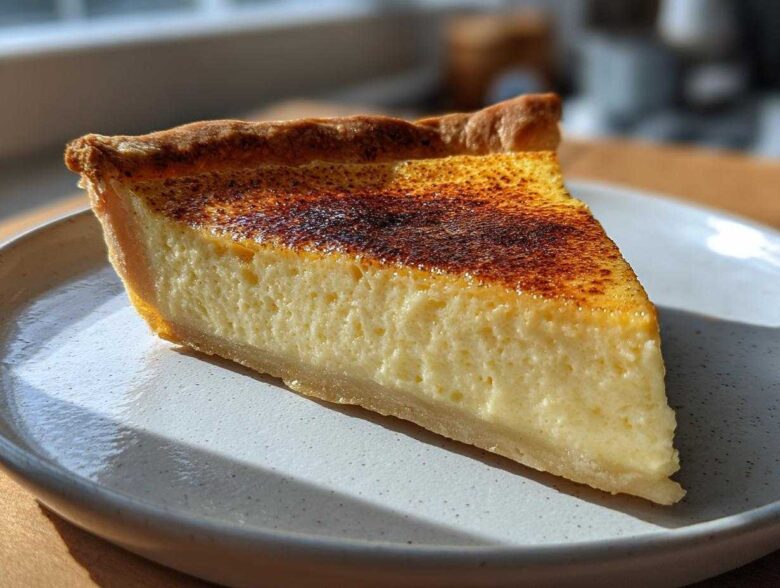
Oh, let me tell you something: when the air gets crisp or when I’m thinking about those perfect, cozy winter holiday desserts, nothing—and I mean nothing—beats a slice of genuine, old-fashioned comfort food pies. Forget fussy layers! I’m talking about the smooth, simple magic held within a perfect **custard pie**. This isn’t just any recipe; this is the recipe that finally gave me that silky, melt-in-your-mouth texture I always chased. I swear, every Christmas Eve, this pie sets up perfectly, and the smell of vanilla and baked egg fills the whole house. If you’ve struggled with rubbery fillings or weeping custard, trust me, you’re in the right place. I figured out the secret to that unbelievably creamy custard pie filling, and I’m sharing it all with you today!
You can check out my journey and see a little more about what makes this whole site tick over here: we love sharing our kitchen stories. But for now, let’s make some memories in a pie dish!
Why This Classic Custard Pie Recipe Stands Out
What makes my approach to this classic custard pie recipe different? Well, most recipes are good, but mine hits that specific nostalgia note. It’s the texture, honestly. You want filling that feels like velvet—silky, soft, and completely decadent. This is pure, unadulterated American comfort food pies at its best, relying on simple ingredients treated with respect. We aren’t hiding anything heavy here; we’re celebrating the pure taste of vanilla and that gentle kiss of nutmeg that blooms as it bakes.
Achieving the Perfect Creamy Custard Pie Filling
The difference between a good custard and a great one is all about how you handle the whisk! We are going for the smoothest texture possible. My secret is adding the milk in slowly after the eggs and sugar are just combined, which stops those annoying bubbles from forming. Bubbles mean cracks, and cracks mean nobody gets the perfect slice! Remember, keeping things gentle prevents curdling and locks in that luxurious, creamy custard pie filling you dream about.
Ingredients for Your Old Fashioned Custard Pie
I know you’re impatient to get this into the oven, but pause for just a second because the quality of these few ingredients makes all the difference in your old fashioned custard pie. This recipe is beautifully honest—it doesn’t hide behind a mountain of extracts or flavorings! For that fantastic, rich base, we absolutely need large eggs and good quality whole milk. Don’t even think about using low-fat milk here; we need that fat content for the richness that defines a true egg custard pie from scratch.
Ingredient Notes and Substitutions for Custard Pie
Regarding the crust, I often use a store-bought 9-inch shell to shave off time, especially if I’m busy preparing other holiday goodies. If you make your own, make sure it’s unbaked! The melted butter is a little trick I picked up; brushing it lightly over the top of the wet custard just before it goes into the oven helps create that stunning surface for our eventual nutmeg topping pie. It also seals in a tiny bit of extra richness. Every single measurement here, down to the quarter teaspoon of salt, is there to balance the sweetness, so weigh those spices carefully!
Step-by-Step Instructions for Traditional Baked Pie
Alright, this is where the magic happens. Making a wonderful traditional baked pie like this requires gentle hands and a little attention to timing, but it’s really straightforward once you know the rhythm! First things first, get your oven shouting hot at 350 degrees Fahrenheit. I always take my unbaked pie crust and just settle it onto a regular baking sheet. Honestly, this small step saves so much cleanup if the custard decides to be temperamental, so don’t skip it!
Preparing the Vanilla Custard Pie Base
In a medium bowl, don’t go crazy beating the eggs! You just want to gently whisk those four large eggs until they are pale yellow and slightly incorporated. Then, we add the sugar, the salt, the vanilla extract, and that essential touch of nutmeg. Whisk this just enough so everything is combined—we are aiming to introduce minimal air here, which keeps our final vanilla custard pie smooth and crack-free. Next, take your two cups of whole milk and slowly, I mean slowly, whisk it into the egg mixture until everything looks uniform and lovely. If you pour the milk in too fast, you’ll get those troublesome bubbles.
Baking the Custard Pie and Checking for Doneness
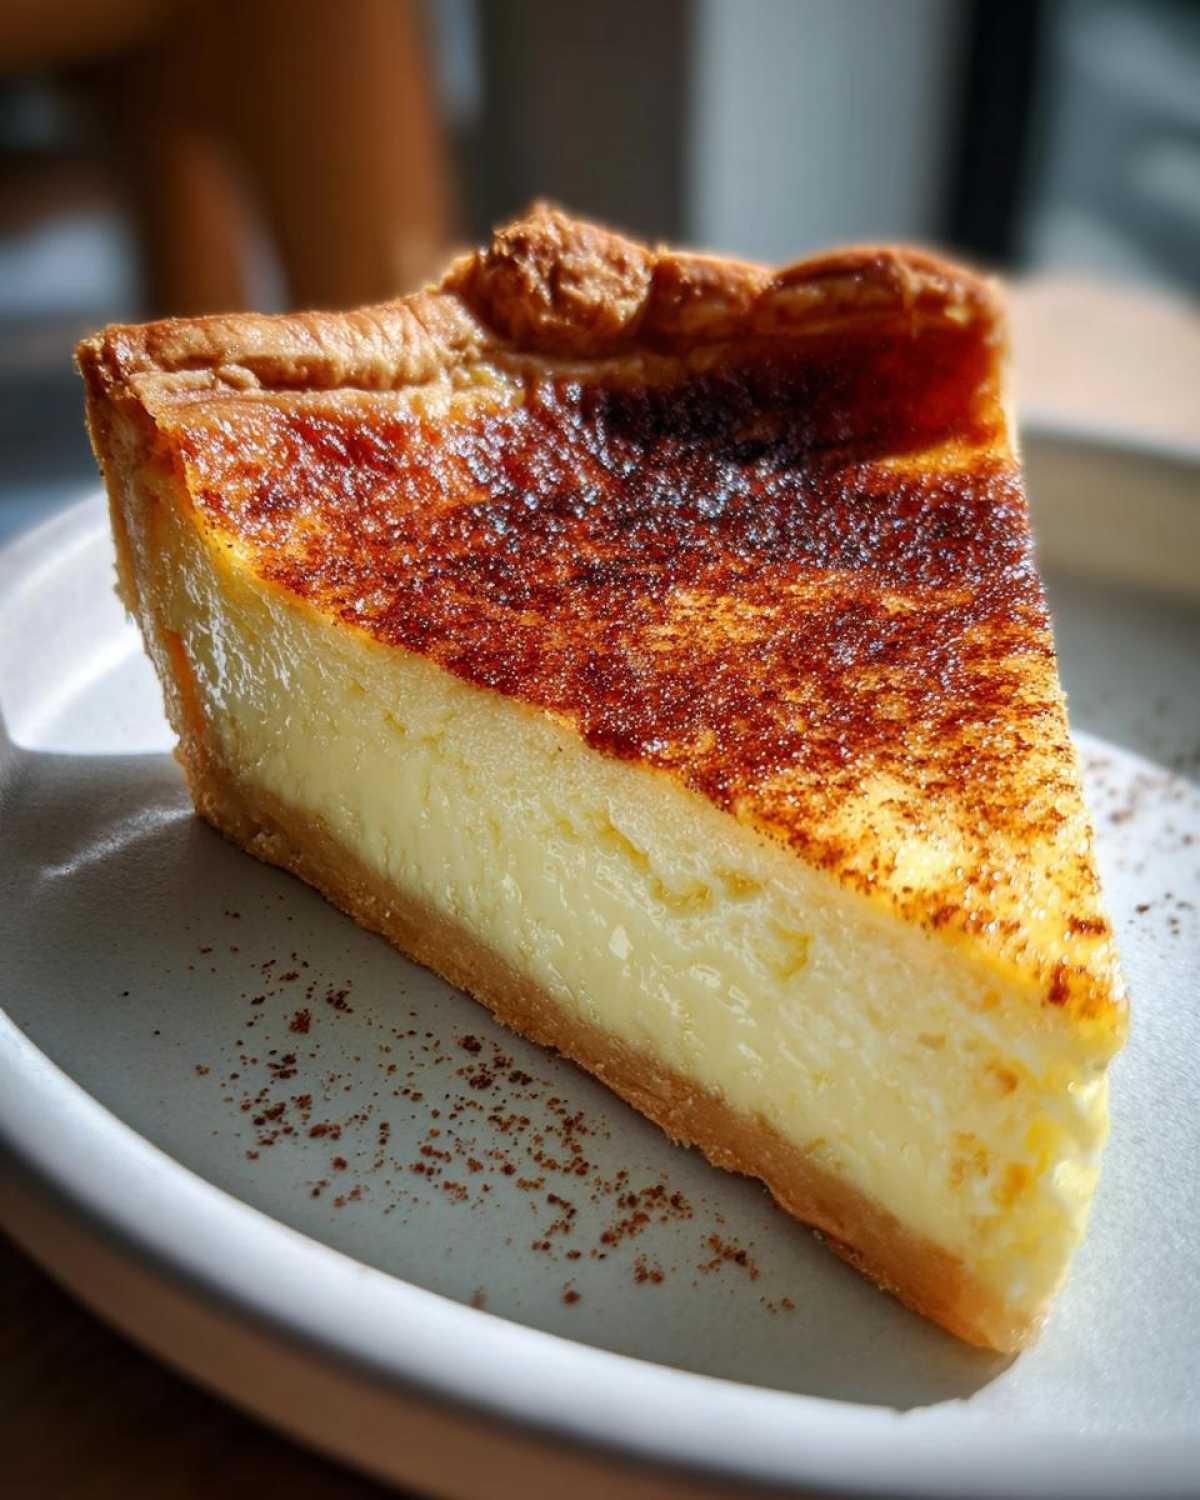
Now, delicately pour that smooth custard right into your waiting pie shell. This is my favorite small trick for presentation: take that tablespoon of melted butter and just brush it lightly right over the top of the raw filling. It creates this beautiful sheen! Pop the whole assembly into the preheated oven for about 45 to 55 minutes. Watch the edges of the crust. If they start looking a little too browned halfway through, just grab a strip of foil and loosely tent them over the edges—that keeps them protected while the center finishes baking. You know it’s done when you insert a thin knife near the center and it comes out clean. I know recipes say “clean,” but don’t overbake! If the center has just the tiniest, almost imperceptible jiggle left—like thick gelatin—it’s perfect. It will firm up completely as it cools down. Trust me on this jiggle test!
Tips for the Best Homemade Custard Pie
We’ve nailed the core recipe, but like anything worth doing, there are a few little secrets that take this from a good easy homemade custard pie to an absolutely legendary one. You want this to be perfect, right? Especially since this is one of those wonderful simple pie recipes that people expect perfection from because it has so few elements!
So, here’s my top piece of advice for getting that professional, impossibly smooth look. Before you even think about pouring the final custard mixture into the crust, grab a fine-mesh sieve. Yes, a sieve! Pour the entire liquid mixture through it first. This is genius for catching any tiny bits of undissolved sugar or small air bubbles that might have snuck in during whisking. It’s one of those extra steps that shows you care, and boy, does it pay off in texture.
Also, remember that little dab of melted butter we brushed on top? That’s part of what helps give this pie its signature look. It creates a barrier that essentially nurtures the nutmeg when it starts to bake. If you’re looking for ways to keep things speedy, don’t feel guilty about using high-quality store-bought crust. I do it all the time! Just make sure you’re using whole milk—that’s the one area where you just cannot compromise if you want the richest result.
If you ever need to quickly check out some of my general guidelines or kitchen opinions, here’s a link where I lay out the ground rules: Check out my kitchen philosophy here. It’s all about enjoying the process!
Serving and Storing Your Custard Pie
Oh, this is maybe the hardest part! When the pie comes out of the oven, you are going to want to cut into it immediately. Don’t do it! You absolutely must let this **custard pie** cool completely on a wire rack. If you slice it warm, that creamy filling will just weep everywhere, and you’ll end up with a soupy mess instead of those beautiful, clean wedges you deserve.
I usually let mine sit on the counter for about two hours until it’s just warm to the touch, but honestly, it tastes best when it’s thoroughly chilled. Serving it straight from the fridge is perfection, especially on a cold night when you want that cool, smooth contrast to the warm spices! Store any leftovers tightly covered in the refrigerator. It keeps wonderfully for about three to four days, and I promise you, the texture stays just as unbelievably silky!
Frequently Asked Questions About Custard Pie
I always get questions when I post pictures of this pie online, especially around the holidays! People want the secrets to that perfect smooth texture. Here are some of the things folks ask me most often about making this gorgeous custard pie.
Can I use evaporated milk instead of whole milk in this custard pie?
You certainly can, and I know some older Southern style custard pie recipes use it! You’ll need to reduce it correctly, usually by thinning it with water according to the can directions, but I have to be honest: the resulting pie will definitely be denser. If you are chasing that ultimate, light, buttery, creamy custard pie filling texture, stick with the whole milk. It just makes a world of difference in the way the slice holds together!
How do I prevent my egg custard pie from cracking?
Oh, the dreaded crack! This is usually caused by one of two things—either you whisked too much air into the mixture while combining the eggs and milk (remember, keep it gentle!), or you simply overbaked it. A custard is done when it sets but still has that tiny bit of wobble in the very center; it needs to finish cooking gently as it cools outside the heat. Also, making sure you start with room temperature eggs helps them integrate smoother, which is a big win for avoiding cracks on your beautiful egg custard pie from scratch.
If you have other burning questions about specific flavors—maybe you want to turn this into a cinnamon custard pie variation—feel free to drop me a line! You can always reach out right here: Send me a message through my contact page.
Nutritional Estimate for This Custard Pie
Now, I know when we’re talking about true, homemade comfort food pies, we aren’t usually sitting here counting every calorie, right? We’re focused on the taste and the love baked in! However, since many of you have asked about the general breakdown of this classic dessert, I pulled the figures for you. This is based on standard recipe amounts and yields 8 good-sized slices.
Please keep in mind these are just estimates, as the size of your eggs or the brand of crust you use can change things slightly! I always want to be up front about that, so you can read my full policy details here: See our full statement on data and estimates. But for what it’s worth, here’s what we’re looking at for one slice of this fantastic vanilla custard pie:
- Serving Size: 1 slice
- Calories: 280
- Fat: 13g (with 6g saturated fat, thank you very much whole milk!)
- Carbohydrates: 30g
- Sugar: 22g (That’s the natural sugar from the milk and eggs doing the heavy lifting!)
- Protein: 9g
- Cholesterol: 110mg
It’s a beautiful balance for a slice of something so rich and satisfying. I think knowing that you’re getting 9 grams of protein makes that second slice feel just a little bit better!
Share Your Experience with This Classic Custard Pie
Now that you have pulled out glorious, perfectly set slices of this classic custard pie, I desperately want to hear all about it! Seriously, reading your notes keeps me inspired to keep testing and sharing my favorite family recipes. Did you manage to get that beautiful, slight jiggle in the center? Did you serve it with a dollop of fresh whipped cream?
When you get a chance, please come back and leave a rating for the recipe using the star system below. I always aim for five stars, but I’m curious to see how you found the instructions! If you made any fun adaptations—maybe you substituted a pear slice on the bottom for a fun twist, or perhaps you leaned into the spices and made a beautiful cinnamon custard pie for your table—please tell me how it went! We love seeing how you make these traditional recipes your own, especially when baking for those big winter holiday desserts.
And hey, if you found this recipe useful and want to save it for later so you don’t have to hunt for it next time you need some serious homemade comfort, don’t forget to bookmark it! You can manage all your favorites right over here: Save this recipe now! Happy baking, everyone!
PrintClassic Old Fashioned Egg Custard Pie

A recipe for a traditional baked custard pie featuring a creamy, silky filling flavored with vanilla and topped with nutmeg.
- Prep Time: 15 min
- Cook Time: 50 min
- Total Time: 65 min
- Yield: 8 servings
- Category: Dessert
- Method: Baking
- Cuisine: American
- Diet: Vegetarian
Ingredients
- 1 (9 inch) unbaked pie crust
- 4 large eggs
- 1/2 cup granulated sugar
- 1/4 teaspoon salt
- 1 teaspoon vanilla extract
- 1/4 teaspoon ground nutmeg
- 2 cups whole milk
- 1 tablespoon butter, melted
Instructions
- Preheat your oven to 350 degrees Fahrenheit. Place the unbaked pie crust on a baking sheet.
- In a medium bowl, whisk the eggs lightly.
- Add the sugar, salt, vanilla extract, and nutmeg to the eggs. Whisk until just combined.
- Slowly whisk in the whole milk until the mixture is smooth.
- Pour the custard mixture into the unbaked pie crust.
- Brush the top of the custard lightly with the melted butter.
- Bake for 45 to 55 minutes, or until a knife inserted near the center comes out clean. The center should be mostly set but may have a slight jiggle.
- Cool the pie completely on a wire rack before slicing.
Notes
- For a smoother filling, strain the custard mixture through a fine-mesh sieve before pouring it into the crust.
- If the crust edges begin to brown too quickly during baking, cover them loosely with aluminum foil.
- This pie tastes best when served chilled or at room temperature.
Nutrition
- Serving Size: 1 slice
- Calories: 280
- Sugar: 22
- Sodium: 180
- Fat: 13
- Saturated Fat: 6
- Unsaturated Fat: 7
- Trans Fat: 0
- Carbohydrates: 30
- Fiber: 1
- Protein: 9
- Cholesterol: 110