

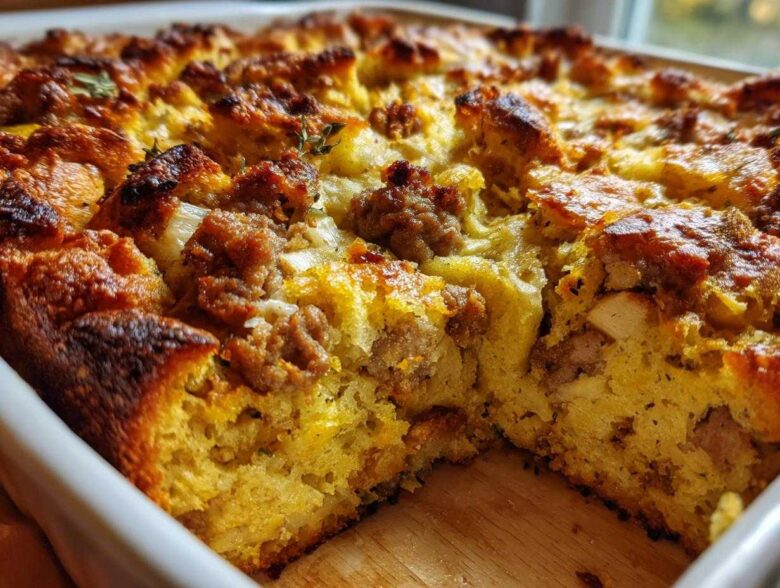
Oh, the holiday rush! Doesn’t it feel like everyone is asking for the same three side dishes every single year? Well, I used to stress about my sausage stuffing being dry on top and soggy underneath—it drove me crazy! After years of trying, I finally nailed the texture contrast we all dream about. This recipe for my Perfectly Moist & Crispy Make-Ahead Sausage Stuffing with Sage and Apple is my game-changer every single time. You can read a bit more about my general cooking philosophy right over here on my about page. Trust me, getting that crunchy golden crust while keeping the inside absolutely tender is my secret weapon for epic holiday cheer. You’ve got to try this!
Why This Sausage Stuffing Recipe Stands Out (The Best Stuffing Recipe)
I’m not going to lie; I think this might be the absolute Best Stuffing Recipe out there. It defeats the dreaded sogginess that plagues so many holiday tables! This isn’t just another bread casserole; it’s engineered for contrast. We want that satisfying crunch when the fork hits the top layer, right?
Here’s the magic breakdown that leads to perfectly Moist and Crispy Stuffing:
- The apple melts down just enough to perfume the interior without turning it mushy.
- We use just the right amount of liquid so every cube gets coated, but none are swimming.
- That melted butter drizzled on top creates a protective, golden shield during baking.
Achieving the Perfect Texture with Your Sausage Stuffing
It all comes down to two things: ratios and the final drizzle. If you use too much chicken broth, you’re making dressing soup! I learned you need exactly enough moisture to barely coat the bread—the eggs also help bind things up nicely so it sets instead of sagging later. The melted butter really is non-negotiable. You cover that whole top layer with it before it goes into the oven. That fat seeps down ever so slightly, browning the top crust beautifully while keeping the inside warm and steamy. It’s a textural masterpiece, honestly!
Essential Ingredients for Classic Sausage Stuffing
You can’t have a great dish without great starting materials, right? This is always true for my Sausage Stuffing Recipe. When I list these out, I want you to pay close attention to the bread choice—that’s half the battle won right there. We aren’t making soup; we need structure! I’ve listed everything you need below. Just gather these items, and honestly, you’re 90% of the way to the best holiday side dish ever. Don’t be scared by the big number for the bread cubes; they dry out so much during baking, they shrink down to almost nothing, leaving plenty of room for the sausage and veggies to shine!
- 1 pound bulk pork sausage
- 1 large yellow onion, chopped
- 3 celery stalks, chopped
- 1 large Granny Smith apple, peeled and diced
- 1 tablespoon fresh sage, chopped
- 1 teaspoon dried thyme
- 1 teaspoon salt
- 1/2 teaspoon black pepper
- 12 cups dried bread cubes (sourdough or plain white bread work well)
- 1 1/2 cups chicken broth
- 2 large eggs, lightly beaten
- 1/2 cup (1 stick) unsalted butter, melted
Ingredient Notes and Substitutions for Sausage Stuffing
So, let’s talk details because technique starts with the ingredients. For the sausage, I insist on bulk pork sausage; nothing fancy needed, but make sure you drain that fat really well, or your stuffing will turn soupy fast! When it comes to the bread, you need something sturdy. I love using slightly stale sourdough because it holds its shape beautifully. If you can’t find that, just slice up basic white sandwich bread a day ahead and let it air dry on a sheet pan. Don’t even think about using that pre-bagged, fluffy stuffing mix!
For the apples, Granny Smith is my go-to every time. That tartness cuts through the richness of the sausage and keeps the whole dish feeling lively. If you absolutely must swap the pork sausage, mild Italian sausage works in a pinch, but you might want to skip adding any extra salt since that sausage usually has more sodium already. Remember, every choice here adds flavor!
Step-by-Step Instructions for Moist and Crispy Sausage Stuffing
Alright, let’s get messy! Putting this together is really straightforward, but you have to follow the order. First things first: you need to get your heat going and prepare your home base. Preheat your oven to 350 degrees Fahrenheit and make sure you grab that 9×13 dish—grease it up good with butter or cooking spray!
Now, here is a little bonus tip right up front: If you’re trying to get ahead of the game, you can complete everything right up to drizzling the butter on top, cover it tightly, and pop it in the fridge for up to 24 hours. That’s the beauty of a great Make Ahead Stuffing! Just pull it out about 30 minutes before you plan to bake so it’s not stone-cold.
Preparing the Sausage Base for Your Sausage Stuffing Recipe
We start this by cooking the star of the show, the sausage, in a big skillet over medium heat. Break it apart with your spoon as it browns—you want it nice and crumbly. Once it looks cooked through, you absolutely have to drain off that excess grease. Seriously, don’t skip this part; we want savory, not swimming in oil! Next, toss in your chopped onion and celery. You’ll cook those down until they start getting soft, maybe 5 to 7 minutes. Then, stir in your diced apple, sage, thyme, salt, and pepper. Let that mingle for just two more minutes until you can really smell those lovely herbs coming alive. As soon as you smell that amazing aroma—that’s your cue to take the whole skillet OFF the heat before moving on.
Baking and Finishing the Sausage Stuffing
Now, grab your huge bowl with the dried bread cubes and dump in that sausage and veggie mix. Give it a gentle toss. In a separate little bowl, whisk your eggs and chicken broth together, then pour that wet mixture over the bread. Mix it gently until everything looks damp—don’t beat it like a cake batter, or it’ll get gummy! Transfer that gorgeous, slightly damp mixture into your prepared dish. The grand finale before baking? Drizzle that melted butter evenly across the very, very top. Bake it for about 40 to 50 minutes. You are looking for that deep golden brown crust, which really locks everything in for that desired Moist and Crispy Stuffing finish. If you want it extra crunchy, turn the broiler on right at the end, but watch it like a hawk so it doesn’t burn!
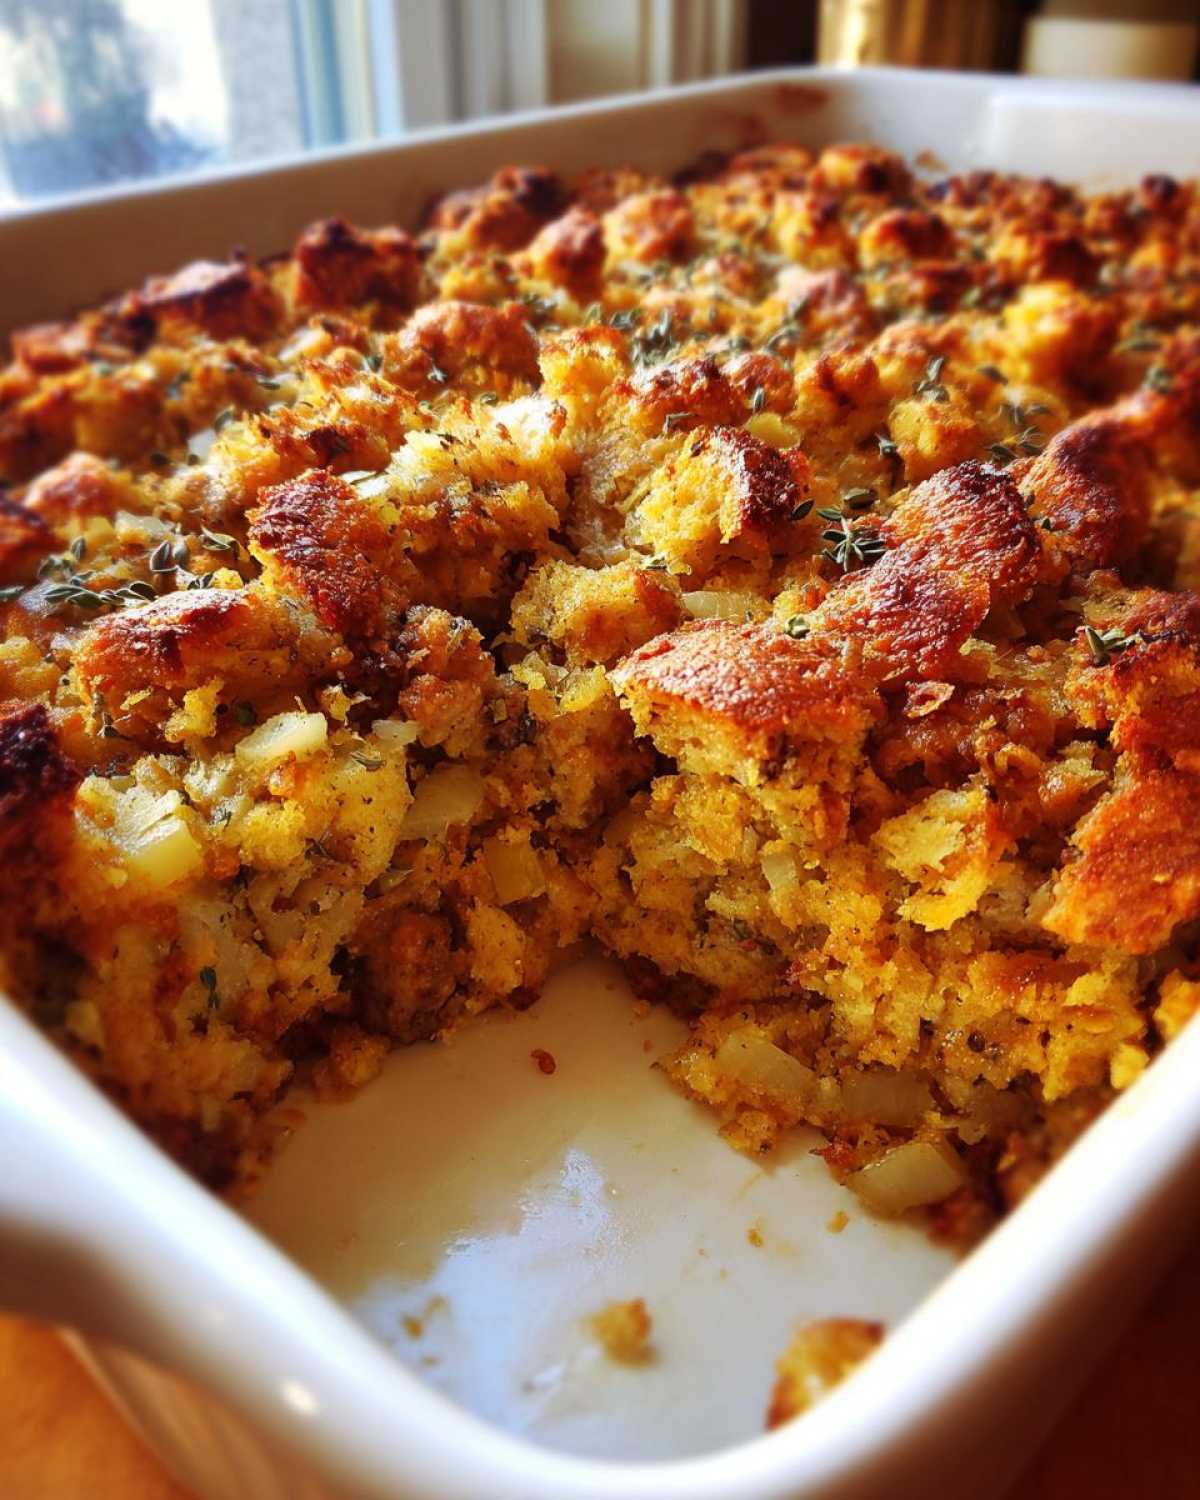
Tips for Perfect Holiday Sausage Stuffing
Even with a great recipe, sometimes things go sideways, especially when you’re juggling ten pans for your big Thanksgiving Stuffing spread. I’ve learned a few survival tips over the years to make sure this side always gets rave reviews.
Here are my top three rules for foolproof stuffing, whether you’re making this for Christmas or any random Tuesday:
- The Bread Must Be Dry: This is my constant battle cry! If your bread cubes are too fresh, they will absorb all the liquid and turn into a dense, heavy paste. You want them stale. If you cut your bread today, leave it out on sheet pans overnight—uncovered. If you’re doing this last minute, you can quickly toast all 12 cups in a 300-degree oven for about 15 minutes until they feel dry to the touch.
- Don’t Over-Saturate, Seriously: When you add the broth and egg mix, fold gently! I know it feels like it needs more liquid, but remember that the sausage is still going to release some fat and moisture as it bakes. Stop mixing when there are still a few dry streaks—the residual moisture will hydrate those bits while they bake on top. Too much liquid equals sad, gluey stuffing.
- Bake It Outside the Bird: This is super important for food safety, but it also guarantees that crispy topping! If you cram all that stuffing inside your turkey, the top layer is insulated by the bird’s meat and never gets a chance to crisp up properly. Stuff the bird loosely only if you absolutely must, but for true texture perfection as a Christmas Side Dish, always bake it separately in a casserole dish like the recipe calls for. If you do cook it inside, make sure a meat thermometer reads 165°F in the center before you serve anything. Safety first, but crunchiness is a close second!
Variations on the Traditional Sausage Stuffing
I love sticking to tradition, but sometimes you need a little something extra to make your holiday spread truly yours, don’t you? This basic recipe is like a perfect canvas, and you can paint all sorts of delicious flavors onto it without losing that fantastic base texture we worked so hard to achieve. I’ve played around yearly, and these are the swaps that always get rave reviews from my family.
If you want to dip your toes into different styles, try these easy adjustments. Remember, they should all generally follow the same liquid-to-bread ratio so you keep that heavenly moist center!
Going Southern with Cornbread Stuffing Sausage
If you want a slightly less dense, more crumbly stuffing, swap out exactly half of your dried bread cubes for dried cornbread. This instantly gives you that rustic, smoky flavor profile often associated with Cornbread Stuffing Sausage mixes. You’ll need about 6 cups of dried white bread and 6 cups of crumbled cornbread. Make sure your cornbread isn’t too sweet; we want savory here!
Adding A Little Sweetness with Fruit
Apples are great, but sometimes I want that intense burst of tartness that only dried fruit can give you. If you find your stuffing is missing that ‘pop,’ try adding about 1 cup of dried cranberries or cherries. I always soak mine in very hot water for about 10 minutes first—just drain them really, really well before tossing them in with the sausage mixture. This keeps them plump and stops them from sucking all the delicious broth away from your bread cubes.
Leaning into Spices and Nuts
For those who adore a more complex, savory flavor, don’t stop at the sage and thyme! A little addition goes a long way. Try tossing in a handful of toasted pecans or walnuts right before you bake it—they add a fantastic textural crunch that compliments the crispy top. Also, sometimes I’ll throw in a pinch of ground cloves along with the thyme. Cloves are powerful, so just a tiny, tiny pinch will add that deep, warm holiday flavor without making it taste like Christmas cookies!
Serving and Storing Your Sausage Stuffing
So, you nailed it! The stuffing is golden perfection, and the house smells incredible. Now what? Whether you have leftovers (which, bless you, you probably do) or you’re planning a big dinner and need to schedule things out, storage and reheating are key to keeping that beautiful texture intact. We worked hard for that crispy top, and we aren’t going to let sad, mushy leftovers ruin our hard work!
If you made this ahead of time, you’re already ahead of the curve, but here’s how to manage the aftermath and plan your big day serving this as one of the best Turkey Dinner Sides.
Storage Timeline: Keeping That Stuffing Fresh
For any leftovers—and I mean any—get them into an airtight container and into the fridge as soon as they are cool enough to handle, ideally within two hours of coming out of the oven. Because we used eggs and sausage, this isn’t something you want lingering on the counter. In the refrigerator, this stuffing stays perfectly good for about three to four days. Don’t try to push it past that, especially since it’s packed with meat.
If you baked off a huge batch just for freezing, let it cool completely before bagging it up in heavy-duty freezer bags—lay them flat so they don’t take up all your freezer space! It keeps great frozen for up to three months.
Reheating for Maximum Crispiness
This is the most important part of saving your leftovers! You absolutely cannot just microwave this. Microwaving works for reheating soup, not for resurrecting crispy goodness. If you want to bring back that glorious crust, you have to use dry heat.
The best method is spreading a single layer of the cooled stuffing onto a baking sheet. If you have a lot of leftovers, reheat them in batches. Cover the tray loosely with foil—this steams the inside back to life so it gets moist again. Bake at 350 degrees for about 15 minutes until it’s hot all the way through. Then, pull that foil off for the last 5 minutes to let the top crisp back up a little. If you’re reheating straight from frozen, add about 20 minutes to that covered baking time.
Serving Suggestions for These Savory Side Dishes
Of course, this is the star partner for any roasted bird or ham. But don’t let it just sit on the holiday table! This robust, savory stuffing is fantastic used in other ways. If you have some leftover turkey meat, toss it right into the stuffing mixture when you reheat it—it becomes this amazing, hearty one-dish meal. You can also use it cold, crumbled over a simple green salad for an unexpected crunch instead of using croutons. It’s an incredibly versatile dish! If you need to reach out for recipe clarity after you make it, my contact page is always open!
Frequently Asked Questions About Sausage Stuffing Recipe
Can I use bread stuffing mix instead of dried bread cubes?
Oh, please don’t! If you want that *moist and crispy* texture we worked so hard for, stick to drying your own bread. Stuffing mixes are often too finely ground and too dry already. They absorb the liquid way too quickly and result in a heavy, almost paste-like texture rather than light, individual cubes. It’s worth the extra step to dry your own sourdough or plain white bread cubes, trust me on this one.
Can this sausage stuffing be made into balls or bites?
Yes, absolutely! That’s a fun way to serve it as an appetizer, too. Once you assemble the mixture (before you add the melted butter topping), instead of putting it in a casserole dish, scoop out tablespoon-sized portions using a cookie scoop. Place them onto a parchment-lined baking sheet. You’ll need to bake these at 375 degrees for about 20 minutes until they are nicely browned all over. They cook faster because they are smaller. You can find more tips for turning sides into Holiday Baked Sides on our site!
What kind of sausage should I use if I don’t like pork?
If you need an alternative to pork, ground turkey or chicken sausage works fine in a pinch for your sausage stuffing. Just be aware that turkey and chicken sausage are much leaner than pork, so they won’t release as much fat into the vegetables. You might need to increase that final drizzle of butter from 1/2 cup to about 3/4 cup to ensure the top still gets that gorgeous, golden crisp.
How far ahead of time can I assemble this recipe?
This is one of my favorite aspects of this great Stuffing Recipe! You can combine all the ingredients—everything except the melted butter dribbled on top—up to 24 hours in advance. Cover that dish tightly with plastic wrap and keep it in the fridge. When you’re ready to bake, take it out about 30 minutes before it goes into the oven to take the chill off, then add the butter and proceed with the baking time as written. It’s the perfect make-ahead solution!
Nutritional Estimates for This Sausage Stuffing
Now, I know when we’re cooking for the holidays, we aren’t usually thinking about macros or calories, right? We’re thinking about comfort and deliciousness! But since you asked, I’ve gone ahead and pulled up the estimated nutritional data based on the serving size we listed—that’s 10 generous servings from a 9×13 dish. This stuff is rich because it’s made with real sausage and butter, so be prepared for a satisfying plate!
Here’s the breakdown for one serving of this amazing stuffing. Remember, these numbers are based strictly on the ingredients I listed above and might swing a little based on the exact brand of sausage or type of bread you use. Think of this as a helpful guideline, not a strict mandate from the nutrition police!
- Calories: About 350 per serving. Yep, it’s a treat!
- Total Fat: Around 20g. That includes the rich, savory fats from the sausage and that lovely melted butter topping.
- Saturated Fat: About 7g. We use unsalted butter, which helps keep this in check, but sausage does contribute here.
- Carbohydrates: Roughly 30g, coming mostly from the bread cubes and the diced apple we added.
- Protein: A solid 14g, thanks to all that delicious pork sausage!
- Sodium: Around 550mg. This is why I always say to use low-sodium broth if you can, since the sausage and added salt contribute quite a bit.
- Fiber: Just about 2g; not a health food, but it’s got some from the celery and apple!
If you’re looking to make any tweaks to lower the sodium or fat content for future baking, you could try leaner turkey sausage or reducing the butter drizzle slightly, but honestly, that butter is what makes the top so crispy! You can check out my full site policies here if you have any questions about referencing this data. Enjoy this comfort food!
Share Your Experience Making This Sausage Stuffing
Now that you’ve seen all the secrets behind getting that perfect, flaky crust and juicy inside, it’s your turn! I truly hope this recipe ends up right alongside your own family favorites. Tell me, how did it go? Did you stick strictly to the sage and apple, or did you try tossing in dried cherries like I suggested?
I absolutely live for hearing how you customize these recipes. Did you use sourdough, or did you go with plain white bread? Drop a rating below—five stars if your kitchen smelled like pure holiday magic, right?
Tell Me Your Favorite Holiday Additions
Every family has that one secret ingredient they sneak into their dressing. Maybe it’s a splash of sherry wine, maybe it’s wild rice, or maybe you always have to have chestnuts in there. I’d truly love to know what makes your Homemade Stuffing unique! Leave your best tip or addition in the comments section below. Hearing from you helps improve these recipes for everyone else!
Don’t Forget to Pin and Share!
If you took a picture of your golden-brown casserole dish sitting proudly next to the turkey, please share it! Tag me on social media so I can see your beautiful work. It honestly makes my day when I see one of my recipes making someone else’s holiday table brighter. Don’t forget, if you try this, remember to check out the cookie guidelines over at our cookie policy page for future site usage!
Happy baking, and here’s hoping your stuffing game is strong this year!
PrintMoist and Crispy Make-Ahead Sausage Stuffing with Sage and Apple

A traditional sausage stuffing recipe featuring a moist interior and a golden, crispy top, perfect for holiday meals. This recipe includes apple for sweetness and can be prepared in advance.
- Prep Time: 20 min
- Cook Time: 50 min
- Total Time: 70 min
- Yield: 10 servings
- Category: Side Dish
- Method: Baking
- Cuisine: American
- Diet: Vegetarian
Ingredients
- 1 pound bulk pork sausage
- 1 large yellow onion, chopped
- 3 celery stalks, chopped
- 1 large Granny Smith apple, peeled and diced
- 1 tablespoon fresh sage, chopped
- 1 teaspoon dried thyme
- 1 teaspoon salt
- 1/2 teaspoon black pepper
- 12 cups dried bread cubes (sourdough or plain white bread work well)
- 1 1/2 cups chicken broth
- 2 large eggs, lightly beaten
- 1/2 cup (1 stick) unsalted butter, melted
Instructions
- Preheat your oven to 350 degrees Fahrenheit. Grease a 9×13 inch baking dish.
- In a large skillet over medium heat, cook the sausage, breaking it up as it cooks, until browned. Drain off excess grease.
- Add the onion and celery to the skillet with the sausage. Cook until the vegetables soften, about 5 to 7 minutes.
- Stir in the diced apple, sage, thyme, salt, and pepper. Cook for 2 more minutes until fragrant. Remove the skillet from the heat.
- In a very large bowl, combine the dried bread cubes and the sausage mixture. Toss gently to distribute evenly.
- In a separate bowl, whisk together the chicken broth and eggs. Pour this mixture over the bread and sausage. Toss until the bread is evenly moistened. Do not overmix.
- Transfer the stuffing mixture to the prepared baking dish. Drizzle the melted butter evenly over the top surface.
- Bake for 40 to 50 minutes, or until the top is golden brown and the center is heated through.
- If you prefer a crispier top, you can broil for the last 2 minutes, watching carefully to prevent burning.
Notes
- For a make-ahead option, assemble the entire dish (steps 1 through 6) up to 24 hours ahead. Cover tightly and refrigerate. Before baking, let it sit at room temperature for 30 minutes, then proceed with baking instructions.
- If you are stuffing a turkey, use a separate baking dish for the stuffing to ensure it reaches a safe internal temperature of 165 degrees Fahrenheit.
- If you want a richer flavor, substitute half of the chicken broth with turkey broth.
Nutrition
- Serving Size: 1 cup
- Calories: 350
- Sugar: 4
- Sodium: 550
- Fat: 20
- Saturated Fat: 7
- Unsaturated Fat: 13
- Trans Fat: 0
- Carbohydrates: 30
- Fiber: 2
- Protein: 14
- Cholesterol: 65