

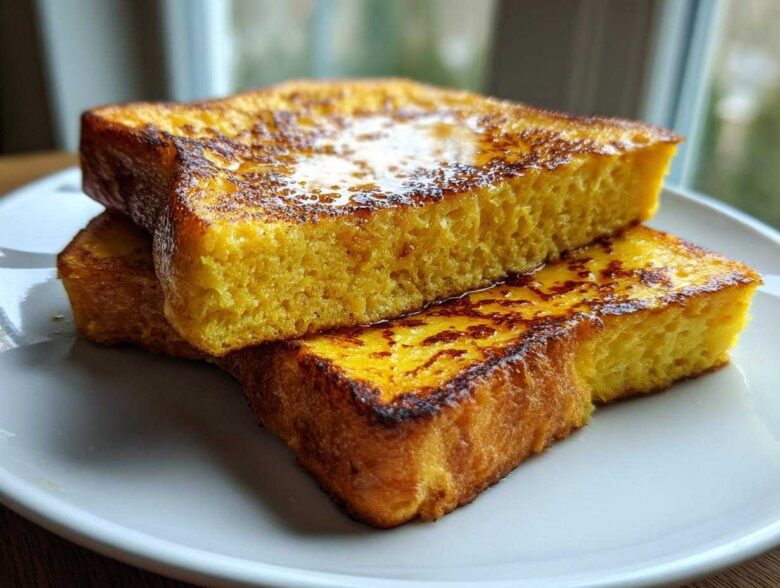
Oh my gosh, stop whatever you’re doing and listen up, because I’m about to solve your biggest breakfast dilemma! For years, my French toast was either soggy, tasting faintly of raw egg, or completely burnt on the outside while still being icy cold inside. It was a disaster, honestly. But after countless attempts, I finally cracked the code to creating the absolute best french toast recipe—the kind that has those impossibly golden, slightly crispy edges but the absolute center melts like warm custard in your mouth. Trust me, once you nail this technique, you’ll never look at a pancake stack the same way again. This isn’t just breakfast; it’s a weekend event!
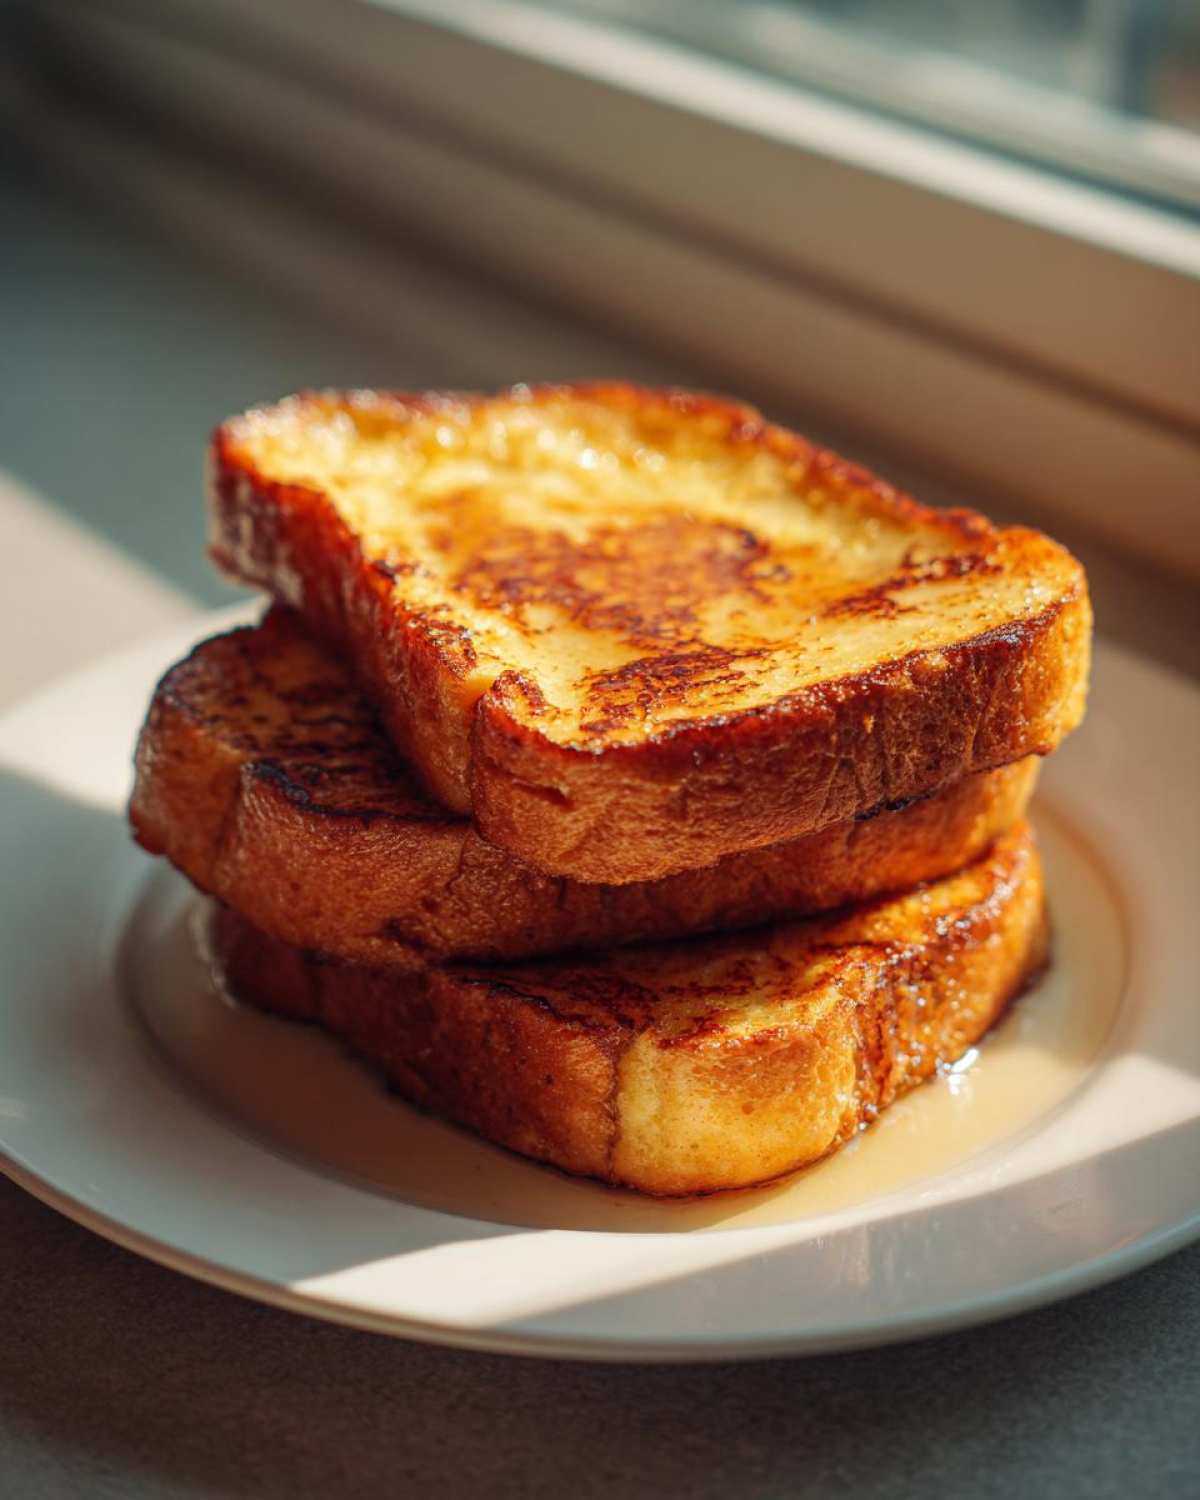
I learned that making amazing french toast isn’t about fancier ingredients; it’s all about timing and temperature control. I spent way too many mornings wrestling with under-soaked bread or pans that were too hot. After reading through heaps of older cookbook tips and doing a little experimenting myself, I finally found the sweet spot that gives you that perfect, eggy interior every single time. If you’re ready for the easiest upgrade to your morning routine, stick with me!
It really just comes down to respecting the bread and balancing the fat in the custard. If you’ve ever checked out my story over at my cooking philosophy page, you know I believe simplicity executed perfectly beats anything complicated. This recipe proves that concept!
Why This is the Best French Toast Recipe You Will Ever Make
This recipe stops being ‘just okay’ and starts being legendary because we’re focusing on two non-negotiable outcomes: a creamy interior and a slightly shatteringly crisp exterior. We aren’t making cheap, thin slices here; we are aiming high for that perfect french toast experience. Forget dryness! This method traps moisture beautifully.
- It uses a richer custard base than most recipes—that’s where the magic starts.
- The bread soaks long enough to penetrate the center fully.
- We use proper fat (butter!) on the griddle for that beautiful, deep golden color.
It’s the balance that makes this the absolute best!
Achieving Custardy French Toast Centers
The secret to that unbelievable, fluffy, almost pudding-like center? Heavy cream, my friends! Most recipes just use milk, which results in bread that tastes a little wet after cooking. By adding that quarter cup of heavy cream to the egg and milk mixture, we create a true custard. Also, don’t rush the dip! Allowing the thick bread slices that full 30 seconds per side ensures the liquid penetrates past the surface, giving you that dreamy, custardy french toast texture all the way through.
Tips for Crispy French Toast Edges
Getting those edges right is almost an art form, I swear! The biggest mistake people make is using high heat. If it’s too hot, the outside burns before the interior custard sets. We’re sticking strictly to medium heat for this recipe. More importantly, you absolutely must use real unsalted butter in the pan—not oil, not spray. Butter foams and browns beautifully, giving you those lovely, tiny, crispy french toast edges that contrast perfectly with the soft middle. It adds flavor you just can’t get any other way!
Essential Ingredients for Perfect French Toast
Okay, let’s get down to the good stuff. You can’t have the best french toast if your ingredients are phoned in! I’ve laid out exactly what you need below. It’s a short list, which is great because it means less shopping and more eating, right? Honestly, quality matters so much here, especially with the bread. Think of the custard as the soaking agent, but the bread is the star that holds it all together.
Here’s what you need for about three servings:
- 6 thick slices of bread (Challah or Brioche are my absolute favorites!)
- 4 large eggs—no using those sad little eggs from the back of the fridge!
- 1/2 cup whole milk
- 1/4 cup heavy cream (Yes, we talked about this, but it’s essential!)
- 1 teaspoon vanilla extract
- 1 teaspoon ground cinnamon
- 1/4 teaspoon ground nutmeg
- 1 tablespoon granulated sugar
- Pinch of salt
- 2 tablespoons unsalted butter for cooking (Don’t skimp here!)
Bread Selection: The Foundation of Great French Toast
You simply have to pay attention to your bread choice if you want that perfect soak without ending up with a soggy mess. I’m begging you, skip the thinly sliced, soft sandwich bread—it dissolves into mush the second it hits the custard. You need something substantial. Challah is my top pick because it’s rich in egg and has that perfect density.
Brioche is another winner, or a sturdy country white loaf works in a pinch. The key is thickness—aim for slices that are at least an inch thick. Also, slightly stale bread is your best friend! It keeps its structure better when it absorbs the liquid. If your bread is super fresh, just leave the slices out on the counter for an hour or two before you start. It makes all the difference in achieving that ideal textural contrast.
Step-by-Step Instructions for Classic French Toast
Now that we have the perfect ingredients assembled, it’s time to turn this gorgeous custard and bread into the ultimate french toast! Don’t rush the process, especially the soaking; that’s where we build that internal tenderness. The key, remember, is balancing a wet interior with a beautifully browned exterior. Follow these steps exactly, and you’ll have breakfast gold ready in about 25 minutes total.
Preparing the Custard Base
First up, grab your shallow dish—a pie plate works perfectly for dipping. We are whisking together the eggs, milks, cream, vanilla, spices, sugar, and that tiny pinch of salt. You need to treat this like you’re making scrambled eggs before the frying starts! Whisk vigorously until everything is completely uniform. I mean it—you shouldn’t see any streaks of egg white or unmixed spice clumped at the bottom. A smooth, homogenous custard ensures your final french toast has an even, creamy texture throughout, not patchy spots!
Cooking Technique for Fluffy French Toast
Heat management is crucial here, I can’t stress that enough! Set your griddle or large skillet over medium heat. If it’s too low, the bread just gets gray and tough; too high, and it burns before the middle cooks. Melt half of your butter until it’s foaming nicely and coats the pan—that foam signals the right temperature. Dip your bread—20 to 30 seconds per side is usually right for thick slices—and lay them carefully onto the hot surface. Do not overcrowd the pan! If the slices are touching, they steam instead of frying, and we lose that crispiness we worked so hard for. Cook for about 3 to 4 minutes per side until they look deeply golden brown. Keep the cooked slices warm in a low oven while you finish the rest, adding more butter for each new batch to keep that frying surface consistent for truly fluffy french toast.
Ingredient Notes and Substitutions for Your French Toast
I know sometimes we don’t have exactly what a recipe calls for, so let’s talk about how to navigate substitutions without completely ruining this fantastic french toast! The most flexible parts are usually the liquid dairy. If you’re out of heavy cream, you can totally substitute it with more whole milk, but I have to warn you: the center won’t be *quite* as rich or custardy. It’ll still be delicious, but maybe lean closer to the 20-second soak time to avoid sogginess.
As for the spices, cinnamon is non-negotiable for that cozy breakfast flavor, but nutmeg is optional if that’s not your jam. You could even add a tiny pinch of cardamom if you are feeling fancy! Just don’t swap the eggs or the sugar; they are structural components that affect how well the custard sets up. Stick close to the bread and fat recommendations, and you’ll be golden!
Tips for Success When Making Homemade French Toast
Alright, let’s talk about avoiding those little kitchen hiccups so your homemade french toast always turns out picture-perfect. I’ve listed some core rules here that make my life so much easier when I’m whipping up breakfast on a busy Saturday morning. First off, I can’t stress enough: use slightly stale bread!
If your bread is too fresh, it acts like a sponge and just sucks up all that precious custard without ever firming up properly when it hits the heat. That’s why I often leave it out on the counter for an hour before mixing begins. It firms up just enough to handle the liquid beautifully.
The other huge tip, which goes back to the cooking stage, is definitely about managing your pan space. You absolutely must cook these in batches. Resist the urge to cram too many slices in there! Overcrowding instantly drops the pan temperature, and instead of frying beautifully, your lovely bread starts steaming. That steam equals soggy french toast, and we aren’t having that! Give each slice room to breathe and crisp up on those edges.
Serving Suggestions for Your Weekend Brunch Ideas
Once you pull that perfectly cooked, golden batch of french toast off the griddle, the fun really begins! These feel like a fancy treat, so let’s dress them up for your next weekend brunch ideas gathering. Sure, pure maple syrup is the standard—and I mean, the real stuff, not that corn syrup nonsense!—but we can elevate things.
For something classic, a light dusting of powdered sugar and a side of fresh berries always looks gorgeous on the plate. If you want to step it up for company, try topping it with a dollop of lightly sweetened homemade whipped cream and maybe some toasted pecans for crunch. Oh! And for a slightly tangy bite, a quick spoon of lemon curd pairs unbelievably well with the cinnamon spice. It makes everyone feel like they are eating at a fancy café!
Storage and Reheating Instructions for Leftover French Toast
Listen, sometimes we make too much—which is never really a bad thing! If you have leftovers of this amazing french toast, you need to store them correctly so they don’t turn into sad, soggy discs. Store your cooled slices in a single layer, separated by parchment paper, in an airtight container in the fridge. They stay great for about three days.
Reheating is best done in the oven or an air fryer to bring back that exterior crispness. Pop them on a baking sheet at 350°F (175°C) for about 5 to 7 minutes. That gentle heat warms the custard through without drying it out too much!
Frequently Asked Questions About Making French Toast
I get so many questions about this recipe, which just tells me everyone is obsessed with making perfect cinnamon french toast! It’s great, because solving these little hurdles is how we turn good cooks into great ones. Here are the most common things people ask me about achieving this classic breakfast recipe at home without any stress. If you want to learn more about how we handle information on this site, please check out our disclaimer.
Can I use regular sandwich bread for this french toast?
You can, but I really advise against it if you are aiming for the best results! Regular, thin, soft sandwich bread just doesn’t have the structure to handle this rich custard bath. It turns into goopy sludge almost instantly. For truly fluffy french toast that holds its shape, you need something substantial—think challah, brioche, or maybe a good Texas toast style cut thick. Stale is better than fresh, remember!
How do I make this a true cinnamon french toast?
Oh, that’s the easiest fix! The recipe already calls for 1 teaspoon of cinnamon, which gives it that lovely warming flavor, but if you want it to taste like you bought it from a specialty café, just bump that amount up to 2 teaspoons and perhaps add a tiny pinch of allspice along with the nutmeg. That extra spice really pops when it caramelizes on those crispy french toast edges. It’s a simple switch for maximum cozy flavor!
Can I make this ahead of time? I need a make ahead breakfast casserole vibe!
Absolutely! If you are planning for a big morning or want quick breakfast recipes for later, you can totally assemble the components. You can prep the custard base ahead of time and keep it covered in the fridge for up to 24 hours. However, for the best texture, I don’t recommend soaking the bread in advance unless you are making a true overnight French toast bake!
If you want a true make-ahead option, you might want to check out my full recipe for my overnight french toast bake, which is structured differently to handle being assembled the night before. For this classic pan-fried version, only soak right before cooking!
Can I prepare the custard for this french toast ahead of time?
Yes, you definitely can! I often mix up the egg, milk, cream, and spices the night before. Just put it in a tightly sealed container in the fridge. Whisk it again really well right before you dip your bread, as the spices can settle to the bottom. This saves you precious time when you’re hungry in the morning!
Is this recipe good for kids?
This is perfect french toast for kids! Since we aren’t using any coffee or strong alcohol, the flavors are warm and familiar. Just go easy on the nutmeg if your little ones are sensitive to strong spice flavors. And honestly, serve it with sliced bananas and a drizzle of syrup, and they’ll think you’re serving up the most fancy brunch recipes ever!
Estimated Nutritional Data for Classic French Toast
Okay, I promised you the best, and that includes being upfront about what goes into these beautiful slices of heaven! Since we are using rich ingredients like heavy cream and butter to get those perfect textures, the nutrition numbers reflect that richness. Please remember though, this is just an estimate based on the standard recipe measurements I included. If you swap out the bread or use skim milk, your numbers will definitely look different!
Here is the estimated breakdown per serving size (which we figure is two slices of this incredible french toast):
- Serving Size: 2 slices
- Calories: 350
- Sugar: 15g
- Sodium: 300mg
- Fat: 18g
- Saturated Fat: 10g
- Carbohydrates: 35g
- Protein: 14g
We gotta have that fat and sugar to get that incredible flavor and that golden-brown crust, so I never feel guilty about including them! It’s all about balance, right? Enjoy every bite knowing you made the best french toast recipe possible!
PrintThe Absolute BEST Classic French Toast Recipe

Make perfect French toast every time with a custardy center and crispy edges using this simple technique guide.
- Prep Time: 10 min
- Cook Time: 15 min
- Total Time: 25 min
- Yield: 3 servings
- Category: Breakfast
- Method: Pan Frying
- Cuisine: American
- Diet: Vegetarian
Ingredients
- 6 thick slices of bread (Challah or Brioche recommended)
- 4 large eggs
- 1/2 cup whole milk
- 1/4 cup heavy cream
- 1 teaspoon vanilla extract
- 1 teaspoon ground cinnamon
- 1/4 teaspoon ground nutmeg
- 1 tablespoon granulated sugar
- Pinch of salt
- 2 tablespoons unsalted butter for cooking
Instructions
- In a shallow dish, whisk together the eggs, milk, heavy cream, vanilla extract, cinnamon, nutmeg, sugar, and salt until fully combined. This is your custard base.
- Dip each slice of bread into the custard mixture, allowing it to soak for about 20 to 30 seconds per side. You want the bread saturated but not falling apart.
- Heat a large griddle or non-stick skillet over medium heat. Add half of the butter and let it melt and coat the surface.
- Place the soaked bread slices onto the hot griddle, ensuring they do not touch.
- Cook for 3 to 4 minutes per side until the French toast is golden brown and slightly crisp on the edges. Adjust heat if browning too quickly.
- Remove the cooked French toast and keep warm while you cook the remaining slices, adding more butter as needed.
- Serve immediately with your preferred toppings.
Notes
- Use slightly stale bread; fresh bread absorbs too much liquid and becomes soggy.
- For extra crisp edges, cook the slices slightly longer on medium-low heat.
- Do not overcrowd the pan; cook in batches for even browning.
Nutrition
- Serving Size: 2 slices
- Calories: 350
- Sugar: 15
- Sodium: 300
- Fat: 18
- Saturated Fat: 10
- Unsaturated Fat: 8
- Trans Fat: 0.5
- Carbohydrates: 35
- Fiber: 2
- Protein: 14
- Cholesterol: 180