

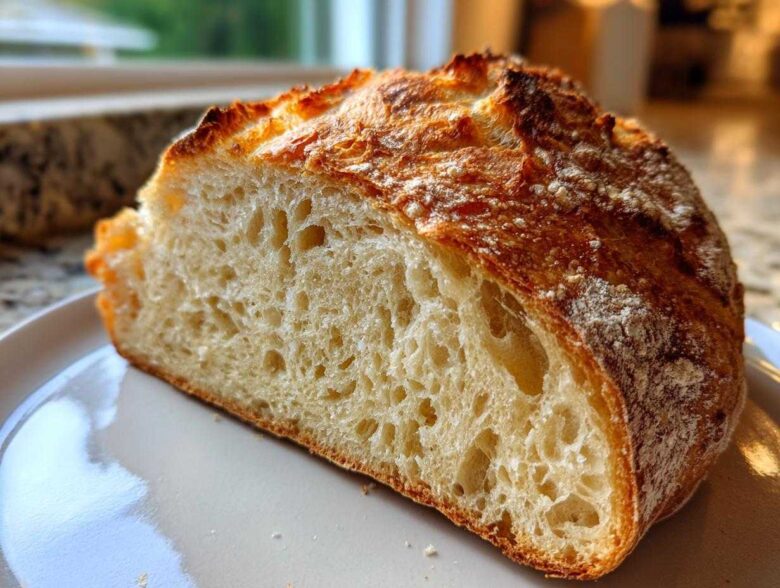
I used to think that getting that perfect, shatteringly crisp crust on my homemade bread meant spending hours working dough until my arms ached. Seriously, I thought artisan loaves were just too complicated for a busy midweek meal. Well, friends, I was completely wrong! This Easy No Knead Artisan Bread recipe changed everything for me. It’s the secret weapon you need for bakery-quality results with honestly almost zero effort on your part. You just mix a few things, walk away for a day, and come back to the most beautiful, crusty loaf imaginable with a soft, open interior. It truly made me fall in love with baking all over again. You’re going to see what I mean when you smell up your kitchen!
We actually bake this bread using a trick involving a super-hot Dutch Oven, which traps all the steam created by the dough itself. This method mimics professional steam injection ovens, giving you that stunning, crackly crust without any fuss. If you’re ready to stop buying expensive loaves and start pulling incredible bread right out of your own oven, grab your bowl and let’s get started.
Why This No Knead Bread Recipe Works So Well (Expert Baking Tips)
So, you might be wondering how you can skip the kneading step and still get that incredible honeycomb structure people brag about? It all comes down to chemistry, my friends! This recipe relies on time, not muscle power, to do the hard work for us. The key is using cool water, which might seem counterintuitive when working with yeast, but trust me on this one.
If you use warm water, the yeast wakes up too fast and burns out its potential energy before you’re ready. Using cool water forces the yeast to work slowly over those long 12 to 18 hours. This slow, gentle rise develops an unbelievable complexity of flavor in your simple bread dough that you just can’t rush. It’s what separates a good loaf from a GREAT one!
The Magic of Long Fermentation for Artisan Bread
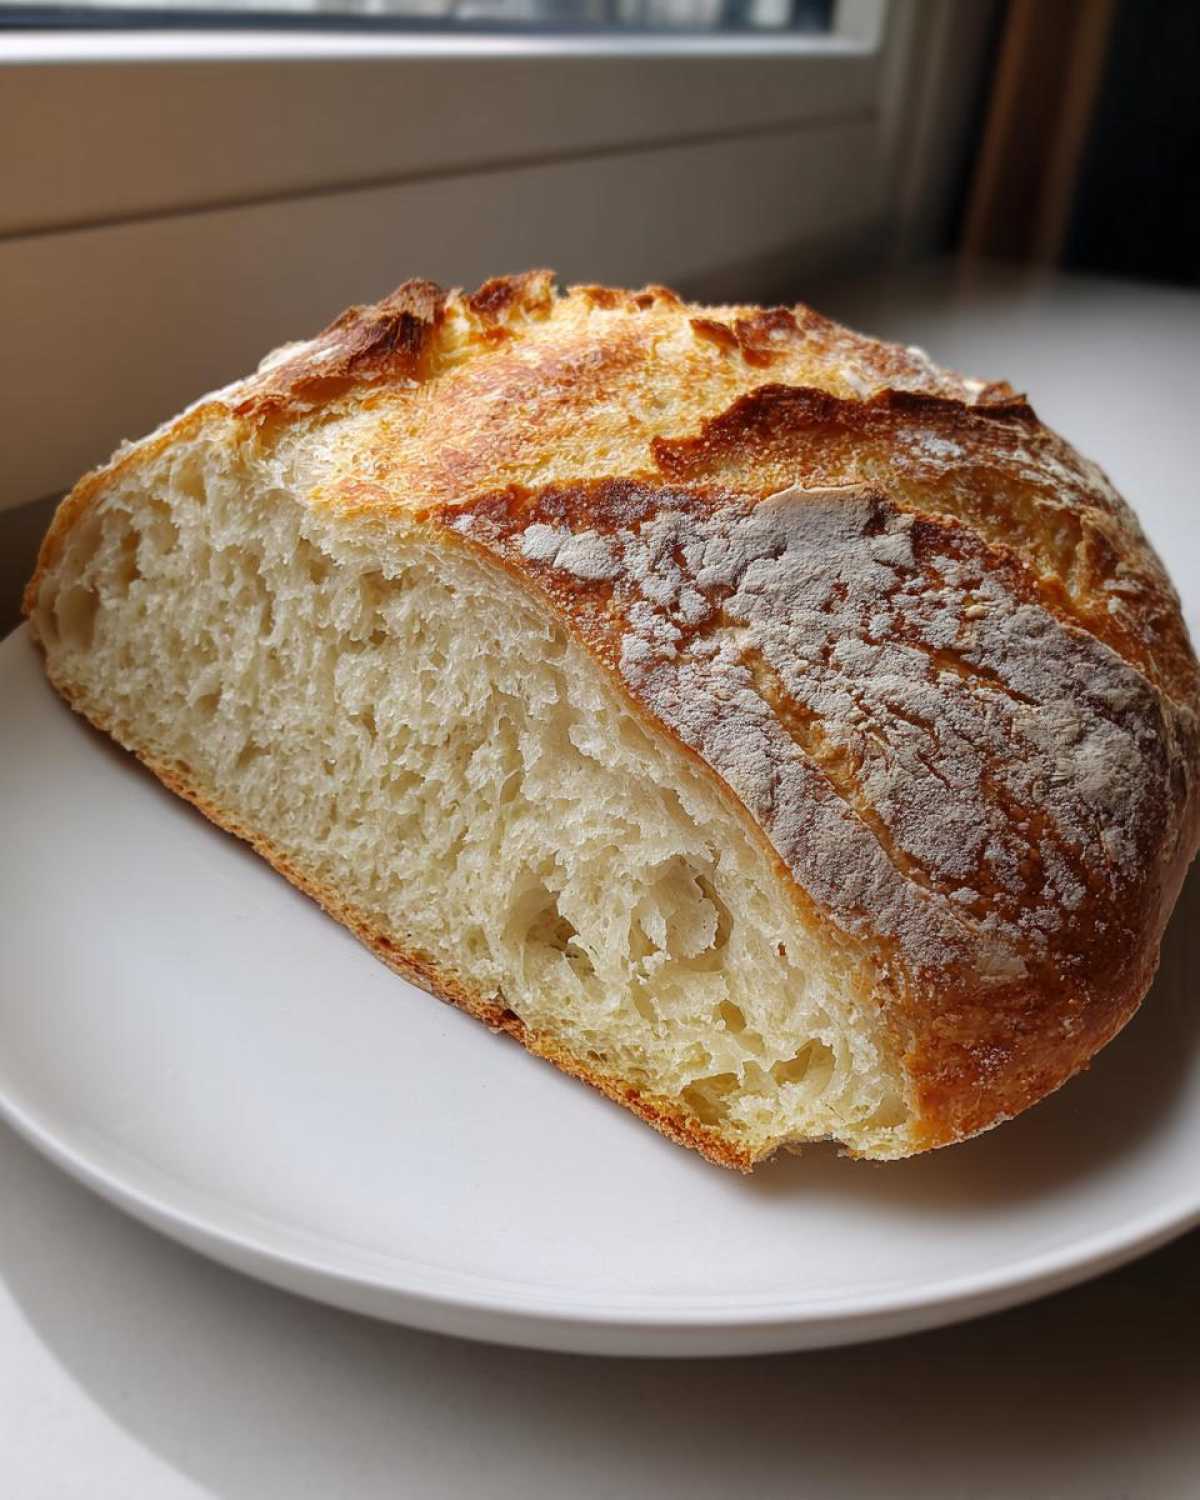
During that long rest on the counter, the yeast is eating sugars and producing tiny pockets of gas, which naturally starts building up the gluten structure. You don’t have to punch it down or knead it because those slow gasses gradually align the proteins in the flour. This results in the open, airy crumb we look for in a real artisan bread without any physical effort from you. It’s seriously genius!
Gathering Your Ingredients for Perfect Homemade Bread Recipe
Okay, I know seeing a recipe list can sometimes be intimidating, but this one is incredibly straightforward! The beauty of this no-knead method is that you probably have most of what you need sitting in your pantry right now. Remember, if you skip the extras, you get a beautiful, classic artisan bread that pairs perfectly with anything. But if you want that bakery-fresh flavor we talked about, keep the optional bits handy!
Base Ingredients for the No Knead Bread
You only need four things to get this dough going: 3 cups of all-purpose flour—don’t bother with fancy bread flour here, standard stuff works great! We need 1 1/2 teaspoons of salt, exactly 1/4 teaspoon of instant dry yeast (this is important, please don’t use too much!), and then 1 1/2 cups of cool water.
Optional Flavor Boosts: Herb and Parmesan Bread Topping
If you’re going for the full experience, these flavorings get brushed right on top just before the final uncovered bake. You’ll want 2 tablespoons of melted butter—it helps everything stick! Then, you’ll need 1 minced clove of garlic, about 1 teaspoon of dried mixed herbs (whatever you have!), and a quarter cup of grated Parmesan cheese. Don’t add these to the dough initially; they go on when the crust is forming!
Step-by-Step Instructions for Easy Bread Making
This is where the magic happens, but don’t let the simple steps fool you—timing is everything! Remember, most of the work here is just waiting patiently. Because this is a slow-rise yeast bread, you have to think ahead. You’ll be starting this dough the day before you want to eat the bread for dinner, which is totally worth it for the flavor payoff.
Mixing and the Long Rest Period for Your Yeast Bread
First thing’s first: grab your large bowl! Whisk together that 3 cups of flour, salt, and the tiny bit of instant yeast. Once they look friendly together, pour in your cool water. Now, I want you to mix this with a wooden spoon or spatula until it *just* comes together. I mean it—it should look shaggy, wet, and kind of messy. Do NOT try to knead it here! Cover that bowl super tight with plastic wrap and just leave it alone on the counter at room temperature for a long, long nap—12 to 18 hours. When you come back, it’ll be bubbly and massive. Time to get that oven ready!
Shaping and Final Proofing Before Baking the Crusty Bread
About 30 minutes before you plan to bake, you need to preheat your oven. Put your Dutch oven, lid and all, inside and crank the heat up to 450 degrees Fahrenheit. While that’s heating up, turn your dough out onto a lightly floured surface. Gently fold the dough over onto itself just three or four times—this tightens up the outside skin. Don’t wrestle it! Form it into a rough ball and place it carefully on a piece of parchment paper. Cover it loosely and let it rest for those last 30 minutes while the pot gets screaming hot.
Baking Your Dutch Oven Bread to Perfection
Carefully pull that scorching hot Dutch oven out! Use the parchment paper like a sling to gently lower your dough ball right into the pot and put the lid back on. Bake it covered for 30 minutes—this traps the steam for a great rise. After that, take the lid off! If you want the cheesy herb bread, brush the top now with melted butter and sprinkle on your garlic, herbs, and Parmesan. Pop the lidless pot back in the oven for another 15 to 20 minutes until that crust is deep golden brown. Be careful removing that hot bread at the end.
Essential Equipment for Artisan Bread Success
Look, you don’t need a ton of fancy gadgets for this baking adventure, but a few specific items really make the difference between a good loaf and that amazing crusty bread we are after. The absolute non-negotiable superstar here is a heavy, cast-iron Dutch Oven with a good lid. It traps the steam perfectly, which is the secret to that professional-level oven spring and crust development.
Besides the pot, you’ll need a big mixing bowl—nothing fancy—and that parchment paper I mentioned. The paper acts like a little sling so you can safely lower the dough into that searingly hot pot without burning yourself. That’s pretty much it! Keep your tools simple and focus on the process.
Tips for Perfecting Your Homemade Bread Recipe
Even though this is a no-knead recipe, there are still a couple of rookie mistakes beginners make that can totally ruin that gorgeous loaf of bread you worked so hard to ferment. The biggest one I see people fall for? Slicing it hot! I know the smell is intoxicating, and you want to tear into that beautiful crust right away, but hold your horses!
If you attack the loaf when it’s fresh out of the oven, you’re essentially cutting into steam pockets. The structure hasn’t had time to fully stabilize inside. It turns gummy, and you lose that fantastic open texture we worked all day for. Seriously, if you want the best result from your bread, walk away for at least an hour, preferably two. Patience is the final ingredient!
Why You Must Let the Bread Cool Completely
When the bread finishes baking, the internal moisture is super high, almost like liquid steam. As it cools on a wire rack, that moisture slowly evaporates and redistributes throughout the crumb. This sets the internal structure, making the bread tender yet sturdy. If you slice it early, that steam rushes out, collapsing the soft interior into a dense, slightly doughy mess. Trust me, waiting makes it so much better! Don’t forget to check out our cookie policy while you wait!
Storage and Reheating Instructions for Leftover Bread
Oh, leftovers! If you actually manage to have any of this incredible bread left over the next day—which, frankly, I rarely do—storage is key to preserving that crust. You absolutely cannot keep it in a plastic bag! That traps moisture right against the crust, turning it instantly soggy and sad. Yuck!
My trick is to let the loaf cool completely, then wrap it loosely in a clean kitchen towel and stick it in a paper bag on the counter. If you need to revive your slightly stale loaf, don’t toss it! Just sprinkle a few drops of water directly onto the crust, wrap it loosely in foil, and pop it back into a 350-degree oven for about 8 minutes. It steams the inside and crisps the outside right back up!
Frequently Asked Questions About This Simple Bread
I know these no-knead recipes bring up a few questions when you first try them. It’s so different from traditional quick bread making! Here are the things folks always ask me when they’re about to mix up their first batch of this artisan bread.
Can I use active dry yeast instead of instant yeast in this bread?
Yes, absolutely, you can swap it out! Since active dry yeast needs a little nudge to wake up, you can’t just toss it in the dry ingredients like instant yeast. Here’s what you do: take about half a cup of the cool water required for the recipe, warm it slightly (like bath water, not hot!), and dissolve about half a teaspoon of sugar in it. Sprinkle your active dry yeast over the top and let it sit for about 5 to 10 minutes until it gets foamy. Once it’s bubbly, add that mixture right into your flour, using the rest of the water in the recipe as normal. That just ensures your yeast is alive and ready to do its job for your homemade bread!
What is the best way to make this bread without a Dutch Oven?
If you don’t have that trusty cast iron pot, don’t panic! You can still make fantastic crusty bread. The Dutch Oven’s job is to create that initial blast of steam, so we have to fake it a little. Place a baking stone or a heavy-duty baking sheet on the lowest rack while your oven preheats to 450 degrees. Once it’s hot, place your dough on parchment paper and slide it directly onto the hot surface. Then, you need a source of steam—carefully pour about a cup of boiling water into a shallow, heat-proof pan you set on the bottom rack *before* you put the dough in. Bake covered (maybe place a metal bowl over the top to help trap steam initially) for the same time, uncovered for the remainder. The crust won’t be quite as uniformly thick as the Dutch oven version, but it will still be super crunchy!
If you have any other questions about making this easy bread, feel free to reach out on our contact page. Happy baking!
Estimated Nutritional Data for This Basic White Bread
Okay, let’s talk numbers! Below you’ll find the estimated nutritional breakdown for one slice of this amazing loaf. Just remember, these figures are for the plain version—the one without any of that gorgeous butter, garlic, herbs, or Parmesan cheese brushed on top. When you skip those little extras, you’re left with a wonderfully clean, basic white bread perfect for sandwiches or toast!
For reference, here’s what the data shows per serving, based on the full recipe yield:
- Calories: 205
- Total Fat: 0.8g
- Carbohydrates: 42g
- Protein: 7g
- Sodium: 380mg
If you pile on the Parmesan and butter topping, those totals will naturally jump up a bit, so keep that in mind if you’re tracking things closely! See our full disclaimer for more details on how these estimates are calculated.
Share Your Artisan Bread Creations
Wow, I am so incredibly proud of you if you made it through that 18-hour wait and managed to pull off a perfect loaf of this no knead bread! Now comes the best part: sharing the results. Baking is always better when you can show off your incredible work!
Seriously, I want to see all those gorgeous, crackly crusts and those beautiful open crumbs you achieved in your Dutch Oven. Don’t be shy! If you made the Garlic Parmesan version, tell me how much you loved that salty, savory bite right on top. If you kept it plain, maybe you’re already using it for the best avocado toast ever?
Head down to the comments section below and tell me what you thought! Did it live up to the hype? Were you surprised by how easy it was to make such incredible homemade bread? Please leave a rating for the recipe—five stars if you think it’s the best easy bread-making discovery you’ve made this year!
And if you snapped a picture, tag me! I love seeing your creations come to life. I promise I read every comment and adore hearing how this recipe worked in your kitchen. Thanks so much for baking with me today. Don’t forget to check out our privacy policy before you go!
PrintEasy No Knead Artisan Bread
Make a crusty, flavorful artisan loaf at home with this simple no-knead recipe that requires minimal hands-on time.
- Prep Time: 10 min
- Cook Time: 50 min
- Total Time: 13 hours 0 min
- Yield: 1 loaf
- Category: Baking
- Method: No Knead
- Cuisine: American
- Diet: Vegetarian
Ingredients
- 3 cups all-purpose flour
- 1 1/2 teaspoons salt
- 1/4 teaspoon instant dry yeast
- 1 1/2 cups cool water
- Optional: 2 tablespoons melted butter for brushing
- Optional: 1 clove garlic minced
- Optional: 1 teaspoon dried mixed herbs
- Optional: 1/4 cup grated Parmesan cheese
Instructions
- In a large bowl, whisk together the flour, salt, and yeast.
- Pour in the cool water and mix with a wooden spoon until just combined into a shaggy dough. Do not overmix.
- Cover the bowl tightly with plastic wrap and let it rest at room temperature for 12 to 18 hours. The dough will become bubbly and increase in volume.
- After the long rise, lightly flour a work surface. Scrape the dough out onto the surface. Gently fold the dough over onto itself a few times to form a rough ball.
- Place the dough ball on a piece of parchment paper. Cover loosely with a clean kitchen towel and let it rest for 30 minutes.
- About 30 minutes into this rest, place a Dutch oven (with the lid on) into your oven and preheat to 450 degrees Fahrenheit (232 degrees Celsius).
- Carefully remove the hot Dutch oven from the oven. Lift the dough using the parchment paper and gently place it inside the hot pot. Cover with the lid.
- Bake for 30 minutes with the lid on.
- Remove the lid. If using optional toppings, brush the top of the bread with melted butter and sprinkle with garlic, herbs, and Parmesan cheese.
- Continue baking uncovered for another 15 to 20 minutes, or until the crust is deep golden brown.
- Carefully remove the bread from the pot and let it cool completely on a wire rack before slicing.
Notes
- Use cool water, not warm, to slow the initial rise and develop better flavor during the long rest period.
- If you do not have a Dutch oven, you can bake the bread on a baking stone or sheet pan, but the crust will be less uniform.
- For a plain loaf, skip the optional butter, garlic, herbs, and cheese additions.
Nutrition
- Serving Size: 1 slice
- Calories: 205
- Sugar: 0.5
- Sodium: 380
- Fat: 0.8
- Saturated Fat: 0.1
- Unsaturated Fat: 0.7
- Trans Fat: 0
- Carbohydrates: 42
- Fiber: 1.5
- Protein: 7
- Cholesterol: 0