

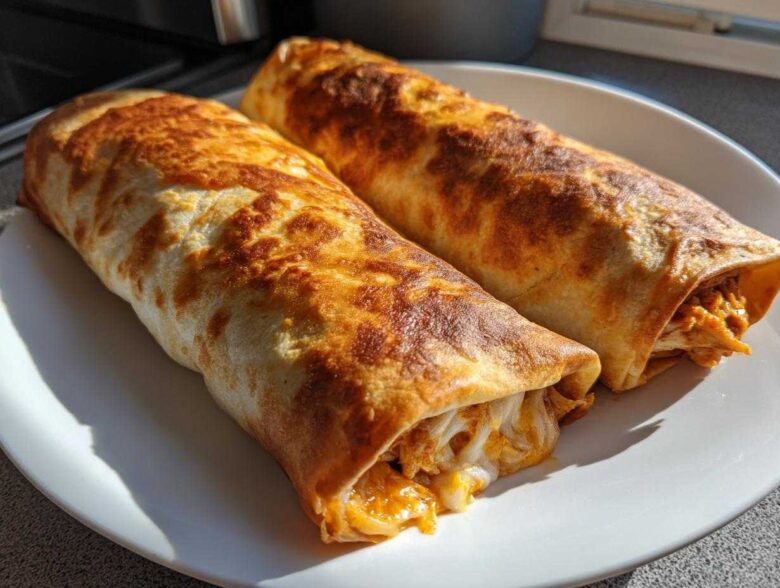
Oh, you know those nights, right? You’re craving that perfectly crunchy, cheesy, savory hit of a chimichanga, but the thought of dealing with that huge bubbling pot of oil just kills the vibe. Been there, done that, scrubbed that mess way too many times! That’s why, after years of tweaking Tex-Mex classics in my kitchen, I finally nailed it. I’m talking about truly crispy **Baked Chicken Chimichangas** that deliver all the flavor without the fryer. Seriously, you get this whole amazing, family-friendly dinner ready in about oh-so-speedy 35 minutes total. It’s my secret weapon for busy weeknights when the craving for bold flavor hits hard!
Why You Will Love These Baked Chicken Chimichangas
This isn’t just another recipe; it’s a weeknight lifesaver that tastes way better than it should for how easy it is. If you’re looking for that satisfying crunch you usually only get from deep-frying, listen up—you get it right here in the oven! It’s such a crowd-pleaser, transforming into true Family Friendly Tex Mex in under 40 minutes.
- It’s a total time-saver! We’re looking at just 15 minutes of prep before it goes in the oven.
- Seriously crispy texture, making it the perfect Healthier Alternative to Fried Food.
- Uses simple pantry staples and pre-cooked chicken, which means less stress after work.
- Everyone digs the cheesy, spicy filling—perfect for sneaking extra veggies past the kids!
Essential Ingredients for Perfect Baked Chicken Chimichangas
Okay, getting the right building blocks is half the battle, right? For these Baked Chicken Chimichangas to hit that perfect balance of soft wrap and crispy crunch, we need specific players. Don’t skimp on the tortilla size—those large 10-inch flour ones are essential so you can roll them up nice and tight. Nobody wants a sloppy wrap!
Here’s what you need to gather up:
- 2 cups cooked, shredded chicken (Trust me on this, save time somewhere!)
- 1 cup shredded Monterey Jack cheese (It melts like a dream.)
- 1/2 cup salsa (Use whatever heat level you love.)
- 1/4 cup sour cream (This is secret armor against dryness!)
- 1 teaspoon chili powder
- 1/2 teaspoon cumin
- 1/4 teaspoon garlic powder
- 8 large (10-inch) flour tortillas
- 2 tablespoons melted butter or cooking spray (We’ll discuss which one is better in a minute!)
If you’re staring down a busy afternoon, my biggest time-saving hack is grabbing a rotisserie chicken. Shredding that up in five minutes makes this recipe truly doable on a Tuesday. For more on my time-saving kitchen philosophies, you can check out our general approach over on the About Us page.
Ingredient Notes and Substitutions for Your Baked Chicken Chimichangas
The recipe uses Monterey Jack because it gets nicely gooey, but feel free to swap in some Colby or a Mexican blend if that strikes your fancy. If you like heat, don’t be shy; use a hotter salsa or sneak in a dash of cayenne pepper when you mix your spices. And listen, if you’re out of sour cream, plain Greek yogurt works wonderfully for that creamy tang without losing much texture.
Step-by-Step Guide to Making Crispy Chimichangas No Fry
Alright, let’s get cooking! This is where we prove that you really can get those amazing, shatteringly crisp shells without dropping them into hot oil. First things first: you need a screaming hot oven. Set that dial to 400 degrees Fahrenheit right away and get your sheet pan ready—a little grease or parchment paper works, but I prefer using a silicone baking mat when I’m making these Crispy Chimichangas No Fry.
Next, the filling needs to get friendly. In one bowl, toss together that shredded chicken, your Monterey Jack, salsa, sour cream, and all those gorgeous spices—chili powder, cumin, garlic powder. Don’t just stir it gently; I like to mix it until I can see everything evenly coated and clinging to the chicken pieces. That mix needs to be thick enough to stay put when you roll it. If it looks soupy, you’ve added too much salsa, so maybe toss in a tiny sprinkle more cheese to tighten it up!
Now, the key to structure, which is so important for baking, is the wrap! Don’t skip warming those tortillas for just about 15 seconds in the microwave. They need to be soft so they don’t crack when you start folding. Spoon about a quarter cup of filling in the center. Fold in the edges first, like you’re wrapping a present, and then roll it up as tightly as humanly possible from the bottom up. Shove that seam side right down onto your waiting baking sheet. We want that seam to seal itself during baking!
This is the final step before the oven: the crisping agent! You can spray them lightly with cooking spray, but honestly, brushing them with melted butter? That gives you superior golden color and flavor. Brush every nook and cranny on top. Then they go into that 400°F oven for 15 to 20 minutes. If they look dry on the top halfway through, give them a gentle flip so the other side can get golden brown too. That’s the whole secret to getting the best texture!
Achieving the Best Texture in Your Baked Chicken Chimichangas
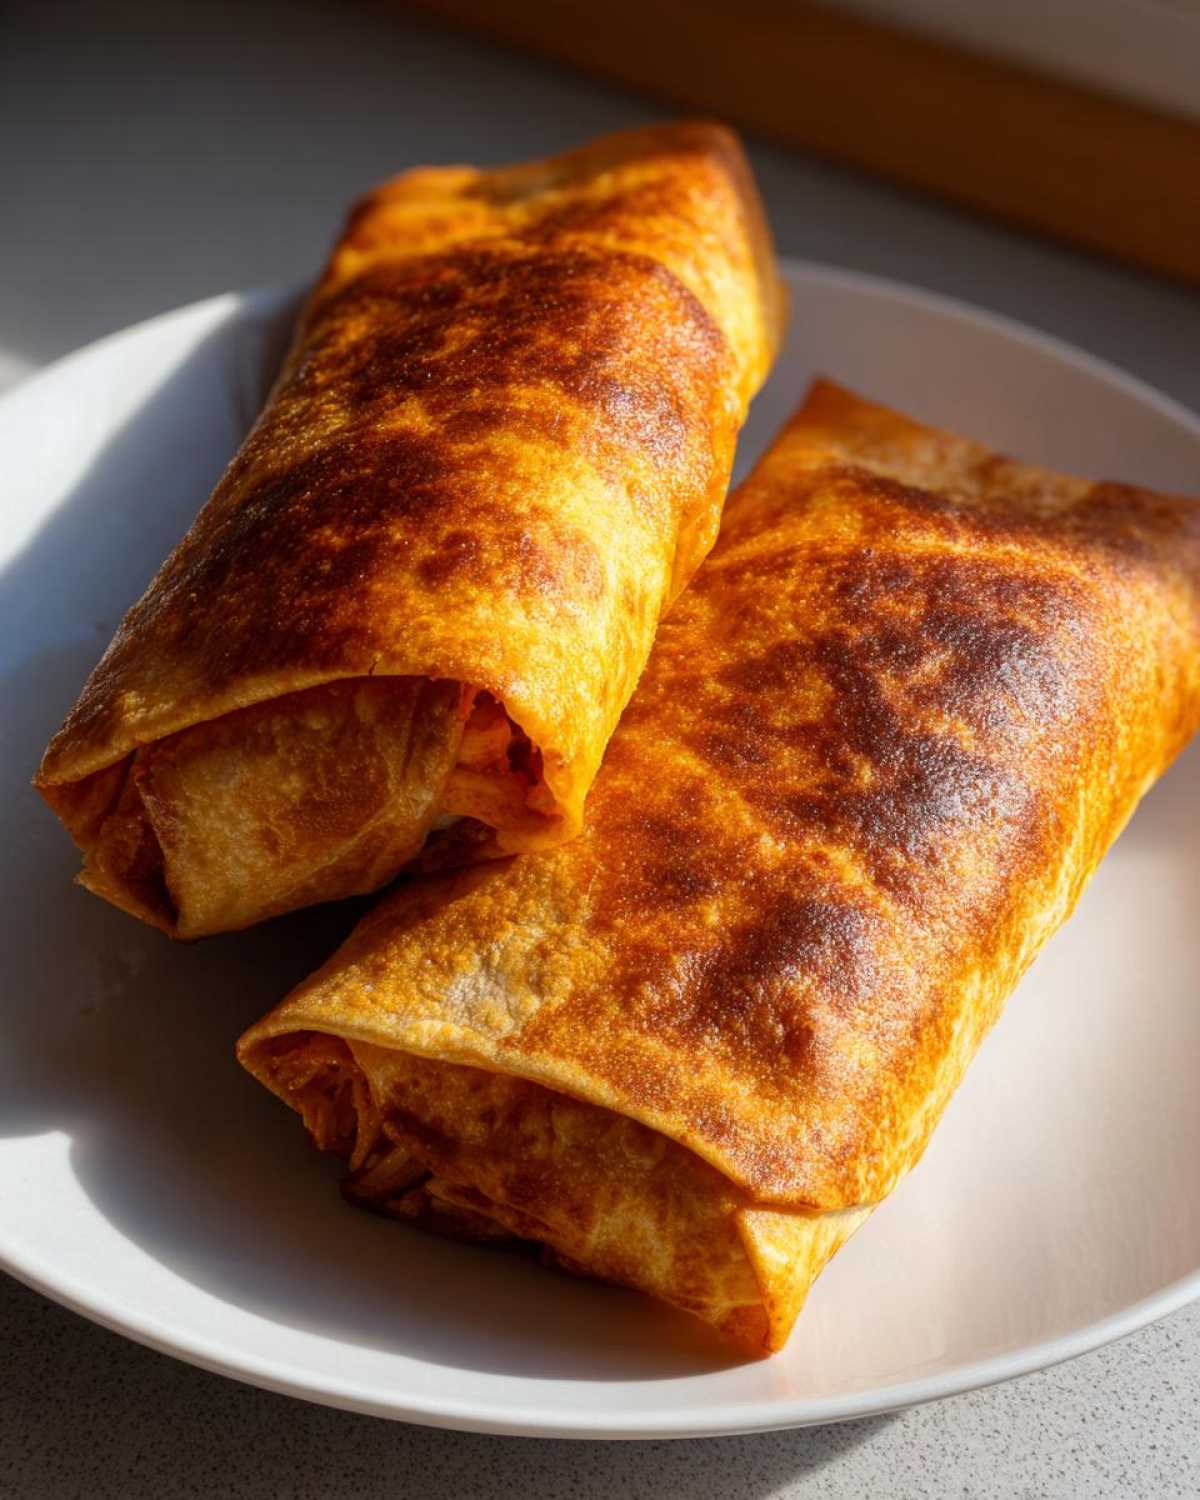
If you want them brittle and crackly, the melted butter is your best friend over the cooking spray. Butter has solids that brown beautifully. My expert tip for the absolute crispiest bottom layer is to pull out the baking sheet about halfway through the baking time and give the chimichangas a quick flip, repositioning them slightly on a clean spot on the mat if the bottom absorbed too much moisture. Also, make absolutely sure your oven rack is well-centered; if it’s too low, the bottoms burn before the tops brown, and we want even cooking for these delicate Baked Chicken Chimichangas!
Tips for Success with Your Weeknight Mexican Food
Getting these wrapper rolls looking perfect takes just a tiny bit of know-how. The biggest failure point for beginners is usually a ripped tortilla, and that happens when they’re cold! Remember how I said to warm them up? Do it just long enough so they are pliable and stretch slightly—maybe 15 or 20 seconds. If you warm them too much, they get tough and chewy instead of soft and easy to fold.
How to Seal Your Chimichanga Ends Perfectly
When you fold those sides in and start rolling up, you need to pull everything snug. Think about tucking the filling in as you go. When you hit the final edge, I sometimes dab the very edge of the last bit of tortilla with just a drop of water to help it stick closed as it bakes. It acts like edible glue! If you roll them tightly and seam-side down, they’ll hold their whole shape while baking, which keeps all that delicious cheese mixture inside where it belongs.
Make Ahead Chimichangas and Storage Instructions
I love that you’re thinking ahead! These Baked Chicken Chimichangas are absolutely perfect for prepping early, which really locks in that quick dinner promise. For the filling, you can mix that whole chicken, cheese, and spice mixture up to two days ahead of time. Just keep it covered tight in the fridge. When you’re ready to eat, assemble them as normal, remembering to slightly soften the tortillas first so they don’t tear!
If you want to get even further ahead, you can assemble the entire {a href=”https://cookerykings.com/Baked Chicken Chimichangas”}. Seal them well in plastic wrap and foil, and keep them frozen for up to a month. When you bake them from frozen, it adds about ten extra minutes to the cooking time, so keep an eye on that golden color!
What about leftovers? Don’t even think about the microwave unless you hate crispy food. The microwave turns them sadly soft. For the best texture on baked leftovers, pop them back into a toaster oven or a regular oven at 350 degrees for about 8 to 10 minutes until they heat through and the shell re-crisps itself. Perfection!
Serving Suggestions for Cheesy Chicken Roll Ups
These Cheesy Chicken Roll Ups are fantastic on their own, but honestly, they beg for toppings! When these hot rolls come out of the oven, I love to immediately drizzle them with a little dollop of cool sour cream, or maybe some homemade crema if I’m feeling fancy. It just cuts through the savory spice so nicely.
You absolutely need guacamole on the side—it’s non-negotiable for me. A little fresh pico de gallo brightens everything up, too. And please, please, hit those beautiful golden tops with a generous sprinkle of fresh, chopped cilantro right before serving. That little pop of green and fragrant flavor is the perfect finishing touch for your Baked Chicken Chimichangas!
Frequently Asked Questions About Baked Chicken Chimichangas
You know I always get the same questions whenever I share this recipe—it’s totally normal! People want to know how to tweak it or make sure they aren’t missing some secret step. Here are the big ones I always hear:
Can I use different meats besides chicken in this recipe?
Oh, absolutely! This filling base is so versatile. If you’re looking for Weeknight Mexican Food inspiration, you can easily swap the chicken for ground beef, making sure to drain all the grease really well first. Black beans or refried beans make this a fantastic vegetarian meal, too. Just make sure that whatever you use is cooked and relatively dry before mixing it with the cheese and sour cream!
How do I make my Baked Chicken Chimichangas extra crispy?
This is my favorite question! Achieving true crispiness without frying is all about the fat on the outside and the temperature inside. I already mentioned brushing with butter for the best gold color, but here is the real secret: make sure your oven is fully preheated to 400°F. If it’s not hot enough, the tortilla steams instead of baking quickly. Also, and this is key for those Crispy Chimichangas No Fry, don’t overcrowd the baking sheet! Give each one a little personal space so the hot air can circulate all around it.
Are these truly a healthier alternative compared to deep-fried versions?
Yes, without a doubt, they are much lighter! We are skipping that whole bath of oil, which cuts down significantly on fat and calories—that’s why they fit into the Healthy Chimichanga Recipe category. You still get all the flavor payoff from the filling, the cheese, and the spices, but you aren’t soaking up all that extra processed oil. It’s one of my favorite ways to enjoy Tex-Mex guilt-free on a busy night.
What is the main difference between these and an Oven Baked Burrito?
That’s a smart question! Technically, the ingredients are almost identical. The difference lies mostly in the wrapping technique and the intended final texture. With these **Baked Chicken Chimichangas**, we are specifically aiming for a tight roll—often with the edges tucked in first—and we are baking them until they are intentionally golden brown and crisp on the outside. An Oven Baked Burrito is usually wrapped a bit looser and is often baked just long enough to heat through and melt the cheese, leaving the tortilla softer, almost like a soft taco but sealed.
Can I use this recipe for Copycat Restaurant Chimichangas?
You absolutely can! While the restaurant versions are usually deep-fried for that intense, slightly tougher shell, my goal with this recipe was to capture that savory, cheesy filling profile that we all love in a Copycat Restaurant Chimichanga, but make it manageable for home. The spices I used really lean into that classic Tex-Mex flavor profile you find in those great chains. They are satisfying, just a bit lighter on your stomach!
If you ever check the general ingredient safety and usage guidelines for recipes shared here, you can find our standard disclaimer linked right here.
Nutritional Estimates for Your Simple Chicken Dinner
Now, I know some of you lovely bakers are tracking things, and I always want to be upfront about what you’re making. Since we’re going with a healthier, baked approach, these **Baked Chicken Chimichangas** are seriously much lighter than the fried versions out there. I’ve done my best to calculate the estimates based on the ingredients listed, but you know how it goes—different brands of flour tortillas or salsa can change the final count!
Bottom line, these estimates are a guideline, not gospel. If you’re concerned about specific dietary needs, always use your favorite brand calculators. For the full context on how we estimate these figures across the site, please take a quick look at our site disclaimer.
Here’s the breakdown per serving of two chimichangas, based on the recipe above:
- Serving Size: 2 chimichangas
- Calories: 450
- Total Fat: 18g (with 8g Saturated Fat)
- Carbohydrates: 45g (with 3g Fiber)
- Protein: 30g
- Sugar: 3g
Share Your Baked Chicken Chimichangas Experience
Okay, now that you’ve tried these incredibly easy and crispy **Baked Chicken Chimichangas**, I absolutely *need* to know what you thought! Did they get as golden and crunchy as mine did? Did your family gobble them down before you could even grab the sour cream?
Please, if you loved this lighter take on a Tex-Mex classic, leave a quick star rating right below the recipe card. Five stars if they made your weeknight so much better!
And seriously, if you snapped a picture of your beautifully baked tray before digging in, tag me on social media! Seeing your creations is genuinely the best part of sharing these recipes. Let me know if you went heavy on the cheese or if you tried swapping the spices—I’m always looking for new twists on this incredible Simple Chicken Dinner. Can’t wait to hear all about your success!
PrintSuper Crispy Baked Chicken Chimichangas (Easy Weeknight Copycat!)
Make satisfying, crispy chicken chimichangas in the oven for a quick, family-friendly weeknight meal.
- Prep Time: 15 min
- Cook Time: 20 min
- Total Time: 35 min
- Yield: 4 servings
- Category: Dinner
- Method: Baking
- Cuisine: Tex-Mex
- Diet: Vegetarian
Ingredients
- 2 cups cooked, shredded chicken
- 1 cup shredded Monterey Jack cheese
- 1/2 cup salsa
- 1/4 cup sour cream
- 1 teaspoon chili powder
- 1/2 teaspoon cumin
- 1/4 teaspoon garlic powder
- 8 large (10-inch) flour tortillas
- 2 tablespoons melted butter or cooking spray
Instructions
- Preheat your oven to 400 degrees Fahrenheit. Lightly grease a baking sheet.
- In a medium bowl, combine the shredded chicken, cheese, salsa, sour cream, chili powder, cumin, and garlic powder. Mix until everything is evenly incorporated.
- Warm the tortillas slightly in the microwave for about 15 seconds to make them pliable.
- Place about 1/4 cup of the chicken mixture onto the center of each tortilla.
- Fold the sides of the tortilla inward over the filling, then tightly roll the tortilla from the bottom up to create a sealed cylinder. Place seam-side down on the prepared baking sheet.
- Brush the tops of the rolled chimichangas lightly with melted butter or spray them well with cooking spray. This helps them crisp up.
- Bake for 15 to 20 minutes, flipping halfway through, until the tortillas are golden brown and crispy.
- Serve immediately with your favorite toppings like extra salsa, guacamole, or sour cream.
Notes
- You can prepare the filling ahead of time and store it in the refrigerator for up to two days.
- For extra crispiness, you can lightly spray the chimichangas again with cooking spray halfway through the baking time.
- Use pre-cooked rotisserie chicken to save time on busy weeknights.
Nutrition
- Serving Size: 2 chimichangas
- Calories: 450
- Sugar: 3
- Sodium: 650
- Fat: 18
- Saturated Fat: 8
- Unsaturated Fat: 10
- Trans Fat: 0
- Carbohydrates: 45
- Fiber: 3
- Protein: 30
- Cholesterol: 85