

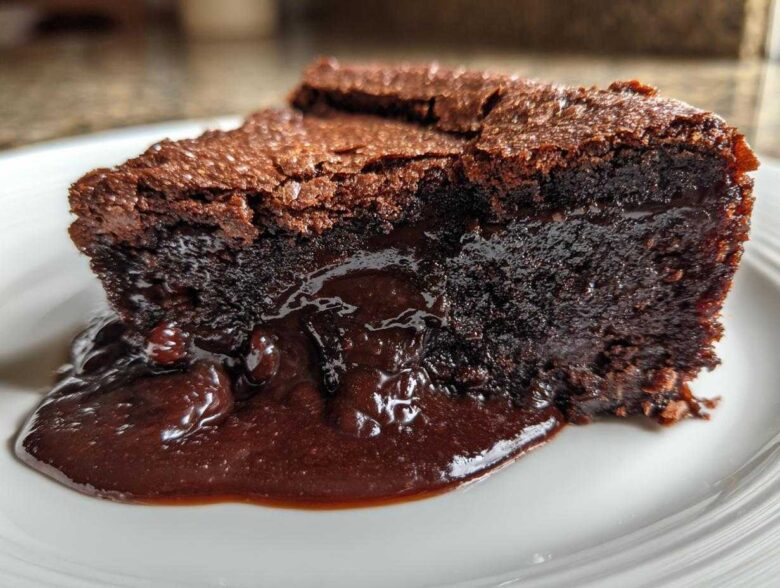
When I need a hug in a bowl, nothing beats a true, old-fashioned comfort dessert. Forget fussy layers or hours of chilling time; I want something rich, deeply chocolatey, and ready before I finish cleaning up dinner. That’s why I’m sharing my absolute favorite recipe for **chocolate pudding cake**. Trust me when I say this isn’t your average bake!
The magic here is entirely in the technique—it’s a self-saucing marvel! You mix up one simple batter, sprinkle a topping over it, pour hot water on top, and walk away. When you return, you have a light, fluffy cake on top and the most incredible, thick, fudgy sauce pooled right underneath. It’s pure alchemy! This tried-and-true family recipe guarantees success, which means even if you’re new to baking, you’re going to look like a genius tonight. If you want to know more about our kitchen philosophy, you can always read a bit about us here.
Why This Ultimate Self-Saucing Chocolate Pudding Cake Works So Well
Honestly, this recipe is what **comfort food baking** should always be: totally foolproof and wildly decadent. The reason it turns out so spectacular is all down to physics, which is my favorite kind of magic! You mix everything together, but the secret is that final layer of boiling water you pour over the top.
When it goes into that hot oven, the water sinks down beneath the regular cake batter. As it bakes, the heavy sugar and cocoa mixture dissolves and creates this amazing, thick, almost syrup-like pool. It’s truly the best little trick for getting a **gooey molten dessert** without needing to mess with any complicated ganaches or separate layers.
Achieving That Perfect Fudgy Chocolate Dessert Texture
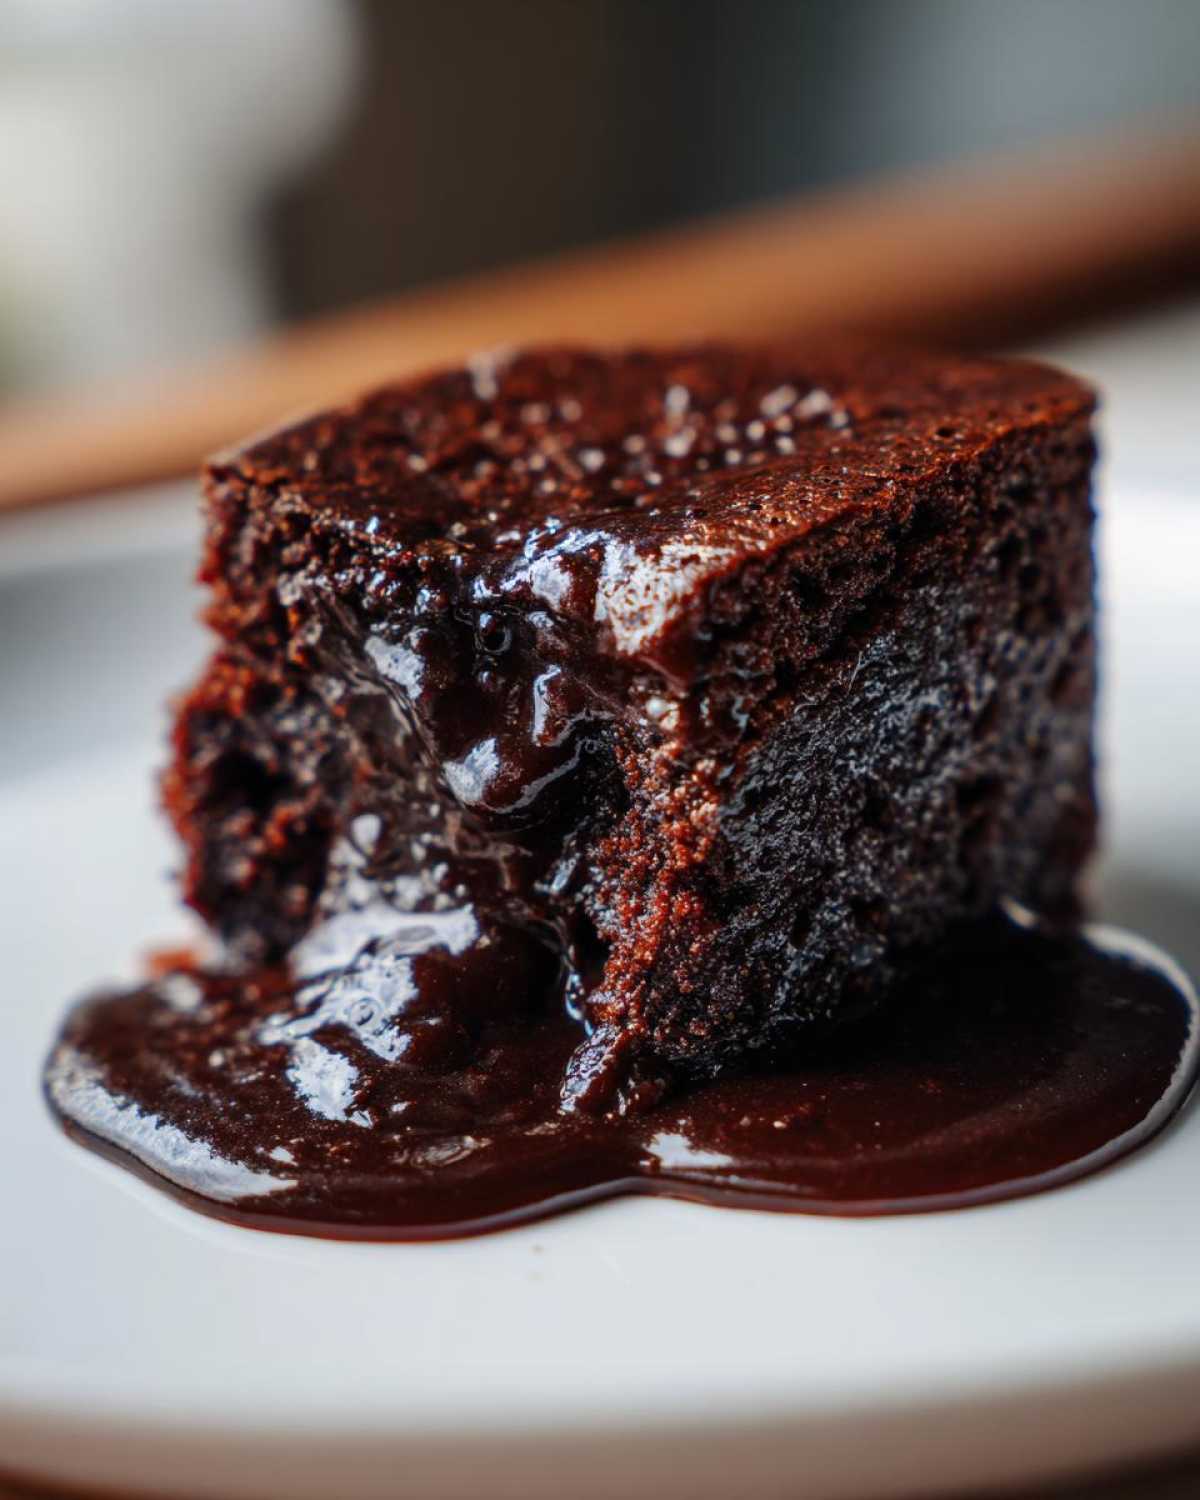
We are not aiming for a dry, crumbly cake here, not at all! What we want is a fantastic contrast. You should end up with a light, springy sponge layer on the top—it bakes up nicely and is just sweet enough. But the real prize, the part you fight your family over, is that rich, dark, **fudgy chocolate dessert** sauce clinging to the bottom of your bowl. It’s warm, it’s intensely chocolatey, and it’s ready in under an hour, which is just wild!
Ingredients for Your Simple Pantry Dessert Chocolate Pudding Cake
You know my favorite thing about this incredible **simple pantry dessert**? It uses staples you probably already have hiding in your kitchen right now! There’s no fancy equipment needed, just a bowl and a whisk. We want to make sure we measure everything right, especially the cocoa powder, because that’s where all the deep chocolate flavor comes from.
Here is exactly what you need to gather up for the batter and the magical sauce layer:
- 1 1/2 cups all-purpose flour
- 1 1/2 cups granulated sugar (this is for the cake part!)
- 1/2 cup unsweetened cocoa powder (good quality makes a huge difference here)
- 1 teaspoon baking soda
- 1/2 teaspoon salt
- 1 cup milk (I usually use whole milk, but 2% is fine too)
- 1/2 cup vegetable oil
- 1 teaspoon vanilla extract
- 2 large eggs, make sure they are room temperature if you can!
- 1 cup boiling water (this has to be boiling when you pour it!)
- 1/2 cup granulated sugar (this second amount is just for the sauce)
- 1/4 cup unsweetened cocoa powder (this second amount is also for the sauce!)
Ingredient Notes and Substitutions for Your Chocolate Pudding Cake
Even though this is a straightforward recipe, a few small tweaks based on my trial-and-error can really elevate your **chocolate pudding cake**. First, if you happen to have buttermilk instead of regular milk, go for it! Buttermilk gives the cake layer a tiny bit of tang that cuts through the richness beautifully. Just make sure you use the same 1 cup measurement.
Now, if you are like me and sometimes want an even *deeper* chocolate punch—almost like a mocha flavor—here is my hidden trick. Before you pour that 1 cup of boiling water over the batter, take 1 teaspoon of instant coffee granules and dissolve them right in the water first. It won’t taste like coffee, I promise! It just magically deepens the cocoa flavor. That little step shows you how even a simple dessert can be tailored to your taste.
Step-by-Step Instructions for Making Chocolate Pudding Cake
Okay, let’s get this **easy chocolate cake** into the oven! This is where the magic happens so quickly. First things first, preheat your oven to 350 degrees F (that’s 175 degrees C). Get your 8×8 inch baking dish greased up lightly—you don’t need a ton, just enough so it releases nicely later.
In a big bowl, whisk your dry cake ingredients together: the flour, the 1 1/2 cups of sugar, the first cocoa amount, the soda, and the salt. Once that’s looking uniform, add the wet stuff—the milk, oil, vanilla, and those two eggs. Mix that gently with a spoon or whisk until everything is *just* combined. Seriously, do not go wild mixing it; we want tender, not tough! Pour that whole batter right into your prepared dish.
Here comes the fun part. In a separate little bowl, mix up the second batch of sauce ingredients: the remaining 1/2 cup sugar and 1/4 cup cocoa. Sprinkle that powder evenly right over the top of the wet batter. It’s going to look weird, I know! The most crucial step, the one you absolutely cannot forget, is next: Carefully pour 1 cup of boiling water straight over the whole thing. Do NOT stir it in! Just let it sit on top. You can check out our official site disclaimer if you have any concerns about ingredient safety.
Baking Time and Checking Doneness for the Rich Chocolate Bake
Pop that dish into the oven for about 30 to 35 minutes. You’re looking for a specific sight: the top should definitely look like a set cake layer, maybe slightly puffed. Underneath, you’ll know the sauce formed because the edges might look slightly jiggly, but not soupy.
When you test it—and this is important for building trust in this recipe—test *only* the top layer with a toothpick. If the toothpick comes out with moist crumbs clinging to it, it’s done! If it comes out wet with raw batter, give it five more minutes. But **never** stick your knife or toothpick deep down into the sauce layer, or you’ll ruin the marvelous separation we’re trying to achieve!
Tips for Success with Your Weeknight Chocolate Dessert
Making this **weeknight chocolate dessert** should feel relaxing, not stressful! I have a few easy-to-remember rules that make sure you get that perfect sauce every single time you bake it. Follow these and you’ll never have a flop!
First up: Don’t you dare overmix the batter! When you combine the wet and dry ingredients before adding the water, mix only until the flour streaks disappear. If you beat it for too long, you are developing gluten, which makes the cake layer tough. It should look like a slightly lumpy, wet batter. That’s your cue to stop immediately.
Second, the water pouring step is non-negotiable. The water must be boiling hot when you pour it over the sprinkled topping, and you absolutely must not stir it in. If you stir, you mix the top layer with the bottom sauce layer, and boom—you just made a regular, less exciting chocolate cake. Let the heat and gravity do the work!
Finally, think about serving temperature. This cake is delicious warm, but piping hot is sometimes too soupy. Let it rest for about 10 to 15 minutes after it comes out of the oven. That little bit of cooling time is just enough for the sauce to thicken up properly while the cake layer stays perfectly soft. It’s the magic window for the best experience.
Serving Suggestions for This Classic Pudding Cake
If you can manage to wait the ten minutes for it to cool down a touch, you absolutely must serve this **warm chocolate cake** right away. Seriously, the best part of this whole process is watching that fudgy sauce ooze out as you spoon it onto the plate. Trying to eat this cold is just cheating yourself out of the experience!
The classic, can’t-beat-it pairing is, without question, a large scoop of good quality vanilla bean ice cream. The contrast between the hot, deeply rich chocolate sauce and the cold, creamy vanilla is just heavenly. The ice cream melts right into the sauce, making it even more luxurious. Don’t skimp on the scoop size here; this cake deserves it.
But if you’re feeling fancy, or maybe you don’t have ice cream on hand, there are plenty of other ways to dress up your serving:
- A soft dollop of slightly sweetened fresh whipped cream cuts through the richness perfectly.
- If you have some tart berries—like raspberries or even sliced strawberries—the slight acidity is a wonderful contrast to all that chocolate goodness. Dust them with powdered sugar before placing them on the side.
- For extra impact (and because we love decadence), you can drizzle a tiny bit more melted chocolate right over the top of your plated serving. That makes it look really professional, even though you made it in about 45 minutes!
No matter how you serve it, remember that the goal is gooey comfort. Make sure your plates are deep enough to catch all that amazing sauce!
Storage and Reheating Instructions for **Leftover Chocolate Pudding Cake**
Now, let’s be real: sometimes you manage to have leftovers of this incredible **chocolate pudding cake**, even though it’s usually gobbled up instantly! Don’t panic if you don’t finish the whole 8×8 pan in one sitting. This keeps surprisingly well, which is great news for your next **fudgy chocolate dessert** craving.
The best way to store any leftovers is to cover the dish tightly with plastic wrap or transfer individual servings into an airtight container. You can keep it safely at room temperature—provided your kitchen isn’t scorching hot—for about a day. If you want it to last longer, pop it right into the refrigerator. It’ll stay good for four or maybe five days wrapped up tight.
Reheating is extremely important here because we *must* reactivate that beautiful sauce. Eating it cold is simply depressing after tasting it fresh! If you’re only warming up a single scoop, the microwave is your best friend. Just zap it for 20 to 30 seconds until it’s steaming slightly. That gentle heat is usually enough to loosen the sauce right back up.
If you’re trying to reheat a larger piece or the rest of the dish, I prefer using the oven because it’s gentler. Pop the covered dish or a small piece onto a baking sheet and heat it at about 300 degrees F. Make sure it’s covered with foil so the top cake layer doesn’t dry out while the sauce underneath gets warm and fudgy again. Give it about 10 to 15 minutes, testing gently with a spoon. It’s all about bringing that **rich chocolate bake** back to its gooey glory!
Frequently Asked Questions About Chocolate Pudding Cake
I get so many wonderful questions about this recipe, which shows how much everyone loves a decadent, easy dessert! Here are the things folks ask me most often when they are planning to bake up a batch of this incredible **chocolate pudding cake**.
Can I prepare the chocolate pudding cake batter ahead of time?
That’s such a good question, especially if you are trying to get dinner organized ahead of time. Honestly, for this particular cake, I strongly advise against assembling the *entire* thing ahead of time. Remember, the magic relies on pouring boiling water over the top right before it goes in the oven. If the batter sits too long, that water will start doing its sauce magic prematurely, which we don’t want!
What you *can* do, though, is mix all your dry ingredients together in one bag or container, and mix all your wet ingredients (milk, oil, eggs, vanilla) in a separate jar. Then, when you’re ready to bake, you just dump the wet into the dry, mix gently, then sprinkle the sauce topping, and pour the boiling water. That’s a huge time saver, and it keeps the texture perfect!
Is this hot fudge cake recipe difficult to master?
Not at all! That’s the best part of this **hot fudge cake recipe**! It is so incredibly forgiving. We aren’t whipping egg whites or folding in delicate ingredients here. You are basically whisking things together and then layering ingredients you don’t stir in. It’s truly one of the easiest things you can make, even if you are just starting out. If you can mix ingredients in a bowl, you can nail this **easy chocolate cake**. The oven does all the complicated layering work for you, which I absolutely love!
Can I use different baking dishes for this chocolate pudding cake?
You certainly can! The recipe is written for an 8×8 inch square baking dish. That dish size allows the batter to spread out well, which helps the sauce form evenly underneath the cake layer. If you use a deeper dish, like a 9×9 or an 8×11, the texture might be slightly different because the heat has further to travel to cook the center, which could result in a soggier sauce on the bottom.
If you want to make individual servings, which helps cool them down for serving quicker, you can use around six small ramekins. Just make sure those ramekins are oven-safe! If you decide to use the ramekins, watch them closely; they might only need 25 minutes of baking time since they are shallower. If you ever need help finalizing details for your kitchen or baking space, feel free to reach out through our contact page.
Estimated Nutritional Data for Decadent Homemade Sweets
So, as much as we love focusing on how delicious and fudgy this **chocolate pudding cake** is, I know some of you lovely bakers care about the details! Here is a very rough estimate of the nutritional breakdown per serving. Remember, this is for one serving, and since this is comfort food baking at its best, it’s definitely meant to be enjoyed!
We prepared this information based on the ingredients listed, but please take these numbers with a grain of salt—literally! The Brand of cocoa powder you use, or whether you use whole milk versus 2%, can really change these figures, so consider this a helpful guide rather than a strict tally. We take our commitment to transparency seriously, which is why we maintain a clear privacy policy regarding user data.
- Serving Size: 1 serving
- Calories: 380
- Sugar: 45g (Yes, it’s a treat!)
- Sodium: 250mg
- Fat: 17g
- Saturated Fat: 3g
- Unsaturated Fat: 14g
- Trans Fat: 0g
- Carbohydrates: 55g
- Fiber: 3g
- Protein: 5g
- Cholesterol: 35mg
There you have it! It’s rich in sugar and carbs because it is a wonderfully **decadent homemade sweet**, designed for satisfaction. That’s why we always recommend serving it warm with that scoop of ice cream—it’s a special occasion, even if the occasion is just “It’s Tuesday and I deserve chocolate!”
Share Your Experience with This Rich Chocolate Bake
Now that you’ve dunked your spoon into that glorious, gooey center, I absolutely have to know what you think! Did this **chocolate pudding cake** live up to the hype? I poured all my best tips into this recipe so it would turn out perfectly for you, and now the results are in your hands!
Please, please, please leave a star rating right below—let everyone know how easy this was and how incredible that self-saucing magic turned out. Did you keep it simple with just vanilla ice cream? Or did you get adventurous with that whipped cream idea?
I live for hearing about your baking adventures! Tell me in the comments how you chose to serve your **rich chocolate bake**. If you snapped a picture of the cross-section showcasing that incredible sauce layer, I would be thrilled if you shared it on social media and tagged me—I love seeing my recipes end up in your kitchens! Remember, you can always check out our terms and conditions for site usage.
PrintThe Ultimate Self-Saucing Chocolate Pudding Cake
Make this rich, gooey chocolate pudding cake that creates its own fudgy sauce while baking. It is simple to prepare using basic pantry ingredients.
- Prep Time: 10 min
- Cook Time: 35 min
- Total Time: 45 min
- Yield: 6 servings
- Category: Dessert
- Method: Baking
- Cuisine: American
- Diet: Vegetarian
Ingredients
- 1 1/2 cups all-purpose flour
- 1 1/2 cups granulated sugar
- 1/2 cup unsweetened cocoa powder
- 1 teaspoon baking soda
- 1/2 teaspoon salt
- 1 cup milk
- 1/2 cup vegetable oil
- 1 teaspoon vanilla extract
- 2 large eggs
- 1 cup boiling water
- 1/2 cup granulated sugar (for sauce)
- 1/4 cup unsweetened cocoa powder (for sauce)
Instructions
- Preheat your oven to 350 degrees F (175 degrees C). Lightly grease an 8×8 inch baking dish.
- In a large bowl, whisk together the flour, 1 1/2 cups sugar, 1/2 cup cocoa powder, baking soda, and salt.
- Add the milk, oil, vanilla extract, and eggs to the dry ingredients. Mix with a spoon or whisk until just combined. Do not overmix.
- Pour the batter evenly into the prepared baking dish.
- In a separate small bowl, mix the remaining 1/2 cup sugar and 1/4 cup cocoa powder for the sauce. Sprinkle this mixture evenly over the top of the batter.
- Carefully pour 1 cup of boiling water over the top of the sprinkled mixture. Do not stir.
- Bake for 30 to 35 minutes. A cake layer will form on top, and a thick, fudgy sauce will form underneath.
- Let the cake cool slightly before serving warm.
Notes
- Serve this warm cake immediately with a scoop of vanilla ice cream for the best molten texture.
- You can substitute buttermilk for regular milk for a slightly tangier cake layer.
- If you prefer a stronger coffee flavor, dissolve 1 teaspoon of instant coffee granules in the boiling water before pouring.
Nutrition
- Serving Size: 1 serving
- Calories: 380
- Sugar: 45
- Sodium: 250
- Fat: 17
- Saturated Fat: 3
- Unsaturated Fat: 14
- Trans Fat: 0
- Carbohydrates: 55
- Fiber: 3
- Protein: 5
- Cholesterol: 35